Table of Contents
Advertisement
Advertisement
Table of Contents

Related Manuals for Universal Laser Systems PLS4.75

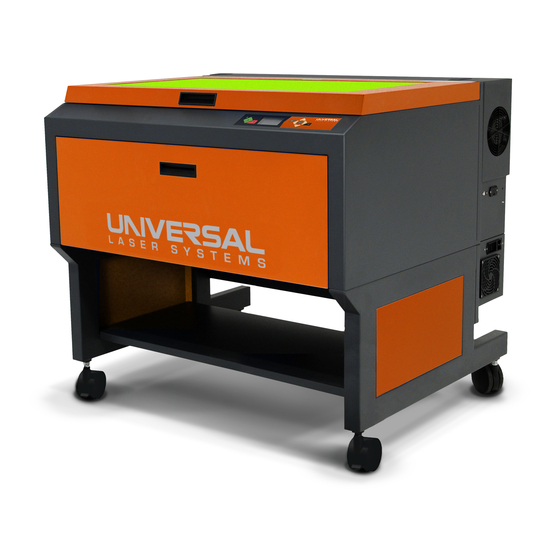
Summary of Contents for Universal Laser Systems PLS4.75
- Page 1 www.ulsinc.com Revision August 2012...
- Page 2 ©2012 Universal Systems, Inc. All Rights Reserved. Universal Laser Systems logo and name are registered trademarks, and High Power Density Focusing Optics, Rapid Reconfiguration, 1-Touch Laser Photo, Laser Interface + and SuperSpeed are trademarks of Universal Laser Systems, Inc. All other company and product names are trademarks or registered trademarks of their respective companies.
- Page 3 Thank you for choosing Universal Laser Systems®. We appreciate innovative customers like you who have made Universal Laser Systems an integral part of their business. Universal Laser Systems is committed to providing the highest level of customer satisfaction and support. To ensure your satisfaction, we urge you to read the documentation provided with your equipment.
- Page 4 USER GUIDE CD Chapter 1 – Specifications Chapter 2 – Safety Chapter 3 – Installation Chapter 4 – Operation Chapter 5 – Accessories Chapter 6 – Maintenance Software Your Reference Guide contains the Software Installation CD. Please follow the instructions for proper installation. Warranty Your Reference Guide contains Warranty documents pertaining to your purchase.
- Page 9 This device is designed for laser cutting and engraving in an office, laboratory, workshop or light duty manufacturing environment. Materials to be processed must fit completely inside the system for proper operation. CAUTION: This device is not designed, tested, intended or authorized for use in any medical applications, surgical applications, medical device manufacturing or any similar procedure or process requiring approval, testing or certification by the United States Food and Drug Administration or other similar governmental entities.
- Page 10 Food and Drug Administration (FDA) in the USA. No guarantees of suitability or safety are provided for any use other than those specified by Universal Laser Systems, Inc. PLS Laser systems are designed to support a sealed carbon dioxide (CO2) laser cartridge that produces intense invisible laser radiation at a wavelength of 10.6 microns in the infrared spectrum.
- Page 11 The PLS6 multi wavelength laser system is designed to support a sealed carbon dioxide (CO2) laser cartridge that produces intense invisible laser radiation at a wavelength of 10.6 microns or 9.3 microns in the infrared spectrum and a fiber laser cartridge that produces intense indivisible laser radiation at a wavelength of 1060 nanometers (1.06 microns).
- Page 12 ILS laser systems are equipped with interlocked access doors on either side of the unit. An optional device is available to allow the user to operate the laser system with the side doors open. This device bypasses the safety interlocks on the side doors of the ILS laser system. With this optional device in place, the protective system housing will not fully contain the infrared laser radiation produced by the carbon dioxide laser, creating the potential for exposure.
- Page 13 2. The Owner of the Class 4 laser system will be responsible for creation of a controlled area in which a Class 4 laser system will be operated. A controlled area is an area designed to fully contain the laser radiation potentially escaping from a Class 4 laser system.
- Page 14 Tamper Proof Labels Safety Labels...
- Page 15 ULS Fiber Laser Cartridge Labels...
- Page 17 PLS4 Back View...
- Page 18 PLS6 Front View...
- Page 20 Product Identification: Professional Laser System Manufacturer: European Office: Universal Laser Systems, Inc. Universal Laser Systems GmbH 16008 N. 81st St. Lerchenfelder Guertel 43 Scottsdale, AZ 85260 A-1160 Vienna/Austria The manufacturer hereby declares that the equipment specified below is in conformity with the following directives:...
- Page 21 15, using shielded cables. Shielded cables must be used in order to insure compliance with FCC regulations. By placing the above symbol on our products and accessories, Universal Laser Systems is indicating that we are committed to helping reduce the amount of waste electronics ending up in municipal landfills. Therefore, Universal Laser Systems urges consumers to recycle this product and its accessories.
- Page 23 Damage to the laser system due to inadequate or improper installation or operation is not covered under the Universal Laser Systems (ULS) Warranty. See the ULS Warranty for additional information. A ULS Warranty document is supplied with your laser system. Should you require a copy of the Warranty, please contact our Customer Service Team at 480-609-0297 (USA), +43 1 402 22 50 (Austria), +81 (45) 224-2270 (Japan) or e-mail us at support@ulsinc.com.
- Page 24 1. We recommend you consult with a licensed contractor to meet local safety and building code requirements. 2. The exhaust system must be capable of supplying a minimum of • PLS4.75 - 250 CFM (cubic feet per minute) of airflow while under a load of 6 inches of static pressure (850m /hr at 1.5kPa).
- Page 25 1. Exhaust blower mounted outside* (User Supplied) 2. Weatherproof shield (User Supplied) 3. Rigid ducting matching the diameter of the blower inlet (User Supplied) 4. Shut-off or air-flow gate (User Supplied) 5. Computer (User Supplied) 6. Flexible, wire-reinforced, industrial grade rubber hose (User Supplied) 7.
- Page 26 Your computer is a critical component in the operation of your laser system. In fact, you cannot operate the laser system if your computer is not connected, powered on, running Windows and running the Universal Control Panel (UCP) software. You can only run one laser system per computer. You will need to purchase a separate computer for each laser system you own.
- Page 27 Power management settings on your computer can interfere with proper operation of the laser system by putting the PC in standby or sleep mode while the laser system is processing material. The settings can be controlled through the power options in the Windows control panel on your PC. The illustrations below show you how to disable power management.
- Page 28 At this point you need to install the Universal Control Panel (UCP) and printer driver. In order to install the software, you need to have administrative privileges on the computer before starting installation. Use the Software Installation CD-ROM included with your laser system. 1.
- Page 29 Familiarize yourself with the instructions before getting started. The final step in installation is to assemble your laser system, install the laser cartridge(s), level the laser system, make final connections and perform a beam alignment check. Do not power up your laser system until the final step, “Checking Beam Alignment.”...
- Page 30 1. Unpack the laser system. 2. Move the laser system to the location in which you intend to operate it and lock the casters. Note: If it becomes necessary to move the laser system through narrow doorways to install in its intended location, the system can be detached from the cart and transported in two pieces.
- Page 31 c. Open the rear cover of the laser system. d. Locate the pocket (1) where the cables disconnected in step b reside. Gently pull the cables up and rest them on top of the sheet metal as shown below. e. Close and latch the rear cover. Tape the front and top doors closed using strong shipping tape, prior to lifting the laser system off the cart, to ensure they stay closed.
- Page 32 g. Locate and remove the eight screws that attach the cart to the laser system (see below). h. Lift the laser system off the cart and place the laser system front door down on a dolly for transport. The cart and laser system can now be moved separately to the install location. Reassemble in reverse order by placing the cart into position first and locking the casters.
- Page 33 Laser Cartridge Installation – CO2 Only Platforms 1. Make sure that your laser system power cord is not plugged in at this time. Open the rear laser cover using the latches on top of the laser cover. Some laser systems are shipped with keyed locks so make sure the latches are unlocked.
- Page 34 3. Locate the “V” groove along the upper (3) and lower (2) part of the laser cartridge base plate and the alignment plate (1) at the end of the base plate. 4. If you have purchased two laser cartridges, mount the one cartridge onto the lower mounting blocks first. Single laser users should mount the laser cartridge in the top position.
- Page 35 6. Slowly rotate the laser cartridge down into place, making sure that the alignment plate is centered in the groove in the alignment fork. The laser should click onto the spring loaded laser catch shown in step 2 to lock it in place. Never force the laser onto the laser latch. If the laser does not install smoothly, check for obstructions such as pinched wires or hoses or a binding laser latch.
- Page 36 1. Make sure that your laser system power cord is not plugged in at this time. Open the rear laser cover using the latches on top of the laser cover. Some laser systems are shipped with keyed locks so make sure the latches are unlocked.
- Page 37 4. IMPORTANT: The fiber laser cartridge weighs 32 lbs. Use caution when installing it. Pick up the laser cartridge by the ends and tilt it at a 30° angle as shown (1). Mount the cartridge onto the mounting blocks shown in step 2 by placing the upper “V” groove on top of the mounting blocks. Slide the cartridge to the right until the outer edge (2) of the alignment plate contacts the inside edge of the tall block of the alignment fork.
- Page 38 6. Plug in the power connector to the laser cartridge. 7. Gently close the rear cover, making sure not to pinch any wires or hoses. 8. Once the laser cartridges have been installed, proceed to “Laser System Leveling.”...
- Page 39 Once the laser system is in place, you should lock the casters and level the laser system using the leveling nuts provided on the laser system casters. This will ensure the laser system is not twisted due to unlevel floors which can affect laser beam alignment and Z axis binding. 1.
- Page 41 6. If one or more of the other corners does not match the upper left corner, loosen the lock nut and adjust the caster directly underneath that corner up or down until the focus tool fit at that corner matches the fit at the upper left corner.
- Page 42 Make the following connections in the order described; otherwise static electricity can potentially damage the computer and/or the laser systems electronics. 1. Connect the 4-inch (101.6 mm) flexible rubber exhaust system to the rear of the laser system. 2. Connect the laser system’s power cord and your computer’s power cord to a grounded electrical outlet. CAUTION: International users - if using an adapter or replacement power cord for local outlets, make sure that you attach the adapter correctly to the power cord and that you are using a properly grounded...
- Page 43 6. After connecting the USB cord, the “Found New Hardware Wizard” will open to install the drivers for the USB connection. If the wizard offers to connect to “Windows Update” to search for software, select “No, not at this time.” Then select “Next” to continue. a.
- Page 44 Checking Alignment As a final step in the installation process you need to check your beam alignment. You do this using the red pointer beam. 1. Open the top door. 2. Place a small piece of masking tape across the 3/4” (19 mm) hole in the focus carriage (1). Gently rub the tape around the edge of the hole so that you can see the outline of the hole through the tape (2).
- Page 45 (0.49 mm) thick anodized aluminum test cards supplied with your laser system. For additional test card please contact Universal Laser Systems’ Customer Service Team at 480-609-0297 (USA), +43 1 402 22 50 (Austria), +81 (45) 224-2270 (Japan) or e-mail us at support@ulsinc.com.
- Page 46 Step 3 – Printing to the Laser System (Materials Database Tab) You are using the Materials Database Tab in the printer driver. 1. Verify that the Universal Control Panel (UCP) is running in the taskbar by looking for the square red icon. 2.
- Page 47 Step 4 – Starting the Process 1. Turn on the exhaust and laser system if not already on. 2. Note: Laser system cooling fans are variable speed and may speed up and slow down during operation as needed to cool the lasers. 3.
- Page 49 CAUTION: Please refer to the Safety section before operating the laser system. All ULS laser systems are designed to operate like a computer printer. The laser systems are provided with two software components designed for Microsoft Windows based operating systems. The first component is a printer driver that allows you to print from any Windows based graphic software capable of printing through the Windows print system.
- Page 50 The printer driver is a piece of software that allows you to create jobs for the laser system using the Windows print system. The printer driver has a preferences dialog with two tabs which allow you to set various parameters for a print job.
- Page 51 Add a sub-material record underneath the main record. This sub-material record captures all user-defined settings in the materials tab GUI which are normally not part of a standard material record, including fixture type, material thickness, printing direction, vector sliders and intensity adjustments. Hide the selected material or category.
- Page 52 This mode is for very specific applications. If you select 3D mode, you can adjust how the grayscale levels are mapped to laser power levels using the SETUP button. You can contact our applications lab at Universal Laser Systems for more information on use of the 3D mode.
- Page 53 If you are not using any type of fixture, set the drop down menu to NONE. If you have purchased this accessory, read how to install and operate this fixture in the Accessories section of the User Guide. If you have purchased this accessory, read how to install and operate this fixture in the Accessories section of the User Guide.
- Page 54 Select this switch if the material can be cut and enter information in the vector cut section. Select this switch if the material being added is only available in a particular thickness and you want to lock the thickness to one value. Select this switch if the material supports rubber stamp mode.
- Page 55 The APPLY button saves all changes made to the printer driver settings. The Default button will reset the driver settings to factory default values. You may abort these changes by selecting Cancel; selecting OK or APPLY will approve the changes. To recall a snapshot of the printer driver settings that have been previously saved to a .LAS file using the save button, select on the “Load”...
- Page 56 This tab of the printer driver is for the advanced user and allows the user to manually configure all laser job settings. This approach allows the user much more configurability, but requires a deeper knowledge of the laser job settings and how they affect laser processing.
- Page 57 that there is no difference in the depth of cut from straight lines to curves. % Power and % Speed work together in determining how deep the engraving or cutting will be. Higher power and slower speeds produce deeper results. Lower power and higher speeds produce shallower results.
- Page 58 This control lets you set the Z-Axis table to a specific height. When the auto Z feature is turned on in the UCP and a Z height is set for a color in the color table, the table moves to the height indicated before processing the elements in the print job graphic that were mapped to that color.
- Page 59 The raster sub-tab on the manual control tab of the printer driver setting interface displays a group of settings which affect how raster objects are processed by the laser system. The controls in the sub-tab are described below: The drop down list allows you to choose from several special print modes, normal for most materials and applications or one of the other modes for special applications.
- Page 60 This mode is specifically for rubber stamp creation and is E n g r a v e d O r i g i n a l used for creating shoulders on characters and graphics R e s u l t G r a p h i c when processing rubber stamps.
- Page 61 The Power table graphically represents the shoulder characteristics of the predefined rubber stamp shoulders and also allows you to adjust the shape of any custom shoulders you create. You will notice that you cannot adjust the settings when a predefined shoulder is selected.
- Page 62 This switch is automatically selected when printing photos from Universal Laser Systems 1-touch Photo laser photo printing software. This switch also be selected when printing a photo processed by 1-Touch Photo and then imported into other software before printing. This switch optimizes settings for best results with 1-Touch Photo images.
- Page 63 Dithering settings are used when printing graphics that contain grayscale or color bitmaps such as photographs in all printing modes except 3D mode. A dither pattern is a special screen filter that is used to convert a grayscale or color image to monochrome (black and white). The screen filter reduces the image to black and white while preserving the illusion of shades of gray by varying the spacing of pixels (dots) in the image.
- Page 64 This section contains settings for enhancing and improving raster imaging. Texturize is a special feature which adds random variation to the laser power level assigned to each color. This is useful for creating a textured effect on engraved surfaces to mask grain lines and motion artifacts.
- Page 65 decelerating to change direction for the next raster stroke. If engraving or marking near the edges of the laser processing field these margins are automatically reduced. Decreases file completion times by removing over stroke margins. The laser system attempts to compensate for laser response while accelerating or decelerating to change directions for the next raster stroke but edge quality may suffer on some materials.
- Page 66 These three parameters (CONTRAST, DEFINITION and DENSITY) work together to compensate for laser response when rastering at higher speeds. For a given material at a given speed they must be determined by testing. If you use the materials database, these values are already determined for you.
- Page 67 Step 5: Establish the tuning value. Once the Contrast, Definition and Density are determined, an easy way to set the tuning value on a given material at a desired processing speed is to create a graphic consisting of about 20 thin vertical lines about 1” (25.4 mm) tall and .010” (.254 mm) apart in the center of the engraving field.
- Page 68 scaling feature respectively. Keep in mind that this feature DOES NOT scale raster images. If you are combining raster and vector images in one file, the raster image may not align with your vectors. Raster objects cannot be scaled after printing. If it is necessary to scale raster objects, adjust their size in the graphic application you are using.
- Page 69 This setting allows you to treat multipage documents in different ways. By default, multipage documents are treated as separate jobs with each page having to be selected in the UCP and run individually. This setting allows you to change that behavior. Selecting this setting once will merge the pages with auto- start, meaning the pages will all be printed one after another as one job.
- Page 70 When a graphic has been printed through the printer driver a laser job is created and passed to the queue in a piece of software called the Universal Control Panel (UCP). The UCP software provides a convenient interface for interacting with and controlling your laser system. Once you have installed the UCP, a red diamond-shaped icon will appear in the lower right corner of your Windows taskbar.
- Page 71 The Focus View allows you to quickly manually move the focus carriage to a desired position in the material processing field. • To have full range of motion, verify that you are zoomed out in the preview window by right- clicking on the mouse before entering the manual focus window.
- Page 72 As jobs are printed they are added to the print queue until the queue reaches the print queue limit set in the system tab. Once the Print queue reaches the maximum number of jobs, the printer driver deletes the oldest job each time a new job enters the queue (a FIFO system). Information listed above the preview screen includes the name of the currently selected job, the number of jobs stored, the date and time the selected job was stored on your hard drive and the job processing time (after the job has been run once).
- Page 73 The System Tab allows you to configure certain features of the laser system. If your laser system needs to be calibrated, you will need to do so from this tab. The System tab contains the following controls • • The PRINT CACHE number indicates the maximum number of print jobs that will be stored on your hard drive.
- Page 74 • If you would like the laser system to re-home the X and Y axes before it processes each job, select the ‘Home XY Before Engraving’ switch. • Your laser system may contain an Air Pressure detection switch to warn you if no air pressure is present and you have selected air assist functions in the job properties window.
- Page 75 The control panel on your laser system provides the functions necessary to setup and run jobs on your laser system. A Red LED on the control panel provides an indication of the status of the interlock system. Indication Condition All access doors to the laser system are closed. If a laser job is initiated in this state, the laser will fire.
- Page 76 Main Menu: When your laser system is initially powered up the laser system model name will appear on the displayed. This screen will remain until laser system establishes communication over the USB port with the Universal Control Panel running in the task bar on your PC. If the UCP is not running in the task bar or the laser system is not connected to a USB port on the PC, the laser system will not be able to function.
- Page 77 Before laser processing material, you will need to load material into the laser system and then focus the laser system onto the top surface of the material. Important Optics Notice The PLS6MW uses special Multi-Wavelength compatible optics which are NOT interchangeable with standard laser optics.
- Page 78 Focusing Once you have positioned the material, you will need to focus the laser system by adjusting the Z axis up or down until the top surface of the material to be laser processed is at the focal plane of the lens installed in the laser system.
- Page 79 A final focusing method is to use the auto-focus feature to focus on the material. In the Cell 2 and Cell 3 laser systems, the autofocus sensor is a light beam sensor that crosses the processing area horizontally at about 3” inches in the Y axis. There is a notch in the Y axis ruler between the 2” and 4” marks to indicate where the beam crosses the processing area.
- Page 80 ULS Windows Printer Driver will work with a wide variety of Windows based graphic software to create laser jobs through the Windows Print System. Every effort has been made to make the printing process as seamless as possible, however, to get the best results when printing through the ULS Windows Printer Driver, you should be aware of a few general guidelines for all software as well as some specific notes regarding some of the more popular Windows software for printing to the laser system.
- Page 81 Vector Output for Vector Cutting and Marking The printer driver distinguishes between raster objects (raster engraving) and vector objects (vector cutting and marking) by the types of elements contained in the graphic being printed. All graphics, other than outlines of very thin line widths will be interpreted as raster objects and the raster mode will be used for laser processing.
- Page 82 Note: AutoCAD version 2000 is not compatible with ULS laser systems. You must upgrade to version 2000i or higher. Vector output Line widths for printing from AutoCAD products are controlled by plot styles. Make sure you set the first eight pens in the plot style you use to .001”...
- Page 84 Manual Air Assist is employed with a backsweep or cone to control air flow onto the material during laser material processing. This feature also provides compressed air to the optics (mirrors and lenses) in the system reducing contamination. Air assists aids in removing smoke and debris from the laser processing area and directing it to the exhaust.
- Page 85 As a rule of thumb the flow rate should be set as low as possible for the application especially when using gas, start with low flow and adjust upward until the desired result such as suppression of flame up. Maintenance The components of the Manual Air Assist are maintenance free.
- Page 86 travels through a flow control device (7) which adjusts its flow in increments of 25%, 50%, 75% or 100% and finally to the cone or backsweep. The flow control device (7) can be adjusted through the printer driver settings. The cone path protects the focus lens (8) and provides a downward flow directly into the beam path at the focus point of the laser beam.
- Page 87 3. Use the thumbscrew (1) removed earlier to hold the air assist back sweep in place. Adjust the air assist back sweep’s height by loosening the thumbscrew (2) and adjusting it up or down. Tighten the thumbscrew once it is at the desired height. To adjust the angle of the air flow, turn the screw (3) in small increments to direct the air jet to the desired position over the material.
- Page 88 CAUTION: Do not install the cone unless you plan on using Air Assist and never use the Air Assist Cone without proper airflow. Leaving the cone attached to the cone base and running the laser system without airflow will cause smoke from laser processing to be drawn up into the cone and rapidly damage the focus lens.
- Page 89 The ULS Computer Controlled Compressed Air Unit functions automatically when connected the laser system and no operator intervention is necessary. Controls and indicators on the unit are for diagnostics and provide the following information: Link light – blinks to indicate good communications link with the laser system ON and OFF lights –...
- Page 90 The cutting table is used to support material when cutting so that exhaust flow is redirected both above and below the material for clean cuts. Without it, smoke and debris can build up underneath the material and cause the surface of the material to be damaged. The cutting table also helps to reduce damage to the surface of the material from laser back reflection which can occur when the laser reflects off of the table supporting the material if you attempt to cut without the cutting table.
- Page 91 screws slightly (you may have to remove the cutting table to do this). Adjust the rulers and then retighten the screws. CAUTION: To properly use the cutting table with the autofocus feature or the auto Z feature in the printer driver, the Cutting table must be calibrated to the lens you are using.
- Page 92 and passes the other half of the laser beam through the beam splitter. The second half of the laser beam then travels through the beam tube and is deflected by the primary carriage mirror and through the focus lens. Installation Note: The example below assumes that you have also purchased the Dual Head Air Assist option.
- Page 93 4. Locate the threaded mounting holes on the right side of the Dual Head carriage shown below and the similar threaded mounting holes on the left side of the primary carriage. 5. Pick up the Dual Head tube and note the “L” (Left) and “R” (Right) markings. Install the tube using the supplied mounting screws as shown below.
- Page 94 c. Attach the other end of the Air hose to the Dual Head carriage in the same way. d. Install cones in both carriages as shown. Operation Start your graphics program and create new artwork or open existing artwork. Remember that the Dual Head Option splits the engraving/cutting area in two halves in the X direction.
- Page 95 Removal Remove the Dual Head Option by reversing the order of the steps used for installation. If you have the Air Assist option, remember to put the black thumbscrews back into the original holes in the primary carriage to prevent air leaks. Also, be sure to uncheck the “Dual Head” option in the printer driver. High Power Density Focusing Optics (HPDFO) has a smaller focal spot size than a standard 2.0”...
- Page 96 0.013” (0.330 mm), but has an effective focal range of +/- 0.2” (5.08 mm) making it much less sensitive to flatness of material and accuracy of focus but with the trade off of a larger spot size. Contact Universal Laser Systems customer support for help in choosing the right lens for your application.
- Page 97 Then connect the other end of the patch cable to the PWR/COM IN RJ9 connector at top of Automation Kit. (Optional) If you are using an ULS computer Controlled Compressed Air Unit for air assisted laser processing, use the included RJ9-to-RJ9 cable to connect the compressor to the unused RJ9 PWR/COM OUT jack on the automation kit.
- Page 98 The automation kit connector J2 is used to wire external signals to six programmable inputs which can initiate various laser functions. To trigger a function, supply between 5V DC to 24V DC to one of the input pins as shown below. It is not necessary to limit current with a resistor to the input pins. The pulse on the input pins should be held high longer than 5mS in order to register.
- Page 99 Example Connection for PNP mode Example Connection for NPN mode...
- Page 100 Input and output events are configured in the systems tab of the UCP. The controls for automation Port setup will only be visible if the automation board is plugged in and working properly. You can configure the input functions to perform the following actions: Start Job, Pause Job, Resume Job, Select Previous Job, Select Next Job, Initiate Autofocus, Display a Message, Z height and Quit the UCP application.
- Page 101 The Rotary Fixture allows the laser system to engrave and mark on cylindrical objects. The Rotary fixture is equipped with an external cone shaped fixture mounted to the fixed, motorized end and an internal cone shaped fixture attached to the adjustable end allowing the fixture to hold a variety of objects such as wine glasses, mugs, cups, etc.
- Page 102 With the power to the system still OFF, connect the rotary fixture control cable to the receptacle on the laser system (6). Loading Material Before loading material into the fixture, measure the diameter (1) of the material in the area where the engraving or marking is to be located, by using a caliper or similar measuring device.
- Page 103 8. Power ON the laser system. If you are using the rotary for the first time or replaced the laser system’s CPU, rotary calibration may be needed, so proceed to the next step. If rotary calibration is not needed proceed to “Determining Graphic Placement.” Rotary Calibration Select the System Tab of the UCP and press on the CALIBRATE button in the Rotary section.
- Page 104 After focusing, press both SAVE buttons on the Rotary Calibration dialog. If asked to overwrite an existing position, accept the new value by pressing YES. Once complete, press the CLOSE button and the focus carriage will re-home. Calibration is now complete.
- Page 105 Determining Graphic Placement The next step is to align the graphics to be printed with the material inserted in the rotary fixture. Again, a wine glass is used for illustration. You can use the X axis ruler or to be more precise use the Red alignment Laser and the X-Y coordinate display in the UCP to position the graphics in the X axis.
- Page 106 7. Once you have the new engraving field size, exit the printer driver properties dialog. 8. In your graphics software change the page size to equal the new engraving field size from the printer driver dialog. 9. This new vertical dimension of the page is now the circumference of the material to be engraved. 10.
- Page 107 3. Once you are ready to print, select print in your graphics software and open the printer driver preferences dialog. In the materials driver tab select the material you are going to laser process, select “Rotary” in the fixture section and enter the diameter of the material measured earlier. 4.
- Page 108 The SuperSpeed option increases the productivity of the system by printing two lines of raster information simultaneously with each pass of the X axis over the material being laser processed. This reduces job completion times at a particular density by up to 50%. The option also provides two extra densities to choose from which can improve productivity even further.
- Page 109 Installation 1. Place base against rulers on material processing table. Place additional pin table bases against first base, magnets will secure them to each other when oriented correctly. 2. Place rounded pins as needed to support material to be cut. 3.
- Page 110 vector colors will retain their original color but will use the red vector cut laser settings in the database. If using the manual tab in DXF mode vector colors will be mapped to the color table and use the laser settings assigned to each color.
- Page 112 Accumulation of dirt and debris on the motion system components will cause uneven or rough engraving, loss of engraving position and premature failure. Accumulation of smoke or dirt on optics can result in loss of laser power and premature failure. It is important to keep your laser system as clean as possible to ensure trouble free operation and best results from laser processing.
- Page 113 • Mild soap solution mixture of 1 tablespoon (14.78 ml) liquid soap and 1 quart (liter) of water in a spray bottle • Window cleaner • Paper towels • Cotton cloth • Denatured alcohol (do not use on any painted surface, plastic or the Top Window) •...
- Page 114 A visual inspection of the #2 and #3 mirrors, beam window and focus lens should be performed at least once a day. CAUTION: Do not clean an optic that is visually clean. Excessive cleaning can damage the optical coatings. To prevent contamination, wash your hands thoroughly before handling and cleaning any optic. Try not to touch the optical surfaces with your fingers, handle optics only by the edge or optical housing.
- Page 115 3. Tilt the front cover enough to enable you to apply the lens cleaning solution directly to the #3 mirror and to the focus lens. 4. Flood the reflective surface of the #3 mirror with the solution. If heavy debris is present, let the solution soak in for a minute.
- Page 116 1. Power on the laser system and UCP. 2. Using the Z-Axis buttons on the laser system or UCP, raise the Z-Axis table as high as possible. 3. Power the system OFF. 4. Open the front door. 5. Locate and remove the four socket head cap screws found on the inside of the laser system. 6.
- Page 117 This air-cooled laser system will require periodic cleaning of the cooling fan filters. Since ambient air is used to cool a laser cartridge, the air must be filtered before it passes through the laser. Dust contamination in the intake filter may reduce the cooling fan’s ability to keep the laser cartridge, as well as the CPU and power supply, from overheating.
- Page 118 We recommend the following schedule: As necessary Every month • Clean engraving table • Clean cooling fan filters • Clean main enclosure • Clean Z-Axis lead screws with white lithium • grease Clean top door window • Check for X-Axis and Y-Axis belt wear. Every 8 hours of engraving Replace as necessary.
- Page 119 www.ulsinc.com...
Need help?
Do you have a question about the PLS4.75 and is the answer not in the manual?
Questions and answers