Table of Contents
Advertisement
User Guide
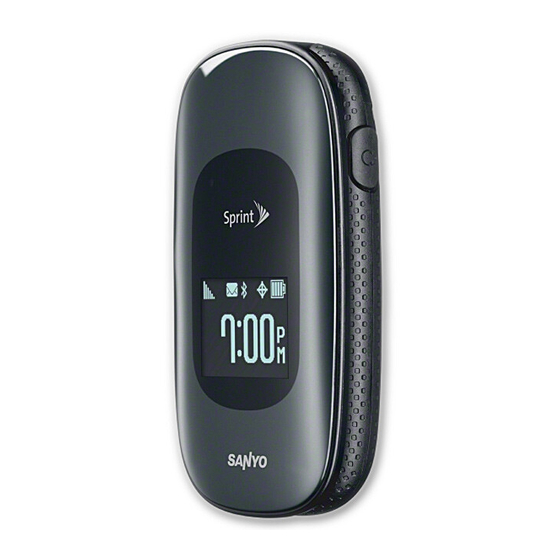
SANYO Vero™ by KYOCERA
www.sprint.com
©2010 Sprint. SPRINT and the logo are trademarks of Sprint.
Other marks are the property of their respective owners.
"SANYO" is a registered trademark of SANYO Electric Co., Ltd.
and is used under license. KYOCERA is a registered
trademark of Kyocera Corporation. Kyocera manufactures
and markets the SANYO line of wireless products.
9/16/10
Advertisement
Table of Contents

Related Manuals for Sanyo Vero


Summary of Contents for Sanyo Vero
-
Page 1: User Guide
©2010 Sprint. SPRINT and the logo are trademarks of Sprint. Other marks are the property of their respective owners. “SANYO” is a registered trademark of SANYO Electric Co., Ltd. and is used under license. KYOCERA is a registered trademark of Kyocera Corporation. Kyocera manufactures and markets the SANYO line of wireless products. - Page 2 Consejo: Para encontrar esta guía para usuarios en español, por favor visita a www.sprint.com y haz clic en Support > Devices To find this user guide in Spanish, please visit www.sprint.com and click Support > Devices Important Privacy Message – Sprint’s policies often do not apply to third-party applications.
-
Page 3: Table Of Contents
Table of Contents Displaying Your Phone Number ... . . 16 Making and Answering Calls ....16 Entering Text . - Page 4 Making a New Group Entry From History ..47 Calculator ....... . 61 Deleting History .
- Page 5 Section 4: Safety and Warranty Section 3: Sprint Service ....83 Information ......109 3A.
-
Page 7: Introduction
Introduction Your Phone’s Menu ® This introduces you to Sprint service and The following table outlines your phone’s main menu User Guide all the features of your new phone. It’s divided into four structure. For more information about using your sections: phone’s menus, see “Navigating Through the Menus”... - Page 8 Photos My Account 1: Camera 1: Account Details Press the right softkey to view the following options: 2: Hear Minutes 1: Picture Mode 2: Zoom 3: Hear Balance 3: Self-Timer 4: Fun Tools 5: Image Controls 6: CameraSettings Settings 7: Review Media 8: Key Guidance 9: User Settings 1: Display...
- Page 9 4: Text Entry 2: Airplane Mode 3: Alerts 1: Word Complete 2: Next Word Complete 3: Phrase Complete 4: Word Scan 1: Beep Each Minute 2: Out of Service 5: Word Choice List 6: Input Language 3: Connect 7: My Words 8: Help 4: Call Setup 5: Phone Info...
- Page 10 0: Navigation Keys 0: Stopwatch 1: Left Navigation 2: Right Navigation : World Clock (Calendar) (Web) Shopping 3: Up Navigation 4: Down Navigation (Send Message) (My Stuff) In Use Menu Tools Press OPTIONS (right softkey) to display the following 1: Device Self Service options: 2: Alarm 1: Save/Contact Details 2: Main Menu...
-
Page 11: Section 1: Getting Started
Section 1 Getting Started... -
Page 12: 1A. Setting Up Service
1A. Setting Up Service Press to turn the phone on. Setting Up Your Phone (page 2) If your phone is activated, it will turn on, search for Activating Your Phone (page 3) Sprint service, and enter standby mode. Setting Up Your Voicemail (page 4) If your phone is not yet activated, see “Activating Sprint Account Passwords (page 4) Your Phone”... -
Page 13: Activating Your Phone
(left softkey) to override Activating Your Phone Press ACTIVATE auto-activation and start the manual activation wizard. If you purchased your phone at a Sprint Store , it is probably activated and ready to use. Note: If you don’t override Hands-Free Activation, your phone will attempt to auto-activate five times, and then the If you received your phone in the mail and it is for a new manual activation wizard will start automatically. -
Page 14: Setting Up Your Voicemail
Setting Up Your Voicemail Sprint Account Passwords Your phone automatically transfers all unanswered As a Sprint customer, you enjoy unlimited access to calls to your voicemail, even if your phone is in use or your personal account information, your voicemail turned off. -
Page 15: Getting Help
Data Services Password From Your Sprint Phone Press to check minute usage and With your Sprint phone, you may elect to set up an account balance. optional data services password to control data (Web) Press to make a payment. access and authorize Premium Service purchases. Press to access a summary of your For more information, or to change your passwords,... -
Page 16: Sprint Operator Services
Sprint Operator Services Sprint Operator Services provides assistance when placing collect calls or when placing calls billed to a local telephone calling card or third party. Press For more information or to see the latest in products and services, visit us online at www.sprint.com 1A. -
Page 17: Section 2: Your Phone
Section 2 Your Phone... -
Page 18: 2A. Phone Basics
Your Phone 2A. Phone Basics 1. Earpiece 2. Main Screen 14. LED Indicator Your Phone (page 8) 13. Softkeys Viewing the Display Screen (page 10) Turning Your Phone On and Off (page 13) 3. MENU/OK Key 12. Headset Jack Battery and Charger (page 13) 11. -
Page 19: Key Functions
Key Functions lets you enter numbers, letters, and Keypad characters and navigate within menus. You can Earpiece lets you hear the caller and automated use the numeric keypad for speed dialing (see prompts. “Speed Dialing” on page 22). END/POWER Key lets you turn the phone on or off, displays all the information needed to Main Screen... -
Page 20: Viewing The Display Screen
lets you monitor the phone’s status Viewing the Display Screen Outer Screen and see who is calling without opening the phone. The status bar at the top of your phone’s display screen lets you hear the different ringers and Speaker provides information about your phone’s status and options. - Page 21 Status Icons Messaging and Alert Icons Battery – Your phone’s current battery charge New Messages – You have one or more new level. (The icon to the left shows the battery is messages waiting. fully charged.) The icon is animated while the –...
- Page 22 Bluetooth Icons Other Icons Visible – Your phone is discoverable by (visible – Your phone is connected to a TTY device. to) other Bluetooth devices. Connected – Your phone is connected to a – An alarm or countdown is set. Alarm Bluetooth device.
-
Page 23: Turning Your Phone On And Off
Turning Your Phone On and Off Turning Your Phone Off Press and hold for two seconds until you see Turning Your Phone On the powering-down animation on the display screen. Press Your screen remains blank while your phone is off Once your phone is on and finds a signal, it unless the battery is charging. -
Page 24: Battery Capacity
Battery Capacity Installing the Battery Your phone is equipped with a Lithium Ion (Li-Ion) See “Setting Up Your Phone” on page 2. battery. It allows you to recharge your battery before it is Removing the Battery fully drained. The battery provides up to 5.2 hours of continuous digital talk time. -
Page 25: Navigating Through The Menus
Charging the Battery To navigate through a menu, press the navigation key up or down. Keeping track of your battery’s charge is important. For a diagram of your phone’s menu, please see “Your If your battery level becomes too low, your phone Phone’s Menu”... -
Page 26: Displaying Your Phone Number
Backing Up Within a Menu Press . (To make a call when you are roaming and Call Guard is enabled, see “Call Press to go to the previous menu. Guard” on page 92.) Press to return to standby mode. Press when you are finished. -
Page 27: Dialing Options
Dialing Options Answering Calls Make sure your phone is on. (If your phone is off, When you enter numbers in standby mode, you can incoming calls go to voicemail.) see available dialing options by pressing OPTIONS (right softkey). To select an option, highlight it and Press to answer an incoming call. - Page 28 to mute the ringer and stop the vibration. Ending a Call Silence Pressing or the volume button has the same Press effect. to ignore the call and transfer it Send to Voicemail Missed Call Notification to your voicemail. When an incoming call is not answered, your screen to ignore the call and send a Ignore with Text displays the Missed Call log.
- Page 29 to switch the call to a Bluetooth device Transfer Audio Important: Always report your location to the 911 operator (if applicable). when placing an emergency call. Some Contacts to display your Contacts list. designated emergency call takers, known as Public Safety Answering Points (PSAPs) may not to record the other party’s voice.
-
Page 30: Saving A Phone Number
Press the volume button up or down to adjust the Press (left softkey) to send a SEND MESSAGE receiver volume. message. Press (left softkey) to switch MUTE UNMUTE Press to return to standby mode. between the mute or unmute mode. (Muting Press or simply wait 10 seconds to return to applies to your voice, not the other party’s.) -
Page 31: Finding A Phone Number
Finding a Phone Number automatically sends the next set of 2-Sec. Pause numbers after two seconds. You can search Contacts entries for phone numbers Note: You can have multiple pauses in a phone number and that contain a specific string of numbers. combine two-second and hard pauses. -
Page 32: Dialing From The Contacts List
Dialing From the Contacts List Speed Dialing From standby mode, press (right softkey). You can store up to 98 numbers in your phone’s speed CONTACTS dial memory to make contacting friends and family Highlight the entry you want to call. easier. -
Page 33: Entering Text
Abbreviated Dialing Contacts Match will not retrieve numbers if you Note: enter 911 or reserved three-digit service numbers such Abbreviated Dialing is similar to speed dialing. You can as 411 or 711. use either of the following abbreviated dialing features. –... - Page 34 Select one of the following options: Setting Text Entry Options to use multi-tap entry – press once for The text entry options menu allows you to specify a “a,” twice for “b”, three times for “c.” (See page 25.) suitable feature during the text entry process. T9Word to enter text using a predictive text system From a screen where you can enter text, press...
-
Page 35: T9 Text Input
to edit or delete custom words you make a mistake, press to erase a single character. My Words have added to the predictive text database. Press and hold to erase an entire word.) to store words that you frequently use. Add Word ●... -
Page 36: Simple Data Exchange
If the word you want is not displayed after you have Simple Data Exchange entered all the letters, press the navigation key down to scroll through additional word selections. To accept a This feature makes it easy to select certain information word and insert a space, press in a message and automatically save it or use it in a related application. - Page 37 to save the email address in . The application will open and Save to Contacts Share > Message Contacts. the phone number will appear in the message body. Contact Details to display the Contacts entry if the email address is already saved in Contacts. to save the phone number in Save to Contacts Contacts.
-
Page 38: 2B. Settings
Display Settings 2B. Settings Changing the Screen Saver You can set a screen saver to display while in standby mode. Display Settings (page 28) Volume Settings (page 31) Press > Settings > Display > Screensaver Ringer Settings (page 32) Select a screen saver option by pressing the navigation key up or down, and select a screen Messaging Settings (page 34) saver. -
Page 39: Changing The Backlight Time Length
Changing the Backlight Time Length Note: Long backlight settings reduce the battery’s talk and standby times. Select how long the main screen and keypad remain backlit after any keypress is made. You can also change the backlight for when a Java application is Setting the Notification Pop-up running in the foreground. -
Page 40: Power Save Mode
Select a picture ID option by pressing the navigation Setting a Custom Greeting key up or down, and then select an image. You can display your own custom greeting in standby If you select , press to take a Take New Picture mode. -
Page 41: Volume Settings
, > Settings > Others > Accessibility > Press Select Incoming Ringer Playback Volume , or Font Size Power Up/Down Key Beeps If you select Power Up/Down , select Note: You will see a message the first time you change the font or ... -
Page 42: Ringer Settings
To activate Silence All: If you select , select , or select Contacts All Contacts and then select an entry. One Contact Press and hold the volume button down. Select a ringer option by pressing the navigation (The screen will display “Silence All.”) key up or down, and then select a ringer. -
Page 43: Setting Up Voice Guide
Select a ringer type category ( email addresses, URLs, etc., as you highlight each item Incoming Calls , etc.) and any applicable onscreen. (The default setting is Voicemail Messages subcategories until you arrive at the Select Ringer > Settings > Others > Accessibility > Press screen. -
Page 44: Messaging Settings
(left Messaging Settings From standby mode, press MESSAGING softkey) (right softkey) > OPTIONS > Callback Number Select , or . If you Your phone’s advanced messaging capabilities let you None My Phone Number Other , enter a callback number and select Other send and receive different kinds of messages without... -
Page 45: Managing Preset Messages
Managing Preset Messages To change the language of the preset messages: From standby mode, press (left MESSAGING Your phone is loaded with 20 preset messages to help softkey) > OPTIONS (right softkey) > Preset Messages make sending messages easier. Customize or delete these messages, such as “Where are you?,”... -
Page 46: Airplane Mode
to deliver emergency to deactivate Airplane Mode immediately. Imminent Threat - Severe alerts in a severe emergency situation (a to activate Airplane Mode the next On Power-up significant threat to life or property). time the phone is powered on and to keep to deliver alerts related to missing or Airplane Mode activated even when the phone is Amber Alerts... - Page 47 To turn TTY Mode on or off: Note: In TTY Mode, your phone will display the TTY icon if a . TTY device or an optional headset is connected to your Press > Settings > Others > Accessibility > TTY phone.
-
Page 48: Using The Hearing Aid Device Compatibility
Using the Hearing Aid Device Phone Setup Options Compatibility Function Navigation Key Shortcuts Your phone has been tested and rated for hearing aid You can use the navigation key to access shortcuts to device compatibility. To use this function effectively, set specific menu items directly from standby mode. -
Page 49: Alert Notification
> Settings > Others > Call Setup > Alert Notification Press Auto-Answer Set your phone to alert you with an audible tone when Highlight an option and press you change service areas, once a minute during a to answer calls automatically when the Hands-free voice call, or when a call has been connected. -
Page 50: Security Settings
Security Settings Your Phone’s Lock Feature Locking Your Phone Accessing the Lock Phone Menu When your phone is locked, you can only make calls to 911 and Sprint Customer Service. You must enter your lock code to view the Lock Phone menu. -
Page 51: Parental Controls
Enter your new lock code and press Re-enter your new code and press (left CONTINUE SAVE (left softkey). softkey). Re-enter your new lock code and press SAVE (left Repeat the procedure above with each change from softkey). . Also, while set to , a user will be required to enter the current code to access the Parental Each time you change the lock code, you will be... - Page 52 to restrict sending messages except to to prevent using the camera. Messages Camera designated recipients. to prevent changing the Force Location On Location setting from . (See “GPS Select . Read the message and press On/Off > On Services” on page 106.) (left softkey).
- Page 53 to delete all of your Contacts including to reset all settings and erase all data Contacts Reset Phone speed dial numbers saved in your Contacts. on your phone. Voice Memo to delete all voice data and call Read the message and press the left softkey memos saved in the phone.
-
Page 54: Net Guard
To disable data services: Press > Settings > Others > Data > Data On Read the disclaimer and press (right DISABLE softkey) to sign out. Net Guard When you first connect to the Web, the Net Guard will be displayed to confirm that you want to connect. The Net Guard helps you avoid accidental connections. -
Page 55: 2C. History
Each entry contains the phone number (if available) and Contacts entry name (if the number is in your 2C. History Contacts). Duplicate calls (calls from the same number) may appear only once on the list. Press > History Viewing History (page 45) Shortcut: You can also press from standby mode to... -
Page 56: History Thread
History Thread according to the type of call. (See “History Options” on this page). To make a call from the History details screen, The History thread screen shows all history for a press selected entry. You can also keeps track of all the messages you have sent to and received from the History Options selected entry. -
Page 57: Making A Call From History
was selected, select a number type, New Entry Note: If Parental Controls is on and Voice Calls or Messaging and then enter the new entry name. is restricted, you cannot use the New Group or Save – or – Contact menu. (See page 41.) was selected, select an existing Existing Entry entry to which you want to save the number, and... -
Page 58: Deleting History
Deleting History You can delete individual or all entries in your History. Press > History Highlight an entry you wish to delete and press (right softkey) OPTIONS > Delete Select Delete All to delete all entries. If you are certain you want to delete one or all entries from History, press (left softkey). -
Page 59: 2D. Contacts
About Contacts 2D. Contacts Your phone can store up to 600 Contacts entries. Each entry can contain up to seven phone numbers, three email addresses, three IM addresses, and three Web addresses. You can also add Contacts entries to a About Contacts (page 49) , allowing you to send one message to up to 40 Group... -
Page 60: Adding A New Contacts Entry
Displaying Contacts Details Press (left softkey). DONE After you have saved the number, the new Contacts From the Contacts list, highlight an entry and entry is displayed. press Tip: ICE – In Case of Emergency Highlight any data field and press . -
Page 61: Adding A Number To A Contacts Entry
Adding a Number to a Contacts Tip: Press (right softkey) OPTIONS > Enter New Address Recent History to enter a new phone number or Entry address or to select an entry from your history. When you have selected all the entries you want to Display a Contacts entry. -
Page 62: Finding Contacts Entries
Read the message and press (left softkey). Finding Contacts Entries START Highlight an entry you want to add and press From standby mode, press (right softkey). CONTACTS Repeat step 4 to add additional members. Scroll through all the entries. Press CONTINUE (left softkey) >... -
Page 63: Using Contacts Information In Other
Using Contacts Information in Other Assigning Speed Dial Numbers Applications Your phone can store up to 98 phone numbers in speed dial locations. (See “Speed Dialing” on You can use saved Contacts information in other page 22.) applications. To assign a speed dial number to a new phone number: To copy information into a message: Add a phone number to a new or to an existing From the Contacts list, highlight an entry and ... -
Page 64: Selecting A Ringer Type For An Entry
Highlight an available speed dial location and Tip: If you select in step 5, you can Downloaded > Get New press purchase and download new ringers right from your phone. For details, see “Getting New Ringers” on Tip: To replace a current assignment, select a location and page 32 and “Downloading Games, Ringers, and More”... -
Page 65: Secret Contacts Entries
Secret Contacts Entries My Name Card When you make an entry secret and hide it, that entry is In My Name Card, you can edit your contact not displayed in your Contacts. In History, a telephone information to display when you need, as well as send number is displayed but the Contacts entry’s name is not. -
Page 66: Dialing Sprint Services
Dialing Sprint Services Your Contacts list is preprogrammed with contact numbers for various Sprint services and other useful services. To dial a service from your Contacts: From standby mode, press (right CONTACTS softkey) (right softkey) > OPTIONS > Settings > Services Select an available service, such as ... -
Page 67: 2E. Calendar & Tools
Highlight a day to which you would like to add an > event and press (right softkey) OPTIONS 2E. Calendar & Tools Add Schedule Enter a description and press Select a category for the event (Appointment, Calendar (page 57) Meeting, etc.) by highlighting the category field and pressing Alarm (page 60) -
Page 68: Adding A To Do List Item To The Calendar
Select a repeat status for the alarm by highlighting Adding a To Do List Item to the Calendar the repeat field and pressing Your phone can store and manage up to 40 To Do list If you chose , set a start and end Specific Period items. -
Page 69: Calendar Alerts
Calendar Alerts Viewing Events If you have an event on the Calendar, your phone alerts Tip: Days with scheduled events are indicated by small you by a ringing or vibrating alarm and displays a colored rectangles just below the date. A rectangle’s color depends on the repeat status for an event. -
Page 70: Alarm
Highlight an option and press Enter a description for the alarm by highlighting the description field and pressing to delete the highlighted event. This Select a time for the alarm by highlighting the time to delete multiple events. Select field and pressing to delete all events on the list. -
Page 71: Calculator
World Clock Tip: Press (left softkey) to toggle the alarm on and off. To view the time in different locations: In steps 5 and 9, use your keypad or navigation key (up Press > Tools > World Clock or down to change value, left or right to move underscore) to set a time. -
Page 72: Stopwatch
Press (left softkey). SAVE Tip: Press (left softkey) to toggle the countdown alarm on and off. See “To respond to the alarm:” on page 59 for ways to stop, pause, or reset the alarm. Stopwatch Press > Tools > Stopwatch Press (left softkey) to select split timing or MODE... -
Page 73: 2F. Voice Services
Available ASR commands include: <Name or #> to call an entry in your Contacts Call 2F. Voice Services list or a spoken phone number. (See the next article for details.) <Name or #> to send a message to Send Message an entry in your Contacts list or to a spoken phone Automatic Speech Recognition (ASR) (page 63) number. -
Page 74: Opening Menus Using Asr
When you hear “Say the name or number,” say a Displaying a Contacts Entry’s Information name or a phone number. Using ASR When you hear “Which location?,” say a number Press and hold type (for example, “Mobile”). When you hear “Say a command,” say “ .”... -
Page 75: Checking Phone Status Using Asr
Checking Phone Status Using ASR to always ask for confirmation. Always Confirm to never ask for confirmation. Never Confirm You can use ASR to obtain information about your phone: To adapt the system to your voice: (all of the following except My Phone Number) Status Press and hold Time... -
Page 76: Managing Voice Memos
To change the ASR dialing region: Recording Memos Press and hold To record an audio memo: Press (right softkey) SETTINGS > Dialing Region Press > Tools > Voice Services > Voice Memo > Record Highlight an option and press Start recording after the beep. to recognize only numbers valid in North America North America. - Page 77 Press (right softkey) to play all Press OPTIONS > Play > All > Tools > Voice Services > Voice Memo > memos continuously. List To play multiple memos: Highlight a memo and press OPTIONS (right softkey) to display available menu options: Press >...
-
Page 78: 2G. Camera
Using the phone’s main screen as a viewfinder, aim the camera lens at your subject. 2G. Camera Press , or (left softkey) until the CAPTURE shutter sounds. The picture will automatically be saved in the My Photos folder. (See “Storing Pictures”... -
Page 79: Assigning Pictures
Assigning Pictures to zoom in and out on a subject. (See “Zoom” Zoom on page 70.) Assign a picture as a screen saver or as a picture ID. to activate the camera’s timer. (See Self-Timer Take a picture. (See steps 1–3 on page 68.) “Self-timer”... - Page 80 Self-timer Note: When taking multiple shots, the resolution is temporarily set to 0.1M (240x320) From camera mode, press (right softkey) OPTIONS > Self-Timer Highlight an option ( , or 3 Shots 6 Shots 9 Shots and press Highlight a delay time ( 5 Seconds 10 Seconds and press...
-
Page 81: Camera Settings
Camera Settings Saving Your Settings From camera mode, press OPTIONS (right softkey) > You can save your favorite camera mode options as your preferred settings. CameraSettings Highlight an option and press Set your favorite camera mode options and press to select a picture’s file size OPTIONS (right softkey) >... -
Page 82: Storing Pictures
Camera Icons To review your stored pictures in the My Photos folder: Function Icon Details Press > Photos > My Photos Beach/Snow Use this setting in bright light. Scenery Use this setting for scenery at a distance. My Photos Folder Options Picture Mode Mirror Image... -
Page 83: Sending Pictures From Your Phone
to edit or display details relating to your Sending Pictures From Your Phone Details/Edit pictures. to edit the selected picture’s caption. Text Caption Once you have taken a picture, you can use the , to select from Special Effects Fun Frames messaging capabilities of your phone to instantly share , or... -
Page 84: Printing Pictures From Your Phone
(right softkey) to enter a recipient’s Press (right softkey) NEW ADDRESS OPTIONS > Select Multiple wireless phone number or email address directly. select multiple pictures. Press (left softkey) to proceed. CONTINUE Note: You may not be able to print pictures that you cannot Compose a message. - Page 85 When you have finished selecting the print settings, press (left softkey). PRINT Note: While you are connected to the printer, your phone’s screen will display “Phone Off.” You cannot make or receive calls during this time. When printing is finished, press Press (left softkey).
-
Page 86: 2H. Bluetooth
Turning Bluetooth On and Off 2H. Bluetooth By default, your phone’s Bluetooth feature is turned off. Turning Bluetooth on enables your phone’s Bluetooth functions. About Bluetooth (page 76) Press > Tools > Bluetooth > On/Off Turning Bluetooth On and Off (page 76) Press (left softkey) to enable Bluetooth. -
Page 87: Bluetooth Menu
Select . If you select Displaying your Bluetooth trusted devices list. Visible for 3 min Always visible , your phone will be discoverable by Always visible Displaying your phone’s Bluetooth information. all in-range Bluetooth devices until you change the To access the Bluetooth menu: setting. -
Page 88: Pairing Bluetooth Devices
Pairing Bluetooth Devices Viewing the Trusted Devices List The Bluetooth pairing process allows you to establish This list displays a list of devices which are paired with trusted connections between your phone and another your device and set as trusted devices. Bluetooth device. -
Page 89: Sending Data Via Bluetooth
Options Menu Press (left softkey) TRANSFER... > Send Contacts From the Trusted Devices list, highlight a device, Select an option: and press OPTIONS (right softkey) to display the to send all the entries in your Send All Contacts following options: Contacts. -
Page 90: Printing Pictures Via Bluetooth
Printing Pictures via Bluetooth To set the print settings, highlight each element and select a setting using your navigation key right or left. You can print out your pictures stored on your phone. : You can select the print mode from Type Prints (Some Bluetooth-enabled printers may not support this... - Page 91 When you have finished selecting the print settings, press (left softkey), and wait for the PRINT Bluetooth connection and printing. When printing is finished, press Note: Before using the Bluetooth printing feature, make sure your phone’s battery is fully charged. 2H.
-
Page 93: Section 3: Sprint Service
Section 3 Sprint Service... -
Page 94: Sprint Service: The Basics
From standby mode, press and hold 3A. Sprint Service: Follow the system prompts to: Create your password. The Basics Record your name announcement. Record your greeting. Voicemail (page 84) Note: Voicemail Password Messaging (page 86) Sprint strongly recommends that you create a Caller ID (page 89) password when setting up your voicemail to protect against unauthorized access. -
Page 95: New Voicemail Message Alerts
New Voicemail Message Alerts Retrieving Your Voicemail Messages When you receive a new voicemail message, your You can review your messages directly from your wireless phone or from any other touch-tone phone. phone alerts you and prompts you to call your voicemail. -
Page 96: Messaging
Using Another Phone to Access Messages Messaging Dial your wireless phone number. With messaging, you can send and receive messages When your voicemail answers, press the star key ( between your phone and another messaging-ready phone. When you receive a new message, it will Enter your password. -
Page 97: Composing Messages
Composing Messages Select files you would like to attach, and then press (left softkey). (If you have taken a new picture NEXT From standby mode, press (left MESSAGING or recorded a new audio, skip this step.) softkey) > Send Message Review your message and press (left softkey). -
Page 98: Threaded Messaging
Threaded Messaging The message will be sent automatically when your phone reconnects to the network. Threaded messaging lets you follow a chain of – Message you saved as a draft. Only Me (Draft) messages to and from a particular contact. one draft can be saved in each thread, and that draft appears at the top of the thread. -
Page 99: Caller Id
Press (left softkey) to send a draft message. to block text messages from SEND Manage Text Blocking specific phone numbers or email addresses. Press (left softkey) to resend a failed RESEND Settings to display the Messaging Settings menu. message. to display more information More Information Select a message, press (right softkey),... -
Page 100: Call Waiting
Call Waiting Making a 3-Way Call When you are on a call, Call Waiting alerts you to With 3-Way Calling, you can talk to two people at the incoming calls by sounding two beeps. Your phone’s same time. When using this feature, the normal airtime screen informs you that another call is coming in and rates will be charged for each of the two calls. -
Page 101: Call Forwarding
Call Forwarding Roaming Call Forwarding lets you forward all your incoming calls Roaming Icon to another phone number – even when your phone is Your phone’s display screen always lets you turned off. You can continue to make calls from your know when you’re off the Nationwide Sprint Network. -
Page 102: Setting Roam Mode
> Settings > Others > Roaming > Checking for Voicemail Messages While Press Set Mode Roaming Select an option: When you are roaming off the Nationwide Sprint to access only the Nationwide Sprint Sprint Only Network, you may not receive on-phone notification of Network and prevent roaming on other networks. -
Page 103: Data Roam Guard
Data Roam Guard Note: Call Guard is turned on by default on your phone. Depending on service availability and roaming Voice dialing and speed dialing are not available when agreements, your phone may be able to access data you are roaming with Call Guard enabled. services while roaming on certain other networks. -
Page 104: 3B. Web And Data Services
Your User Name 3B. Web and Data Services When you buy your phone and sign up for service, you’re automatically assigned a user name, which is typically based on your name and a number, followed by “@sprintpcs.com.” (For example, the third John Smith to sign up for data services Getting Started With Data Services (page 94) might have as his user name.) - Page 105 Launching a Web Connection Data Connection Status and Indicators Press > Web . (Your data connection starts and Your phone displays the current status of your data you see the SprintWeb home page.) connection through indicators at the top of the screen. The following symbols are used: Note: If Net Guard is enabled and displayed (see page 44),...
-
Page 106: Navigating The Web
Navigating the Web Scrolling As with other parts of your phone’s menu, you’ll have to Navigating through menus and websites during a data scroll up and down to see everything on some websites. session is easy once you’ve learned a few basics. Here are some tips for getting around. -
Page 107: Accessing Messages
Going Back Accessing Email To go back one page: Sprint provides you with access to popular email services, ® ® ® ® such as Yahoo! Mail, AOL Mail and AIM Mail, and MSN Press on your phone. Hotmail to keep in touch, even while you’re on the go. Note: You can also use for deleting text (like a... -
Page 108: Accessing Sprint Instant Messaging
Accessing Sprint Instant Messaging Accessing Wireless Chatrooms Sprint provides you with access to popular instant Sprint gives you the ability to join wireless chatrooms ® messaging (IM) clients, including AOL Instant from your phone. ® ® Messenger™, MSN Messenger, and Yahoo! Messenger. -
Page 109: Downloading Games, Ringers, And More
Downloading Games, Ringers, and Selecting an Item to Download More You can search for available items to download in a number of ways: Featured displays a selection of featured items. You have access to a dynamic variety of downloadable content, such as Games, Screen Savers, and other allows you to narrow your search to a Categories applications. - Page 110 To download a selected item: My Content Manager From the information page, select . (The item Whether you purchase your content from your phone will download automatically. When you see the or from your online account management page at screen, you have successfully New Download stores all of your www.sprint.com...
-
Page 111: Scanlife
To download purchased content from My Content Tip: You can also access My Content Manager through the Manager: phone’s main menu. Press > My Stuff > [Games Applications] > , or Ringers Screen Savers From the display, highlight the My Content Manager My Content Manager . -
Page 112: Browser Menu
Opening the Browser Menu Important Privacy Message – Sprint’s policies often do not apply to third-party applications. Third-party applications may You may open the browser menu anytime you have an access your personal information or require Sprint to disclose active data session, from any page you are viewing. your customer information to the third-party application provider. - Page 113 to show more detailed information about to display a prompt when Help Redirect prompt ● using the browser. your data is being redirected. Advanced Reset browser settings to reset all browser ● settings. to display the icon row, the top area Icon Row ●...
- Page 114 Creating a Favorite Deleting a Favorite Favorites (bookmarks) allow you to store the addresses Press (right softkey) to open the browser TOOLBAR of your favorite websites for easy access at a later time. menu. From the Web page you wish to add, press Select MY PAGES (right softkey) to open the browser menu.
-
Page 115: Data Services Faqs
Data Services FAQs When is my data connection active? Your connection is active when data is being transferred. Both incoming and outgoing calls are How will I know when my phone is ready for data service? allowed. When active, the is animated on the Your User ID (for example, bsmith01@sprintpcs.com... -
Page 116: 3C. Gps Navigation
Select When the Location feature is on, your phone’s standby 3C. GPS Navigation screen will display the icon. When Location is turned off, your phone will display the icon. To send the GPS log to other devices: GPS Services (page 106) >... -
Page 117: Sprint Family Locator
Sprint Family Locator Using Sprint Family Locator Press > Sprint Family Locator Sprint Family Locator uses GPS technology to locate Enter the parent phone number and password to your child’s phone and display the location on an sign in to your account. interactive map. -
Page 119: Section 4: Safety And Warranty
Section 4 Safety and Warranty Information... -
Page 120: Important Safety Information
General Precautions 4A. Important Safety There are several simple guidelines to operating your phone Information properly and maintaining safe, satisfactory service. To maximize performance, do not touch the bottom portion of your phone where the internal antenna is located while General Precautions (page 110) using the phone. -
Page 121: Phone
Using Your Phone Near Other Electronic Devices Maintaining Safe Use of and Access Most modern electronic equipment is shielded from radio to Your Phone frequency (RF) signals. However, RF signals from wireless phones may affect inadequately shielded electronic equipment. Do Not Rely on Your Phone for Emergency Calls RF signals may affect improperly installed or inadequately Mobile phones operate using radio signals, which cannot guarantee connection in all conditions. -
Page 122: Using Your Phone With A Hearing Aid Device
Phones that have been your phone or accessories. ™ rated have a label located on the box. Your Vero has an M4 and a T4 rating. Restricting Children’s Access to Your Phone These ratings are not guarantees. Results will vary depending on the Your phone is not a toy. - Page 123 Phones rated M3 or M4 meet FCC requirements for Thus, if you pair an M3 hearing aid with an M3 phone, you will M-Ratings: hearing aid compatibility and are likely to generate less have a combined rating of six for “excellent use.” This is interference to hearing devices than unrated phones.
-
Page 124: Caring For The Battery
Caring for the Battery Do not short circuit a battery or allow metallic conductive objects to contact battery terminals. Keep the metal contacts on top of the battery clean. Protecting Your Battery Battery usage by children should be supervised. The guidelines listed below help you get the most out of your Charging battery’s performance. -
Page 125: Radio Frequency (Rf) Energy
Do not handle a damaged or leaking Li-Ion battery as you In August 1996, the FCC adopted hybrid standard consisting of the can be burned. existing ANSI/IEEE standard and the guidelines published by the For safe disposal options of your Li-Ion batteries, contact National Council of Radiation Protection and Measurements your nearest Sprint authorized service center. -
Page 126: Fcc Notice
This equipment has been tested and found to comply with the limits for a Class B digital device, pursuant to Part 15 of the The highest reported SAR values of the Vero™ are: FCC Rules. Cellular CDMA mode (Part 22) :... -
Page 127: Owner's Record
Record the serial number in the space provided below. This will be helpful if you need to contact us about your phone in the future. Model: SANYO Vero™ by KYOCERA Serial No.: User Guide Proprietary Notice T9 Text Input is licensed under one or more of: U.S. Pat. Nos. -
Page 128: 4B. Manufacturer's Warranty
Manufacturer’s Warranty 4B. Manufacturer’s Warranty Manufacturer’s Warranty Kyocera Communications, Inc. (“KCI”) offers you, the original purchaser who has purchased the enclosed Manufacturer’s Warranty (page 118) subscriber unit (“Product”) only from an authorized dealer in the United States, a limited warranty that the Product, including Your phone has been designed to provide you with accessories in the Product’s package, will be free from defects reliable, worry-free service. - Page 129 (iii) the any Product in which the operating system has been unlocked battery has been used in equipment other than the SANYO (allowing installation of a third party operating system); or (xiv) brand mobile phone for which it is specified.
- Page 130 INABILITY TO USE ANY PRODUCT (FOR EXAMPLE, WASTED AIRTIME CHARGES DUE TO THE MALFUNCTION OF A PRODUCT OR LOST APPLICATIONS). THIS WARRANTY DOES NOT COVER PRODUCTS SOLD “AS IS” OR “WITH ALL FAULTS”. KCI MAKES NO OTHER EXPRESS WARRANTY WITH RESPECT TO THE PRODUCTS.
-
Page 131: End User License Agreement
TO BE BOUND BY THE TERMS OF THIS LICENSE 4C. End User License AGREEMENT. IF YOU DO NOT AGREE TO THE TERMS AND CONDITIONS OF THIS AGREEMENT, DO NOT USE, Agreement DOWNLOAD OR OTHERWISE ACCESS THE SOFTWARE OR SERVICES AND (I) PROMPTLY RETURN THE SOFTWARE OR SERVICE TO KYOCERA OR End User License Agreement (page 121) DELETE IT;... - Page 132 Limitations: PARTY SOFTWARE IS NOT A KYOCERA PRODUCT. This Software is licensed for use only on the KYOCERA IS NOT RESPONSIBLE FOR AND HAS NO single Kyocera device you originally purchased. You LIABILITY WITH REGARD TO THIRD PARTY SOFTWARE. acknowledge and agree that ownership of the Software and all other rights associated with the Software not expressly granted Open Source Software: The Software contains certain open...
- Page 133 ACCURACY, CORRESPONDENCE WITH DESCRIPTION NEVER EXCEED THE PURCHASE PRICE YOU PAID FOR AND SATISFACTORY QUALITY. TO THE MAXIMUM THE KYOCERA DEVICE. EXTENT PERMISSIBLE BY LAW, THE ENTIRE RISK No software is fault free. The Software is designed for use in ARISING OUT OF THE USE OR PERFORMANCE OF THE systems that do not require fail-safe performance.
- Page 134 Kyocera reserves the right to modify the terms of this Agreement at its sole discretion. Any such modification will be effective upon Kyocera or a Kyocera affiliate or agent sending notice to you by email, text message, other electronic communication or postal mail. Your continued use of the Software after such notice will constitute your binding acceptance of the Agreement as revised.
- Page 135 ©2010 Sprint. SPRINT and the logo are trademarks of Sprint. Other marks are the property of their respective owners. “SANYO” is a registered trademark of SANYO Electric Co., Ltd. and is used under license. KYOCERA is a registered trademark of Kyocera Corporation. Kyocera manufactures and markets the SANYO line of wireless products.
-
Page 136: Index
Index Call Guard 92 Backlight 29 Call Waiting 90 Battery Callback Number 34 Capacity 14 Caller ID 89 Numerics Charging 15 Camera 68–75 3-Way Call 90 Disposal 114 Chat 98 Installing 2 Clock Abbreviated Dialing 23 Removing 14 Display 30 Activation 3 Bluetooth 76–81 World Clock 61... - Page 137 Group Data Roam Guard 93 Email 97 Adding Members to 51 Creating 51 Data Services 94–105 Emergency Call 18 End User License Making From History 47 see also Web Removing Members Enabling/Disabling 43 Agreement 121 From 52 FAQs 105 Entering Text 23 Launching 95 Preset Messages 35...
- Page 138 My Content Manager 100 Language My Name Card 55 Resetting 43 Display 31 Ringers Preset Messages 35 Net Guard 44 Assigning 32 Location 106 Downloading 32, 99 Lock Code 40 Roaming 91 Owner’s Record 117 Locking Phone 40 Safety Information 110–117 Parental Controls 41 Saving Phone (illus.) 8...
- Page 139 Sprint Service Account Passwords 4 Warranty 118 Dialing 56 Web 94–105 Operator Services 6 see also Data Services Sprint 411 5 World Clock 61 Stopwatch 62 Zoom 70 To Do 58 TTY Use 36 Turning Your Phone On and Off 13 Unlocking Your Phone 40 User Name 94 Vibration 33...