WiseWay GW1949 Owner's Operation And Installation Manual
Hide thumbs
Also See for GW1949:
- Installation and operating manual (20 pages) ,
- Installation and operating manual (18 pages)
Table of Contents
Advertisement
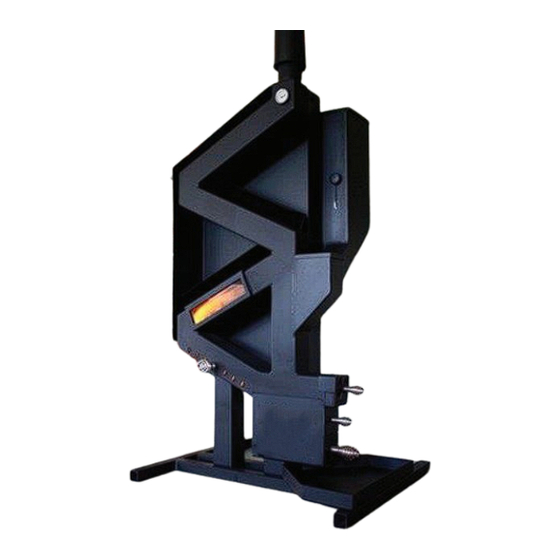
OWNER'S OPERATION AND INSTALLATION MANUAL
Your pellet stove has been approved for installation in the USA and Canada. It
may also be installed in a manufactured or mobile home (for USA only) . Your stove
conforms to UL1482, 2010, and Certifi ed to ULC S627-00, and(UM) 84-HUD
French version is available for download from the U. S. Stove website: http://www.usstove.com
La version française est disponible pour téléchargement à partir du
This unit is not intended to be used as a primary source of heat.
United States Stove Company
227 Industrial Park Rd. P.O. Box 151
South Pittsburg, TN 37380
Phone (800) 750-2723 www.usstove.com
MODEL: GW1949
SAFETY AND EPA COMPLIANCE
site U. S. Stove website: http://www.usstove.com
U.S. Environmental Protection Agency
Certified to comply with 2015 particulate emissions
standards.
Please read this entire manual before
installation and use of this pellet fuel-
burning room heater. Failure to follow
these instructions could result in property
damage, bodily injury, or even death.
Contact your local building or fire
offi cials about restrictions and installation
inspection requirements in your area.
Save these instructions.
This manual will help you to obtain
efficient, dependable service from the
heater, and enable you to order repair
parts correctly. Keep in a safe place for
future reference.
Tested &
Listed By
Report #: 504-S-01-2
Portland
Oregon USA
852489-4202E
Advertisement
Table of Contents

Related Manuals for WiseWay GW1949


Summary of Contents for WiseWay GW1949
- Page 1 OWNER’S OPERATION AND INSTALLATION MANUAL MODEL: GW1949 Please read this entire manual before installation and use of this pellet fuel- burning room heater. Failure to follow these instructions could result in property damage, bodily injury, or even death. Contact your local building or fire offi...
-
Page 2: Heating Specifications
Plant at least one tree each year. Future generations will thank you. This manual describes the installation and operation of the Brand Name, GW1949 wood heater. This heater meets the 2015 U.S. Environmental Protection Agency's crib wood emission limits for wood heaters sold after May 15, 2015. -
Page 3: Floor Protection Requirements
FLOOR PROTECTION REQUIREMENTS REQUIREMENTS OF 3/8” NON COMBUSTIBLE MATERIAL Minimum hearth requirements USA – 25”D X 44” W Minimum hearth requirements Canada – 635MM D X 1168.4mm L A NON FLAMMABLE PAD MUST BE INSTALLED THAT MEETS UL 1618 Dimension Inch A Front B Rear C Left... - Page 4 STOVE PIPE INSTALL/ HELPFUL HINTS This stove has no need for electricity, it operates with a natural draft, the strength of the draft is determined by the height of its chimney, and that’s why the chimney installation is the determining factor on how well this stove will perform.
- Page 5 STOVE PIPE INSTALL/ HELPFUL HINTS Clearance to Combustibles Dimension Inch Left Sidewall to Stove Backwall to Stove Backwall to Flue* 13.5 Sidewall to Flue* 14.6 Ceiling Height Right Sidewall to Stove Front Front Back wall / Arrière Mur Front Front M o b i l e h o m e s r e q u i r e R e s i d e n t i a l s t a n d a r d outside air, use a vent with a...
-
Page 6: Combustible Wall Chimney Connector Pass-Throughs
COMBUSTIBLE WALL CHIMNEY CONNECTOR PASS-THROUGHS Method A. 12” (304.8 mm) Clearance to Combustible 6” (152.4) mm separation area containing fi berglass Wall Member: Using a minimum thickness 3.5” (89 mm) insulation, from the outer surface of the wall thimble brick and a 5/8” (15.9 mm) minimum wall thickness to wall combustibles. - Page 7 STOVE PIPE INSTALL/ HELPFUL HINTS • Have your stove and chimney system installed by a certifi ed stove installer or licensed contractor. • All installations must meet local codes. • Use 4, 5 or 6 inch standard class A 103 HT exhaust chimney system. •...
-
Page 8: Main Body Assembly
MAIN BODY ASSEMBLY Caution! The appliance is very heavy. The assistance from a second person is strongly suggested. Please use proper lifting technique when positioning the appliance for assembly and installation. ITEMS NEEDED 1. One 1/2” opened ended wrench 4. Screw gun (cordless is recommended) 2. - Page 9 ASSEMBLY Use a pair of needle nose pliers to install the Insert the damper slide into place; it will only temperature gauge. fi t one way. Damper Slide Screw on damper slide handle by turning Install primary burn tube, secondary burn plate, and ash tray. clockwise.
- Page 10 SEAL INSTRUCTIONS HOPPER OPENING Apply adhesive side of insulation rope to the top edge of the hopper opening, and then fold the rope over the hopper opening edges. FEED TUBE AND TUBE LID Apply adhesive side of insulation rope to the top edge of the feed tube opening, and then fold the rope over the feed tube opening edges.
-
Page 11: Using The Correct Fuel
USING THE CORRECT FUEL ALL PELLET FUELS ARE NOT CREATED EQUAL! It is recommend to not buy pellet fuel in bulk until experience has revealed the best pellet fuel available in your area. • The stove was developed to burn pelletized wood fuel only! Pellets ¼”... -
Page 12: Helpful Hints
HELPFUL HINTS INSTALLATION • Have your stove installed by a certifi ed chimney installer or licensed contractor (see page 10 of the Installation and Operating Manual). Do not make changes to the draft recommendations during the installation of the chimney or stove. This is a stove that burns pellet fuel, if adequate draft is not accomplished this stove will not operate properly and can potentially cause smoke to come from the stove. - Page 13 LIGHTING WITH A HANDHELD PROPANE TORCH You will need a handheld propane torch to ignite your stove. We recommend a high quality torch with a squeeze trigger ignition system. DO NOT USE CHEMICALS OR FLUIDS TO START THE FIRE. 1. Make sure the pellet feed door is in the closed position, this is the external knob located on the front of the hopper.
-
Page 14: Controlling The Temperature
LIGHTING WITH A HEAT GUN You will need a 120 volt industrial heat gun available at most hardware stores. DO NOT USE CHEMICALS OR FLUIDS TO START THE FIRE. 1. Follow steps 1-6 of the lighting with a handheld propane torch instruction. 2. -
Page 15: Tuning Your Stove
TUNING YOUR STOVE After your stove is installed and ready for use there will be a period of time where some adjustments may be necessary to fi t your specifi c needs from the stove. We like to refer to this as “getting to know your stove”. Each stove demonstrates its own unique personality based upon;... -
Page 16: Cleaning And Maintenance
CLEANING AND MAINTENANCE WARNING: DO NOT ATTEMPT TO CLEAN THE STOVE WHILE RUNNING OR HOT! Establish a routine for the fuel, burner and fi ring technique. Check daily for creosote build-up until experience shows how often you need to clean to be safe. Be aware that the hotter the fi re the less creosote is deposited, and weekly cleaning may be necessary in mild weather even though monthly cleaning may be enough in the coldest months. - Page 17 CLEANING AND MAINTENANCE SMOKE AND CO MONITORS Burning wood naturally produces smoke and carbon monoxide(CO) emissions. CO is a poisonous gas when exposed to elevated concentrations for extended periods of time. While the modern combustion systems in heaters drastically reduce the amount of CO emitted out the chimney, exposure to the gases in closed or confi...
- Page 18 HELPFUL HINTS FOR RUNNING YOUR STOVE • When the stove is not in use take the opportunity to inspect and perform any cleaning or maintenance of the primary burn tube, secondary burn plate and ashtray. • Keep foreign debris out of the hopper. •...
- Page 19 NOTES...
-
Page 20: Repair Parts
REPAIR PARTS... -
Page 21: Parts List
27452 ASH RETAINER 83935 TUBE PLUG, SQUARE 610206 BASE STAND WELDMENT 610204 DRAFT SLIDE 892553 GW1949 GLASS 88087 GASKET, WINDOW .125 x 1” w/PSA 610205 WINDOW FRAME 80653 THERMOMETER, 100-900° STOVE IN ORDER TO MAINTAIN WARRANTY, COMPONENTS MUST BE REPLACED USING ORIGINAL MANUFACTURERS PARTS PURCHASED THROUGH YOUR DEALER OR DIRECTLY FROM THE APPLIANCE MANUFACTURER. -
Page 22: How To Order Repair Parts
HOW TO ORDER REPAIR PARTS This manual will help you obtain efficient, dependable service from your PELLET STOVE, and enable you to order repair parts correctly. Keep this manual in a safe place for future reference. When writing, always give the full model number which is on the nameplate attached to the heater. - Page 23 WARRANTY INFORMATION CARD Name__________________________________________ Telephone #: (_____)_____________ City____________________________________________ State_______ Zip_________________ Email Address __________________________________________________________________ Model # of Unit________________________________ Serial #___________________________ Fuel Type: □ Wood □Coal □Pellet □Gas □Other _________________________ Place of Purchase (Retailer)______________________________________________________ City____________________________________________ State_______ Zip_________________ If internet purchase, please list website address___________________________________ Date of Purchase _______________________________________________________________ Reason for Purchase: □Alternative Heat...
- Page 24 Fold Here Fold Here Fold Here PLACE STAMP HERE United States Stove Company 227 Industrial Park Rd. South Pittsburg, TN 37380...
Need help?
Do you have a question about the GW1949 and is the answer not in the manual?
Questions and answers