
Related Manuals for Ninebot PTR E


Summary of Contents for Ninebot PTR E
-
Page 1: User Manual
User Manual Personal Transportation Robot (PTR) Model E Ninebot Website: www.ninebotamericas.com E-mail: customeroperations@segway.com technicalsupport@segway.com Telephone: 1-603-222-6000... - Page 2 PTR and result in serious injury from loss of control, collisions, and falls. Use only Ninebot approved parts and accessories. Do not modify the PTR. Modifications to the PTR could interfere with the operation of...
- Page 3 Ninebot User Manual 24859-00001 ac...
-
Page 4: Trademark And Legal Statement
Ninebot holds various patents relating to Ninebot personal transportation robots, with other patents pending. This manual is prepared by Ninebot, who reserves all its copyrights. No institute or individual shall copy or disseminate this manual in whole or in part, or make use of the aforesaid patents without the prior written consent of Ninebot. -
Page 5: About This Manual
PTR safely. It is impossible to predict and warn against every possible harm or hazard that exists. Thus, users must also use their own intuition and commen sense to help avoid phyisical injury or damage to their Ninebot. To reduce risk of injury, users must also watch and follow all instructions and warnings in the Safety Instruction Video before they ride. -
Page 6: Table Of Contents
Safety Messaging The Risk of Injury Obey all Laws and Regulations California Warning Regulatory Statements Introduction What is a Ninebot PTR? Ninebot PTR E Features Ninebot PTR E Diagram Ninebot Assembly Unpacking Ninebot Serial Number/Limited Warranty Sheet Assembling a New Ninebot... - Page 7 Other Functions Your Car Companion Parking Stand Remote Control (R/C) Mode USB Charge Port Changing the Operation Bar Changing the Tire/Wheel Sensor Calibration Daily Maintenance Cleaning and Storage Ninebot PTR Battery Pack Battery Transportation, Shipping, and Disposal Fasteners Lifting Ninebot PTR...
- Page 8 Table of Contents Tire Pressure Regular Maintenance Ninedroid App Appendix — Specifications Contact Us...
-
Page 9: Obey All Laws And Regulations
In addition to other requirements, these laws and regulations may prescribe minimum ages for Ninebot PTR users and may set speed limits and mandate protective gear for riders. Some governmental authorities prohibit use of Ninebot PTRs on public roads and sidewalks. You should consult local authorities to become familiar with applicable laws and regulations. -
Page 10: Introduction
However, in terms of riding method and the places Ninebot can go, riding Ninebot is more like walking than driving a vehicle. Ninebot is a great choice for you to go somewhere that is either too far for walking... -
Page 11: Ninebot Ptr E Features
Ninebot PTR E Features Table 1: Ninebot PTR E Features Model Features Notes PTR E High cost/performance ratio Balanced performance, affordable • Powerful motor, maximum speed 20km/h (12.4 mph) price, and practical configuration. Range ≥ 20km (12.4 mi) • •... -
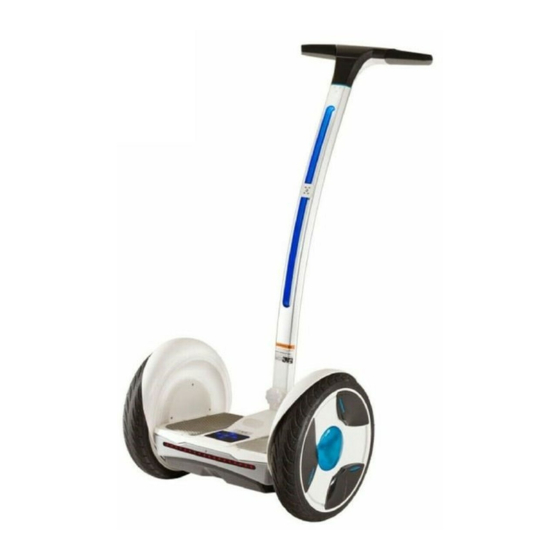
Page 12: Ninebot Ptr E Diagram
Bumper and Atmosphere Lights Operation Bar USB Power Port Handlebar Fasteners Atmosphere Lights and Accessory Mount Fender/Atmosphere Lights Gearbox Warning Label Tire/Wheel Foot mat LED Indicator Lights Battery Pack Slow/Stop Lights Mainframe Charging Port Figure 2: Ninebot PTR E Diagram... -
Page 13: Ninebot Assembly
Ninebot Assembly Unpacking Ninebot Fasteners Handlebar Remote keyfob While unpacking, take out the Parking stand handlebar assembly, the pack- User Materials ing materials for the handle bar, and the mainframe in that Battery charger order. Not shown is the sepa- rate operation bar box. - Page 14 Please check whether the following parts are included in the package. Contact your reseller immediately if any parts are missing. Table 2: Parts List PTR E Mainframe (including tires, bolts for rapid disassembly of operation bar) Battery pack 1x 620 Wh...
-
Page 15: Serial Number/Limited Warranty Sheet
Figure 5: Serial number label and code explanation NOTICE The serial number—which is unique to every Ninebot—and the limited warranty sheet are required for obtaining warranty service. Please verify the serial numbers at the above-mentioned places are identical. If there is any absence or inconsistency, please contact your reseller immediately. -
Page 16: Assembling A New Ninebot
Preparation Before assembling a new Ninebot, you should first find the hex driver set supplied with the product. Keep these tools handy for any future maintenance needs or disassembly. This hex driver set features standard metric sizes, so you may use any standard metric hand tools. - Page 17 Figure 6: Attach the handlebar. 1. Mount the handlebar/to the operation bar by fastening the six M4 x 8 hexagon flat cap head screws using the appropriate hex wrench included with the Ninebot. 2. Insert the operation bar, with handlebar attached, into the mainframe.
- Page 18 NOTICE When you install the operation bar, remove the quick release knob first so you can ensure correct alignment of the operation bar and mainframe mount. See illustration below for proper operation bar alignment. The holes in the mounting base and operation bar both should be concentric so the mounting bolt can be inserted correctly.
- Page 19 AC Power outlet is wet. 1. Put your PTR in a clean, dry place, within the recommended charging temperature range (see Ninebot PTR Battery Pack), then pull back the Charging Port silicone gasket. Figure 10: Installing the Battery 2.
-
Page 20: Guide For Safe Riding
WARNING Whenever you ride the Ninebot PTR, you risk death or serious injury from loss of control, collisions, and falls. To reduce risk of injury, you must read and follow all instructions and warnings in the user materials. To reduce risk of injury, users must also watch and follow all instructions and warnings in the Safety Instruction Video before they ride. -
Page 21: While Riding
While Riding WARNING NEVER lean your body against the Operation Bar. Doing so may result in a crash and/or injury to yourself or the PTR. Always keep your body at least 5 cm (2 in) from the Operation Bar. • Do not add more than 5 kg (11 lb) in weight to the Operation Bar. - Page 22 while riding. Expectant mothers should not ride the PTR. • Do not take both of your hands off the operation bar. • Do not let the young (under the age of 14) or the aged (above the age of 65) ride a PTR alone; they must be accompanied during riding and have met all the riding requirements outlined herein.
-
Page 23: Intelligent Safety Warning System
PTR surpass specified safety limits. If this happens, the rider must immediately dismount and push Ninebot ahead using power assistant mode. If the rider does not dismount, and the overload conditions remain, the PTR will enter stand-by mode (non-balancing) after 5 seconds. - Page 24 If the Ninedroid App is installed on your smart device, you can Figure 18: Do not let go of the Ninebot. use the “Intelligent Diagnostics” function to determine what the problem is and how to solve it. A specific fault code is shown on the PTR dashboard and displayed along with the wrench icon.
-
Page 25: Your First Ride
Your First Ride Preparation • You should be proficient in using all the functions of the remote keyfob before attempting to ride the PTR. • Wear an approved helmet and other protective gear to minimize any possible injury. • Be sure your PTR's battery is fully charged. •... -
Page 26: Power-On The Ptr
Power-On the PTR Using the remote key, press the “Power ON/OFF” button to power-on the PTR (see Remote Keyfob and Dashboard). When you hear the starting tone, the dashboard icons light up and fade out in sequence, then the battery charge level and speed indicator are shown. This indicates a normal start up. -
Page 27: Before Stepping On
Before Stepping On 1. Stand behind the PTR and hold onto the Operation Bar. Center the Operation Bar, and level the foot mats. When level, there will be 5 LED lights on the steering base, indicating the PTR is now level and in stand-by mode. If the operation bar leans in one direction or the foot mats are not level, the LED lights on the steering base will go out, which means the PTR is not level. -
Page 28: Stepping On And Maintaining Balance
Stepping On and Maintaining Balance Your instructor should stand in front of the PTR and hold the Operation Bar securely with both hands. 1. Hold onto the operation bar with both hands, and look straight ahead. 2. Place one of your feet on the foot mat. 3. -
Page 29: Riding Forward/Backward
Riding Forward/Backward 1. With your instructor available to assist you, slowly lean forward and feel the PTR move forward. Then stop leaning forward and feel it slow down and stop. Do this a few times. WARNING Your first movements should be slow and gentle, and your body should be relaxed. Rocking back and forth may cause a loss of traction and could result in a fall. -
Page 30: Stopping The Ptr
Stopping the PTR The PTR can be stopped by leaning backward, away from the direction of travel: 1. While you are riding forward, gently shift your hips back and down (as if you are preparing to sit down) to stop the PTR. 2. -
Page 31: Turning The Ptr
Turning the PTR You turn the PTR by leaning the Operation Bar left or right in the direction you want to travel. 1. Practice turning in place. Slowly lean the Operation Bar in the direction you wish to turn. The PTR will rotate in that direction, while remaining in place. -
Page 32: Stepping Off The Ptr
Stepping Off the PTR When you are ready to step off the PTR for the first time, ask your instructor to hold the Operation Bar. 1. While holding the Operation Bar with both hands, step backward off the foot mats, one foot at a time. Keep your body centered and upright, and do not move the Operation Bar left or right while stepping off. -
Page 33: Power Assistant Mode
Power Assistant Mode When you step off the PTR, it enters power assistant mode. You can also enter power assistant mode by tapping on a foot mat while in the stand- by mode—you will hear a “beep”. In power assistant mode, the PTR's movement rates are damped, meaning it responds slower than while in balance mode. -
Page 34: Locking The Ptr
Locking the PTR The PTR includes a temporary lock mode designed to discourage people from disturbing the PTR when the rider must leave it for a short time, such as when entering a store. The lock mode features an audible and tactile alarm, and uses the motors to make it difficult to move the PTR. To enter lock mode, press the “lock mode button”... -
Page 35: Ptr Modes
PTR Modes The PTR features the following "status" modes: Power OFF: In power off mode, all the electronic control • systems are dormant, with the remote module alone standing by for start-up operation. • Stand-by Mode: In stand-by mode, the PTR is powered on, but not balancing. -
Page 36: Remote Keyfob And Dashboard
Remote Keyfob and Dashboard Power ON/OFF button Figure 38 shows the remote keyfob and the basic function of each button. Use the included keychain to keep your remote keyfob safe. Each of the four buttons can be operated in two ways: •... -
Page 37: Basic Functions
Basic Functions Table 3: Remote Keyfob Basic Functions Function Button Input Dashboard Display Remarks All the dashboard lights turn ON in sequence. Power On Short press Then most of the lights turn OFF, leaving the — Power Button battery status and current speed illuminated. First all the dashboard lights turn ON, and then The PTR will not power off if Power Off... - Page 38 Function Button Input Dashboard Display Remarks The Speed Limit icon appears on the display. The current speed limit appears for 3 seconds. Limit Max Speed Limit cannot be set Short press Speed if the PTR is locked Speed Limit Button The Speed Limit icon disappears from the display.
- Page 39 Function Button Input Dashboard Display Remarks Scroll through the available information. Kph — the real-time speed kmS — the mileage for the current ride kmT — the total mileage Information Short press Tim — the elapsed time Display Info Button (hours-minutes) since the PTR was powered ON °C —...
-
Page 40: Extended Functions
Extended Functions Table 4: Remote Keyfob Extended Functions Function Button Operation Method Display Remarks Enter Only available when operation bar Remote None: the operation bar Long press is removed or knee control bar is Control (R/C) must be removed. Info Button installed. - Page 41 Function Button Operation Method Display Remarks With the speed limit Increase speed limit value. icon ON, press the Lock screen displays the Speed Limit Max 10km/h (6.2 mph) Adjust the lock button. Then use current set value. Button lower speed the speed limit button Lock limit...
-
Page 42: Dashboard Icons
Dashboard Icons Table 5: Dashboard Icons Name Description Display Remarks The only info shown is the battery Default display charge level and the current speed. Low power When the battery is empty, the battery alarm icon and the warning triangle blink. When the internal temperature gets High temp too high, the “temperature alarm icon”... -
Page 43: Charge Level Lights
Charge Level Lights Table 6: Charge Level Lights While charging, the three center LEDs on the Ninebot base show the Power LEDs battery state of charge. ∫ Table 6 describes the LED status: 90% – 100% ∫ ∫ = LED is ON ∫... -
Page 44: Other Functions
Your Car Companion Use Ninebot PTR for short commutes: with a range of 20–40 km (12–25 miles)—depending on battery type, riding style, and payload— the PTR is ideal for commutes up to 10 km (6 miles) each way. You can ride smoothly past traffic jams, secure in the knowledge that your zero-emission vehicle is not contributing to air pollution. -
Page 45: Parking Stand
Parking Stand Some Ninebot PTR models come equipped with a parking stand. On other models it is an optional accessory. Use the parking stand to prop the PTR upright without leaning it against a wall. WARNING Only use the parking stand when the PTR is powered OFF, in lock mode, or in standby mode. -
Page 46: Remote Control (R/C) Mode
• Android device (Android 4.3 or newer) with Bluetooth 4.0 To connect to your Ninebot PTR: 1. Install the Ninedroid App and turn on Bluetooth. 2. Use the remote keyfob to turn ON your PTR, then press and hold the Speed Limit button to enable Bluetooth. The Bluetooth icon will appear and start blinking. -
Page 47: Usb Charge Port
USB Charge Port There is a USB charge port near the top of the operation bar (Figure 40). This port provides 5V / 1A current for charging small devices that charge via a USB cable. NOTICE This USB port only supplies power when the PTR is powered ON. It cannot transmit data. -
Page 48: Changing The Operation Bar
Instructions for changing the operation bar are included with your new Small 790 mm (31 in) 1.3–1.7 m (4'3"–5'7") operation bar. If you do not feel comfortable changing the operation bar yourself, your Ninebot dealer can do it for you. -
Page 49: Changing The Tire/Wheel
Performing this repair without the proper tools could result in damaging the wheel. If you cannot bring your PTR to a Ninebot authorized service center, we suggest you replace the whole tire/wheel assembly. Follow the steps below to remove the tire/wheel assembly. -
Page 50: Sensor Calibration
Sensor Calibration The internal attitude sensor and steering shaft sensor of every Ninebot PTR have been accurately calibrated during manufacture. Under normal operation these sensors will never need to be recalibrated. However, in some situations (extreme temperature fluctuations or strong magnetic fields) the sensors may experience "drift." In such cases, the internal sensors should be recalibrated. -
Page 51: Daily Maintenance
Daily Maintenance Cleaning and Storage For best performance, clean your PTR after each use. 1. Make sure the PTR is unplugged, powered off, and the rubber cap on the charge port is tightly sealed. 2. Gently clean your PTR with soap and water and a soft cloth. 3. -
Page 52: Ninebot Ptr Battery Pack
Ninebot PTR Battery Pack It is important to take good care of the battery pack on your Ninebot PTR. A well-maintained battery pack can continue to operate at peak performance even after many miles of riding, whereas a poorly-maintained battery pack may no longer be able to hold a full charge after only a few months. - Page 53 6. The wireless receiver on the PTR always consumes a small amount of battery power, even when the PTR is powered OFF. This is to allow the remote keyfob to power ON the PTR. Therefore: Fully charge the battery pack before storage. If storing for more than 30 days, remove the battery pack after charging and store it in a cool, dry place.
-
Page 54: Battery Transportation, Shipping, And Disposal
Battery Transportation, Shipping, and Disposal If you are transporting your Ninebot PTR, protect the battery packs to avoid damage. Do not expose the battery packs to direct heat or moisture, and avoid heavy vibration during transportation. WARNING Do not use or transport a battery pack if the casing breaks open, leaks any substance, becomes excessively hot, or if you detect an unusual odor. -
Page 55: Fasteners
Fasteners The Ninebot PTR features fasteners with threadlock applied so they will not loosen over time. However, you must still take care to avoid damaging fasteners during removal and installation. 1. Make sure the hex wrench slides all the way to the bottom of the hex socket (see Figure 43). -
Page 56: Lifting Ninebot Ptr
Lifting Ninebot PTR Use proper lifting techniques to safely lift the PTR for loading into a car trunk or for other purposes: 1. Make sure the PTR is OFF. 2. Remove the operation bar if you intend to place the PTR in the car trunk. -
Page 57: Tire Pressure
WARNING Do not disassemble the PTR. Doing so will void your warranty and may result in electric shock. Only Ninebot authorized personnel may disassemble Ninebot products. Ninebot shall bear no responsibility for any damage, fault, property loss, or personal injury caused by unauthorized persons disassembling it. - Page 58 Table 9: Maintenance Schedule Every 3 months or 1 year or 2 years or 3 years or Item 6 months or Comments 2,000 km 5,000 km 10,000 km 15,000 km 3,000 km Surface cleaning • • • • • Damaged foot mat •...
- Page 59 15,000 km 3,000 km 2 years/10,000 km Inspect motor • • (6,200 mi) 3 years/10,000 km Inspect seals • • • (12,400 mi) Change gearbox and 3 years/10,000 km • coupler (12,400 mi) As suggested by Other Ninebot service center technicians...
-
Page 60: Ninedroid App
“Support & Service” channel to download the installer package. • Ninebot periodically releases SDK and Communication API materials, as well as third party demos. If you are a maker or developer, these materials can help you transform your Ninebot PTR into a personalized or intelligent robot. -
Page 61: Appendix - Specifications
Appendix — Specifications Table 10: Specifications Parameter PTR E Comments Appearance Anodized silver + porcelain white + lime green Color kit optional Main materials Magnesium alloy + aluminum alloy + LEXAN resin — Gross weight 23.5 kg (51.8 lbs) —... - Page 62 Parameter PTR E Comments This value may be influenced by terrain, Max. payload on flat ground 100 kg (220 lbs) riding habits, and battery level. Maximum power is Max. power 2.7 kW generated for no more than 10s. Maximum speed 20 km/h Max.
- Page 63 Parameter PTR E Comments The effective distance is Remote key 5–10 m (16-32 ft), line of sight. 1x charger, 120 W Battery charge time 110 V / 220 V ~4 hours to full charge Stand-by mode, power assistant mode, limit speed mode, Working modes —...
-
Page 64: Contact Us
Email Service: technicalsupport@segway.com Website: www.ninebotamericas.com Ninebot Worldwide: Ninebot 1F, A1 Bldg. Zhongguancun Dongsheng Technology Park (Northern Territory), 66 Xixiaokou Rd., Haidian Dist., Beijing, China Tel: +86-010-84828002 Fax: +86-010-84828002-800 Email (inquiry): sales@ninebot.com Email (Global service): service@ninebot.com Skype (Global service): service@ninebot.com Website: www.ninebot.com...
Need help?
Do you have a question about the PTR E and is the answer not in the manual?
Questions and answers
Achat d'un Chargeur pour la Batteris ..??
** Aurais-je une réponse ..???
Hi, I have acquired a ninebot elite ptr e it had dead batteries do I built new batteries for it and nothing happens, no power even to the charging port. Does the remote have to turn everything on or can it be turned on with just the unit like a power button? I hope someone can help me get this thing running. I have put a lot of work into it and hate to see it just sit I have already contacted a business to unbind it if it was, Serial number is N1UEA1532A3182 Any help would be great Russell Nixon 775-843-7554
The Ninebot Elite PTR E requires a remote to power on. You need to use the remote key and press the “Power on/off” button to start the device.
This answer is automatically generated