Table of Contents
Advertisement
Advertisement
Table of Contents

Related Manuals for Minolta DIMAGE SCAN DUAL II AF-2820U


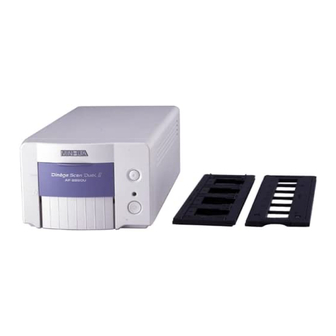
Summary of Contents for Minolta DIMAGE SCAN DUAL II AF-2820U
- Page 1 9224-2886-11 H-A006 Dimâge Scan Dual II...
- Page 2 Thank you for purchasing the Minolta Dimâge Scan Dual2. The Dimâge Scan Dual2 AF-2820U is a dual format film scanner capable of scanning 35mm and, with the optional AD-10 APS Adapter, Advanced Photo System film. This manual has been designed to help you understand the operation of your scanner. Please read this manual thoroughly to realize all the benefits of your scanner.
-
Page 3: For Proper And Safe Use
Minolta Service Facility. Do not attempt to disassemble this product. It contains high-voltage circuits. Take the product to a Minolta Service facility for repairs. Unexpected damage may occur if this unit is left unattended near young children. -
Page 4: Package Contents
Warranty. No postage is necessary. • The information you provide is confidential and will only be used by Minolta Customer Service and Product Research & Development. The display indications may differ depnding on your PC’s preferences and a using version of the scanner driver. -
Page 5: Index Scan
This section describes how to set up of the scanner. This section describes how to load the film holder and perform the Minolta Easy Scan Utility. This section describes how to perform the index scan. This section describes how to perform the preview scan. -
Page 6: Table Of Contents
SCANNER – NAMES OF PARTS ........ - Page 7 PREVIEW SCANNING FLOW ..........49 SCAN PRESCAN .
- Page 8 CONTACTING MINOLTA ........
-
Page 9: Scanner - Names Of Parts
SCANNER – NAMES OF PARTS 1. Eject button 2. Front door 3. Mark of 35 mm Film 4. Mark of APS cassette 5. Indicator lamp 6. Power switch 7. USB port 8. DC power input plug Dimâge Scan Dual II... -
Page 10: System Requirements - Pc/At
SYSTEM REQUIREMENTS – PC/AT CPU: IBM PC/AT compatible with an Intel Pentium or later processor or better. An Intel Pentium or later when Windows 98 or Windows 2000 is installed. Operating System: Windows 98, or Windows 2000 Professional. Memory: A minimum of 32 MB RAM. Hard Disk Space: 90 MB of available hard disk space. -
Page 11: System Requirements - Macintosh
SYSTEM REQUIREMENTS – MACINTOSH CPU: Power PC Operating System: Mac OS 8.5 – 9 A minimum of 16 MB application RAM in addition to the requirements Memory: for the Mac OS and Adobe Photoshop™ Hard Disk Space: 90 MB of available hard disk space. Monitor: 19 inch (1024 x 768) monitor or better. -
Page 13: Scanner Setup Flow
SCANNER SETUP SCANNER SETUP FLOW INSTALLING THE PHOTOSHOP LE CONNECTING THE HARDWARE INSTALLING THE SOFTWARE GETTING STARTED Dimâge Scan Dual II... -
Page 14: Installing The Photshop Le - Windows
INSTALLING THE PHOTSHOP LE – WINDOWS CAUTION – Before installing • Please remove or disable any antivirus system extensions before launching this installer. These extensions may conflict with the operation of the installer. Replace or re-enable them when the installation is complete. This manual describes how to install Adobe Photoshop LE as the image editing application. -
Page 15: Installing The Photoshop Le - Macintosh
INSTALLING THE PHOTOSHOP LE – MACINTOSH Installing Photoshop LE –- Macintosh 1. Insert the Photoshop LE CD-ROM into the CD-ROM drive. 2. Double-click on the installer icon. • The install program will start. 3. Click on “English” and read “Install” and confirm the content. -
Page 16: Installing The Software - Windows
Windows running on your machine. • These installation instructions assume drive D is the CD-ROM drive. 1. Turn on the scanner, then turn on the PC. 2. Start the Windows operating system. This step varies with your specific operating software…... - Page 17 4. Select Run from the Start menu. 5. Select D:\Driver\English\Setup.exe from the Open drop-down list, then click on OK. • If your CD-ROM drive is not the D drive, replace the D with the appropriate designation for your CD-ROM drive. 6.
- Page 18 INSTALLING THE SOFTWARE – WINDOWS 9. Choose either Typical or TWAIN Files install, then click on Next. 10. Click on Next. • Setup will begin. 11. Click on Close. 12. Click on Finish. The Setup Type dialog box will appear. The Select Program Folder dialog box will appear.
-
Page 19: Installing The Software - Macintosh
INSTALLING THE SOFTWARE – MACINTOSH Please remove or disable any antivirus system extensions before launching this installer. These extensions may conflict with the operation of this installer. Replace or re-enable them when installation is complete. Hold the shift key down during startup to disable the extensions. - Page 20 INSTALLING THE SOFTWARE – MACINTOSH Install type pulldown menu Install location pulldown menu Name and icon of the selected install drive or folder. 9. Select the install drive (or folder) and type from the pulldown menus. • You can also click on drive.
-
Page 21: Connecting The Hardware
CONNECTING THE HARDWARE Connecting the AC power adapter and the USB Cable. This scanner has been packaged with the USB cable and AC power adapter. 1. Plug the AC power adapter cord into the scanner’s AC socket, then plug it into a grounded outlet. - Page 22 CONNECTING THE HARDWARE 3. Connect the other end of the USB cable ( ) to the USB port on the computer or the USB Hub terminal. Example: Connect the USB Hub terminal...
-
Page 23: Easy Scan Utility Flow
EASY SCAN UTILITY EASY SCAN UTILITY FLOW Launch the Software Set the Preferences Load the Film Holder Insert the Film Holder Specify the Film Type Sample Index Scan Specify the Job Type Saving Easy Scan Utility Dimâge Scan Dual II... -
Page 24: Launching Easy Scan Utility
LAUNCHING EASY SCAN UTILITY WINDOWS 98/WINDOWS 2000 Starting up the utility software The Minolta Easy Scan Utility can be performed by using the utility software. 1. After performing steps 1 and 2 on page 36, select Start > Program (P) > Minolta Dimâge Scan Dual2 ver.1.0 >... -
Page 25: Easy Scan Utility Window
Easy Scan Utility Window While the Minolta Easy Scan Utility software is functioning, the following window is displayed. The Easy Scan Utility Window – Name of parts LAUNCHING EASY SCAN UTILITY Operation Step display Film Type list box Film Format list box... -
Page 26: Loading The Film Holder
LOADING THE FILM HOLDER Using the included 35mm negative and slide holders, the Minolta Dimâge Scan Dual2 can scan mounted or unmounted… • 35mm color negatives • 35mm black & white negatives • 35mm black & white positives APS (Advanced Photo System) negatives and slides can also be scanned using the optional AD-10 APS Adapter. -
Page 27: Loading The Slide Mount Holder - Sh-U1
Loading the Slide Mount Holder – SH-U1 1. Insert slides into the slide mount holder emulsion side up. • Brush dust off the the slide before placing it into the film holder. • Slide mounts must be thicker than 1 mm and thinner than 2 mm to fit into the slide mount holder. -
Page 28: Aps Adapter (Optional)
Advanced Photo System film (IX-240 type) without the AD-10 APS Adapter. Names of Parts Film-chamber door Film-chamber release Scanner contacts* * Do not touch Loading the APS Adapter 1. Slide the film-chamber release as shown. • The film-chamber door will open. -
Page 29: Inserting The Film Holder Into The Scanner
Scanning with the FH-U1 35 mm film or SH-U1 slide film holder 1. Open the scanner lid by pushing it down to the 35 mm mark 2. Be sure that the white arrow mark on... -
Page 30: Inserting The Aps Adapter
INSERTING THE APS ADAPTER 1. Open the scanner lid by pushing it down to the APS mark 2. Be sure that the arrow mark on the APS adapter is facing up and then insert the APS holder into the scanner until the holder stops. -
Page 31: Specify The Film Type
SPECIFY THE FILM TYPE Selecting the film type 1 Select the film format to be scanned in the Main window. 2 Select the film type. • The index tab is selected and the index window will appear. Dimâge Scan Dual II... -
Page 32: Easy Index Scan
EASY INDEX SCAN 1. Select whether the index scan should be perform or not. • When Perform the index scan' is selected, the index scan starts. When 'Not Perform the index scan' is selected, the window changes to the scan window. -
Page 33: Specify The Job Type/Saving
SPECIFTY THE JOB TYPE/SAVING 1. Click on the Scan button to scan. • When the 'file saving dialog box' appears, select the file format and save the scan. File format: BMP JPEG, TIFF (Windows) PICT, JPEG, TIFF (Macintosh) Dimâge Scan Dual II... -
Page 35: Index Scan
INDEX SCAN SCANNING FLOW Launch the Software Set the Preferences Load the Film Holder Index Scan Changing the window size Insert the Film Holder Selecting frames Specify the Film Rotating the Type index frames Reversing frame order Saving the index scan image Saving the index image... -
Page 36: Launching The Software
LAUNCHING THE SOFTWARE The TWAIN driver allows you to control the software through another application, such as your image editing software. Launching the TWAIN Driver – Windows This manual uses Adobe Photoshop LE as the host application. Commands may vary among applications. 1. -
Page 37: Launching The Plug-In - Macintosh
Launching the Utility Software Windows Select Start > Programs > Minolta Dimâge Scan Dual2 ver.1.0 > DS Dual II Utility Macintosh Double click on The software is ready for use when the Main window appears (page 38). -
Page 38: Main Window - Name Of Parts
MAIN WINDOW – NAME OF PARTS MAIN window The Command window part – Name of parts Film Type list box Film format list box Index Scan button Prescan button Scan button Navigation button Command Window part (see below) Scan Setting part (see page 84) Close button Status bar Help button (... -
Page 39: Setting The Preferences
Select this checkbox to use the auto focus function when performing the index scan, preview scan and AF scan. Close Driver After Scanning checkbox Closes the scanner's driver software after the scan is complete. Color depth setting box The pixel depth of each color channel used to scan your image (RGB or CMY). - Page 40 SETTING THE PREFERENCES Index Scan priority Speed – Creates a thumbnail representation of each frame on the roll. Quality – Thumbnail and Prescan images are created for each frame on the roll. • Double-clicking on the index image opens the ready-made prescan image. 3.
-
Page 41: Setting The Film Type
SETTING THE FILM TYPE 1. Insert the holder into the scanner. 2. Select 35mm or APS Cassette from the film format drop-down list in the Command window. 3. Select the film type from the film type drop-down list. Select APS Cassette... -
Page 42: Index Scan - Name Of Parts
INDEX SCAN – NAME OF PARTS Index scan displays a scan of each image on the film holder in the Index tab. The time required for an index scan depends on the performance of your computer. If you don’t want to index scan the entire roll, select the frame number of the image you want to scan from the index print provided by your photofinisher. -
Page 43: Index Scan
INDEX SCAN Index scan 1. Click on in the Command window. • All frames on the film folder will be scanned and appear in the Index tab. Changing the Window Size Change the size of the Index tab window as desired. The position of the frames will change accordingly. -
Page 44: Scanning The Image
Max # of Frames set in the Preferences dialog box. See page 39. • The image will be opened in your photo application software when the scanner’s driver software is closed. • Some photo applications can only acquire one image at a time. -
Page 45: Rotating The Index Frames
Rotating the Index Frames Rotate index frames so they appear in the Index scan tab window with the proper orientation. 1. Select the desired frames, then click on • The selected frames will rotate in 90° increments either clockwise or counter-clockwise or flip vertically or horizontally. -
Page 46: Saving Index Scan Image
SAVING INDEX SCAN IMAGE When performing the index scan, all the thumbnail images displayed in the index window can be saved as an image file. 1. Click on the 'Save Index Image' button in the Main window. • The standard file save dialog box for each operating system will appear. -
Page 47: Saving Index Image File
Save. • When the index images are displayed, these images are saved regardless of the film set in the scanner. • When the index images are not displayed, the index images are saved after performing the index scan. -
Page 48: Loading Index Image File
LOADING INDEX IMAGE FILE The index file can be displayed in the index tab after reading the saved index file. The previously displayed preview images are erased. 1. Click on the 'Read Saved Index' button in the Main window. • The standard file open dialog box for each operating system will appear. -
Page 49: Preview Scan
PREVIEW SCAN SCANNING FLOW Launch the Software Set the Preferences Load the Film Holder Index Scan Insert the Film (see page 37) Holder Specify the Film Type Scan and Save (see page 83) Prescan Rotate Flip Full screen view Magnifying or Reducing the view ScrollSetting... -
Page 50: Scan Prescan
PRESCAN Prescanning creates a scan of the image that you can apply and view color, contrast, orientation, and brightness corrections before clicking on the Scan button. This ensures that final scan will be the best it can be. Click on the Prescan tab in the Main window. The Prescan tab part –... - Page 51 PRESCAN 1. Click on in the Command window. The prescanned image will appear in the Prescan tab. Dimâge Scan Dual II...
-
Page 52: Orienting The Image
ORIENTING THE IMAGE Rotate Click on the buttons to correct the orientation of your image before scanning. Changes will be reflected in the prescan image. Click on to rotate the image 90° clockwise. Click on to rotate the image 90° counter-clockwise. -
Page 53: Flip
Flip buttons let you flip the image left to right or top to bottom before scanning. Changes will be reflected in the prescan image. Click on to flip the image top to bottom. Click on to flip the image left-to-right. ORIENTING THE IMAGE •... -
Page 54: Full Screen View
ORIENTING THE IMAGE Full screen view This function allows you to display the entre prescanned image in the Prescan tab. 1. Click on Magnifying or Reducing the View Use the zoom button to increase or reduce the image magnification. Zooming In 1. -
Page 55: Scroll
Scroll Use the grab button to scroll an enlarged image. • can only be selected when the image has been magnified beyond the limits of the Prescan tab. 1. Click on in the Prescan image display area. • The pointer will change to 2. -
Page 56: Auto-Exposure Lock
2. Select another image, then click on • The scanner skips the setting exposure step in the prescan sequence. Images will be scanned using the AE lock settings until AE lock is cancelled or the scanner is reinitialized. Cancelling AE-Lock 1. -
Page 57: Ae Area Lock
AE AREA LOCK The AE area in auto exposure adjusting mode can be changed and the exposure of that area is adjusted automatically. Perform the procedure below after prescanning the image. 1. Click on 2. Press the Shift key. • The AE area is indicated by a line instead of the cropping area indicated by a dashed line. -
Page 58: Focus - Point Af
FOCUS – POINT AF Focus The Dimâge Scan Dual2 uses the CCD sensor for autofocus. Autofocus uses the center of the image to determine focus. Normally, this results in an excellent scan because the film plane is flat. However, if the film is warped or curled, or if Autofocus is turned off in the preferences, focus may not be accurate. -
Page 59: Focus - Manual
FOCUS – MANUAL MANUAL FOCUS Use manual focus on a specific area of the image or to reduce the appearance of grain in grainy film (such as high-speed or pushed film) by slightly defocusing it. 1. Click on • The pointer will change to the Manual Focus icon. •... -
Page 60: Cropping The Image
CROPPING THE IMAGE Auto Cropping The cropping area is determined automatically so that the holder or slide mount frame in the prescan image is removed. Click on Cropping The cropping frame defines how much of the prescan image will be scanned. The dimensions of the cropping frame are displayed in the lower left corner of the Prescan tab. -
Page 61: Prescan And Image Correction
PRESCAN AND IMAGE CORRECTION 1. Click on an image or an image box, then click on . The image will be prescanned, then opened in the Prescan tab. Click here to specify an APS format (C, H, or P) cropping frame. 2. -
Page 62: Aps Formats; C, H And P (Aps Only)
PRESCAN AND IMAGE CORRECTION APS formats; C, H and P (APS only) When APS is selected in the Main Window, the CHP button allows you to quickly and easily define the cropping frame by the standard APS format; C, H and P. 1. -
Page 63: Image Correction
IMAGE CORRECTION IMAGE CORRECTION FLOW Launch the Software Set the Preferences Load the Film Holder Index Scan Insert the Film (see page 37) Holder Specify the Film Type Scan and Save (see page 83) Prescan (see page 49) Image Correction Auto image correction Tone... -
Page 64: Image Correction
IMAGE CORRECTION This scanner gives you three options for correcting the brightness, contrast, and color balance of the final scan. Click on the Image Correction tab in the Main window. The Image Correction tab part – Names of parts Variations button... -
Page 65: Auto Image Correction
AUTO IMAGE CORRECTION This function automatically performs the ideal correction for each image. All the corrections performed before clicking on the Auto Image Correction button will be reset. This function is available only when the Color depth is set to “8 bit” in the Preference Dialog box on page 39. -
Page 66: Tone Curves/Histogram
TONE CURVES/HISTOGRAM When the Tone curves/Histogram Correction button is clicked, the Tone Curves and Histogram dialog box is displayed. The Tone Curves part allows you to change the tone curves and directly correct the output value. The Histogram part allows you to specify the input and output area from the information included in a film and correct images. -
Page 67: Correcting The Tone Curves
Correcting the Tone Curves Changing the shape of a correction curve changes the output level for each corresponding input level. Changing the shape of the red, green, or blue curves affects color balance of the image. Changes to the RGB curve affect the image contrast and brightness. -
Page 68: Correcting The Histogram
TONE CURVES/HISTOGRAM Correcting the Histogram The input slide bar has the Input shadow slider, Input gamma slider and Input Highlight slider. The output slide bar has the Output Highlight slider and Output shadow slider. The image can be corrected by dragging the slider or inputting the value in the text box. -
Page 69: Setting The White Or Black Points
Setting the White or Black points This function allows you to correct the highlight or shadow point to the specified value. • Changes are automatically applied to the prescan image. Setting the White Point 1. Double-click on • The Point Value Setting dialog box is displayed. 2. -
Page 70: Viewing The Histogram Of Images After Making Corrections
TONE CURVES/HISTOGRAM Setting the Gray point This function can specify the point to be changed to gray in the image. 1. Click on • The cursor changes to the gray dropper shape. 2. Click the point to be changed to gray in the image. -
Page 71: Brightness/Contrast/Color Balance
BRIGHTNESS/CONTRAST/COLOR BALANCE When the Brightness/Contrast/Color Balance Correction button is clicked, the Brightness, Contrast and Color Balance Correction dialog box is displayed. The images can be corrected by dragging the slider or inputting the desired value in the text box. Click on in the Image Correction tab. -
Page 72: Auto Setting
BRIGHTNESS/CONTRAST/COLOR BALANCE 1. Drag the each Brightness, Contrast or Color balance slider, or input the desired value in the text box. • The change will be reflected in the prescan image. • Moving the Brightness, Contrast or Color balance slider changes “Post-Correction Gray Scale”... -
Page 73: Hue/Saturation/Lightness
HUE/SATURATION/LIGHTNESS When the Hue/Saturation/Lightness Correction button is clicked, the Hue, Saturation, Lightness Correction dialog box is displayed. The images can be corrected by dragging the slider or inputting the desired value in the text box. Click on in the Image Correction tab. The Hue, Saturation, Lightness Correction Dialog box –... -
Page 74: Auto Setting
HUE/SATURATION/LIGHTNESS Auto Setting When the Auto Setting button is clicked, the saturation of the image is corrected automatically without changing the hue and lightness. Reset If you click the Reset button, the settings in the current correction window are reset. -
Page 75: Variation Correction
VARIATION CORRECTION The few frames of variation images are displayed around the corrected prescan image. You can correct the image while comparing with the variation images. Click on in the Image Correction tab. The Variation Dialog Box – Names of Parts Variation Amount Control slider Correction list box Pre/Post Correction Image Display... -
Page 76: Color Balance Correction
VARIATION CORRECTION Color Balance Correction The 6 images that have been corrected by one-step in each RGBCMY direction for the center current image are displayed. 1. Click the color balance. • The corrected 6 frames of variation images are displayed. 2. -
Page 77: Saturation Correction
Saturation Correction The 2 images of which saturation has been corrected on the right and left sides of the center image are displayed . The variation image on the left side shows reduced saturation, and on the right side shows increased saturation. 1. -
Page 78: Snapshot
SNAPSHOT When the Snapshot button is clicked, the current prescan image is stored in the Snapshot Display Area temporarily and displayed as a thumbnail. When the thumbnail in the Snapshot Display Area is double-clicked, that image is displayed in the Prescan tab. This is convenient when storing the image correction temporarily while processing, or when correcting the image again after going back to a certain step. -
Page 79: Cancelling Image Correction
CANCELLING IMAGE CORRECTION Cancelling the Image Correction When the Undo button is clicked, the current image correction is cancelled and the image returns to the previous one. Redo the Correction When the Redo button is clicked, the cancelled image correction can be resumed. Delete the Image Correction When the Correction Reset button in the Image Correction tab is clicked, all the image corrections are deleted and the image... -
Page 80: Full-Screen View
FULL-SCREEN VIEW Full-Screen View This function allows you to display a full screen view of the corrected image in the Image Correction tab. 1. Click on • When is clicked, the size of pre and post correction image is automatically changed according to the size of the Main window. -
Page 81: Job Save/Job Load
JOB SAVE/JOB LOAD The image correction setting in the correction window can be saved as an image correction job. You can easily correct the image by loading the most appropriate previously saved correction job. Saving an Image Correction Job 1. Click on in the Image correction tab. -
Page 82: Loading Image Correction Job
JOB SAVE/JOB LOAD Loading Image Correction Job This function allows you to load the saved correction job and apply an image correction to the displayed image. 1. Click on in the Image correction tab. • The Selected Image Correction Job dialog box is displayed. -
Page 83: Final Scan
FINAL SCAN FLOW Scan setting Navigation Creating a job Deleting a job Job type Final scan Dimâge Scan Dual II... -
Page 84: Scan Scan Settings
SCAN SETTINGS The scan settings determine your final image’s resolution, dimensions, and file size, as well as helping determine the image quality. You can select a Job (see page 87) to have the scan settings selected for you or you can directly enter them into the Main window (Index tab or Prescan tab). - Page 85 Image resolution is the number of pixels per inch (ppi or dpi) that represent your scanned image. The size of an image file is determined by its size (dimensions) and resolution. The rule to follow when scanning is "bigger is better". To obtain the best results, set the output resolution to the highest value your final output device (printer, monitor, etc.) can handle.
- Page 86 6. Enter the desired output size (maximum 3 digits). • The output size is limited by the maximum resolution of the scanner. • The values will change if a different unit of measure is selected. • The output size cannot be changed when the unit list box is set to pixels.
-
Page 87: Creating/Deleting Job Files
CREATING/DELETING JOB FILES Creating a Job In addition to the Job settings included with the software, it is possible to create and save your own Job settings. 1. Set the desired settings in the Main window (Index tab or Prescan tab). 2. -
Page 88: Scan Job Type
SCAN JOB TYPE Before making the final scan, the scanner needs to know how big the final image will be and the quality of output that will be used (printer, monitor, etc.) so it knows what resolution to scan the film. Using the Job function is a quick and easy way to enter the scan settings. -
Page 89: Final Scan
FINAL SCAN Scan the film according to the Prescan settings. With the Dimage Scan Dual2 utility software, you can save the final scan in one of the following file formats. • JPEG • BMP (Windows only) The image file of 48 bit (16 bit each RGB) can only be saved in the tiff format. Twain Driver/Plug-in Software With the Prescan image displayed in the Prescan tab…... -
Page 90: Navigation
NAVIGATION The Navigation window allows you to automate the procedure of scanning. When the Navigation button is clicked in the Main window, the Navigation dialog box is displayed. The Navigation Dialog box – Name of parts Operation Item checkbox Navigation Flow Repeated Operation Item checkbox Navigation Menu list box Operation Items... -
Page 91: Navigation Menu
Navigation Menu This menu allows you to select the saved setting for automatic operation. Not only the saved settings but the “Save Setting” and “Delete Setting” items are displayed in this menu. 1. Select the operation items in the Operation Item Checkbox or Repeated Operation Item checkbox. -
Page 92: Saving, Selecting And Deleting A Navigation Setting
NAVIGATION Saving, Selecting and Deleting a Navigation Setting This function allows you to save the navigation settings. The above settings can be saved, selected or deleted in the Navigation Menu list box. Saving a Navigation setting 1. Click on the arrow next to the Navigation menu list to display the available menu. -
Page 93: Appendix
APPENDIX Color maching Scan job file list Glossary Trouble shooting Specifications User technical support Dimâge Scan Dual II... -
Page 94: Color Matching
COLOR MATCHING The function allows you to match the scanner data to the monitor specification (color space). Colors in the original film are reproduced on the monitor with a high fidelity. The output color space and the monitor ICC profile can be specified with the color matching function. -
Page 95: Output Color Space Setting
Output color space setting 1. Insert the check mark in the “Color Matching ON” checkbox. 2. Click the (menu) button in the Output Color Space list box, the available output color space settings are displayed. 3. Click the desired output color space setting. ICC profile setting 1. -
Page 96: Scan Job File List - 35Mm
SCAN JOB FILE LIST – 35MM For your reference, the following is a listing of the scan job categories and names for the 35mm and APS film formats. Category Job name Default Default Color Laser Printer Max Size_600dpi A4Quarter_600dpi A4Eighth_600dpi Letter Quarter_600dpi Letter Eighth_600dpi Max Size_400dpi... - Page 97 Category Job Name Web Page 1023 x 682 960 x 640 870 x 580 768 x 512 624 x 416 600 x 400 480 x 320 Photo CD 2048 x 3072 Photo CD 1024 x 1536 Photo CD512 x 768 Photo CD256 x 348 Screen 1280 x 1024...
-
Page 98: Scan Job File List - Aps
SCAN JOB FILE LIST – APS Category Job name Default Default Color Laser Printer Max Size_600dpi A4 Eighth_600dpi Letter Eighth_600dpi Max Size_400dpi A4 Half_400dpi A4 Quarter_400dpi A4 Eighth_400dpi Letter Quarter_400dpi Letter Eighth_400dpi Photosensitive Max Size A5_400dpi 5x7_400dpi Post Card 4 x 6_400dpi Letter_267dpi A4_267dpi A5_267dpi... -
Page 99: Glossary
GLOSSARY BRIGHTNESS CHANNEL CONTRAST CROP EMULSION SIDE GAMMA HIGHLIGHTS HISTOGRAM INTERPOLATION JPEG MIDTONE NEUTRAL PICT PIXEL The lightness or darkness of the image. The component of an image. Your scanned image has three channels: red, green, and blue (RGB). The gradation of shades in an image. A high contrast image has very dark areas and bright areas without many middle shades. - Page 100 In the USB connection, the peripheral devices such as a mouse, printer, scanner, etc. can be connected up to 127 with an interface. Furthermore, the peripheral equipment can be easily set up because...
-
Page 101: Trouble Shooting
• Set the film type manually. • Increase the memory requirements for the host application. • If you have scanned multiple images, close and relaunch the host application. • Contact a Minolta Service Facility to change the fluorescent lamp. Dimâge Scan Dual II... -
Page 102: Specifications
SPECIFICATIONS Type: Usable Film: Scanning Dimensions: Optical Input Resolution: 2820 dpi A/D Conversion: Image Sensor: Scan Times (approx): Testing Conditions Interface: Light Source: Power/Frequency: Power Consumption: Dimensions (W x H x D): Weight (approx): Specifications are based on the latest information available at the time of printing and are subject to change without notice. -
Page 103: User Technical Support
Please contact your dealer for information regarding installation, USB interface recommendations, or application compatibility. If your dealer is unable to help you, contact an authorized Minolta service center. Please have the following information ready when calling Minolta Technical Support. Make and Model of your computer: Available application RAM:... -
Page 104: When The "Add New Hardware Wizard" Window Is Displayed
APPENDIX B When the “Add New Hardware Wizard” window is displayed The “Add New Hardware Wizard” window may be displayed in the following cases: • If you connected the Dimâge Scan Dual II to the PC before installing the Dimâge Scan Dual II driver software. - Page 105 SOFTWARE-INSTALLATION – WINDOWS 5. Click on [Next>]. 6. Click on [Finish]. Dimâge Scan Dual II...
-
Page 106: When The Dimâge Scan Dual Ii Driver Software Does Not Start Up
APPENDIX B When the Dimâge Scan Dual II driver software does not start up In the following cases, “Dimâge Scan Dual II is not connected.” appears and the Dimâge Scan Dual II driver software may not be able to start up even if you attempt to make the Dimâge Scan Dual II start up. - Page 107 SOFTWARE-INSTALLATION – WINDOWS 8. Make sure that neither “USB Device” nor “Unknown Device” appears as displayed left and then click on [Close]. 9. Press the power button of the Dimâge Scan Dual II to turn off. 10. Press the power button of the Dimâge Scan Dual II again to turn on.
-
Page 108: For Windows 2000 Users
*Specify the value from about 20 to 50 (%) Close Photoshop and then restart it. Turn on the power of the scanner again, remove the film holder and close the scanner front for set-up. Restart the Twain_32 driver from Adobe Photoshop LE. - Page 109 B-2550 Kontich, België Tel: 03 451 07 00 Fax: 03 458 50 48 http://www.minolta.be en http://www.minolta.nl Minolta Canada Inc., Head Office 369 Britannia Road East, Mississauga, Ontario L4Z 2H5, Canada Tel. 0905 890 66 00 Fax 0905 890 71 99 http://www.minolta.com...
Need help?
Do you have a question about the DIMAGE SCAN DUAL II AF-2820U and is the answer not in the manual?
Questions and answers