Table of Contents
Advertisement
Quick Links
Vol.2
This document explains in detail how to operate this device. Concerning basic operation, please
refer to the enclosed "Operating Instructions Vol.1" (printed document).
Please read these instructions carefully before using this product, and save this manual for future
use.
F0815MT0
Operating Instructions
Memory Card Camera-Recorder
Model No.
AG-DVX200PJ
AG-DVX200PB
AG-DVX200PX
AG-DVX200EJ
AG-DVX200EN
AG-DVX200ED
Vol.2
ENGLISH
SQT1051
Advertisement
Table of Contents

Related Manuals for Panasonic AG-DVX200PJ


Summary of Contents for Panasonic AG-DVX200PJ
-
Page 1: Operating Instructions
Operating Instructions Vol.2 Memory Card Camera-Recorder AG-DVX200PJ Model No. AG-DVX200PB AG-DVX200PX AG-DVX200EJ AG-DVX200EN AG-DVX200ED Vol.2 This document explains in detail how to operate this device. Concerning basic operation, please refer to the enclosed “Operating Instructions Vol.1” (printed document). Please read these instructions carefully before using this product, and save this manual for future use. -
Page 2: Read This First
∫ Indemnity about recorded for recording motion pictures content This unit can record motion pictures using three Panasonic does not accept any responsibility different recording methods, including MOV, for damages directly or indirectly due to any MP4 and AVCHD 33, 141) -
Page 3: This Unit
∫ About security Be careful about the possibility of theft or loss of the unit, and be careful not to leave the unit unattended. Please note that Panasonic does not accept any responsibility for the compromise, manipulation, and loss of information caused by these events. -
Page 4: Table Of Contents
Contents Read this first ..........2 Manual Focus Assist......51 Focus Transition ........52 Preparation White Balance..........55 Iris/Gain adjustment........59 Iris adjustment........59 What you can do with this unit ..... 6 Gain adjustment........61 Recording to the SD card ......6 Manual shutter speed ........63 Linking to external devices ...... - Page 5 Linking to external devices Others Connecting Headphones, a Remote Troubleshooting .........189 Control or an External Monitor ....113 About recovery........193 Headphones ........113 Updating the firmware incorporated into Remote control ........113 the unit ............193 External monitor ........114 Cautions for use.........194 Setting the external output About copyright .........198...
-
Page 6: What You Can Do With This Unit
Preparation What you can do with this unit This unit is a 4K* camera recorder with the following features: Please refer to page about recording format of this unit. ≥ The 4/3-type large sensor allows you to record beautifully defocused images with shallow depth of field as ultra high-definition 4K motion picture. -
Page 7: Usb Host Mode
It can also play back the scenes and still pictures copied to the external media device. ≥ This unit supports USB 3.0. Refer to the following support site for information about an external media device. http://pro-av.panasonic.net/ (This Site is English only) ... -
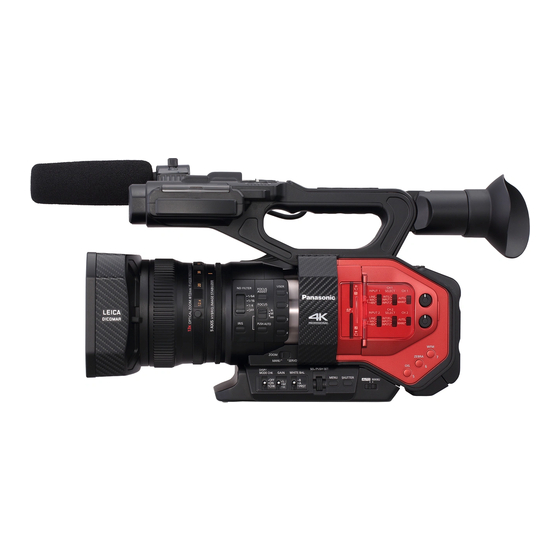
Page 8: Names And Functions Of Main Parts
Preparation Names and Functions of Main Parts USB HOST terminal 125) SDI OUT terminal 114) TC PRESET IN/OUT terminal USB DEVICE terminal 122) HDMI OUT connector [HDMI] 114) VIDEO OUT terminal 114) Handle Headphone terminal [ 100, 113) Lens hood release button ≥... - Page 9 36 37 47 48 49 50 Tripod receptacle User 5 button [O.I.S.] 42, 74) Eyepiece corrector lever User 6 button [ZEBRA] 74, 88) ND filter switch [ND FILTER] User 7 button [WFM] 74, 87) Focus auto/Manual/¶ switch Zoom switch [MANU/SERVO] [FOCUS A/M/¶] Display/Mode check switch [DISP/ Iris button [IRIS]...
- Page 10 63 64 66 67 SD Card slot cover Eye cup mount Access lamp (card 1) Eye sensor Viewfinder Card slot 1 Access lamp (card 2) Eye cup Card slot 2 Open/close lever [OPEN] INPUT1 / INPUT2 switches Battery cover CH1 SELECT/CH2 SELECT switches Battery holder Battery release lever [BATTERY] CH1/CH2 switches...
- Page 11 79 80 81 82 83 84 85 86 87 Accessory shoe Sub zoom lever 40, 156) ≥ This lever functions in the same manner as the zoom lever. Zoom lever [T/W] (In Recording Mode) Volume lever [rVOLs]/ Thumbnail display switch [ ] (In Playback Mode) 103)
- Page 12 ∫ Attaching/detaching the lens hood (How to detach the lens hood) While pressing and holding the lens hood release button, rotate the lens hood in the direction of the arrow to detach it. A Lens hood release button (How to attach the lens hood) ...
-
Page 13: Attaching The Eye Cup
∫ Adjust the length of the hand strap so that it fits your hand. Adjust the hand strap according to the size of your hand. ≥ If you find it difficult to fasten the buckle B, move the pad A towards you, and fasten the buckle B again. -
Page 14: Attaching The Tripod
∫ Attaching the front microphone ≥ The microphone holder is set up so that a 21 mm (0.83 q) external microphone (AG-MC200G: optional) can be attached. Check in advance whether the microphone you wish to use can be attached. Attach the microphone holder to the microphone holder attachment part. ≥... -
Page 15: Power Supply
Please be advised that we are not liable for any accident or failure occurring as a result of use of a counterfeit battery pack. To ensure that safe products are used we would recommend that a genuine Panasonic battery pack is used. - 15 -... -
Page 16: Charging The Battery
Connect the AC cable to the battery charger and the AC outlet. Insert the battery into the battery charger by aligning the arrows. ≥ We recommend using Panasonic batteries 18). ≥ If you use other batteries, we cannot guarantee the quality of this product. -
Page 17: Inserting/Removing The Battery
Inserting/removing the battery Slide the open/close lever, and open the battery cover. Install the battery by inserting it in the direction shown in the figure. ≥ Insert the battery until it clicks and locks. Close the battery cover. ≥ Close the battery cover until it clicks and locks. Removing the battery Make sure that the power switch is set to OFF and the status indicator is turned off, and then remove by holding onto it taking care not to drop. -
Page 18: Charging And Recording Time
Charging and recording time Charging/Recording time Voltage/Capacity Continuously recordable Battery model number Charging time (minimum) time Supplied battery/ 7.2 V/5800 mAh 380 min 150 min VW-VBD58 (optional) ≥ The times given apply when the ambient operating temperature is 20 oC (68 oF) and the relative operating humidity is 60%. - Page 19 Checking the remaining power of the battery You can check the remaining power of the battery by looking at the battery capacity indication displayed on this unit's screen or by looking at the supplied battery VW-VBD58. ∫ Checking the remaining power using this unit Battery capacity indication ≥...
-
Page 20: Connecting To The Ac Outlet
Connecting to the AC outlet The unit is in the standby condition when the AC adaptor is connected. The primary circuit is always “live” as long as the AC adaptor is connected to an electrical outlet. Important: ≥ Use the supplied AC adaptor. Do not use the AC adaptor of another device. ≥... -
Page 21: Preparation Of Sd Cards
The unit can record motion pictures or still pictures to an SD card. Cards that you can use with this unit ≥ The cards that you can use are correct as of August 2015. ≥ We recommend that you use a Panasonic Memory Card. Card type Capacity... -
Page 22: Inserting/Removing An Sd Card
Inserting/removing an SD card When using an SD card for the first time, it is necessary to format the SD card. 32) When the SD card is formatted, all of the recorded data is deleted. Once the data is deleted, it cannot be restored. -
Page 23: Turning The Unit On/Off
Preparation Turning the unit on/off Set the power switch to ON while pressing the lock release button B to turn on the unit. To turn off the unit Set the power switch to OFF while pressing the lock release button. The status indicator goes off. -
Page 24: Using The Lcd Monitor/Viewfinder
Preparation Using the LCD monitor/Viewfinder Setting how to turn on/off the LCD monitor and Viewfinder Select the menu. MENU : [OUTPUT SETUP] [LCD/EVF OUTPUT] # desired setting [AUTO]: The LCD monitor is turned on when the LCD monitor is extracted. When you move your eye closer to the eye cup of the viewfinder, the LCD monitor is turned off, and the viewfinder is turned on. -
Page 25: How To Use The Touch Screen
Rotate to the position that is easy to view. To retract the LCD monitor Retract as shown in the figure with the LCD facing downward. Range of rotation of the LCD monitor ≥ It can rotate up to 270o towards the lens. 270°... -
Page 26: Lcd Monitor Adjustment
∫ About the operation icons Touch when changing a page or performing settings. ≥ Do not touch the LCD monitor with hard pointed tips, such as ball point pens. LCD monitor adjustment ≥ These settings will not affect the images actually recorded. [LCD BACKLIGHT] Brightness of the LCD monitor can be switched. -
Page 27: Viewfinder Adjustment
Viewfinder adjustment ≥ These settings will not affect the images actually recorded. Adjusting the field of view It adjusts the field of view to show the image on the viewfinder clearly. Adjust the viewfinder to suit your vision so that you can see the display images clearly. ≥... -
Page 28: Recording Yourself
[EVF COLOR] The recording images or playback images on the viewfinder can be selected between color/black and white. Select the menu. MENU : [DISP SETUP] # [EVF COLOR]# [ON] or [OFF] [ON]: Displayed in color [OFF]: Displayed in black and white ≥... -
Page 29: Setting Date And Time
Preparation Setting date and time When this unit is turned on, the message [SET TIME ZONE AND DATE/TIME] may appear. To make these settings, select [YES], and follow the instructions from Step 2-3 of the time zone setting procedure. Select the menu. MENU : [OTHER FUNCTION] # [CLOCK SET] Touch the date or time to be set, then set the... -
Page 30: Using The Menu Screen
Preparation Using the menu screen ≥ You can also select menu items by operating the jog dial. MENU MENU Press the MENU button Touch the top menu A. Touch the submenu B. ≥ Next (Previous) page can be displayed by touching Touch the desired item to enter the setting. -
Page 31: Recording
Recording Before recording ≥ When recording, make sure your footing is stable and there is no danger of colliding with another person or object. ≥ Hold the eye cup of the viewfinder as close as possible to your eye. ≥ Adjust the angle of the LCD monitor according to the position in which the unit is held. ≥... -
Page 32: Formatting Media
≥ The following functions are not available when [4:2:2(10bit)] is selected: j [DIGITAL ZOOM] j [LAST SCN DEL] j [REC CHECK] Formatting media If you use the SD cards for the first time for recording with this unit, format the cards. Please be aware that if a medium is formatted, then all the data recorded on the medium will be erased and cannot be restored. -
Page 33: Recording Motion Picture With This Unit
Recording Recording motion picture with this unit ≥ Before turning on this unit, open the lens cover. ≥ Set [OUTPUT BITS] to [4:2:2(8bit)]. Change the mode to Recording Mode. ≥ Extract the LCD monitor. Press the recording start/ stop button B to start recording. -
Page 34: Recording Still Pictures
≥ (Maximum recordable scenes of a single SD card) Recording mode MOV/MP4 AVCHD Recordable scenes Approx. 89100 Approx. 3900 Different dates 108) Approx. 900 Approx. 900 ≥ When the SD card contains scenes recorded with [REC MODE] set to [MOV]/[MP4] and still pictures, the maximum recordable scenes and the maximum recordable scenes on each date will be smaller than those in the table above. - Page 35 ∫ About picture size Picture sizes in which still pictures will be recorded differ depending on the [REC MODE] setting and the [REC FORMAT] setting 141, 142). Recording mode Recording format Aspect Picture size [REC FORMAT] setting with a size of 4K 17:9 4096k2160 (4096k2160)
-
Page 36: Switching Between Auto And Manual Mode
Recording Switching between Auto and Manual Mode MANU AUTO/MANU switch Slide the switch to change Auto Mode/Manual Mode. ≥ is displayed in the Auto Mode. ∫ Auto Mode In Auto Mode, this unit operates according to the [ ] menu settings. AUTO SW ≥... -
Page 37: Auto Focus
Menu item Setting [ON]: Activates Auto Iris in Auto Mode. [A.IRIS] [OFF]: Activates Auto Iris as a manual mode. Use the IRIS button to switch between Auto Iris Mode and Manual Iris Mode. Auto Gain in Auto Mode. [ON]: Activates [AGC] [OFF]: Activates Auto Gain as a manual mode. -
Page 38: Adjusting The Picture Quality
∫ Controls that are disabled in Auto Mode Certain controls of this unit may be disabled in Auto Mode. Controls to be disabled vary by the [AUTO SW] menu settings. Conditions that disable controls Controls that are disabled in Auto Mode [A.IRIS] is set to [ON]. -
Page 39: Color Correction Function
∫ Menu item [RB GAIN CONTROL SETTING] 134) Chroma setting function This function sets color saturation and phase. It applies effects on whole images. It cannot be set to individual color hue. ∫ Menu item [CHROMA LEVEL]: Adjusts the color density. 135) [CHROMA PHASE]: Adjusts the color balance. -
Page 40: Using The Zoom
Recording Using the zoom It can be zoomed up to 13k. ≥ (When the picture size of [REC FORMAT] 142) or [OUTPUT FORMAT] 147) is 1920k1080 or below) It can zoom up to approx. 20k when the [i.Zoom] is set to [ON]. 157) ≥... - Page 41 ≥ If you take your finger off the zoom lever during zoom operation, the operation sound may be recorded. When returning the zoom lever to the original position, move it quietly. Adjusting the i.Zoom magnification When [i.Zoom] is set to [ON], you can zoom in while maintaining the beauty of high-definition picture quality up to a magnification of approx.
-
Page 42: Image Stabilizer Function
∫ About the zoom speed ≥ The zoom speed will vary depending on how far the zoom lever is pressed or how fast the zoom ring is rotated. ≥ The zoom operation using the sub zoom lever will be performed at a constant speed. Zoom speed of the sub zoom lever will vary depending on the setting of [SUB ZOOM]. - Page 43 ≥ Stabilization may not be possible under strong shaking conditions. ≥ When using a tripod, we recommend that you set the Image Stabilizer to (setting canceled). Customizing the Image Stabilizer for various recording conditions You can customize the Image Stabilizer by adjusting the [BLUR AMPLITUDE] and [BLUR FREQUENCY] settings individually.
-
Page 44: Focus
[3]: This mainly enhances the correction performance against fast and subtle camera shake that falls in the high frequency range while weakening the correction performance against slow camera shake that falls in the low frequency range. We recommend that you use this setting when panning or tilting this unit many times while recording. - Page 45 ∫ To change the way you adjust focus with the focus ring Select the menu. MENU : [SW SETUP] # FOCUS RING DRIVE] [SPEED]: Adjusts the focus value according to the speed at which the focus ring is rotated. [COARSE]: Adjusts the focus value according to the rotational position of the focus ring.
- Page 46 Customizing Auto Focus for various recording conditions You can customize Auto Focus for various recording conditions by adjusting the settings of [AF SPEED], [AF SENSITIVITY], and [AF AREA WIDTH] individually. ∫ Custom AF function When [ON] is selected, Auto Focus works with customized [AF SPEED] and [AF SENSITIVITY] settings.
-
Page 47: One Push Af
≥ [CUSTOM AF], [AF SPEED] and [AF SENSITIVITY] cannot be set in Variable Frame Rate Mode. ≥ [AF SPEED] and [AF SENSITIVITY] cannot be set in Manual Focus Mode. ≥ When a faster [AF SPEED] value is selected, focus mechanism noise will be more audible. As a result, the noise may be recorded while recording is in progress. -
Page 48: Push Af
Push AF If you press and hold the PUSH AUTO button, Manual Focus will be temporarily switched to Auto Focus. ≥ Set this unit to Manual Focus. Press and hold the PUSH AUTO button. ≥ The focus position will be automatically adjusted for the subject at the center of the screen. ≥... - Page 49 ∫ To adjust the magnified display When [FOCUS ASSIST] is set to [EXPAND] or [BOTH], the central area of the screen will be magnified. You can change the magnification level and position of the magnified display. ≥ You can also change the magnification level of the magnified display using the jog dial. ...
- Page 50 MENU : [SW SETUP] # [PEAKING LEVEL] # desired setting Touch to adjust settings. ≥ You can select a value between s7 and r7. Touch [EXIT] to complete the setting. (Notes on Focus Assist) ≥ Focus Assist is not possible in following cases: j During Recording Check j During Freeze Frame j When color bars are displayed.
-
Page 51: Manual Focus Assist
Manual Focus Assist Focus is automatically adjusted after you adjust it with the focus ring in Manual Focus Mode. ≥ Focus may not be achieved when the focus deviation is great. ≥ After automatic adjustment is complete, the focus is not adjusted automatically again until you operate the focus ring. -
Page 52: Focus Transition
Focus Transition You can use Focus Transition by registering “Focus Transition” to a USER button. With Focus Transition, you can shift the current focus position to a pre-registered focus position. ≥ Please refer to page for details about setting the USER button. Registering a focus position To use Focus Transition, you need to register a focus position. - Page 53 Using Focus Transition ≥ Select the [FOCUS TRANSITION] menu. l 52 ≥ Register [FOCUS TRANS] to a USER button. Switch to Manual Focus Mode. Press the USER button to which [ ] is registered or touch FOCUS TRANSITION the applicable USER button icon. Touch a registered item ([1]s[3]).
- Page 54 ≥ You can switch between the items or exit Focus Transition by pressing the USER buttons 1 s 4. USER button Corresponding setting USER1 to USER3 [1] to [3] USER4 [EXIT] ≥ When using Focus Transition, functions registered to the USER buttons 1 s 4 do not work with the USER buttons.
-
Page 55: White Balance
To set the length of time before Focus Transition starts Select the menu. MENU : [RECORD SETUP] # [FOCUS TRANSITION WAIT] # desired time [0 SEC.]/[5 SEC.]/[10 SEC.] Recording White Balance Automatic White Balance function may not reproduce natural colors depending on the scenes or lighting conditions. - Page 56 About White Balance modes Mode Settings ATW (ATW) It will automatically adjust in accordance with the recording condition. LOCK It will lock the setting for ATW. (ATW Lock) P3200K Preset value for studio/indoor recording (halogen lamp, etc.) (P3200K) P5600K Preset value for outdoors (P5600K) Setting can be finely adjusted in accordance to the recording conditions.
- Page 57 Customizing ATW for various recording conditions You can customize the ATW settings for various recording conditions by adjusting the settings of [ATW SPEED], [ATW TARGET R], and [ATW TARGET B] individually. ∫ Adjusting the control speed of ATW Select the menu. MENU : [SW SETUP] # [ATW SPEED] # desired setting [FAST]/[NORMAL]/[SLOW]...
- Page 58 To finely adjust the White Balance Setting the White Balance mode to [VAR] allows you to set a White Balance value between P2000K and P15000K. ≥ Use the jog dial to change the settings. ≥ Switch to Manual Mode. Set the White Balance mode to [VAR]. Rotate the jog dial to adjust the color balance.
-
Page 59: Iris/Gain Adjustment
Recording Iris/Gain adjustment When recording a scene that is too dark (or bright) or a scene in a similar situation, manually adjust the iris and gain. Iris adjustment IRIS F4.0 A Iris value 1 IRIS button B Auto iris icon 2 Iris ring * It is displayed in Auto Iris Mode. - Page 60 Customizing Auto Iris motion settings for various recording conditions You can customize Auto Iris motion settings for various recording conditions by adjusting the settings of [A.IRIS SPEED], [AUTO IRIS LEVEL], and [AUTO IRIS LEVEL EFFECT] individually. ∫ Adjusting the control speed of Auto Iris Mode Select the menu.
-
Page 61: Gain Adjustment
Gain adjustment ≥ Use the jog dial to change the settings. 1 Jog dial 2 GAIN switch A Gain value ≥ The gain value changes depending on [GAIN/ISO DISPLAY CHG] setting: j (When set to [GAIN]) In Auto Gain Mode, “AGC”... - Page 62 ≥ It is not possible to adjust the gain value using the GAIN switch and jog dial in the following situations: j During Freeze Frame ≥ If the gain value is increased, the noise on the screen increases. ≥ In Auto Iris Mode or Auto Shutter Mode, the screen brightness may not change even if you adjust the gain.
-
Page 63: Manual Shutter Speed
Recording Manual shutter speed Adjust the shutter speed when recording fast-moving subjects. ≥ Use the jog dial to change the settings. SHUTTER 1/60 A Shutter speed SHUTTER button ≥ This is displayed in Manual Shutter Mode. Jog dial ≥... - Page 64 (When [SHUTTER DISPLAY CHG] is set to [deg]) 5.0d to 360.0d ≥ It is possible to adjust the shutter speed in increments of 0.5d. ≥ The shutter speed closer to 5.0d is faster. ≥ You can adjust the setting faster by rotating the jog dial while pushing and holding it. ∫...
- Page 65 Making adjustments with Synchro Scan If you press the jog dial when the shutter speed is displayed as a decimal number, the Synchro Scan setting will be displayed. You can fine-adjust the shutter speed by adjusting the Synchro Scan setting. This will minimize flickering and horizontal bars in images. ≥...
-
Page 66: Audio Input
Recording Audio Input This unit can record audio in 2 ch. It is possible to switch between built-in microphone, external microphone, or connected audio equipment for each channel. ∫ About audio recording methods The audio recording method varies depending on the [REC MODE] setting. 141) Recording mode Audio recording method... - Page 67 ∫ Using an external microphone or audio equipment Connect an external microphone or audio equipment to AUDIO INPUT1, 2 terminals (XLR 3 pin). Use INPUT1 or INPUT2 switches to switch the connected audio input signal. LINE : Audio equipment is connected A AUDIO INPUT1 : An external microphone is connected terminal (XLR 3 pin)
-
Page 68: Adjusting The Audio Input Level
To remove the external microphone, etc., from the AUDIO INPUT1, 2 terminals (XLR 3 pin) Remove while pushing on the PUSH section of the AUDIO INPUT1, 2 terminals (XLR 3 pin). ≥ Set the input signal to built-in microphone by switching the CH1 SELECT, CH2 SELECT switches to INT (L) or INT (R) after removing the external microphone. - Page 69 Using the ALC function ALC can reduce audio noise. For audio channel 1, select [AUDIO ALC CH1]: for audio channel 2, select [AUDIO ALC CH2]. Select the menu. MENU [AUDIO ALC CH1] or [AUDIO ALC CH2] : [AUDIO SETUP] # # desired setting [ON] Enables ALC, allowing you to record audio with reduced noise.
-
Page 70: Counter Display
Recording Counter display You can change a counter display that indicates how much time has elapsed during recording or playback. COUNTER A COUNTER button RESET/TC SET B RESET/TC SET button Press the COUNTER button to switch the counter display. ≥... - Page 71 [DF MODE] Select the compensation mode for the time code. ≥ Set [SYSTEM FREQ] to [59.94Hz]. 141) Select the menu. MENU : [RECORD SETUP] # [DF MODE] # desired setting [DF]: Time code is compensated in accordance with the actual time. It is mainly used for broadcasting such as TV programs.
-
Page 72: Setting The User Information
[TC PRESET] You can set the initial time code. Select the menu. MENU : [RECORD SETUP] # [TC PRESET] Touch the item to set and change with ≥ It will be set to 00h00m00s00f when the RESET/TC SET button is pressed. ≥... -
Page 73: Setting The Recording Counter
Setting the Recording Counter Recording Counter will display the recording time in seconds. 0:00:00 (hour : minute : second (When [REC COUNTER] is set to [TOTAL])) SCN 0:00:00 (hour : minute : second (When [REC COUNTER] is set to [SCENE])) [REC COUNTER] Select the counting method during the recording. -
Page 74: User Button
MENU : [RECORD SETUP] # [EXT TC LINK] # [SLAVE] ≥ [TCG] will be set to [FREE RUN]. (On the slave device) Press the RESET/TC SET button. ≥ [TC LINK OK] will be displayed and the time code will be synchronized with that of the master device. -
Page 75: Using The User Button
Using the USER button To use the set USER button, press USER1 to USER8 button or touch the USER9 to USER12 button icon displayed when you touch the LCD monitor. (When you use the USER1 to USER7 button) (When you use the USER8 button) USER REC CHECK ZEBRA... -
Page 76: Functions Of The User Button
Functions of the USER button ∫ List of USER button functions Item Icon Function [INHIBIT] [INH] Invalid [FOCUS ASSIST] [FA] Focus Assist [BACKLIGHT] [B.Light] Backlight Compensation [SPOTLIGHT] [S.Light] Spotlight [BLACK FADE] [B.FD] Black Fade [WHITE FADE] [W.FD] White Fade [ATW] [ATW] Auto Tracking White Balance [ATW LOCK]... -
Page 77: Backlight Compensation
Item Icon Function [AF AREA] [AF Area] AF area width adjustment [VFR] [VFR] Variable Frame Rate Mode [FOCUS MACRO] [F.Macro] Focus Macro [i.ZOOM] [i.Zoom] i.Zoom [LOG VIEW ASSIST] [LogView] Log View Assist [LCD/EVF OUTPUT] [LCD/EVF] LCD/EVF Output [MENU] [MENU] Menu ≥... -
Page 78: Black Fade
Black Fade ≥ Register “Black Fade” to a USER button. Fade in/fade out effect (black) can be added to the video and audio that is being recorded. Press USER button or touch USER button icon in the recording screen. ≥ Fade out will start, and fade in will start after completing the fade out. ≥... -
Page 79: Digital Zoom
Digital Zoom ≥ Register “Digital Zoom” to a USER button. ≥ Set [OUTPUT BITS] to [4:2:2(8bit)]. Press USER button or touch USER button icon in the recording screen. ≥ When [DIGITAL ZOOM] is set to [k2], [k5] or [k10], Digital Zoom will be turned on/off each time you press the button. -
Page 80: Recording Check
≥ This function is not available in the following cases: j When [REC FORMAT] is set to [UHD 2160/59.94p 150M] or [UHD 2160/50.00p 150M] 142) j During Freeze Frame ≥ To adjust the brightness, refer to page 59. Recording Check ≥... -
Page 81: Freeze Frame
≥ Register “DRS” to a USER button. Selects the DRS (Dynamic Range Stretcher) function. It is possible to expand the dynamic range by compressing the video signal level of the highly illuminated area that gets washed out with standard recording. ≥... - Page 82 Area Mode You can apply a variety of effects to the subject you touch. ∫ Setting an Area Mode effect You can select the following menu items to set an effect to be applied when you touch the subject. MENU : [SW SETUP] # [AREA MODE] # desired setting [INH]: Does not apply any effects of Area Mode.
- Page 83 ≥ Area Function is not possible in following cases: j In Variable Frame Rate Mode j When a remote control (commercially-available) is connected 113) ≥ Area mode is canceled in following cases: j If you turn the unit off j If you press the THUMBNAIL button j When you set [REC FORMAT] to [4K 2160/24.00p 100M] 142) j When you set [OUTPUT FORMAT] to [4K 2160/24.00p]...
- Page 84 Infrared Rec ≥ Register “Infrared Rec” to a USER button. This changes the Infrared Recording Mode setting. ≥ This unit operates as follows in Infrared Recording Mode: appears on the screen. j The iris, gain, and shutter speed are adjusted automatically. j When [AUTO SLOW SHTR] is set to [ON], the shutter speed will be automatically adjusted to 1/30, 1/24 or 1/25.
- Page 85 Level Gauge ≥ Register “Level Gauge” to a USER button. This function displays the horizontal/vertical tilt of the unit with the electronic level. ∫ To correct the tilt (Horizontal direction) (Vertical direction) When correcting the leftward tilt When correcting the downward tilt ≥...
- Page 86 ≥ Please refer to page about Background recording. Flash band compensation ≥ Register “Flash band compensation” to a USER button. If you set this item to [ON], you can compensate for and reduce flash band, a phenomenon that creates markedly different levels of luminance between the top and bottom of the image when recording is performed in an environment where another camera is firing its flash.
- Page 87 ≥ Register “WFM” to a USER button. This function displays waveforms on the LCD monitor. Press USER button in the recording screen. ≥ When [WFM TYPE] is set to [WAVE] or [VECTOR], each press of the button enables/disables WFM. ≥ When [WFM TYPE] is set to [WAVE/VECTOR], each press of the button switches the setting. WAVE (wave display) # VECTOR (vector display) # OFF ≥...
- Page 88 Fast Zoom ≥ Register “Fast Zoom” to a USER button. You can use Fast Zoom when operating the zoom with the zoom lever. EVF ON/OFF ≥ Register “EVF ON/OFF” to a USER button. This forces the viewfinder to turn on/off. ≥...
-
Page 89: Optical Image Stabilizer
≥ You can record an image with little white saturation if you manually adjust the shutter speed or brightness not to display zebra pattern. 59, 63) ≥ The zebra pattern does not appear on the images actually recorded. ≥ It is also possible to adjust the level of the zebra pattern to be displayed. 171) ≥... -
Page 90: Auto Rec
Auto Rec ≥ Register “Auto Rec” to a USER button. This enables/disables a function that controls recording performed with an external device (recorder, etc.) connected to the SDI OUT terminal. Select the [SDI REMOTE] menu. MENU : [OUTPUT SETUP] # [SDI REMOTE] # [ON] Select the [REMOTE REC LINK] menu. - Page 91 Push the jog dial to fin ish the adjustment ≥ Press USER button or touch the USER button icon to cancel the setting. ≥ To adjust the AF area frame again, press the jog dial while the on-screen icon [ AF AREA] (yellow) is displayed, and repeat Steps 2s3.
- Page 92 Press USER button or touch USER button icon in the recording screen. ≥ [VFR] will be displayed. ≥ The frame rate display will change. (Example) Frame Rate (fps) Frame rate in [REC FORMAT] 12 : 23.98p will be displayed. Audio is not recorded during recording. ≥...
- Page 93 ≥ You can also enable/disable Variable Frame Rate Mode or change the frame rate using the menu. j [VFR MODE] 131) j [FRAME RATE] 131) ≥ Variable Frame Rate Mode is set to [OFF] in following cases: j When the [REC MODE] or [REC FORMAT] setting is changed to a setting that does not support Variable Frame Rate Mode j When the [REC FORMAT] setting is changed to a setting with a different frame rate ≥...
- Page 94 Focus Macro ≥ Register “Focus Macro” to a USER button. You can enable/disable Focus Macro. is displayed on the screen when [ON] is selected. ≥ i.Zoom ≥ Register “i.Zoom” to a USER button. You can enable/disable i.Zoom. Log View Assist When [V-Log L MODE] is selected, you can temporarily display images in REC.709 color space.
-
Page 95: Useful Functions
Recording Useful functions A BARS button B ND FILTER switch C DISP/MODE CHK switch Color Bar Screen BARS button Press the BARS button to output a color bar screen to an external monitor so you can adjust them. -
Page 96: Nd Filter
ND filter Using the ND filter switch, you can switch the built-in optical ND filter setting. (The filter adjusts the amount of light.) ≥ Use this function when recording a bright subject outdoors under a clear sky that causes the screen to look white. -
Page 97: Using Operation Icons
∫ To display the Mode Information Each time you set the DISP/MODE CHK switch from ON to CHK, the mode information display switches in the following order: Normal Mode information display1 # Mode information display2 # Mode information display3 # display Mode information display1: Displays the list of functions assigned to the USER buttons... -
Page 98: Using Of Jog Dial
Recording Using of jog dial A Jog dial Selecting/setting items You can select and set menu items 30), etc. using the jog dial. Rotate the jog dial on the menu screen, etc., to move the cursor. ≥ The selected item will be displayed in yellow. Push the jog dial to set. - Page 99 Using the multi manual function You can select the following functions and adjust their settings using the jog dial. You can also switch between the functions and adjust their settings. (When the recording screen is displayed) On-screen icons Functions Settings GAIN Gain adjustment Adjusts the gain value.
- Page 100 To change the function you adjust Change settings in advance so that you can select more than two functions. ≥ Change settings as follows: Functions Settings to be changed in advance Gain adjustment Switch to Manual Mode. Set the WHITE BAL switch to PRST, and press the AWB VAR adjustment button to set the White Balance mode to [VAR].
-
Page 101: Playback
Playback Motion picture/Still picture playback Set this unit to playback mode. Touch the play mode select icon A. Select the media C you wish to play back. (To set this unit to Motion Picture Playback Mode) Touch the desired recording mode D and ... - Page 102 (To set this unit to Still Picture Playback Mode) Touch the still picture (JPEG) F. Touch the scene or the still picture to be played back. ≥ Next (Previous) page can be displayed by touching Select the playback operation by touching the operation icon.
- Page 103 ∫ Change the thumbnail display While the thumbnail is displayed, the thumbnail display changes in the following order if the zoom lever or the sub zoom lever is operated to side or side. side) side) 20 scenes () 9 scenes () 1 scene () Scene information display * Detailed information of the scene is displayed when playing back motion pictures.
-
Page 104: Motion Picture Compatibility
Rotate the jog dial to adjust the volume. B [VOLUME] Push the jog dial to finish the adjustment ≥ Sound will be heard only during normal motion picture playback. ≥ If pause play is continued for 5 minutes, the screen returns to the thumbnails. ≥... -
Page 105: Motion Picture Playback Using Operation Icon
Motion picture playback using operation icon For details on the basic playback operations, refer to page 101. Playback operation Playback display Operating steps During Playback Touch the LCD monitor and slide from right to left (from left to right) during playback. Skip playback (to the start of a scene) -
Page 106: Useful Functions
Playback Useful functions Creating still picture from motion picture You can save a frame of a recorded motion picture as a still picture. The picture size with which a still picture will be recorded differs depending on the picture size of [REC FORMAT] with which the motion picture was recorded. -
Page 107: Repeat Playback
Repeat Playback Playback of the first scene starts after playback of the last scene finishes. Select the menu. MENU : [VIDEO SETUP] # [REPEAT PLAY] # [ON] indication appears on the full screen views. ≥ All the scenes displayed in the thumbnail will be repeatedly played back. ≥... -
Page 108: Playing Back Scenes Or Still Pictures By Date
Playing back scenes or still pictures by date The scenes or still pictures recorded on the same day can be played back in succession. Touch the date select icon. A Date select icon Touch the playback date. ≥ The scenes or still pictures recorded on the date selected are displayed as thumbnails. Touch the scenes or still picture to be played back. -
Page 109: Editing
Editing Deleting scenes/still pictures Deleted scenes/still pictures cannot be restored, so perform appropriate confirmation of the contents before proceeding with deletion. ≥ Press the THUMBNAIL button to switch this unit to the Playback Mode. ∫ To delete the scene or still picture being played back TC 00:02:30.00 TC 00:02:30.00 TC 00:02:30.00... -
Page 110: Protecting Scenes/Still Pictures
When you stop deleting halfway: Touch [CANCEL] or press MENU button while deleting. ≥ The scenes or still pictures that have already been deleted when the deletion is canceled cannot be restored. To complete editing: Touch [Return] or press MENU button. ≥... -
Page 111: Copying Between Sd Cards
Editing Copying between SD cards Motion pictures or still pictures recorded with this unit can be copied between SD Cards inserted in this unit. ≥ Copying is not possible if the type of the source SD card (SDHC Memory Card/SDXC Memory Card) is different from that of the target SD card. - Page 112 If you will delete the motion pictures or still pictures after copying is complete, be sure to play back the motion pictures or still pictures to check that they have been copied to correctly before deleting. ≥ Depending on the following conditions, the time it takes for copying may be longer. j The number of recorded scenes is large.
-
Page 113: Connecting Headphones, A Remote Control Or An External Monitor
Linking to external devices Connecting Headphones, a Remote Control or an External Monitor Headphones You can connect headphones (commercially-available) to the headphone output jack (3.5 mm (0.14 q) diameter stereo mini jack). A Headphone output jack ≥ Sound is not output from the speaker when headphones are connected. Remote control You can connect a remote control (commercially-available) to either of the CAM REMOTE terminals (FOCUS IRIS or ZOOM S/S). -
Page 114: External Monitor
External monitor You can connect this unit to an external monitor as shown in the figure below. AUDIO VIDEO A HDMI Cable (optional) B BNC Cable (commercially-available) C Audio cable (commercially-available) 3.5 mm (0.14 q) diameter jack to RCA cable D External monitor ≥... -
Page 115: Setting The External Output Resolution
≥ If you connect this unit to the external monitor when this unit is set to Recording Mode, a squealing sound may be output. Before connecting this unit, set it to Playback Mode. * The microphone may pick up the sound from the speakers, producing an abnormal sound. ≥... - Page 116 ≥ When [OUTPUT BITS] 31) is set to [4:2:2(10bit)], following settings are not available: j [OUTPUT SEL] is set to [SDI+AV]. j [RESOLUTION] is set to [DOWN CONV.]. ≥ When [REC FORMAT] or [OUTPUT FORMAT] is set to [4K 2160/24.00p 100M], following settings are not available: j [OUTPUT SEL] is set to [SDI+AV].
- Page 117 Setting Resolution of images output to the external device Picture size/Frame rate [RESOLUTION] HDMI OUT VIDEO OUT SDI OUT terminal in [REC FORMAT] setting terminal terminal FHD (1920k1080)/ [SYSTEM] 1080/59.94i 59.94i, [1080p] 1080/59.94p ― PH 1080/59.94i, [1080i] 1080/59.94i HA 1080/59.94i, [DOWN CONV.] 480/59.94p 480/59.94i...
- Page 118 Setting Resolution of images output to the external device Picture size/Frame rate [RESOLUTION] HDMI OUT VIDEO OUT SDI OUT terminal in [REC FORMAT] setting terminal terminal [SYSTEM] 2160/25.00p 1080/25.00PsF [1080p] 1080/50.00p UHD (3840k2160)/ ― 25.00p [1080i] 1080/50.00i [DOWN CONV.] 576/50.00p 576/50.00i [SYSTEM] 1080/50.00p...
- Page 119 When [OUTPUT BITS] is set to [4:2:2(10bit)] ≥ When [RESOLUTION] is set to [SYSTEM], the resolution of images output to the external device varies depending on the picture size and frame rate in [OUTPUT FORMAT]. (When [SYSTEM FREQ] is set to [59.94Hz]) Resolution of images output to the external Setting device...
- Page 120 Resolution of images output to the external Setting device Picture size/Frame rate [RESOLUTION] HDMI OUT terminal SDI OUT terminal in [OUTPUT FORMAT] setting [SYSTEM] 1080/50.00p FHD (1920k1080)/50.00p [1080p] [1080i] 1080/50.00i [SYSTEM] 1080/50.00i FHD (1920k1080)/50.00i [1080p] 1080/50.00p [1080i] 1080/50.00i [SYSTEM] 1080/25.00p 1080/25.00PsF FHD (1920k1080)/25.00p [1080p]...
-
Page 121: Connecting To A Pc (File Transfer/Nonlinear Editing)
Linking to external devices Connecting to a PC (File transfer/nonlinear editing) When this device and a computer for editing are connected using a USB 3.0 Cable (commercially- available), image data in the SD card can be transferred. ≥ This unit supports USB 3.0. ≥... -
Page 122: Connecting To A Pc
Connecting to a PC DEVICE A USB 3.0 Cable (commercially-available) ≥ Insert the plugs as far as they will go. Connect this unit to the AC adaptor. ≥ Use the AC adaptor to free you from worrying about the battery running down. Turn on the unit. -
Page 123: To Disconnect Usb Cable Safely
∫ To disconnect USB Cable safely (For Windows) Select the icon in task tray displayed on the PC, and then click the on-screen display that lets you eject [AG-DVX200]. ≥ Depending on your PC’s settings, this icon may not be displayed. (For Mac) Drag [CAM_SD] disk icon to the [Trash], and then disconnect the USB Cable. - Page 124 ∫ Folder names for motion picture data recorded in MOV/MP4 format The fourth to eighth characters of the folder name of a recorded MOV/MP4 scene are determined by its picture size, frame rate, motion picture format, recording setting and camera number setting. 1 0 0 R A R H 0 ...
-
Page 125: Copying/Playing Back With An External Media Device
≥ Please read the operating instructions of the external media device for how to use it. Preparing for copying/playing back Refer to the following support site for information about an external media device. http://pro-av.panasonic.net/ (This Site is English only) When the external media device that requires formatting is connected, a message is displayed. - Page 126 ≥ If you are using a bus-powered or portable USB HDD, this unit can supply power to the USB HDD by USB Cable (supplied with USB HDD). Connect the AC adaptor to this unit. ≥ Use the AC adaptor to free you from worrying about the battery running down. Turn on this unit, and press the THUMBNAIL button to switch to Playback Mode.
-
Page 127: Differential Copy
∫ Formatting This is for initializing the external media device. ≥ Please be aware that if a media is formatted then all the data recorded on the media is erased and cannot be recovered. Back up important data on a PC etc. ≥... -
Page 128: Copy Selected Files
Copy selected files Connect this unit to the external media device to prepare for copying. 125) Touch [SELECT COPY]. ≥ You can also access this function by selecting menu items. [ COPY ] # [ SELECT COPY ] Touch the media you want to copy. When copying from the SD card 1 to the external media device. -
Page 129: Playing Back The External Media
Playing back the External Media ≥ Only motion picture/still picture that have been copied by connecting this unit to the external media device can be played back. HOST A USB Cable (supplied with USB HDD) B USB HDD (commercially-available) C USB flash memory (commercially-available) Connect this unit to the external media device to prepare for playback. -
Page 130: Menu
Menu Using the Menu Refer to page for how to set up the Menu. Scene file Settings that are assigned to [SCENE1] in [CUSTOMIZE SCENE] by default are indicated with underlined text. MENU : [SCENE FILE] # desired setting [CUSTOMIZE SCENE] [SCENE1]/[SCENE2]/[SCENE3]/[SCENE4]/[SCENE5]/[SCENE6] You can save the desired image settings to each scene number. -
Page 131: Frame Rate
Default scene number settings [SCENE1] Setting appropriate for standard recording [SCENE2] Setting appropriate for recording considering the characteristic of fluorescent lamps (indoors, etc.) [SCENE3] Setting appropriate for recording with modulation in resolution, color shade, and contrast [SCENE4] Setting appropriate for recording with wider gradation in dark area (dusk, etc.) [SCENE5] Setting appropriate for recording as a cinema with high contrast [SCENE6]... -
Page 132: Synchro Scan
[SYNCHRO SCAN] Sets the initial Synchro Scan setting. ≥ The setting range changes depending on the size and frame rate in [REC FORMAT] or [OUTPUT FORMAT]. 142, 147) Touch [SYNCHRO SCAN]. Touch to adjust settings. Touch [EXIT] to complete the setting. ∫... -
Page 133: Skin Tone Dtl
[DETAIL CORING] Adjusts the detail noise removal level. Touch [DETAIL CORING]. Touch to adjust settings. ≥ You can select a value between 0 and 60. Touch [EXIT] to exit the menu screen. ≥ The default setting that is assigned to [SCENE1] in [CUSTOMIZE SCENE] is “1”. [SKIN TONE DTL] [ON]/[OFF] This makes skin colors appear softer for a more attractive appearance. - Page 134 [KNEE APE LEVEL] This sets the detail level of high luminosity areas (extremely bright areas). Touch [KNEE APE LEVEL]. Touch the desired setting item. [0]/[1]/[2]/[3]/[4]/[5] Touch [EXIT] to exit the menu screen. [RB GAIN CONTROL SETTING] This adjusts the color balance for each position of the WHITE BAL switch. You can also set whether or not to apply the color balance settings to Auto White Balance/Auto Black Balance.
- Page 135 [CHROMA LEVEL] Adjusts color density. Touch [CHROMA LEVEL]. Touch to adjust settings. ≥ You can select a value between s70 and r30. Touch [EXIT] to exit the menu screen. ≥ The default setting that is assigned to [SCENE1] in [CUSTOMIZE SCENE] is “0”. [CHROMA PHASE] Adjusts color balance.
- Page 136 [COLOR CORRECTION SETTING] This function sets color saturation and phase. It applies individual effect on 16 phases in an image. It can be set to individual color hue. R-Mg 90° 112.5° 67.5° YI-R-R Mg-Mg-B 135° 45° YI-YI-R Mg-B-B 157.5° 22.5° ...
-
Page 137: Master Ped
[MASTER PED] Adjustment of black level based on the image is performed. Touch [MASTER PED]. Touch to adjust the black level. ≥ You can select a value between s150 and r150. Touch [EXIT] to exit the menu screen. ≥ The default setting that is assigned to [SCENE1] in [CUSTOMIZE SCENE] is “0”. [GAMMA MODE] Tone or contrast of the image is set in accordance with the recorded scenes. - Page 138 [BLACK GAMMA] This sets the gamma curve of dark areas. Touch [BLACK GAMMA]. Touch to adjust settings. ≥ You can select a value between s8 and r8. ≥ Making adjustments in the – direction compresses dark areas, while making adjustments in the + direction expands them.
- Page 139 [KNEE MASTER SLOPE] This sets the knee inclination when [KNEE MODE] is set to [MANUAL]. Touch [KNEE MASTER SLOPE]. Touch to adjust settings. ≥ You can select a value between 0 and 99. Touch [EXIT] to exit the menu screen. ≥...
- Page 140 [V-Log L MODE] [ON]/[OFF] When this item is set to [ON], V-Log L (12 stops) allows you to record expressive images with greater latitude. ≥ Images recorded in this mode are suitable for color grading. ≥ The following menu items are not available when [V-Log L MODE] is set to [ON]: j [SCENE FILE] 89, 131) j [MASTER PED]...
-
Page 141: System Mode
≥ By default, the system frequency is set to the broadcasting system of the region where this product was purchased. AG-DVX200PJ/PB/PX: This function’s default setting is [59.94Hz]. AG-DVX200EJ/EN/ED: This function’s default setting is [50.00Hz]. ≥ When recording with [REC MODE] set to [AVCHD], you cannot record scenes of different system frequencies into a single SD card. -
Page 142: Rec Format
[REC FORMAT] Switch the picture quality of motion pictures to be recorded with this unit. Depending on the settings of [SYSTEM FREQ] 141) and [REC MODE], the available [REC FORMAT] settings differ. How to read a [REC FORMAT] setting Items that make up a [REC FORMAT] setting represent Size, Vertical resolution, Frame rate, and Bit rate. - Page 143 ≥ Set [OUTPUT BITS] to [4:2:2(8bit)]. ≥ When [MOV] or [MP4] in [REC MODE] is selected System frequency Size Recording format Frame rate Bit rate (VBR) setting (Picture size) [59.94Hz]/ [4K 2160/24.00p 100M] 24.00p Average 100 Mbps [50.00Hz] (4096k2160) [UHD 2160/59.94p 150M] 59.94p Average 150 Mbps [UHD 2160/29.97p 100M]...
- Page 144 Recording System frequency Picture size Frame rate Bit rate (VBR) format setting [PS 1080/50.00p] 50.00p Average 25 Mbps [PH 1080/50.00i] 1920k1080 Average 21 Mbps [HA 1080/50.00i] 50.00i Average 17 Mbps [50.00Hz] [HE 1080/50.00i] 1440k1080 Average 5 Mbps [PM 720/50.00p] 1280k720 50.00p Average 8 Mbps [SA 576/50.00i]...
- Page 145 About recording formats and recording functions The relationship between recording formats and recording functions of this unit are shown below. ≥ “ ± ”: Available; “ s ”: Not available* * “Not available” includes instances where the desired function cannot be used or selected. Recording function Recording Interval...
- Page 146 Recording function Recording Interval Relay Simultaneous Background Dual codec Normal VFR Mode format recording recording recording recording recording 162) l 159 160) 160) 160, 161) [FHD 1080/ ± ± ± ± ± 59.94p 50M] [FHD 1080/ ± ± ± ± ±...
-
Page 147: Output Format
[OUTPUT FORMAT] This changes the picture quality of images to be output to an external device. The available [OUTPUT FORMAT] vary depending on the [SYSTEM FREQ] 141) setting. ≥ Set [OUTPUT BITS] to [4:2:2(10bit)]. [OUTPUT FORMAT] System frequency setting Size (Picture size) Frame rate 59.94Hz/ [4K 2160/24.00p]... - Page 148 [ASPECT CONVERT] This sets the aspect ratio of images to be recorded with a [REC FORMAT] setting of [SA 480/59.94i] or [SA 576/50.00i]. ≥ Set [OUTPUT BITS] to [4:2:2(8bit)]. ≥ Set [REC FORMAT] to [SA 480/59.94i] or [SA 576/50.00i]. 142) [SIDE CROP]: Records images in standard 4:3 mode.
-
Page 149: User Switch
User switch All default settings are indicated with underlined text. MENU : [USER SW] # desired setting [USER1]/[USER2]/[USER3]/[USER4]/ [USER5]/[USER6]/[USER7]/[USER8] Sets the function to assign to the USER buttons. ≥ For the functions of the USER button that can be registered, refer to page 76. ≥... -
Page 150: Switch Setting
Switch setting All default settings are indicated with underlined text. MENU : [SW SETUP] # desired setting [IRIS RING] Sets the rotation direction and iris control of the iris ring. [DOWN OPEN]: Iris will open when it is turned toward B. [UP OPEN]: Iris will open when it is turned toward A. - Page 151 [HIGH GAIN] Sets the gain value for the [H] position of the GAIN switch. Touch [HIGH GAIN]. Touch to adjust settings. ≥ When [GAIN/ISO DISPLAY CHG] 173) is set to [GAIN], you can select [AUTO] or a value between 0dB and 24dB. ≥...
- Page 152 [BLUR AMPLITUDE] [1]/[2]/[3]/[4]/[5] This sets the blur amplitude of the Image Stabilizer during recording. [BLUR FREQUENCY] [1]/[2]/[3] This sets the blur frequency of the Image Stabilizer. [ATW SET] You can assign ATW to the WHITE BAL switch. [OFF]: Does not assign ATW to the WHITE BAL switch. [Ach]: Sets the White Balance mode to ATW when the WHITE BAL switch is set to A.
- Page 153 [WB PRESET] [3200K]/[5600K]/[VAR] Sets which White Balance mode to use when the WHITE BAL switch is set to the PRST position. [WB VAR] Sets the color temperature when the White Balance mode is set to [VAR]. Touch [WB VAR]. Touch to adjust settings.
- Page 154 [PEAKING LEVEL] You can set the peaking strength for Focus Assist. ≥ This function’s default setting is “0”. [FOCUS RING DRIVE] [SPEED]/[COARSE]/[FINE] This sets the way you adjust focus with the focus ring. [FOCUS MACRO] [ON]/[OFF] This enables/disables the Focus Macro function. ≥...
- Page 155 [AF SENSITIVITY] You can adjust the tracking sensitivity of Auto Focus. ≥ This function’s default setting is “5”. [AF AREA WIDTH] You can adjust the effective area width for Auto Focus according to the size of the subject. [WFM] [ON]/[OFF] This enables/disables the Wave Form Monitor function.
-
Page 156: Bars Type
[BARS TYPE] You can switch the type of color bars to be displayed when you press the BARS button. [TYPE 1] [TYPE 2] [TYPE 3] ≥ When the default setting for [SYSTEM FREQ] is [59.94Hz]: This function’s default setting is [TYPE 1]. When the default setting for [SYSTEM FREQ] is [50.00Hz]: This function’s default setting is [TYPE 2]. -
Page 157: Auto Switch Setting
[i.Zoom] ≥ Set [REC FORMAT] or [OUTPUT FORMAT] to a setting with a picture size of 1920k1080 or below. 142, 147) [ON]/[OFF] You can zoom in while maintaining the beauty of high-definition picture quality up to a magnification of 20k. Auto switch setting All default settings are indicated with underlined text. -
Page 158: Auto Slow Shtr
[AUTO SHUTTER LIMIT] [1/100]/[1/120]* /[1/125]* /[1/250]/[OFF] This option is not displayed when [SYSTEM FREQ] is set to [50.00Hz]. This option is not displayed when [SYSTEM FREQ] is set to [59.94Hz]. This sets the upper limit on the shutter speed for Auto Shutter Mode. [AUTO SLOW SHTR] [ON]/[OFF] You can record bright pictures even in dark places by slowing the shutter speed. -
Page 159: Recording Setup
Recording Setup All default settings are indicated with underlined text. MENU : [RECORD SETUP] # desired setting [MEDIA SELECT] ≥ Set [OUTPUT BITS] to [4:2:2(8bit)]. [SD CARD 1] and [SD CARD 2] can be selected separately to record motion pictures or still pictures. -
Page 160: Simultaneous Recording
∫ Simultaneous recording Same motion picture can be recorded on two SD cards. is displayed beside the display of the SD card selected as the recording destination of ≥ SIMUL motion pictures in [MEDIA SELECT] 32). ≥ If you set the recording destination of motion pictures to [SD CARD 1] in [MEDIA SELECT], they will also be recorded to [SD CARD 2] simultaneously. - Page 161 ≥ [2 SLOTS FUNC.] is not available when [OUTPUT BITS] is set to [4:2:2(10bit)]. (Relay recording) ≥ Destination to record still pictures will be switched to other SD card after performing the relay recording. In addition, a message about the remaining card capacity will be displayed. Replace the SD card that ran out of space or set [2 SLOTS FUNC.] to [OFF].
-
Page 162: Interval Rec
∫ [REC FORMAT] settings that support main recording of dual codec recording (When [DUAL CODEC REC] is set to [FHD 50Mbps]) Recording mode System frequency setting Recording format UHD 2160/29.97p 100M, [59.94Hz] UHD 2160/23.98p 100M MOV, MP4 [50.00Hz] UHD 2160/25.00p 100M (When [DUAL CODEC REC] is set to [FHD 8Mbps]) Recording mode System frequency setting... - Page 163 Setup time Setup example Recording time Recorded time (recording interval) Sunset 2 min Blooming 30 s 12 s ≥ “h” is an abbreviation for hour, “min” for minute and “s” for second. ≥ These times are approximations. ≥ Maximum recordable time is 168 hours. ≥...
-
Page 164: Time Stamp
[INFRARED REC] [ON]/[OFF] Selecting [ON] enables Infrared Recording Mode, allowing you to record images in the dark. [FOCUS TRANSITION] ≥ Switch to Manual Focus. [SET][OFF] You can register a focus position to Focus Transition. [FOCUS TRANSITION TIME] [DIRECT]/[2-15 SEC.]/[20 SEC.]/[30 SEC.]/[45 SEC.]/[60 SEC.]/[90 SEC.] You can set the length of time in which the focus will shift during Focus Transition. - Page 165 ≥ In the following cases, even when [TIME STAMP] is set to [ON], the date and time of recording are not displayed: j When [OUTPUT BITS] is set to [4:2:2(10bit)] j When [REC FORMAT] is set to [SA 480/59.94i] or [SA 576/50.00i] 142) j When [2 SLOTS FUNC.] is set to [DUAL CODEC] 159)
-
Page 166: Audio Setup
Audio Setup All default settings are indicated with underlined text. MENU : [AUDIO SETUP] # desired setting [AUDIO LOW CUT CH1] [ON]/[OFF] Reduces the level of low-pitched sound for audio channel 1. ≥ You may not see the full effect depending on the recording conditions. [AUDIO LOW CUT CH2] [ON]/[OFF] Reduces the level of low-pitched sound for audio channel 2. -
Page 167: Output Setup
[INPUT1 LINE LEVEL] [+4dBu]/[0dBu] Sets the input level of the audio equipment connected to AUDIO INPUT1 terminal (XLR 3 pin). [INPUT2 LINE LEVEL] [+4dBu]/[0dBu] Sets the input level of the audio equipment connected to AUDIO INPUT2 terminal (XLR 3 pin). [INPUT1 MIC LEVEL] [-40 dB]/[-50 dB]/[-60 dB] Sets the input level of the external microphone connected to AUDIO INPUT1 terminal (XLR 3 pin). - Page 168 [SDI REMOTE] [ON]/[OFF] This enables/disables a function that controls recording performed with an external device connected to the SDI OUT terminal. ≥ When [HDMI TC OUTPUT] is set to [ON], you can also control an HDMI device. 170) ≥ It is not possible to control recording performed with an external device connected to the SDI OUT terminal in the following cases: j When [REC FORMAT] is set to [SA 480/59.94i] or [SA 576/50.00i] 142)
- Page 169 [DOWN CONV.] This function allows you to select how to display images with a 16:9 aspect ratio on an external monitor with a 4:3 aspect ratio. ≥ Set [OUTPUT BITS] to [4:2:2(8bit)]. ≥ Set [RESOLUTION] to [DOWN CONV.]. 115) [SIDE CROP]: Outputs images so that they are fit to the height of the external monitor screen.
-
Page 170: Test Tone
This sets the setup level of 480i image signals. ≥ Set [SYSTEM FREQ] to [59.94Hz]. 141, 178) [0%]/[7.5%A] ≥ AG-DVX200PJ/PB: This function’s default setting is [7.5%A]. AG-DVX200EJ/EN/ED/PX: This function’s default setting is [0%]. [LCD/EVF OUTPUT] [AUTO]/[LCD]/[EVF] This sets how to turn on/off the LCD monitor and viewfinder. -
Page 171: Display Setting
Display setting Different menu items are displayed depending on whether this unit is in Recording Mode or Playback Mode. All default settings are indicated with underlined text. MENU : [DISP SETUP] # desired setting [ZEBRA DETECT 1] Selects the brightness level of the left-leaning zebra patterns on the screen. Touch [ZEBRA DETECT 1]. -
Page 172: Guide Lines
[GUIDE LINES] /[OFF] You can check if the image is level while recording motion pictures and still pictures. The function can also be used to estimate the balance of the composition. ≥ The guidelines do not appear on the images actually recorded. ≥... -
Page 173: Date Format
It is possible to change the date and time display mode. [DATE FORMAT] [Y/M/D]/[M/D/Y]/[D/M/Y] It is possible to change the date format. ≥ AG-DVX200PJ/PB: This function’s default setting is [M/D/Y]. AG-DVX200EJ/EN/ED: This function’s default setting is [D/M/Y]. AG-DVX200PX: This function’s default setting is [Y/M/D]. [LEVEL GAUGE] [ON]/[OFF] This function displays the horizontal/vertical tilt of the unit with the electronic level. -
Page 174: Lens Status
[HISTOGRAM] [ON]/[OFF] A graph with brightness as horizontal axis and number of pixels at that brightness as vertical axis is displayed. It is possible to determine the exposure of the whole image by looking at the distribution in the graph. [AUDIO LEVEL METER] ≥... - Page 175 [LCD SET] [COLOR]/[BRIGHTNESS]/[CONTRAST] It adjusts brightness and color density on the LCD monitor. ≥ The default settings are as follows: j [COLOR]: “0” j [BRIGHTNESS]: “0” j [CONTRAST]: “0” [EVF SETTING] [COLOR]/[BRIGHTNESS]/[CONTRAST] Adjusts the brightness and color intensity of the viewfinder. ≥...
-
Page 176: Other Functions
[EVF/LCD DETAIL] [ON]/[OFF] Setting this item to [ON] helps you achieve focus easier by emphasizing the outlines of an image displayed on the LCD monitor and viewfinder. [EVF/LCD PEAK LEVEL] Adjusts the emphasis strength for [EVF/LCD DETAIL]. ≥ This function’s default setting is “0”. [EVF/LCD PEAK FREQ.] [HIGH]/[LOW] Sets the peaking frequency for [EVF/LCD DETAIL]. -
Page 177: Rec Lamp
[REC LAMP] [FRONT]/[REAR]/[BOTH]/[OFF] The recording lamp lights up during recording. When this is set to [OFF], it does not light during recording. [CLOCK SET] Set date and time. [TIME ZONE] Set the time difference from Greenwich Mean Time. [ALERT SOUND] [OFF]/ (Volume low)/ (Volume high) - Page 178 [SYSTEM FREQ] Set the system frequency of this unit. 141) [USB MODE SELECT] The unit’s USB terminal to which a USB Cable will be connected can be switched. Switch the terminal according to the shape of the USB Cable’s plug you intend to connect to the unit.
-
Page 179: Maintenance
Maintenance MENU : [MAINTENANCE] # desired setting [VERSION] The version of the firmware of this unit is displayed. [UPDATE] The firmware of this unit is updated. 193) [HOUR METER] This displays the operation time of this unit, how many times the zoom lever has been operated, and how many times the zoom motor has worked. -
Page 180: Picture Setup
Picture Setup ≥ Press the THUMBNAIL button to switch this unit to the Playback Mode. ≥ Touch the play mode select icon, and set this unit to Still Picture Playback Mode. 101) MENU : [PICT. SETUP] # desired setting [SCENE PROTECT] Still pictures can be protected so that they are not deleted by mistake. -
Page 181: Display
Display Indications ∫ Recording indications Example: Display in English I- REC TC 00:00:00.00 R 1h20m H.SENS R 1h20m 150M D 5X 60:59.94p FBC ND1/64 SHUTTER 1/100 NOV 15 2015 15:30:00 AF50 OPEN Relay recording 159) RELAY Simultaneous recording SIMUL TC 00:00:00.00/TC 00:00:00:00 160) - Page 182 Center Marker 172) AGC, Gain value ISO AUTO, 0dB, ISO500 Recording format 142) SHUTTER Multi Manual Function 1/100, 5.0d Shutter speed Output format 147) 1/100.0 Synchro Scan ALL-I, 150M, 100M, 50M Bit rate 142) D 2X, D 5X, Digital Zoom D 10X Recording mode 141)
- Page 183 Zoom magnification Time Stamp recording in iZ99 1.00 i.Zoom magnification progress 164) Fast Zoom 2015 NOV 15 15:30:00 Card recording possible status NOV 15 2015 15:30:00 (White) (still picture) 15 NOV 2015 15:30:00 Time Stamp 164) Number of recording pixels for still pictures NOV 15 2015 15:30:00 34, 106) 15 11 2015 15:30:00...
- Page 184 ∫ Playback indications ∫ Indication of connection to the external media device Example: Display in English TC 00:00:00.00 Playback of the external media No.0010 150M 59.94p device 129) ∫ Indication of connection to other devices Accessing the card 123) ICONS 15:30 NOV 15 2015 ∫...
-
Page 185: Messages
Display Messages Major confirmation/error messages to be indicated on the screen in text. During recording/playback Display Description Behavior and cause CHECK CARD. The SD card is not supported by this ≥ Check the SD card. unit. THIS CARD CANNOT This is displayed when the SD card ≥... - Page 186 Display Description Behavior and cause ERROR ≥ Check the SD card. This is displayed when the - UNABLE TO REPAIR management information cannot be DATA. recovered. CANNOT USE SD CARD ≥ The operation will stop. This is displayed when the IN VIDEO MODE, ≥...
- Page 187 During thumbnail and menu operation Display Description Behavior and cause NO DATA. There are no scenes in the ≥ Select a recording mode option currently selected recording or recording format option mode option and recording containing recorded scenes. format option. CANNOT REC IN THIS Recording cannot be ≥...
- Page 188 During USB Device mode Display Description Behavior and cause DISCONNECT USB An error has occurred while ≥ Check the SD card. CABLE. accessing the SD card, or the ≥ Check to see if the OS is OS is not supported. supported.
-
Page 189: Others
Others Troubleshooting ∫ It is not a malfunction in following cases The lens, the viewfinder or ≥ This is due to condensation. This is not a malfunction. Please LCD monitor fog up. refer to page 2. A clicking sound is heard ≥... - Page 190 Indication Problem Check points Function display ≥ [CARD & BATTERY] or [OTHER DISPLAY] of the (Remaining Display, [DISP SETUP] is [OFF]. 174) Counter Display, etc.) is ≥ Press the COUNTER button to switch the counter display. not displayed. Recording Problem Check points The unit arbitrarily stops ≥...
- Page 191 Playback Problem Check points Scenes/still pictures ≥ Any scenes/still pictures where the thumbnails are displayed cannot be played back. cannot be played back. ≥ In most cases, is displayed for the following scenes: j Scenes recorded with another device or edited with editing software j Scenes with damaged data Scenes/still pictures...
- Page 192 With a PC Problem Check points When connected by the ≥ After re-inserting the SD card into the unit, reconnect the USB USB Cable, this unit is not Cable. detected by the PC. ≥ Select another USB terminal on the PC. ≥...
-
Page 193: About Recovery
PASS. Other benefits are offered to registered users. For details, refer to the website (http://panasonic.biz/sav/pass_e) of PASS (P2 Asset Support System). Check the version using the camera and apply the update. Check the version of the camera in the main menu... -
Page 194: Cautions For Use
Others Cautions for use When you use the unit in a sandy or dusty About this unit place such as a beach, do not let sand or fine dust get into the body and terminals of the unit. The unit and the SD card become warm Also, keep the unit away from sea water. -
Page 195: About The Battery
≥ The battery should be stored in the vinyl bag Do not lift up this unit by the handle with the so metal does not come into contact with the tripod still attached terminals. ≥ When the tripod is attached, its weight will ≥... - Page 196 About the AC adaptor/battery About the SD card charger When disposing of or giving away the SD card, note that: ≥ If the temperature of the battery is extremely ≥ Formatting and deletion of this unit or high or extremely low, charging may take time computer only changes the file management or the battery may not be charged.
- Page 197 LCD monitor/viewfinder ≥ When the LCD screen is dirty or condensation has occurred, please wipe it using a soft cloth such as a lens cloth. ≥ Do not touch the LCD monitor with your finger nails, or rub or press with strong force. ≥...
-
Page 198: About Copyright
≥ “AVCHD”, “AVCHD Progressive” and the See http://www.mpegla.com “AVCHD Progressive” logo are trademarks of ≥ Separate license contracts must be obtained Panasonic Corporation and Sony from MPEG LA where SD Memory Cards Corporation. containing information recorded with this ≥ Manufactured under license from Dolby product are to be distributed to end users for Laboratories. -
Page 199: Recording Functions That Cannot Be Used Simultaneously
Others Recording functions that cannot be used simultaneously Due to the specifications of this unit, depending on the recording function being used, it is not possible to use or select certain other recording functions. ≥ “ ± ”: Available; “ s ”: Not available* * “Not available”... -
Page 200: Recording Modes/Approximate Recordable Time
Others Recording modes/approximate recordable time ≥ SD cards are only mentioned with their main memory size. The stated times are the approximate recordable times for continuous recording. ≥ “h” is an abbreviation for hour, “min” for minute and “s” for second. ≥... - Page 201 SD card System frequency Recording format setting 141) 4 GB 16 GB 64 GB [UHD 2160/50.00p 150M] 55 min [UHD 2160/25.00p 100M] 20 min 1 h 20 min [FHD 1080/50.00p 10 min 40 min [FHD 1080/50.00p 100M] 20 min 1 h 20 min [50.00Hz] [FHD 1080/50.00p 50M] 10 min...
-
Page 202: Approximate Number Of Recordable Pictures
Others Approximate number of recordable pictures ≥ SD cards are only mentioned with their main memory size. The stated number is the approximate number of recordable pictures. Memory Card Picture size Aspect ratio 4 GB 16 GB 64 GB 4096k2160 17:9 2900 11500... - Page 203 Panasonic Corporation Web site: http://www.panasonic.com...