Table of Contents
Advertisement
Quick Links
Advertisement
Table of Contents

Summary of Contents for Ad Notam REFLEXION
- Page 1 HIDDEN TECHNOLOGY – TECHNOLOGY BECOMES INVISIBLE. MIRROR TV OWNER'S MANUAL REFLEXION – HERITAGE – ELEGANCE For On Wall Installation Register your product and get support at: www.ad-notam.com www.ad-notam.com Subject to modification 30-Apr. 2015...
-
Page 2: Table Of Contents
INTRODUCTION Thank you for choosing ad notam. You acquired a high-quality product; ad notam means supreme technology and design. CONTENT SAFETY WARNINGS CLEANING AND PRODUCT CARE ENVIRONMENTAL AD NOTAM CONFIGURATOR PRODUCT DELIVERY MOUNTING YOUR AD NOTAM ON WALL MOUNTING - WALL PREPARATION... -
Page 3: Safety
SAFETY To prevent damage to your ad notam product or injury to yourself or to others, read the safety instruction in their entirety before installing and operating the product. Keep these safety instructions where all those who use the product will read them. -
Page 4: Warnings
WET ENVIRONEMT. For installations in wet-rooms specific installation guidelines apply, which are to be HANDLING. ad notam products are made of heavy components. Two or more people may be needed to seen in the context of placing a power adaptor outside transport large goods. -
Page 5: Cleaning And Product Care
Static images include onscreen ENVIRONMENTAL ad notam aims to design, produce, deliver and dispose eco-friendly products. Our environmental policy applies to the entire product lifecycle and business activities. LOW STANDBY POWER... -
Page 6: Ad Notam Configurator
AD NOTAM CONFIGURATOR Your own unique product, made by ad notam, has been designed with ad notam online configurator. Your configuration is a valuable reference. Keep a hardcopy of your configuration with this owner manual. Shop Drawing - Front View... -
Page 7: Product Delivery
You purchased a high-end device. Verify wooden crate and gift box integrity before unloading the product. If damage is noticed write all the information on the bill of lading and hand it to the driver of the forwarder. Pictures will be required for the claim process. You can consult your ad notam reseller for additional information. GIFTBOX... -
Page 8: Mounting Your Ad Notam
(eg. 10 cm wooden bar) underneath the front national regulations and standards. ENVIRONMENT ad notam products include heavy, bulky and delicate items. To prevent damages to your ad notam product or injury to yourself or to others, prepare the installation environment properly. CAUTIONS ... -
Page 9: On Wall Mounting - Wall Preparation
4 (Legend - Back View). To determine the proper position of your ad notam on the wall the ad notam configuration provides an ideal Wall View shop drawing page 5 (Wall View) shop drawing preparation. - Page 10 Art. Description provides the description of the selected items necessary for your wall preparation. Reference point. Identify your ad notam position on the wall and identify the bottom left corner of the crystal. Mark this point with the pencil.
- Page 11 .) .) Art. Description - FIXATION MAGNET Verify x-position and y-position. These coordinates Not found? Move to the next step correspond to the FIXATION MAGNET middle screw drilling point. Start from the reference point moving upward on the vertical axe and mark the point (y-position). Plot an horizontal line verifying horizontal alignment using the level. Measure and mark the drilling point on this line according (x-position).
- Page 12 STEP 2 - WALL PREPARATION The following paragraphs explain how to mount the different elements on the wall. ad notam provides different mounting combinations. Verify your own shop drawing page 6 (Wall View Legend) to identify your wall mounting option. The column Art.
- Page 13 DFU casing. HOLDING ANGLE Lift your ad notam monitor and place it on the lower HOLDING Not found? Move to the next step ANGLES so that the injection nuts on the bottom are aligned with the holes in the HOLDING ANGLE. The holes in the upper HOLDING ANGLES should be aligned with the screw anchors.
-
Page 14: On Wall Mounting - Monitor
MOUNTING YOUR AD NOTAM ON WALL MOUNTING MONITOR Your own ad notam has been pre-assembled according to your configuration instruction. The product back view including pre- shop drawing Page 3 (Back View) assembled items is visible on your you can find additional information on the visible items on page 4 (Legend - Back View). - Page 15 STEP 3 - MONITOR The following paragraphs explain how to mount and connect your ad notam monitor. ad notam provides different mounting combinations. Verify your own shop drawing page 6 (Wall View Legend) shop drawing page 4 (Back View Legend) identify your monitor mounting option.
- Page 16 DFU casing. EXPERT TIPS. The ad notam monitor can now be affixed with the connection plugs face up to the rear side of the crystal surface. Clean the crystal rear side and the monitor properly before proceeding.
-
Page 17: On Wall Mounting - Final Assembly
MOUNTING YOUR AD NOTAM ON WALL MOUNTING FINAL ASSEMBLY Your own ad notam has been pre-assembled according to your configuration instruction. The product back view including pre- shop drawing Page 3 (Back View) assembled items is visible on your you can find additional information on the visible items on page 4 (Legend - Back View). - Page 18 STEP 4 - FINAL ASSEMBLY The following slides explain how to identify, mount and secure your ad notam to the wall. ad notam provides different mounting combinations. Verify your own shop drawing page 6 (Wall View Legend) shop drawing page 4 (Back View Legend) to identify your monitor mounting option.
- Page 19 EXPERT TIPS. Ensure that the in-built Monitor IR receiver is fully exposed to incoming IR signal verifying its alignment with the transparent IR window. This misalignment might result in disability to control your ad notam. Art. Description. GMS (Glass on Monitor Mounting)
-
Page 20: Highlights Suggested Settings
HIGHLIGHTS - SUGGESTED SETTINGS INSTANT ON USB & MEDIA PLAYER Your ad notam screen will power ON/OFF within 1 second. Watch your photos, listen to your music, play your movies All screen settings are done via the on screen display (OSD) and read your documents. -
Page 21: Connect Your Product
CONNECT YOUR PRODUCT POWER SCREEN EXTERNAL POWER ADAPTER (Optional) LUSTER TERMINAL AND OPEN ENDED POWER CORD The product should only be operated using the provided power adapter and its power cord. Insert the DC Plug of This type of electrical connections are to be performed the external power adapter into the POWER INPUT socket by a skilled technician only following local electrical and of your product. -
Page 22: Audio-Video
CONNECT YOUR PRODUCT EXPERT TIPS. Disconnect the mains power before connecting any of the inputs below. AUDIO/ VIDEO HDMI 1/2 /3 VGA IN (not available for all models) HDMI has the best picture and sound quality. VGA is an analog video connection for PC´s HDMI combines video and audio signals for and laptops. -
Page 23: External Control
CONNECT YOUR PRODUCT EXPERT TIPS. Disconnect the mains power before connecting any of the inputs below. EXTERNAL CONTROL IR IN IR OUT2 (LED) An external IR receiver might be needed in An external IR emitter might be needed in some applications. -
Page 24: Use Your Screen
USE YOUR SCREEN SWITCH ON/OFF Make sure you plugged in the mains power on the back of your product or to the external power adapter before trying to switch ON. Make sure your remote is equipped with batteries and that its LED indicator is lighting once a button is pressed. -
Page 25: On Screen Display (Osd Menu)
ON SCREEN DISPLAY (OSD MENU) ON SCREEN DISPLAY (OSD) MENU OSD NAVIGATION All screen settings are done via the on screen display (OSD) The up, down, left right keys are used in order to navigate menu. To access this menu please use the setup key. - Page 26 ON SCREEN DISPLAY (OSD MENU) SCREEN AUDIO SETTINGS SCREEN SETUP SETTINGS SOUND MODE SAVE CURRENT SETTINGS TO USB Define the sound mode according to your preferences, Transfer your individual device settings to a USB stick. choose from standard, music, movie, sports or user. Connect a USB stick to the corresponding input of the In user mode the settings for bass and treble may be adjusted manually.
-
Page 27: Service Settings
This special service password chosen time. If signal loss timer is set OFF the search will will be provided by ad notam to an authorized technician continue indefinitely or until a signal is present again. only upon a written request. - Page 28 SERVICE SETTINGS BAUD RATE Set the screen's RS232 communication baud rate to your preferred value, choose from 9600, 19200 or38400. By default the baud rate is 38400. CHANGE PASSWORD Use this feature to change the password allowing access to the SERVICE SETTING menu pages. DC OUTPUT Use this feature to feed DC power to SINGLE external playout devices (DTB, IPTV, etc.).
-
Page 29: Using Your Waterproof Remote Control
Select audio mode and audio track PRESET Scene 1 on the Dimmer RCU functions used for ad notam Set Top Box solutions functions used for ad notam lighting solutions BATTERIES Please replace the batteries if your remote signal is weak. Make sure that battery is inserted with the right +/– polarity marking. -
Page 30: How To Program
Place the WATERPROOF IR remote control (learning) and RESET THE REMOTE your external device remote control (teaching) head to In order to reset all keys to ad notam factory default head, approximately 30cm apart, as shown below: IR commands please follow the next steps:... -
Page 31: Using Your Slimline Remote Control
Dimmer on / off PRESET Scene 1 on the Dimmer RCU functions used for ad notam Set Top Box solutions functions used for ad notam lighting solutions BATTERIES Please replace the batteries if your remote signal is weak. Make sure that battery is inserted with the right +/– polarity marking. -
Page 32: Using Your Touchpad
(+) and ( ) keys. The mute key will toggle between mute mode (no sound) and un-mute mode (restores last volume level). SET-TOP-BOX CHANNEL UP/DOWN Once your product is equipped with ad notam' s set-top- box (Optional) use the up and down keys to control the channels. -
Page 33: Adjusting Your Digital Clock
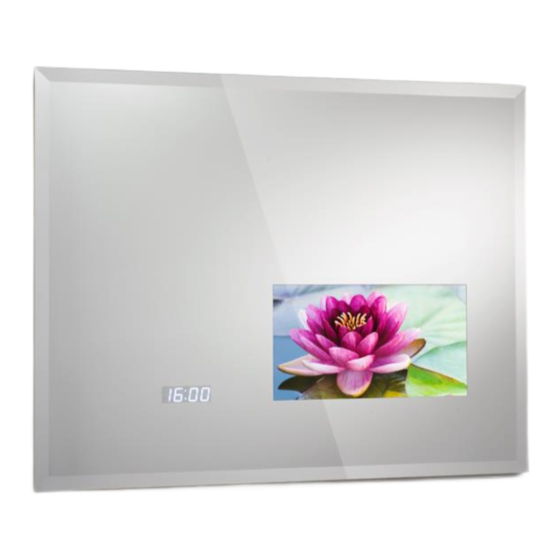
(OPTIONAL) The digital clock features bright white LED digit design, and can be combined with any of the ad notam glass and mirror options for a cool complete glowing look. A backup battery provides power to the digital clock when the primary source of power is interrupted or unavailable. -
Page 34: Software
SOFTWARE STEP 1 Check your Firmware Version in the OSD menu in Setup Settings/Firmware Version. The screen Model and Firmware Version Info indicate the name of the device and the version of the installed Firmware. STEP 2 Download the current Firmware Version for your screen from our website at: www.ad-notam.com STEP 3... -
Page 35: Copyrights, Licences & Certificates
COPYRIGHTS, LICENCES TROUBLESHOOTING & CERTIFICATES To solve any ad notam product related problem, you can consult our online support. You can select your language and enter your product model number. Go to www.ad-notam.com SERVICE & SUPPORT ad notam ® , MIRROR IMAGE ®... - Page 36 Specifications of the ad notam products are subject to unannounced changes. This manual may thus not reflect the current technical status of ad notam's product.
Need help?
Do you have a question about the REFLEXION and is the answer not in the manual?
Questions and answers