Advertisement
Quick Links
Advertisement

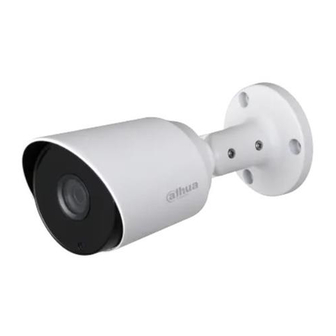
Summary of Contents for Dahua HAC-HFW Series
- Page 1 HDCVI IR Mini Fixed Camera User’s Manual Version 1.0.0...
-
Page 2: Table Of Contents
Table of Contents General Introduction ........................1 Overview ........................1 Features ......................... 1 Device Framework ........................2 Installation............................ 5... - Page 3 Welcome Thank you for purchasing our HDCVI camera! This user’s manual is designed to be a reference tool for your system. Please read the following safeguard and warnings carefully before you use this series product! Please keep this user’s manual well for future reference!
- Page 4 Important Safeguards and Warnings 1.Electrical safety All installation and operation here should conform to your local electrical safety codes. The power shall conform to the requirement in the SELV (Safety Extra Low Voltage) and the Limited power source is rated 12V DC in the IEC60950-1. We assume no liability or responsibility for all the fires or electrical shock caused by improper handling or installation.
- Page 5 Please shut down the device and then unplug the power cable before you begin daily maintenance work. Use the dry soft cloth to clean the device. If there is too much dust, please use the water to dilute the mild detergent first and then use it to clean the device. Finally use the dry cloth to clean the device. Please put the dustproof cap to protect the CMOS component when you do not use the camera.
- Page 6 Applicable model This manual can be applied to the following model: HAC-HFW XXXXR HAC-HFW XXXXS HAC-HFW XXXXRM...
-
Page 7: General Introduction
1 General Introduction 1.1 Overview This series HDCVI camera conforms to the HDCVI standard. It supports video signal high- speed long distance transmission without any delay. It can be controlled by the DVR conforming to the HDCVI. 1.2 Features High-performance CMOS image sensor, megapixel definition. -
Page 8: Device Framework
2 Device Framework Please refer to the following figures for dimension information. The unit is mm. HAC-HFWXXXXR Figure 2-1 Figure 2-2 HAC-HFWXXXXS... - Page 9 Figure 2-3 Figure 2-4 HAC-HFWXXXXRM...
- Page 10 Figure 2-5 Figure 2-6 Figure 2-7 Figure 2-8...
-
Page 11: Installation
3 Installation Important Before the installation, please make sure the installation surface can sustain at least 3X weight of the bracket and the camera. HAC-HFWXXXXR Figure 3-1 Step 1 Install the camera bracket. Please install the expansion bolt if you want to install in the cement wall (Please make sure the installation holes of the expansion bolts are the same with the bracket.) Then you can install the bracket. - Page 12 Figure 3-2 HAC-HFWXXXXS Step 1 Dig three holes in the installation surface of the wall or the ceiling. Insert three expansion bolts to the three holes and then lock firmly. See figure 3-3.
-
Page 13: Figure
Figure 3-3 Step 2 First prepare the cable according to the cable. Line up the three screw holes at the bottom of the bracket to the three installation holes in the wall or the ceiling, and then insert three screws to the three holes of the chassis of the bracket and fix them firmly. -
Page 14: Figure
Figure 3-4 HAC-HFWXXXXRM Figure 3-5 Step 1 Please install the expansion bolt if you want to install in the cement wall (Please make sure the installation holes of the expansion bolts are the same with the bracket.) Then you can install the bracket. -
Page 15: Figure
Figure 3-6 Step 3 Connect the video output port of the device cable to the terminal encode devices, and connect the power port of the device cable to the power. Note This manual is for reference only. Slight difference may be found in the user interface.


Need help?
Do you have a question about the HAC-HFW Series and is the answer not in the manual?
Questions and answers