Table of Contents
Advertisement
Quick Links
Procussion ............................................................................................................................... 6
Basic Pad Setup ...................................................................................................................... 7
Quick Setup for MIDI Keyboard ......................................................................................... 8
Keyboard Setup ..................................................................................................................... 9
Quick Setup for MIDI Drum Pads .................................................................................... 10
Live Performance Setup ...................................................................................................... 11
Electronic Drum Kit Setup ................................................................................................. 12
Overview of Outputs .......................................................................................................... 13
Controls ................................................................................................................................. 17
Selecting Kits ........................................................................................................................ 18
Selecting MIDI Channels, Volume and Pan .................................................................... 18
Multi-Timbral Operation .................................................................................................... 19
Master Menu Functions ..................................................................................................... 20
Master Tune .......................................................................................................................... 20
Transpose .............................................................................................................................. 21
Submix Outputs ................................................................................................................... 21
MIDI Modes ......................................................................................................................... 22
Global Velocity Curve ......................................................................................................... 22
Global Trigger Tempo ......................................................................................................... 23
Zone Maps ............................................................................................................................ 23
User Zone Maps 1 + 2 ......................................................................................................... 24
Drum Replacement with the User Zone Maps ................................................................ 24
Procussion Factory Zone Assignment Chart ................................................................... 25
Envelope Mode .................................................................................................................... 26
MIDI Enable ......................................................................................................................... 26
Program Change .................................................................................................................. 26
MIDI Mode Change ............................................................................................................. 27
MIDI Controller Assign ...................................................................................................... 27
MIDI Footswitch Assign ..................................................................................................... 28
MIDI Program -> Kit ........................................................................................................... 28
Auto Select ............................................................................................................................ 29
Remote Edit .......................................................................................................................... 29
Send MIDI Data ................................................................................................................... 30
Viewing Angle ..................................................................................................................... 30
Demo Sequence .................................................................................................................... 31
About Procussion ................................................................................................................ 32
Modulation ........................................................................................................................... 36
Procussion Modulation Sources ........................................................................................ 37
Envelope Generators ........................................................................................................... 38
Low Frequency Oscillators ................................................................................................. 39
CONTENTS
5
7
15
33
1
Advertisement
Table of Contents

Summary of Contents for EMU procussion
-
Page 1: Table Of Contents
Zone Maps ..........................23 User Zone Maps 1 + 2 ......................24 Drum Replacement with the User Zone Maps ..............24 Procussion Factory Zone Assignment Chart ..............25 Envelope Mode ........................26 MIDI Enable ......................... 26 Program Change ........................26 MIDI Mode Change ...................... -
Page 2: Contents
MIDI Realtime Controls ...................... 44 Stereo Mix Outputs ......................46 EDIT MENU Enabling the Edit Menu ...................... 49 Procussion Block Diagram ....................50 Kit and Zone Programming Functions Kit Name and Keyboard Character Charts ..............51 Stack Select ..........................52 Key Range .......................... - Page 3 Hi-Hat Investigation ......................81 Programming Tips and Ideas .................... 82 Procussion Synthesis ......................83 Spatial Convolution ......................85 Using Procussion with a Sequencer .................. 86 More Advanced Sequencing ....................86 REFERENCE SECTION Factory Kit Listing ....................... 90 Standard Kit Layout ......................91 Factory Stack Listing ......................
-
Page 4: Procussion Operation Manual
Procussion operation manual... -
Page 5: Introduction
Emulator III sound library and stored on ROM (Read Only Memory) for instant access. But this is only the beginning. Procussion gives you the ability to literally take these sounds apart and re-assemble them into an almost limitless... -
Page 6: Procussion
The Kit is a complete set of all program parameters for a set of up to 24 Procussion drum Stacks. There are 128 kit locations in the Procussion. Kits 0-63 are unalterable factory kits; Kits 64-127 are user kits which can be changed. -
Page 7: Connection Instructions
System This diagram shows a typical equipment setup for the Procussion. MIDI In - Procussion is controlled by MIDI messages received at the MIDI In connector. Connect the MIDI In of the Procussion to the MIDI Out connector of a MIDI controller such as a MIDI keyboard, MIDI Drum Pads or MIDI sequencer. - Page 8 Press Enter again to stop the demo. PROCUSSION SETUP The Zone Map function re-maps every kit in Procussion to fit your MIDI keyboard. This is much easier than having to modify each individual kit. 1) Press the Master button on Procussion.
-
Page 9: Keyboard Setup
Tape In Home Stereo System MIDI In - Procussion is controlled by MIDI messages received at the MIDI In connector. Any MIDI controller such as a MIDI keyboard, MIDI drum pads or a computer can be connected. MIDI Out - The MIDI Out jack is normally used to transmit program data to a computer or other device. - Page 10 Procussion flashes as the pads are played. If not, check the MIDI connection. 2) Set Procussion to Kit 000, “Ampitheater” (or any of the kits marked with an asterisk in the kit listing). 3) Assign each pad of your MIDI drum pad controller to a MIDI note number using the Standard Factory Kit Layout on page 91.
-
Page 11: Live Performance Setup
MIDI chain. MIDI Thru transmits an exact copy of the messages received at the MIDI In jack. Outputs - Each of the Sub 1 and Sub 2 output jacks on the Procussion are stereo jacks. The tip of each jack (accessed when a standard phone plug is inserted) connects to the left or right output of that group. -
Page 12: Electronic Drum Kit Setup
When using the Anatek Pocket Pedal, the first pedal move- ment determines the The diagram above shows how to connect the Procussion as a full pedal's polarity. electronic drum kit containing: a Kick Drum Pedal, Hi-Hat Pedal, MIDI Down 1st = Normal Drum Controller (with 2 external pads) and a Control Footswitch. - Page 13 POWER UP! The power switch is located on the left side of the front panel. The Procussion and its MIDI controller may be turned on in any order. When power is applied, the liquid crystal display will light, indicating that the Procussion is operating.
- Page 14 Procussion operation manual...
-
Page 15: Basic Operation
Procussion operation manual Basic Operation BASIC OPERATION... - Page 16 Procussion operation manual...
-
Page 17: Controls
SELECT BUTTON CONTROL Power Switch - Switches AC power to the Procussion ON and OFF. MIDI Activity LED - Indicates that MIDI data is being received. Master Menu Select Button - The Master menu contains parameters that affect the entire machine, not just certain Kits. An illuminated LED above the button indicates that you are in the Master menu. -
Page 18: Midi Channel Selection
Kit Information MIDI CHANNEL SELECTION Press the cursor key repeatedly until the cursor is underneath the channel If your Procussion is not responding properly number. (The cursor is a little flashing line underneath one of the or plays the wrong kit, parameters in the display.) Rotate the data entry control to select MIDI... -
Page 19: Multi-Timbral Operation
MIDI (for each MIDI channel) or using the Cursor and Data Entry control in the MIDI Channel/Kit selection screen. Volume Channel 01 Volume Channel 02 Volume Channel 03 Volume Channel 16 Each of the 16 MIDI channels can be assigned to play a specific kit in Procussion. -
Page 20: Master Menu Functions
MASTER MENU FUNCTIONS MASTER TUNE Master Tune adjusts the overall tuning of all kits so that the Procussion may be tuned to other instruments. The master tuning range is ± 1 semitone in 1/64th semitone increments. A master tune setting of "00"... -
Page 21: Transpose
Procussion operation manual Transpose MASTER MENU TRANSPOSE This function transposes the key of the Procussion in half-step intervals. The transpose range is ± 12 semitones or one octave. TRANSPOSE +12 semitones SUBMIX OUTPUTS The function provides a convenient method of assigning types of instru- ments a particular output. -
Page 22: Midi Modes
MIDI channel (on the kit selection screen) and plays that channel’s associated kit. Multi mode - Procussion responds to data on any combination of MIDI channels and plays the specific kit associated with each of the MIDI channels. -
Page 23: Global Trigger Tempo
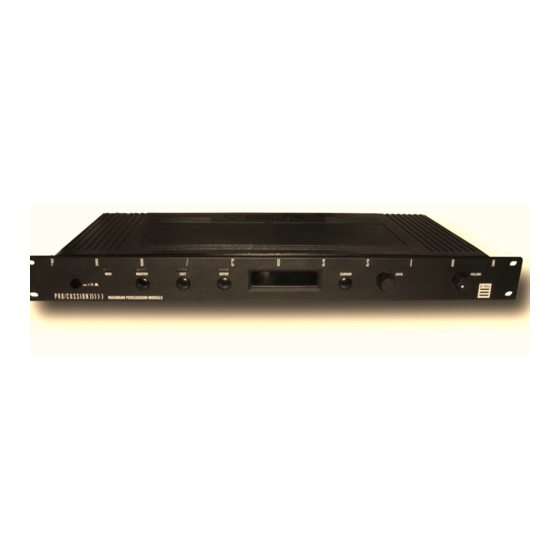
M A X I M U M E-mu Systems, Inc. PERCUSSION MODULE POWER MASTER EDIT ENTER CURSOR DATA VOLUME C01 Vol127 Pan=K Roland R5 - default 000 Kit Name ON/OFF Roland R8 - default This diagram shows how MIDI key numbers are “mapped” to Procussion Zones. -
Page 24: Drum Replacement With The User Zone Maps
This function allows you to program the two user definable Zone Maps. The User Zone Maps are useful to route MIDI note data from existing drum machine patterns to the appropriate stacks in Procussion for drum replacement. Each zone may be assigned a MIDI key range. The User Zone Maps are retained in memory when power is removed. - Page 25 The chart at the bottom of this page shows which types of Procussion drum sounds will be assigned to each zone. For example, if you want the first button on...
-
Page 26: Envelope Mode
When in MIDI Multi mode, this function lets you turn each MIDI channel On or Off. This is useful when you have other MIDI devices connected and do not want the Procussion to respond to the MIDI channels reserved for the other devices. MIDI Enable only operates when in Multi Mode. -
Page 27: Midi Mode Change
Disabled MIDI CONTROLLER ASSIGN The Procussion allows you to assign up to six realtime control sources from your MIDI controller. These control sources could be foot pedals, data sliders or whatever. In this screen, you set up which controllers will be received by Procussion. -
Page 28: Midi Footswitch Assign
Procussion. Simply selecting a program on your MIDI controller will automatically call up the proper Procussion kit. Any of the kits in the Procussion may be mapped to any incoming MIDI program change number. -
Page 29: Auto Select
Remote Edit is designed to be used with MIDI drum pads. Create a preset on your MIDI drum pads which assigns the pads to MIDI key numbers 0-5. Now you can program Procussion without putting down your sticks. Example - To change the stack assigned to a zone using Remote Edit: a) Hit pad 2 (Edit) to enter the edit menu. -
Page 30: Send Midi Data
Procussion. The MIDI data can either be sent to a computer/sequencer Sequencer: or to another Procussion. Using the cursor key and the data entry control, 1. Setup your select the type of MIDI data you wish to transmit. The choices are:... -
Page 31: Demo Sequence
Demo Sequence DEMO SEQUENCE Procussion contains a play-only sequencer in order to give you some idea of what is possible using this amazing machine. Press the cursor switch to move the cursor to the bottom line of the display. The Enter LED will begin flashing. -
Page 32: About Procussion
Of course, playing back 32 channels at different pitches tends to complicate matters, but this is basically how it works. In Procussion, we have left out the Analog/Digital converter stage since the sounds are already sampled for you. -
Page 33: Programming Basics
Procussion operation manual Instrument Layer Block Diagram PROGRAMMING BASICS INSTRUMENT LAYER Instrument Reverse Delay Sample Pitch Tone Start Volume Level Envelope Accent Modulation Destinations INSTRUMENT LAYER BLOCK DIAGRAM The diagram above shows the basic architecture of a single instrument layer. The large, horizontal lines and arrows show the audio signal path. -
Page 34: Modulation Sources
LFO Rate, LFO Amount STACK BLOCK DIAGRAM The diagram above shows the organization of a Procussion Stack. You can think of a stack as a single sound, although it can be made up of up to four different instruments. "Stacking" instruments, in combination with the various modulation parameters can create almost unlimited variations in the final sound. -
Page 35: Velocity Curves
Procussion operation manual Velocity Curves PROGRAMMING BASICS VELOCITY CURVES Incoming velocity values can be scaled by one of the 10 velocity curves in order to match your playing style or better adapt to the MIDI controller. Selecting "Linear" leaves the velocity data unaltered and "Constant"... - Page 36 3 basic types of messages; note on/off, program changes, and continuous controller messages. Your MIDI keyboard or MIDI drum pads, in addition to telling Procussion which note was played, may also send realtime control information, which simply means occurring in real time or live.
- Page 37 Procussion operation manual MIDI Realtime Controllers PROGRAMMING BASICS Let's say for instance, that you are using a Yamaha DX7 as your master keyboard. The DX has pitch and modulation wheels, a breath controller, a data slider and a foot pedal, all of which transmit their values over MIDI.
-
Page 38: Stereo Mix Outputs
PROGRAMMING BASICS STEREO MIX OUTPUTS Procussion has three sets of polyphonic stereo outputs (Main, Sub 1, Sub 2). Each zone in a particular kit may be directed to appear at any of these three stereo outputs. This feature is useful for signal processing (EQ, reverb, etc.) of individual sounds prior to final mixdown. - Page 39 Procussion operation manual Programming Basics PROGRAMMING BASICS PROGRAMMING BASICS...
- Page 40 Procussion operation manual PROGRAMMING BASICS...
- Page 41 PROGRAMMING BASICS PROGRAMMING BASICS Your initial involvement with the Procussion will most likely consist of using the existing kits and selecting MIDI channels. While the factory kits are very good, there are probably some things you would like to change, perhaps the tuning, or the tone of a stack.
-
Page 42: Modulation
If we had a device that would automatically turn the volume control, we would also call that device a modulation source. The Procussion is designed so that for each of the variable parameters, such as the volume, there is an initial setting which can be changed by a modulation source. - Page 43 Alternate Volume Release (Layers 1, 2, 3, 4 or All), or Reverse the Sound (Layers 1, 2, 3, 4 or All). Note that the Procussion does not have actual footswitch input jacks. Your MIDI controller (keyboard, MIDI drum pads, etc.) should have...
-
Page 44: Envelope Generators
ENVELOPE GENERATORS An envelope can be described as a “contour” which can be used to shape Each Instrument has the sound in some way over time. Each channel of the Procussion contains its own factory preset AHD envelope which is two envelope generators. -
Page 45: Low Frequency Oscillators
LOW FREQUENCY OSCILLATORS (LFOs) A Low Frequency Oscillator is simply a wave which repeats at a slow rate. Procussion has two multi-wave LFOs for each percussion stack. The LFO waveforms are: Triangle, Sine, Sawtooth and Square. By examining the diagram of the LFO waveforms, you can see how the LFO will affect a modulation destination. -
Page 46: Modulation Patches
MODULATION PATCHES Connecting a modulation source to a destination is called a patch. Procussion lets you connect the modulation sources in almost any pos- sible way to the modulation destinations. Each patch also has an amount parameter which determines “how much” modulation is applied to the destination. - Page 47 Procussion operation manual Low Frequency Oscillator EDIT MENU PITCH ENV S1L1 D23 AMT+255 Decay Time normal time pitch Envelope Amount Envelope Amount normal time pitch Decay Time A positive envelope amount setting will sweep the pitch downward and a negative setting will sweep the pitch upward.
- Page 48 Stack Modulation Procussion operation manual EDIT MENU STACK MODULATION CONTROL These functions allow you to route modulation sources to any of the destinations in the eight custom stacks. Up to 4 simultaneous patches may be programmed (3-6). For each of the modulation patches, there is a Modulation Source, a Modulation Destination, and an Amount parameter.
- Page 49 Procussion operation manual Stack Footswitch EDIT MENU STACK FOOTSWITCH 3 AND 4 This function allows you to route the two stack level footswitches (3 and 4) to any of the footswitch destinations for each of the 8 custom stacks. The...
- Page 50 Switch Mode Procussion operation manual EDIT MENU THRESHOLD If the control input is between 0 and switch point 1, then layer 1 will be played. If the control input is between switch points 1 and 2, then layer 2 will be played.
- Page 51 Procussion operation manual Switch Mode EDIT MENU RANDOM 1 If the control input is less than switch point 1, then layer 1 will be played. Otherwise, a layer will be selected at random. RANDOM 2 If the control input is greater than switch point 1, then layer 1 will be played.
- Page 52 Switch Points Procussion operation manual EDIT MENU SWITCH POINTS This function selects the control input switch points used in Switch Mode (for each of the 8 custom stacks). SWITCH PTS Switch Switch Switch Point 1 Point 2 Point 3 AUDITION LAYER When Audition Layer is turned on, only the selected layer will be heard.
- Page 53 Procussion operation manual Copy Stack EDIT MENU COPY STACK This function allows you to copy a stack from any kit, and place it in any of the 8 custom stack locations of the currently selected kit. To Copy a Stack: 1) First select either the user kit containing the stack you want to copy or select “Factory Stacks”.
- Page 54 Procussion operation manual EDIT MENU...
-
Page 55: Edit Menu
Procussion operation manual EDIT MENU EDIT MENU... - Page 56 Procussion operation manual EDIT MENU...
- Page 57 Procussion operation manual Edit Menu Operation EDIT MENU EDIT MENU The edit menu contains functions that can be modified by the user and then saved as kit information in one of the user kits. For example, the tuning or other parameter can be edited, then the kit can be saved to a user location (64-127).
-
Page 58: Procussion Block Diagram
Pitch Env. Amt/Dcy Pitch Env. Amt/Dcy Pitch Env. Amt/Dcy The Procussion is organized as shown in the diagram above. A Procussion kit can be organized into four levels: 1) Kit - Parameters which affect the entire kit. 2) Zone - Parameters affecting the key assignment range. - Page 59 Procussion operation manual Kit Name EDIT MENU EDIT KIT FUNCTIONS KIT NAME Kit Name allows you to name each of the user kits with a name of up to 12 characters. Position the cursor under the character location and use the data entry control to change the character.
-
Page 60: Stack Select
Stack Select Procussion operation manual EDIT MENU STACK SELECT This function allows you to select which of the available instrument Zones can be easily sounds (or none) will be placed in each zone of the current user kit. selected by playing the MIDI note number assigned to that zone. -
Page 61: Zone Volume
Nontranspose mode can be turned On or Off for each zone. posed sound and play several keys at once When the Procussion is used with a MIDI keyboard you might want to for phasing/flanging effects. play several keys at once for a thicker sound. Turning Nontranspose mode On would let all the notes play at the same pitch. -
Page 62: Assignment Mode
Procussion operation manual EDIT MENU ASSIGNMENT MODE There are a total of 32 output channels on the Procussion. The assignment mode affects note polyphony and interaction. Using assignment mode, each zone can be programmed to be polyphonic, with a certain number... -
Page 63: Zone Submix
Procussion operation manual Zone Submix EDIT MENU If you had a cymbal crash on one drum pad and a choked cymbal on another, you might assign both zones to Exclusive 1 (or any of the other exclusive channels) so that hitting the choke pad would cut off the crash. -
Page 64: Footswitch Enable
Footswitch Enable Procussion operation manual EDIT MENU FOOTSWITCH ENABLE This function allows the Footswitch 1 and 2 routings to be turned On or Off for each zone in the kit. (Footswitches 1 and 2 affect the entire kit.) For example, suppose you want Footswitch 1 to reverse zone 1 only. Simply turn FTSW 1 Off for all zones except zone 1. -
Page 65: Footswitch Control
Procussion operation manual Footswitch Control EDIT MENU FOOTSWITCH CONTROL This function allows you to route the two kit level footswitches (1 and 2) Alternate to any of the footswitch destinations. These two “patchcords” affect all Envelope must be initially turned Off in zones in the kit, although they may be turned On or Off for each zone. - Page 66 Velocity Curves Procussion operation manual EDIT MENU VELOCITY CURVES CURVE 1 CURVE 2 Input Input CURVE 4 CURVE 3 Input Input CURVE 6 CURVE 5 Input Input CURVE 8 CURVE 7 Input Input...
-
Page 67: Trigger Tempo
Procussion operation manual Trigger Tempo EDIT MENU TRIGGER TEMPO Tempo Output Trigger Tempo is a function which generates a control signal based on the Played Amount tempo of your playing. When your playing tempo exceeds the selected Trigger Tempo, the amount of the control signal begins to increase from zero. -
Page 68: Stack Instruments
Stack Instruments Procussion operation manual EDIT MENU STACK INSTRUMENTS This function allows you to select one of the available instrument sounds for each layer in the 8 custom stacks. There are 8 custom Custom Stack 1-8 stacks for each kit in Instrument Layer 1-4 the Procussion. -
Page 69: Delay/Sound Start
The Delay parameter is very useful in producing echo type effects and the Sound Start parameter can be used to remove the attack portion of the sound for “Procussion Synthesis” or to “fine tune” when modulating the Sound Start parameter with velocity or any other modulation source. -
Page 70: Alternate Envelope
Reverse Sound Procussion operation manual EDIT MENU REVERSE When reverse is turned On, the instrument will be played backwards. Reverse can be turned On or Off for each layer in the 8 custom stacks. REVERSE S1L1 ALTERNATE ENVELOPE Each instrument layer in the stack has its own preset Attack/Hold/Decay volume envelope which is normally employed. - Page 71 Procussion operation manual Programming Procussion PROGRAMMING PROCUSSION PROGRAMMING PROCUSSION...
-
Page 72: Programming Procussion
Procussion operation manual PROGRAMMING PROCUSSION... -
Page 73: Creating A Custom Kit
7) Rotate the Data Knob to the last screen, “SAVE KIT". Move the Cursor to the lower line and press Enter. If you are using the Procussion with a MIDI MIDI Drums keyboard, set the Zone Map to “Kit” (Master Menu). -
Page 74: Editing Kits
The easiest way to make a kit is to edit an existing kit. This is also an excellent way of becoming familiar with Procussion. You can find a kit that is almost the way you want it and then slightly modify it to suit your taste. - Page 75 Programming Basics section of this manual and have a basic understanding of the Procussion architecture. Assign a Custom Stack There are 8 Custom Stacks for each User Kit in Procussion. 1) Select one of the “--default--” kits which are located at numbers 105-127. When first learning...
- Page 76 Also notice the distortionless pitch shifting from Procussion that makes this possible. Tune this first layer to your liking, then press Enter. 13) Now go back to the “STACK INST” screen to select the instrument for layer 2.
- Page 77 Procussion operation manual Volume and Panning PROGRAMMING PROCUSSION 15) Now move the Cursor back down to the bottom line and repeat steps 10 through 12. Try to find an instrument which complements the first one you selected. Remember that the tunings have a lot to do with how an instrument sounds.
- Page 78 Procussion operation manual Delay, Sound Start, Reverse PROGRAMMING PROCUSSION 20) Turn the Data Knob to the next screen, “STACK PAN”. Adjust the pan positions to hear how this separates the layers. Leave them set near center (0-2) and press Enter.
- Page 79 Note how the screen parameters relate to the stack block diagram. Try making a few “patches” and note the effects. The flexible modulation routing scheme is probably the most powerful feature of Procussion because it allows you to produce subtle variations in the sound using performance parameters such as velocity, playing speed, etc.
- Page 80 Procussion operation manual Trigger Tempo, Pitch Wheel PROGRAMMING PROCUSSION 27) Using Trigger Tempo. Trigger Tempo is a modulation source which increases from zero when your playing speed exceeds a preset tempo. First of all, go into the Master menu and turn to the Global Trigger Tempo screen.
-
Page 81: Hi-Hat Investigation
PROGRAMMING PROCUSSION HI-HAT INVESTIGATION The Hi-Hat is perhaps the most expressive part of a drum set. Procussion offers expressive Hi-Hat control; up to 4 different Hi-Hat samples can be switched-in depending on the position of a pedal or control wheel. Many of the factory kits already have a Hi-Hat programmed to respond to the Modulation Wheel of a MIDI keyboard. -
Page 82: Programming Tips And Ideas
ON YOUR OWN In the course of these exercises you have hopefully learned a little about programming a Procussion Stack. You can experiment as much as you want and when you come up with something good, save it to one of the empty kit locations. -
Page 83: Procussion Synthesis
PROCUSSION SYNTHESIS Procussion Synthesis is a form of additive synthesis. Normal additive synthesis uses simple sine waves as the basis of its sound. In Procussion Synthesis, we start off with complete sampled sounds or complex wave- forms and combine all or part of these together to form new sounds. The process is illustrated below. - Page 84 Procussion operation manual Programming Examples PROGRAMMING PROCUSSION As an example, let’s combine two cymbals in order to create a new cymbal containing elements of both. Use one of the 8 Custom Stacks in a “Default Kit” for your experiments. Refer to the Edit menu parameters in the chart below and do not change any parameters but the ones specified.
-
Page 85: Spatial Convolution
“tail” that can be tuned and shaped like an ordinary sample. There are four Spatial Convolution “spaces” (instruments 132-135) in Procussion which were created using the Transform Multiplication function on our Emax II 16-bit sampler. -
Page 86: Using Procussion With A Sequencer
MORE ADVANCED SEQUENCING PRE-SEQUENCE SETUP Suppose that you want to have your sequencer set up everything for you before the start of the song. Good idea. This will make the Procussion setup procedure automatic and prevent the wrong kits from playing. - Page 87 KIT, VOLUME and PAN SETUP Program your MIDI sequencer to transmit the following information before the song starts. 1) Select the proper kits for each MIDI channel used on Procussion Transmitting the (program change command). Master Settings will set...
- Page 88 Don’t be afraid to use external processing on specific sounds if you feel the urge. The submix sends and returns on Procussion are there for a reason. In many instances a bit of reverb or EQ will be just the thing a drum stack needs to give it a distinct identity.
-
Page 89: Reference Section
Procussion operation manual Reference REFERENCE SECTION... -
Page 90: Standard Kit Layout
Procussion operation manual Factory Kits PROCUSSION FACTORY KITS ROM KITS Ampitheater * 32. Rocket Drums Mega Drums * 33. Huge Room * Rock n Roll * 34. Churchyard Palladium * 35. Drum Dance * Jazz Drums * 36. Percussion 3 Metal Drums * 37. - Page 91 Procussion operation manual Factory Kits STANDARD FACTORY KIT LAYOUT This diagram shows the layout of the standard trap kits in Procussion. Special kits, such as Latin Percussion or Sound Effects, will not follow the standard layout. MIDI Key # Tuned Toms,...
- Page 92 Procussion operation manual Factory Stacks PROCUSSION FACTORY STACKS Dry Kick 1 49. Cymbal Kick 10. Dry Kick 2 50. Floor Kick 11. Dry Kick 3 51. Janz Kick 12. Dry Kick 4 52. Mambo Kick 13. Dry Kick 5 53. Rapper Kick 14.
- Page 93 Procussion operation manual Factory Stacks PROCUSSION FACTORY STACKS Brush Sweep 129. HerboSnare Room Snare 1 130. Kooky Snare Room Snare 2 131. Tough Snare Stereo Snare 132. Snare Smash Big Snare 133. Pipe Snare Body Snare 134. Sewer Snare God's Snare 135.
- Page 94 Procussion operation manual Factory Stacks PROCUSSION FACTORY STACKS 169. Backward Snare 4 209. Tuned Tomz 170. Rev Snare 1 210. Analog Toms 171. Rev Snare 2 211. Roto Dance 172. Rev Snare 3 212. Roto 2 173. Center Reverse 213.
- Page 95 Procussion operation manual Factory Stacks PROCUSSION FACTORY STACKS 249. Pedal Hat B 289. 19" Pang 250. Metal Hat 1 290. Ride Ping 251. Metal Hat 2 291. Ride Bell 252. Metal Hat 3 292. Mallet Cymbal 253. Syn Hat 1 293.
- Page 96 Procussion operation manual Factory Stacks PROCUSSION FACTORY STACKS 329. Pipe 369. Cowbell 330. Clank 370. Cow Block 331. Lazer Hit 371. Ambi-Stick 332. Sonic Crack 372. Bband Cowbell 333. Rap Scratch 373. Cowtombell 334. Doubl Scratch 1 374. Stereo Marimba 335.
- Page 97 Procussion operation manual Factory Stacks PROCUSSION FACTORY STACKS 409. Quinto Tip 449. Vox Freak 1 410. Quinto Heel 450. Vox Freak 2 411. Hembra Tone 451. Synth Lead 412. Hembra Slap 452. Metalimba 413. Macho Tip Left 453. Red Sky 414.
- Page 98 Procussion operation manual Factory Stacks PROCUSSION FACTORY STACKS 489. Super Spring 529. Pipegg Right 490. Tone Drum 2 530. Rocket #1 491. Industry 531. Rocket #2 492. Master Blast 532. Tweek 493. Ice Missile 533. Ear Splitter 494. Fire Biter 534.
- Page 99 Procussion operation manual Sampled Sounds PROCUSSION INSTRUMENTS SAMPLED SOUNDS 36. Brush Snare B 1. Dry Kick 1 37. Brush Snare C 2. Dry Kick 2 38. Brush Sweep 3. Dry Kick 3 39. Dry 12" Tom 4. Room Kick 1 40.
- Page 100 Procussion operation manual Sampled Sounds PROCUSSION INSTRUMENTS 71. Noise Burst 106. Shekere Net 72. Big Thwack 107. Shekere Snap 73. White Noise 108. Shaker Back 74. Big Rasp 109. Shaker Front 75. Big Hammer 110. Timbale 1a 76. Metal Stack 111.
- Page 101 Procussion operation manual Waveforms PROCUSSION INSTRUMENTS CLASSIC WAVEFORMS 141. Sine Wave 142. Triangle Wave 143. Square Wave 144. Sawtooth HARMONIC WAVEFORMS 145. Oct 1 (Sine) Starting from the first octave (fundamental), the 146. Oct 2 All harmonic waveforms contain the harmonics 147.
- Page 102 Procussion operation manual Digital Waveforms PROCUSSION INSTRUMENTS DIGITAL WAVEFORMS 194. Wind Cycle 3 167. Pulse 33% 195. Wind Cycle 4 168. Pulse 25% 196. Organ Cycle 169. Pulse 10% 197. Soft Bell 170. Saw Odd Gone 198. Swirly 171. Ramp 199.
-
Page 103: Lfo, Delay And Envelope Times
Procussion operation manual Envelope Times LFO, DELAY and ENVELOPE TIMES DELAY ATTACK Knob Time (sec) Knob Time (sec) .015 .032 1.76 2.75 1.46 LFO RATES HOLD Knob Rate (Hz) Knob Time (sec) .089 .015 1.34 1.34 3.14 5.43 8.22 7.17 20.63... -
Page 104: Pitch Modulation Interval Charts
Procussion operation manual Pitch Modulation Interval Charts PITCH MODULATION INTERVAL CHARTS Positive Negative Stack Modulation Stack Modulation Amount Interval Amount Interval minor 2nd minor 2nd major 2nd major 2nd minor 3rd minor 3rd When Pitch Wheel major 3rd is used as the... -
Page 105: Zone Map Chart
Procussion operation manual Zone Map Mysteries ZONE MAP CHART There are four different factory zone maps resident in ROM. The chart below shows how the Zone Maps translate MIDI key numbers to Zones. Always check the Alesis....... Standard Zone Map if zones drumKat ...... -
Page 106: Technical Specifications
Procussion operation manual Specifications TECHNICAL SPECIFICATIONS Audio Channels: 32 Audio Outputs: 6 Submix Inputs: 4 Max. Output Level: +4 dB into 600Ω Output Impedance: 100Ω MIDI: In, Out, Thru Data Encoding: 16 bit Linear Sample Playback Rate: 39kHz Signal to Noise: >90 dB Dynamic Range: >90 dB... -
Page 107: Midi Specifications
Procussion operation manual Received Channel Commands MIDI SPECIFICATIONS RECEIVED CHANNEL COMMANDS Channels number (n) = 0-15. Message bytes are represented in hex. All other numbers are decimal. Command Message Comments Note Off 8n kk vv release velocity is ignored Note On... - Page 108 Procussion operation manual Received System Commands MIDI SPECIFICATIONS RECEIVED SYSTEM COMMANDS Two MIDI bytes (lsb, For system exclusive commands, the following format is used: msb) are required for each 14 bit data word. Bits 0-6 are sent first, system exclusive status byte...
- Page 109 F0 18 06 dd 0D ll ..F7 ll: 0 = kits, 1 = stacks, 2 = instruments Note: When sending a bank of kits to Procussion, the host should pause for about 100 milliseconds between each kit message.
- Page 110 SOUND SETS A sound set consists of 4 Megabytes of sample data (sound ROMs), plus additional instrument data in the program ROMs. Procussion may con- tain one or two complete sound sets. Each sound set has a unique ID number.
- Page 111 ASCII strings. This allows editor/ librarian programs to automatically configure to any future versions of Procussion. Each element in the array is a 13-byte string consisting of 12 ASCII name bytes followed by a null (zero) terminator.
- Page 112 Procussion operation manual Data Formats MIDI SPECIFICATIONS DATA FORMATS Parameter Changes: All individual parameter changes use signed 14-bit values to represent the parameter number and value. Two MIDI bytes (lsb, msb) are required for each 14-bit data word. Bits 0-6 are sent first, followed by bits 7-13 in the next MIDI byte.
- Page 113 Parameter Number Encoding Because of the large number and different types of parameters in Procussion, the parameter number is actually a code made up of several “bit fields” which contain different information. Within the 14-bit param- eter number, the two most-significant bits (the “T” field) determine the...
- Page 114 Procussion operation manual Kit Parameters MIDI SPECIFICATIONS Please note: In the following tables, the “size” specification refers to the number of MIDI bytes used when transferring kit data or master settings as a whole; when sending or reading individual parameter values, two MIDI bytes are always used.
- Page 115 Procussion operation manual Stack Parameters MIDI SPECIFICATIONS STACK PARAMETERS (T=2) Parameter # Parameter Name Size Range P= 0-9 stack name (10 chars) 32-127 mod source 3 mod dest 3 0-57 mod amount 3 -128 to +127 mod source 4 mod dest 4...
- Page 116 Procussion operation manual Layer Parameters MIDI SPECIFICATIONS LAYER PARAMETERS Parameter # Parameter Name Size Range P= 64 layer instrument 0- # of insts coarse tune -48 to +48 fine tune -64 to +63 volume 0-127 -7 to +7 reverse delay...
- Page 117 Procussion operation manual Per MIDI Channel Parameters MIDI SPECIFICATIONS PER MIDI CHANNEL Parameter # Parameter Name Size Range P= 64 kit select 0- max kit # MIDI volume 0-127 MIDI pan -8 to +7 global velocity curve 0-10 envelope mode...
-
Page 118: Index
Procussion operation manual Index A-M INDEX accent 40, 56, 64 headphones 7 aftertouch See pressure hi-hat alternate envelope 62 pedal connection 12 See also envelope generator switch mode 66 alternate switch mode 66 tutorial 81 assignment mode 54 hold 38, 62... - Page 119 39, 63 modulation sequencer description 36 external sequencer setup 86-87 enable 55 Procussion demo sequence 31 footswitch 12, 28, 37, 57, 65, 67 saving kits to 30 interval charts 104 sine wave 39, 63 patching 40, 42, 44, 64, 56 sound start 47, 54, 67, 78, 82 realtime mod.
- Page 120 Procussion operation manual Index T-Z INDEX threshold switch mode 66 tone 42, 56, 64 transpose 21 triangle wave 39, 63 triggering, footswitch 57 trigger mode 26, 38 trigger tempo 25, 59, 80 tuning master tune 20 instrument tuning 60 tuning zones 52, 74...
- Page 121 Procussion operation manual Notes NOTES...
-
Page 122: Serial Number
(408) 438-1921 mportant Notice: In order to obtain warranty service on your Procussion, the serial number sticker must be intact and you must have a sales receipt or other proof of purchase. If there is no serial number sticker on your Procussion, please contact E-mu Systems at once. - Page 123 Procussion operation manual...
-
Page 124: Important Safety Instructions
If the 9020, Procussion is rack mounted, a standard 19 inch open frame rack must be used. USER-MAINTENANCE INSTRUCTIONS 1. The Procussion should be kept clean and dust free. Periodically wipe the unit with a clean, lint free cloth. Do not use solvents or cleaners. - Page 125 Procussion operation manual 8. This Procussion may be equipped with a polarized line plug (one blade wider that the other). This is a safety feature. If you are unable to insert this plug into the outlet, do not defeat the safety purpose of the plug.
Need help?
Do you have a question about the procussion and is the answer not in the manual?
Questions and answers