Denon RCD-M39 Owner's Manual
Cd receiver
Hide thumbs
Also See for RCD-M39:
- Quick start manual ,
- Service manual (105 pages) ,
- Owner's manual (63 pages)
Table of Contents
Advertisement
Advertisement
Table of Contents

Related Manuals for Denon RCD-M39


Summary of Contents for Denon RCD-M39
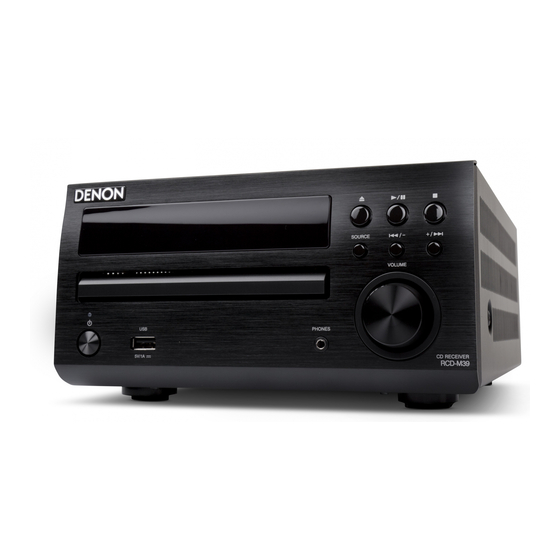
- Page 1 RCD-M39 CD RECEIVER Owner’s Manual DISC...
-
Page 2: Safety Precautions
10. Only use attachments/accessories specified by the manufacturer. electric shock to persons. 11. Use only with the cart, stand, tripod, bracket, or table DENON EUROPE specified by the manufacturer, or sold with the apparatus. The exclamation point within an equilateral triangle is intended Division of D&M Germany GmbH... -
Page 3: Notes On Use
n CAUTIONS ON INSTALLATION NOTES ON USE WARNINGS • Avoid high temperatures. Allow for sufficient heat dispersion when installed in a rack. • Handle the power cord carefully. Hold the plug when unplugging the cord. • Keep the unit free from moisture, water, and dust. • Unplug the power cord when not using the unit for long periods of time. -
Page 4: Table Of Contents
Getting started Thank you for purchasing this DENON product. To ensure proper operation, please read this owner’s manual carefully before using the product. Accessories After reading them, be sure to keep them for future reference. Check that the following parts are supplied with the product. -
Page 5: Features
• Moving the unit DENON’s popular M series gives you high sound quality based on Be sure to remove a disc, turn off the power and unplug the power the “simple &... -
Page 6: Preparations
Preparations Preparations Here, we explain the connection methods for this unit. F Connecting the speakers vpage 4 F Connecting an iPod or USB memory device to the USB port vpage 5 F Connecting a TV vpage 6 F Connecting an antenna vpage 6 F Connecting the power cord vpage 7 DISC... -
Page 7: Connections
Connections NOTE Connecting the speakers • Do not plug in the power cord until all connections have been completed. Connecting the speaker cables Subwoofer • When making connections, also refer to the owner’s manual of the with built-in other components. Carefully check the left (L) and right (R) channels and + (red) and – Speaker SC-M39 amplifier • Be sure to connect the left and right channels properly (left with left,... -
Page 8: Connecting An Ipod Or Usb Memory Device To The Usb Port
• iPod nano • iPod touch DENON does not guarantee that all USB memory devices will operate or receive power. When using a portable USB connection type HDD of the kind to which an AC adapter can be connected to supply power, use the AC adapter. -
Page 9: Connecting A
Connecting a TV Connecting an antenna • Select the connector to use and connect the device. FM (for continental model only) DAB/FM (for RCD-M39DAB only) • To listen to TV audio through this unit, use the optical digital connection. • Connect the FM antenna included with the unit to enjoy listening to n Connecting the DAB/FM indoor antenna radio broadcasts. -
Page 10: Connecting The Power Cord
Connecting the power cord For continental model only Power cord (Supplied) To household power outlet (AC 230 V, 50/60 Hz) For RCD-M39DAB only Power cord (Supplied) To household power outlet (AC 230 V, 50/60 Hz) NOTE • Only use the supplied power cord. • Be sure the power cord is unplugged from the power outlet before connecting or disconnecting it to the AC IN. -
Page 11: Operations
Operations Operations Here, we explain functions and operations that let you make better use of this unit. F Basic operation vpage 9 F Advanced operation vpage 20 DISC... -
Page 12: Basic Operation
Basic operation Preparations n Turning the power on (vpage 9) Turning the power on Before playing a disc n Before playing a disc (vpage 9) n Turning the power off (vpage 9) POWER X POWER X Press Press • The power turns on. Press again to set the n Setting the current time (24-Hour Display) power to standby. -
Page 13: Setting The Current Time (24-Hour Display)
Setting the current time (24-Hour Display) GExampleH Setting the current time to 10:15 am n Checking the current time when the power is on Press POWER X to turn the CLOCK Press power on. Press once more and the display returns to its original condition. SETUP Press Various types of setting menus are... -
Page 14: Operations Possible During Playback
Operations possible during playback Selecting the input source Adjusting the tone Turning off the sound temporarily Press TUNER, iPod/USB, Press SDB TONE to select the Press MUTE : DIGITAL IN ANALOG IN to select tone parameter to be adjusted. “MUTE ON” is displayed. the input source. -
Page 15: Playing Cds
Playing CDs Playing CDs Playing repeatedly (Repeat playback) Playing random order (Random playback) Press REPEAT In the stop mode, press RANDOM Before you start this operation, perform the procedure in “Before playing a disc” (vpage 9). Playback in the respective repeat mode starts. The “RANDOM”... -
Page 16: Switching The Display
Playing CDs n Checking the order of the programmed tracks Switching the display Playing tracks in the desired order In the stop mode, press (Program playback) INFO Press The track numbers are displayed in the programmed order each time the button is pressed. Up to 25 tracks can be programmed. -
Page 17: Listening To Fm Broadcasts
Listening to FM broadcasts Tuning in broadcast stations Automatically presetting FM/DAB stations n Giving station names to preset channels Names of up to 8 characters can be input. (Auto preset) Connect the antenna beforehand (vpage 6). Tune in the preset channel you TUNER Press select... -
Page 18: Presetting Fm Stations Manually
Listening to FM broadcasts Presetting FM stations manually Setting the preset channels and changing Input the station name. the received frequency on the main unit Names of up to 8 characters can be input. This unit can be preset with a total of 40 FM broadcast stations. u, i •... - Page 19 Listening to FM broadcasts RDS (Radio Data System) PTY (Program Type) n PTY search Use this function to find RDS stations broadcasting a designated RDS (works only on the FM band) is a broadcasting service which PTY identifies the type of RDS program. program type (PTY).
- Page 20 Listening to FM broadcasts TP (Traffic Program) RT (Radio Text) TP identifies programs that carry traffic announcements. RT allows RDS stations to send text messages that appear on the This allows you to easily find out the latest traffic conditions in your display.
-
Page 21: Listening To Dab/Dab+ (For Rcd-M39Dab Only)
Listening to DAB/DAB+ (for RCD-M39DAB only) n About DAB (Digital Audio Broadcasting) Tuning in DAB stations Switching the reception information for the • Since the DAB system is broadcasted in digital format, DAB currently tuned in DAB station Press TUNER to select “DAB”. system can supply crystal-clear audio and stable reception even in mobile objects. -
Page 22: Listening To Aux
Listening to DAB/DAB+ (For RCD-M39DAB only) Listening to AUX Making the DAB settings DAB initialize Prepare for playback. Check the connection, then turn on this DAB/RDS Press during DAB When the “DAB Initialize” procedure is performed, all the preset units. memory settings for the stations and DABs are reset. -
Page 23: Advanced Operation
Advanced operation Preparations n Basic operation (vpage 9) Before playing a USB or an iPod MP3 or WMA playback order of MP3 or n Before playing a USB or an iPod (vpage 20) WMA files POWER X Press n MP3 or WMA playback order of MP3 or WMA files (vpage 20) When there are multiple folders containing MP3 or WMA files, the playback order of folders is automatically set when this unit reads the... -
Page 24: Playing Of Mp3 And Wma Files
Playing of MP3 and WMA files MP3 and WMA formats MP3 and WMA files playback There are many music distribution sites on the Internet allowing you to download music files in MP3 or WMA (Windows Media ® Audio) format. The music (files) downloaded from such sites can be stored Load a CD-R or CD-RW disc CD-R and CD-RW discs created in the format described below can on CD-R or CD-RW discs and played on this unit. - Page 25 Playing of MP3 and WMA files n To switch the folder or file during playback n To play repeatedly REPEAT Press Folder Playback starts in the respective repeat mode. to select the folder, then press ENTER • The selectable repeat modes differ in the “Folder Mode” and the “Disc Mode”.
-
Page 26: Playing An Ipod
To switch the display unit and main functions may not operate. Active unit • Note that DENON will accept no responsibility whatsoever for any buttons INFO During playback, press problems arising with the data on an iPod when using this unit in iPod The display switches each time the button is pressed. -
Page 27: Playing A Usb Memory Device
Playing a USB memory device Playable USB memory formats Playing a USB memory device n To switch the folder or file during playback Folder Playback preparation Files stored on USB memory devices created in the formats below ENTER to select the folder, then press can be played. -
Page 28: Setting The Alarm
SETUP”, then press ENTER • Automatically starts playback at the earlier alarm start time set for • DENON will take no responsibility whatsoever for any loss or either of the alarms. damage to data on USB memory devices when using the USB • Automatically stops playback at the earlier alarm stop time set for... -
Page 29: Setting The Sleep Timer
Setting the alarm n Setting the alarm to on or off Setting the sleep timer to select “hours” for the alarm start time, SETUP Press then press ENTER Use this function to automatically switch the power to the standby to select “ALARM ON/OFF”, mode after a specific amount of time (minutes). -
Page 30: Other Functions
Other functions Using an optimizing filter Auto standby Last function memory An optimizing filter suited for the properties of the speakers (SC-M39) With the Auto standby ON, this unit will automatically enter the This stores the settings as they were immediately before going into can be used. -
Page 31: Informations
Informations Informations Here, we list various information related to this unit. Please refer to this information as needed. F Part names and functions vpage 29 F Other information vpage 34 F Troubleshooting vpage 35 F Specifications vpage 37 F Index vpage 37 DISC... -
Page 32: Part Names And Functions
Part names and functions Front panel For buttons not explained here, see the page indicated in parentheses ( ). Power operation button (X) ··············································· (9, 20) Image when viewed Power indicator ········································································· (9) from the top of the front panel USB port ·····················································································... -
Page 33: Display
Display Rear panel For buttons not explained here, see the page indicated in parentheses ( ). RCD-M39DAB Information display Tuner reception mode indicators ············· (14) Various information is displayed here. Tone indicators ··········································· (11) Remote control signal reception indicator SDB: Lights when the super dynamic bass function is set to “ON”. -
Page 34: Remote Control Unit
Remote control unit This section explains the buttons used to playback each source. Buttons that work with all sources (CD, TUNER, iPod and USB) Buttons that work with CDs The buttons listed at “Buttons that work with all sources” can also be used. q w e SLEEP button ··············································... - Page 35 Remote control unit n Buttons that work with the tuner n Buttons that work with iPods or USBs The buttons listed at “Buttons that work with all sources” can also be used. The buttons listed at “Buttons that work with all sources” can also be used. SOURCE button (TUNER) ··························...
- Page 36 Remote control unit Inserting the batteries Operating range of the remote control unit q Remove the rear lid in the w Load the two batteries properly direction of the arrow and as indicated by the marks in the remove it. battery compartment.
-
Page 37: Other Information
Other information Discs Loading discs Cautions on storing discs Discs playable on this unit • Place the disc in the tray, label side up. • Be sure to remove discs after using them. Music CDs • Make sure the disc tray is fully open when inserting the disc. • Be sure to store discs in their cases to protect them from dust, Discs marked with the logo below can be played in this unit. -
Page 38: Explanation Terms
“MPEG-1 Audio”, “MPEG-2 Power turns off • Set is damaged. • Turn off the power and contact – Audio”, “MPEG-4 AAC”. suddenly and a DENON service center . power indicator flashes red. (Flashes at 0.25 second intervals) v See overleaf DISC... - Page 39 • This is not a malfunction. – in the proper direction, as proper direction, following the the set cannot recognize is DENON does not guarantee that indicated by the polarity marks polarity marks in the battery connected. all USB memory devices will in the battery compartment.
-
Page 40: Specifications
Index Specifications n Audio section Accessories ·························································· 1 MP3 ························································ 20, 21, 35 • Power amplifier Alarm ·································································· 25 Mute ··································································· 11 Rated output: 30 W + 30 W (6 Ω, 1 kHz T.H.D 10 %) n Tuner section BASS ·································································· 11 Playback Receiving range: FM: 87.50 MHz –... - Page 41 Dimensions Unit : mm 130.0 210.0 30.0 29.0 152.0 29.0 Weight : 4.0 kg DISC...
- Page 42 D&M Holdings Inc. 3520 10158 00AD...
Need help?
Do you have a question about the RCD-M39 and is the answer not in the manual?
Questions and answers