
Related Manuals for Sanyo EM-SL40S


Summary of Contents for Sanyo EM-SL40S
-
Page 1: Microwave Oven
INSTRUCTION MANUAL EM-SL40S Microwave Oven Read these instructions carefully before use. If you follow these instructions, your Microwave Oven will serve you long and well. - Page 2 THE OVEN CAVITY SHOULD BE CLEANED AND WIPED DRY AFTER EACH USE. THE OVEN SHOULD NOT BE USED IF ANY WATER OR MOISTURE REMAINS IN THE CAVITY. ROLLER REST AND GLASS TRAY SHOULD NOT STAND IN WATER. DUE TO HIGH MOISTURE CONTENT OF CERTAIN FOODS SUCH AS POTATOES, IT IS IMPORTANT THAT THE OVEN IS WIPED CLEAN AFTER EACH USE.
-
Page 3: Table Of Contents
CONTENTS PRECAUTIONS TO AVOID POSSIBLE EXPOSURE TO EXCESSIVE MICROWAVE ENERGY ..........................1 SPECIFICATIONS.........................1 BEFORE YOU CALL FOR SERVICE..................2 INSTALLATION ........................2 GROUNDING INSTRUCTIONS ....................3 RADIO INTERFERENCE ......................3 IMPORTANT SAFETY INSTRUCTIONS................4 MICROWAVE COOKING PRINCIPLES................5 UTENSILS GUIDE....................5 OVEN POSITIONING......................PART NAMES ........................7 CONTROL PANEL ........................8 HOW TO SET THE OVEN CONTROLS ................9 Setting clock time ......................9 Microwave Cooking ......................9... -
Page 4: Energy
Door (bent), Hinges and latches (broken or loosened), Door seals and sealing surfaces. The oven should not be adjusted or repaired by anyone except properly qualified service personnel. Model: EM-SL40S Power Source: 230V~50Hz Power Consumption: 1400W Output Microwave: 900W 2450MHz Outside Dimensions: (W)483×(D)375×(H)281mm... -
Page 5: Before You Call For Service
If the oven fails to operate: Check to ensure that the oven is plugged in securely. If it is not, remove the plug from the outlet, wait 10 seconds, and plug it in again securely. Check for a blown circuit fuse or a tripped main circuit breaker. If these seem to be operating properly, test the outlet with another appliance. -
Page 6: Grounding Instructions
This appliance must be grounded. This oven is equipped with a cord having a grounding wire with a grounding plug. It must be plugged into a wall receptacle that is properly installed and grounded. In the event of an electrical short circuit, grounding reduces risk of electric shock by providing an escape wire for the electric current. -
Page 7: Important Safety Instructions
When using electrical appliance basic safety precautions should be followed, including the following: WARNING: To reduce the risk of burns, electric shock, fire, injury to persons or exposure to excessive microwave energy: Read all instructions before using the appliance. Use this appliance only for its intended use as described in this manual. Do not use corrosive chemicals or vapors in this appliance. -
Page 8: Microwave Cooking Principles
energy. This product is a Group 2 Class B ISM equipment. The definition of Group 2 which contains all ISM (Industrial, Scientific and Medical) equipment in which radio-frequency energy is intentionally generated and/or used in the form of electromagnetic radiation for the treatment of material, and spark erosion equipment. -
Page 9: Oven Positioning
This symbol mark and recycle system are applied only to EU countries and not applied to countries in the other parts of the world. Your SANYO product is designed and manufactured with high quality materials and components, which can be recycled and reused. -
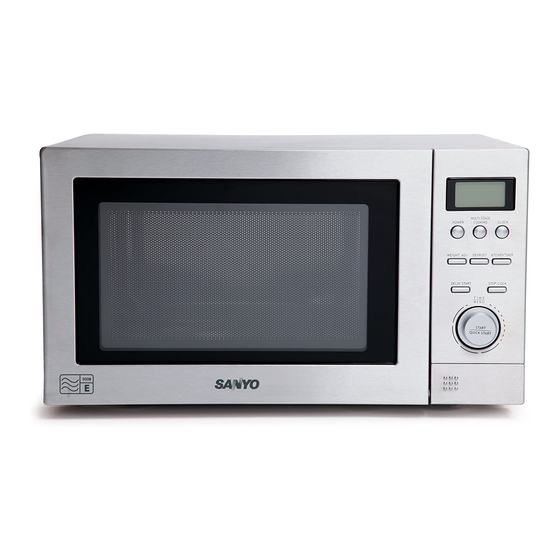
Page 10: Part Names
Door Safety Lock System Oven Window Turntable Support Shaft Door Release Button Control Panel Oven Air Vent Glass Tray... -
Page 11: Control Panel
MENU ACTION SCREEN Cooking time, power, action indicators, and clock time are displayed. POWER Touch this button a number of times to set microwave cooking power level. TIME/MENU(START/QUICK START) Turn the dial to set the oven clock time and input cooking time. Turn the TIME/MENU dial to select an auto-cooking menu including auto defrost. -
Page 12: How To Set The Oven Controls
Each time a button is touched, a beep will sound to acknowledge the touch. For example, suppose you want to cook for 1 ETTING CLOCK TIME minute at 450W of microwave power. This is a 12- or 24-hour clock according to Press POWER button 3 times. -
Page 13: Auto Cook Menu
For the following foods or cooking operation, you do not need to input cooking power and time. Try to focus on telling the oven what you want to cook and how much the food weighs. You can do so by turning the TIME/MENU dial to select a food/operation category, then press the WEIGHT ADJ. -
Page 14: Express Cooking
are automatically set once the food category and the weight are programmed. ETTING IMER PRESS DEFROST BUTTON FOOD The minute timer will enable you to set a once MEAT countdown time. twice POULTRY For example, suppose you want to set timer for 3 minutes. -
Page 15: Cleaning And Care
Turn off the oven and remove the power plug from the wall socket before cleaning. Keep the inside of the oven clean. When food splatters or spilled liquids adhere to oven walls, wipe with a damp cloth. Mild detergent may be used if the oven gets very dirty. Avoid the use of spray and other harsh cleaners as they may stain, streak or dull the door surface. -
Page 16: Electrical Appliance Guarantee (Warranty)
ELECTRICAL APPLIANCE GUARANTEE (WARRANTY) Note: Nothing in this express warranty affects the statutory right available to the consumer. SANYO (the Company) WARRANTS to the user that if this Microwave Oven (the Product) is or becomes defective and the defect results from faulty materials and or workmanship and not in any way...