Viking VCSB483D Service Notebook
Hide thumbs
Also See for VCSB483D:
- Brochure & specs (64 pages) ,
- Installation instructions manual (42 pages) ,
- Install manual (24 pages)
Table of Contents
Advertisement
Advertisement
Table of Contents

Related Manuals for Viking VCSB483D


Summary of Contents for Viking VCSB483D
- Page 1 VCSB483D# -- DFSB483D# --DDSB483D# COVER F90597...
- Page 2 SERVICE NOTEBOOK REFRIGERATION VCSB483D# -- DFSB483D# -- DDSB483D# VIKING RANGE CORPORATION, P.O. DRAWER 956, GREENWOOD, MS 38930-USA F90597...
-
Page 3: Table Of Contents
TABLE OF CONTENTS VCSB483D# with Ice and Water-------------------------------------------------------------------- 4 Cabinet Air Flow-------------------------------------------------------------------------------------- Machine Compartment Air Flow-------------------------------------------------------------------- 6 Refrigerant Flow--------------------------------------------------------------------------------------- 7 Water Flow--------------------------------------------------------------------------------------------- 8 General Specifications-------------------------------------------------------------------------------- 9 Compressor Specifications---------------------------------------------------------------------------- 10 R134a Refrigerant Service Information------------------------------------------------------------- 11 Safety Precautions-------------------------------------------------------------------------------------- 12 Equipment and Tools----------------------------------------------------------------------------- 13-16... -
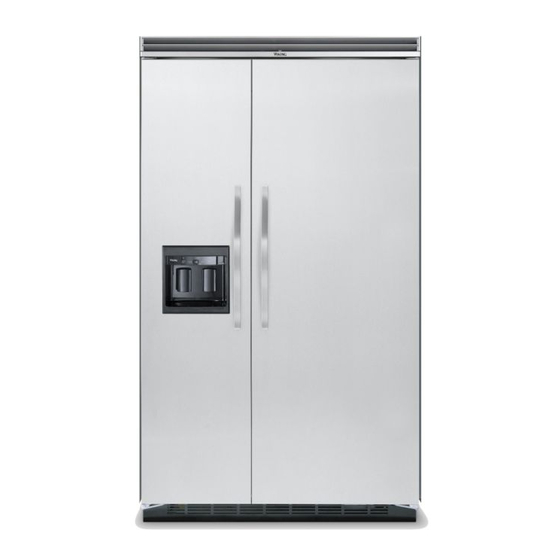
Page 4: Vcsb483D# With Ice And Water
VCSB483D# with ICE and WATER... -
Page 5: Cabinet Air Flow
CABINET AIR FLOW... -
Page 6: Machine Compartment Air Flow
MACHINE COMPARTMENT AIR FLOW... -
Page 7: Refrigerant Flow
REFRIGERANT FLOW... -
Page 8: Water Flow
WATER FLOW... -
Page 9: General Specifications
WARNINGS To avoid electrical shock, which can cause severe personal injury or death, disconnect power to refrigerator using power switch before servicing. Wires removed during disassembly must be replaced on proper terminals to insure correct grounding and polarization. After servicing, reconnect power using power switch. DC Compressor –... -
Page 10: Compressor Specifications
SPECIFICATIONS AND FEATURES The VCC receives one of 3 signals from the adaptor board: OFF, E frequency, and H frequency. OFF STATE CRITERION The VCC control signal is OFF whenever the voltage drive to the compressor relay is off. H (HIGH COOLING CAPACITY) STATE CRITERIA The VCC control signal goes to the frequency when any of the following conditions are detected... -
Page 11: R134A Refrigerant Service Information
R134a REFRIGERANT SERVICE INFORMATION This product uses R134a refrigerant. This refrigerant requires synthetic Ester Oil in the compressor. This cooling system does not tolerate contamination from any of the following: • Other Refrigerants • Moisture • Petroleum-based Lubricants • Silicone Lubricants •... -
Page 12: Safety Precautions
SAFETY PRECAUTIONS TREAT LIQUID AND VAPORIZED REFRIGERANT WITH RESPECT. IN CASE OF ACCIDENTAL RELEASE OF LARGE AMOUNTS OF REFRIGEANT: Vapors from the refrigerant can reduce the oxygen available for breathing and cause suffocation. Refrigerant decomposes rapidly and becomes toxic and corrosive when it reaches approximately 1100° F. Refrigerant can cause skin irritation and frostbite. -
Page 13: Equipment And Tools
EQUIPMENT AND TOOLS A separate set of hoses and hand valves must be maintained for use with sealed systems with R134a refrigerant. Equipment used with CFC refrigerants will contaminate R134a (HFC) sealed systems. EQUIPMENT DESCRIPTION ILLUSTRATION Tank of Liquid Refrigerant – Care should be taken to be sure the proper refrigerant is available. - Page 14 EQUIPMENT DESCRIPTION Purging Hose Configuration – This arrangement of three 4’ to 6’ hoses with low-loss fittings and a ¼” male flare Tee fitting can be used to purge a sealed system for both operating and non-operating compressor situations. No hand valves are required.
- Page 15 EQUIPMENT DESCRIPTION Swaging Kit – A swaging tool kit may be needed to expand system tubing to fit replacement parts. (Fig. 19) Heat Gun – A heat gun can be used to heat a non-operating compressor or the evaporator during purge and the refrigerant tank to increase charging pressure. Many heat guns have a stand that allows continuous operation while other repairs are made.
- Page 16 EQUIPMENT DESCRIPTION Inspection Mirror, Tubing Cutter, Triangular File and Steel Brush – The inspection mirror should be small enough to inspect in tight spaces around joints. A mini-cutter will be required to cut tubing in tight spaces where a standard cutter will not turn.
-
Page 17: Evacuation And Charging
WARNING To avoid electrical shock which can cause severe personal injury or death, disconnect power to refrigerator using power switch before servicing. Wires removed during disassembly must be replaced on proper terminals to insure correct earth ground and polarization. After servicing, reconnect power using power switch. Evacuation and Charging CAUTION: To avoid risk of fire, sealed refrigeration system must be air free. - Page 18 Charging: Low side gauge pressure should rise shortly after opening charging cylinder NOTE: Do not use captured or recycled valve as system pressure equalize refrigerant in Viking units. Captured or through capillary tube. recycled refrigerant voids any warranty. pressure does...
-
Page 19: Display Panel Operation
DISPLAY PANEL KEYBOARD Display Panel Operation Keyboard Pad Functions Entry Tone 2. Change freezer temperature setting by Indicates a pad was pressed, command read pressing Higher Temp or Lower Temp and accepted. Turn off entry tone by Pad. pressing and holding Display On pad for 3 to 5 seconds. -
Page 20: Alarms
Display Panel Operation 2. Deactivates temperature indication area (con’t) of control panel. Lower Temp Pad Lowers temperatures setting one bar at a time. Electronic Functional Description If entry tone is on, tone will sound at each bar level until bottom level is reached. Power Disconnect Switch 1. -
Page 21: Mode A And Mode B
Electronic Functional Description (con’t) Adaptive Defrost Operation Defrost occurs after predetermined length of compressor run hours. Compressor run time 1. Critical temperature for freezer is +15° F; for between defrosts changes, or adapts, depending refrigerator critical temperature is +60° F. upon recent history of defrost lengths (time it 2. -
Page 22: Program Mode
Electronic Functional Description Refrigerator Thermistor Temperature (con’t) 1. Choose Refrigerator Thermistor temperature Program Mode display by pressing Ref Temp pad. 2. Refrigerator thermistor temperature displays. Accessing Program Mode Mode B Functions Two programming modes are available. Mode A allows reading refrigerator and freezer thermistor Automatic Keyboard Functions temperatures. -
Page 23: Electronic Testing
Mode A Functions (con’t) Temperature Offset Calibration Exiting Program Mode (See page 24, Item D) Press Display On pad for 3 seconds to exit Offset amount adjusts temperatures Program Mode. Tone will sound three times. refrigerator cut-ins and cut-outs by the amount Changes made in Program Mode will be of offset. -
Page 24: Refrigerator / Freezer Thermister Resistance
Refrigerator/ Freezer Thermister Factory Set Freezer/Refrigerator ITEM “A” ITEM “B” Temperature Offset Calibration ITEM “D” Reading Temperature Display ITEM “C”... -
Page 25: Low Voltage Board Check Points
Low Voltage Board Check Points WARNING To avoid electrical shock which can cause severe personal injury or death, disconnect power to refrigerator using power switch before servicing. Wires removed during disassembly must be replaced on proper terminals to insure correct earth ground and polarization. After servicing, reconnect power using power switch. -
Page 26: High Voltage Board Check Points
High Voltage Board Check Points WARNING To avoid electrical shock which can cause severe personal injury or death, disconnect power to refrigerator using power switch before servicing. Wires removed during disassembly must be replaced on proper terminals to insure correct earth ground and polarization. After servicing, reconnect power using power switch. -
Page 27: Wiring Diagram Vcsb483# (No Water Or Ice In Door) Dispenser
VCSB483# WIRING DIAGRAM 27 27... -
Page 28: Wiring Diagram Vcsb483D# (Dispenser Model)
VCSB483D# WIRING DIAGRAM – DISPENSER MODEL... -
Page 29: Variable Capacity Compressor (Vcc) Control Unit
VARIABLE CAPACITY COMPRESSOR (VCC) CONTROL UNIT The adapter board sends a frequency signal to the inverter. Typically the adapter board will send a 3mA current and 5VDC (square wave) signal. The frequency can be checked with a Fluke meter that reads frequency. There is a self check provision on the adapter board that occurs during the first 45 seconds after the refrigerator is powered up. -
Page 30: Speed Control Interface
Speed Control Interface 1. Position: 2. Circuit: 3. The microcomputer will wait for a speed information in order to start. 4. The speed signal wave form (continuous pulse train) shall be as follows: 5. The maximum and minimum rating for speed input signals are: INPUT VOLTAGE SYMBOL Type... -
Page 31: Wiring Schematic
WARNING To avoid electrical shock which can cause severe personal injury or death, disconnect power to refrigerator using power switch before servicing. Wires removed during disassembly must be replaced on proper terminals to insure correct earth ground and polarization. After servicing, reconnect power using power switch. -
Page 32: Freezer Compartment Theory Of Operation
Freezer Compartment Theory of Operation WARNING To avoid electrical shock which can cause severe personal injury or death, disconnect power to refrigerator using power switch before servicing. Wires removed during disassembly must be replaced on proper terminals to insure correct earth ground and polarization. After servicing, reconnect power using power switch. -
Page 33: Refrigeration Compartment Theory Of Operation
Refrigeration Compartment Theory of Operation WARNING To avoid electrical shock, which can cause severe personal injury or death, disconnect power to refrigerator using power switch before servicing. Wires removed during disassembly must be replaced on proper terminals to insure correct earth ground and polarization. After servicing, reconnect power using power switch. -
Page 34: Refrigeration And Freezer Compartment Theory Of Operation
Refrigeration and Freezer Compartment Theory of Operation WARNING To avoid electrical shock which can cause severe personal injury or death, disconnect power to refrigerator using power switch before servicing. Wires removed during disassembly must be replaced on proper terminals to insure correct earth ground and polarization. After servicing, reconnect power using power switch. -
Page 35: Compressor Starting Procedures
TERMINAL BOARD The electrical diagram in figure 1 represents d) In the occurance of a failed start, a the most typical connections with the use of limit of 12 consecutive tries will be a terminal board made until the inverter will assume a waiting condition depending on the software version... -
Page 36: Inverter Shutdown And Protections
INVERTER SHUTDOWN and discharge sides in the refrigerating system. The compressor may only be switched off by cutting its power supply or by entering the due d) HARDWARE CHECK –During the speed control input. starting procedure and before applying current to the compressor motor, all If the compressor is make to stop due to power power switches are checked for short supply switch off, then the inverter will self reset... -
Page 37: Adapter Board Logic Flowchart
b) Maximum speed: if the speed (cutting the current) and avoiding signal requires operation further damage to power devices above the speed limit than the or compressor winding. compressor will kept In case of a major failure in the running at the maximum hardware (short circuit of two or speed. -
Page 38: Control Board Operations
CONTROL BOARD OPERATION... -
Page 39: Troubleshooting Guide
TROUBLESHOOTING... - Page 40 TROUBLESHOOTING (con’t)
-
Page 41: Ice And Water Dispenser
• ICE and WATER DISPENSER Stop ice dispensing by releasing pressure on pad before container is full. Som e ice will continue to fall. Do not remove container until last of ice falls. IMPORTANT: Reduce spraying of crushed ice by holding wide mouthe ontainer directly under ice chute and as high as possible in dispenser area. -
Page 42: Water Filter
Removing Ice Bucket: INITIAL INSTALLATION OF • Remove ice bucket by lifting bucket WATER FILTER and pulling out. • Replace ice bucket by sliding in until Locate water filter connection location. The connection is located under the bucket locks in place. Ice bucket Meat Savor™/ Produce drawe r on the... -
Page 43: Standard Installation
WATER FILTER BYPASS INSTRUCTIONS Standard Installation 1. Pull copper Water Supply Line from plumbing forward from underneath refrigerator. 2. Flush air and impurities from Water Supply Line by turning on water supply and running two (2) quarts of water into a bucket. 3. -
Page 44: Water Filter Bypass Instructions
Water Filter Bypass Installation 1. Pull copper Water Supply Line from plumbing forward from underneath refrigerator. 2. Flush air and impurities from Water Supply Line by turning on water supply and running two (2) quarts of water into a bucket. 3. -
Page 46: Water Line Connections
piercing lance over hole in water WATER LINE CONNECTIONS line. Place both halves of saddle Avoid routing tubing behind ovens and other valve bracket against water line. cooking appliances. Avoid kinking, Turn saddle valve handle clockwise smashing the tubing as this can cause leaks until piercing lance enters hole in or diminished flow. -
Page 47: Icemaker
1. Pull copper line from Test points are identified on module: plumbing forward N = Neutral side of line from underneath M = Motor connection refrigerator (see fig. H = Heater connection Flush air and T = Thermostat connection impurities from water L = L1 side of line line be turning on V = Water valve connection... -
Page 48: Ice Maker
WARNING: To avoid electrical shock which can cause severe personal injury or death, disconnect power to refrigerator using power switch before servicing. Wires removed during disassembly must be replaced on proper terminals to insure correct earthing and polarization. After servicing, reconnect power using power switch. - Page 49 Module and Heater Assembly Switches will jam if turned counterclockwise 1. Remove module and support assembly. and gears will be destroyed if turned clockwise. 2. Install module and support assembly on Advance ice maker into cycle be using a jumper replacement mold and heater assembly.
- Page 50 Water Fill Valve Water Problems Turning water level adjustment screw will Poor water quality can cause ice maker to move contact in relationship with contact fail or produce unacceptable cubes. Mineral ring segment. This causes contact to vary content or sand can restrict screen in water time water valve is energized.
- Page 51 ICEMAKER pressure ranging from 20 to 120 PSI (1.4 to 8.2 bar). Wire Harness A non-resettable thermal fuse micro device 170° F (78°C) is spliced into black wire of ice maker wiring harness. Excessive heat can cause no ice production. Replacing wiring harness will only temporarily solve problem.
Need help?
Do you have a question about the VCSB483D and is the answer not in the manual?
Questions and answers