Table of Contents
Advertisement
Quick Links
Advertisement
Table of Contents

Related Manuals for KEDDY Christineberg

Summary of Contents for KEDDY Christineberg
- Page 1 Christineberg Installation Instructions Care and firing instructions...
-
Page 2: Table Of Contents
CARE & FIRING INSTRUCTIONS Fuel..................................... 14 Firing................................... 14 Firing and refilling with wood ............................14 Damper positions................................ 15 Removal of soot and maintenance ..........................15 TECHNICAL SPECIFICATION ..........................16 Dimensions and performance The Christineberg from above The Christineberg from the front... -
Page 3: General Information
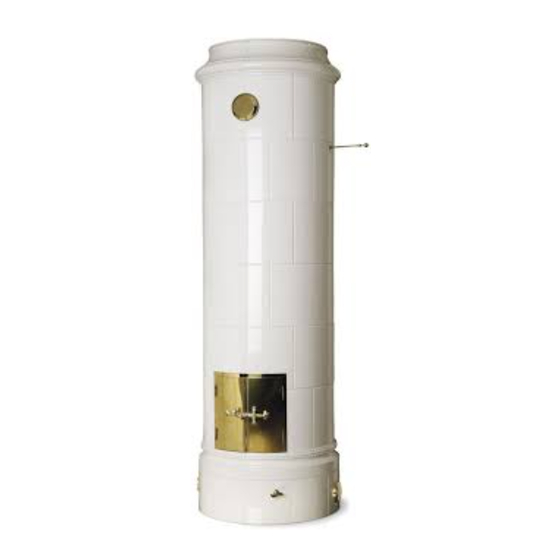
We congratulate you on your choice of tile stove. Christineberg is a new type of tile stove with a unique design. It has been developed and designed to take advantage of modern combustion and heat accumulation technology. The shape originates from 18th century Sweden. -
Page 4: Prerequisites
200 mm on each side of the opening. DISTANCE TO FLAMMABLE STRUCTURAL UNITS For the Christineberg, the width of the floor protection is Before deciding where to place the tile stove, you must 720 mm. -
Page 5: Preparations
PREPARATIONS CORNER WALL INSTALLATION FLUSH WALL INSTALLATION There are two different alternatives for connecting the flue: There are two different alternatives for connecting the flue: • rear installation (turnable) • rear installation • top installation (straight up) • top installation (straight up) The height from the floor to the centre of the flue at the The height from the floor to the centre of the flue at the rear is 1920 mm. -
Page 6: Installation Instructions
INSTALLATION INSTRUCTIONS Before starting on the installation of the tile stove, the following steps need to be fully completed: • Chimney: Alternative 1 - An existing chimney prepared for rear connection Alternative 2 - A newly installed chimney prepared for rear connection Alternative 3 - Prepared for a new top connected chimney. - Page 7 4. Put in six element 3 pieces with matching gaskets, 6. Put in the hearth's rear wall. Push it backwards and note the vertical gasket. centre it against the bottom plate. Place round gasket spacers evenly distributed on all sides, four spacers per course, twelve pieces in total. Push the elements outwards against the safety case, so the spacers are kept in place.
- Page 8 8. Install the two upper horizontal side walls on each side 10. Carefully install element 4 with the figure 4 right way of the hearth, in the same way as the lower ones. round and to the front. Take care to centre the part and fit it in against the previously installed element so it doesn't "tooth".
- Page 9 12. Install element 6 right way round with matching gas- 14. Push down four round gasket spacers evenly distrib- ket and four gasket spacers, in the same way as element uted around element 7. Install three additional element 7 pieces, one element Also install one element 7 right way round with match- 8 piece, and one element 9 piece, the right way round, ing gasket, but wait with the gasket spacers.
- Page 10 15. Install the plate cover with silicone (red) in between. Check the joint is sealed all round. 16. Press in the short thick fireproof rope seal between the hearth's bottom plate and the lower edge of the cast iron frame. Apply a string of silicone (red) around the hole for the air intake in the bottom of the hearth plate.
-
Page 11: Assembling The Tiles
It is now time to assemble the tiles. Each course of tiles is shown below by three illustrations. • The right illustration shows the Christineberg diagonally from the front. • The two illustrations on the left, A and B respectively, are overview illustrations showing the course of tiles in ques- tion from above: A illustrates the Christineberg without the extension tiles. - Page 12 20. Assemble tile course 2 in adhesive. The middle joint for tiles 1 and 3 must line up with the tile moulding's joint. The inside of the tiles must be in line with the inside of the tile moulding. Fix using tape. Note that tiles and 1 and 3 have chamfered front edges.
-
Page 13: Installing The Flue Gas Damper
23. Assemble tile course 5 in adhesive. Tile course 5 Tile course 5 24. Assemble tile course 6 in adhesive. Make sure that the hole for the damper shaft is in the right place. Tile course 6 Tile course 6 25. -
Page 14: Rear Connection To The Chimney
REAR CONNECTION TO THE CHIMNEY NOTE! The flue connection must not be bricked in 26. Connect the chimney connection sleeve to the place! chimney, either at the rear to an existing chimney or, Chimney alternatively, to a new chimney (element chimney). Insulation Chimney connection Read the chimney's installation instructions if a new... -
Page 15: Final Installation And Grouting
Do not fire your Christineberg for at least one week after completing the installation to allow for the hardening times. The first ten fires should be calm, to give the tile stove the opportunity to stabilise and dry. Therefore, fire these ten first fires in damper position NORMAL and with only half the recommended amount of wood, see also the Care &... -
Page 16: Care & Firing Instructions
Both the useful efficiency and the environmental results make the Christineberg directly comparable with the best optimised heating boilers on the market. For the Christineberg to work optimally and to give you the maximum return, it is of the greatest importance that you follow the care and firing instructions below. Non-compliance will invalidate the warranty. -
Page 17: Damper Positions
Also read our warranty terms, which were included in the delivery. If you have questions, you are welcome to contact us. We wish you many pleasant and rewarding years with your Christineberg tile stove - an investment that combines use with pleasure. -
Page 18: Technical Specification
TECHNICAL SPECIFICATION DIMENSIONS AND PERFORMANCE THE CHRISTINEBERG FROM THE FRONT • Height 2265 mm • Width 695 mm • Depth 600 mm • Weight 600 kg • Height to centre of rear connection 1920 mm • Height to centre of top connection 1920 mm •... - Page 20 www.keddy.se...
Need help?
Do you have a question about the Christineberg and is the answer not in the manual?
Questions and answers