Table of Contents
Advertisement
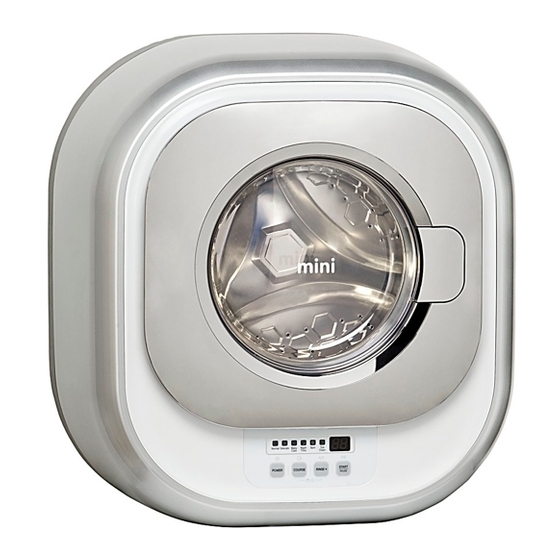
※ mini is the world's first wall-mounted front-load washer developed by Daewoo Electronics.
•
As this product undergoes a functional test, a small amount of water may remain in the product.
•
Store the user manual in an easily reachable place for later use.
•
Please read 'Safety Instructions' carefully before use.
D-M301WP_INTENSIVE_호주향.indd 1
Wall-Mounted Front Load Washer
DWD-M301WP
Wall-Mounted Front Load Washer
2014-02-03 오후 4:18:28
Advertisement
Table of Contents

Related Manuals for Daewoo DWD-M301WP


Summary of Contents for Daewoo DWD-M301WP
- Page 1 Wall-Mounted Front Load Washer DWD-M301WP Wall-Mounted Front Load Washer ※ mini is the world's first wall-mounted front-load washer developed by Daewoo Electronics. • As this product undergoes a functional test, a small amount of water may remain in the product.
- Page 2 Mini's Practical Function Daewoo Electronics' cutting-edge technologies apply to mini, featuring a variety of essential functions for better everyday lives. D-M301WP_INTENSIVE_호주향.indd 2...
-
Page 3: Table Of Contents
CONTENTS Product Features ..............3 Preparation Safety Instructions ..............4 Installation ................9 Preparation................9 Parts and Components ............. 10 Washable Items ................ 11 Non-Washable Items ..............11 Preparing Clothes for washing ..........12 Directions on Detergent and Softener Containers ....13 Washing Course ............... -
Page 4: Product Features
Product Features mini's unique functions for faster and powerful cleaning of various fabrics Powerful Daily Cleaning 29 minute wash mini enables daily washes of towels, shirts, As normal cycle takes only 29 minutes, it underwear and socks for a cleaner home speeds the laundry process and reduces environment. -
Page 5: Safety Instructions
Safety Instructions This appliance is not intended for use by persons (including children) with reduced physical, sensory or metal capabilities, or lack of experience and knowledge, unless they have been given supervision or instruction concerning use of the appliance by a person responsible for their safety. Cautionary information on cases that Cautionary information on cases that may cause death or severe personal... - Page 6 Safety Instructions Warning Insert the plug with 10A or Unplug the cord and open higher in the outlet directly. the window for ventilation without touching any Multiple connections to a single buttons if a gas leak occurs. outlet may cause fire due to heat. Violations may cause a spark and, accordingly, explosion, fire, or burns.
- Page 7 Safety Instructions Warning Do not place your hands or With 'Door Locked', do not metal objects below the open the door by force. washer while the washer is Violations may destroy the door running. or lock, causing technical Violations may cause personal problems.
- Page 8 Safety Instructions Caution Turn on the tap to check for Prevent pets and animals leaks before use. from entering the washer tub. Improper connection may cause leaks. Violations may cause injuries. Do not operate the washer Do not place magnets beside with the detergent or the cap or the washer during softener container detached.
- Page 9 Safety Instructions Caution Remove any detergent Close the door carefully to residue or contaminants on prevent laundry from getting the washer with a wet soft jammed in the door. cloth. It may cause damage to clothes Remaining contaminants may or malfunction. deform plastic parts.
-
Page 10: Installation
Installation Refer to the installation guide for installation. (see "installation guide" on page 25~27) The washer is recommended to be installed by a professional service engineer. Preparation Connect the drain hose to the drain. - Check that the drain hose is tightly connected. - A minor water leak may occur during installation or the initial cycle. -
Page 11: Parts And Components
Parts and Components Softener Detergent Container Container Power Cord Drum Door Cold Water Tap (Do not open during Control Panel (Turn off the tap operation) after cleaning cycle is complete) Parts Elbow Drain hose Anchor bolt Connector Inlet (3 units) (4 units) valve inlet hose... -
Page 12: Washable Items
Washable Items - Underwear and socks - High-quality clothes such as blouse, knitwear, and wool clothing - Dress shirts and T-shirts - Women's wear such as lingerie and stockings - Towel, handkerchief, pillow cover, kitchen towel, and dust cloth - Baby clothes, nappies, and underwear Leather and silk items - Product such as pillow and comforter padded with - Wash supplements for commercial sales (laundry... -
Page 13: Preparing Clothes For Washing
Waterproof mat or sheet, solid and heavy clothes, doormat, and blanket, and non- permeable fabric products are not suitable for washing, rinsing, or spinning. - Floating laundry or abnormal vibrations may cause personal injuries or damage to the washer, wall, floor, and clothes. Remove dust and sand from the laundry before use. -
Page 14: Directions On Detergent And Softener Containers
Spoon-Shaped Detergent Container Softener Container ■ Open : Turn the detergent and softener containers counterclockwise and then pull them. ■ Close : Turn the detergent and softener containers clockwise to close them tight and then run the washer. Addition of Detergent Add detergent as recommended to the detergent container. -
Page 15: Washing Course
Baby Care Night Load Normal Delicate Spin Intensive DWD-M301WP time Recommendations DWD-M301WA Cotton shirt (150g) ● ● ● 11 to 12 shirts A pair of socks (50g) ● ● ● 19 to 20 pairs Underwear set (50g) ● ● ●... -
Page 16: Use Buttons And Functions
Buttons and Functions Power Display LED - Use the Power button to turn the washer on - LED displays cleaning time and course or off. information. Course Child Lock (Button Lock) - Press the Course button to select a cycle. - Press the Child Lock button to prevent your kids from controlling the washer. -
Page 17: Normal
Normal Select the Normal Course for daily laundry (towel, socks, and dress shirts) and other regular items. Open the door and load the washer with clothes. Add detergent and fabric softener into the detergent and softener containers respectively and then close the door. -
Page 18: Delicate
Delicate Select the Delicate Course for items washable with water such as knitwear, wool clothing, and lingerie. Open the door and load the washer with clothes. Add detergent and fabric softener into the detergent and softener containers respectively and then close the door. -
Page 19: Baby Care
Baby Care (DWD-M301WP, DWD-M301WA) Select the Baby Care Course to wash baby clothes, 100% cotton products, and clothing requiring steam wash and bleaching. Open the door and load the washer with clothes. Add detergent and fabric softener into the detergent and softener containers respectively and then close the door. -
Page 20: Night Time
Night Time Select the Night time Course to wash your laundry silently at night or when your baby is asleep. Open the door and load the washer with clothes. Add detergent and fabric softener into the detergent and softener containers respectively and then close the door. -
Page 21: Intensive Wash
Intensive wash Select the Intensive wash Course to wash highly soiled laundry Add powder bleaches into the detergent container. - Add a proper amount of detergent to the detergent container. Press the Power button slightly for a second. Press the Course button to select 'Intensive wash'. - Press the intensive button to select the level. -
Page 22: Spin
Spin Select the Spin Course to spin dry the laundry without a wash or rinse cycle. Load the tub with the laundry and then close the door. Press the Power button slightly for a second. Press the Course button to select 'Spin'. Press the Start/Pause button. -
Page 23: Rinse+Spin
Rinse+Spin Select the Rinse+Spin Course to rinse and spin dry the laundry without a wash cycle. Load the tub with the laundry and then close the door. - Add a proper amount of softener to the softener container. Press the Power button slightly for a second. Press the Course button to select 'Spin'. -
Page 24: Q&A On Laundry
Q&A on Laundry The following instructions are about the cleaning of washer parts for long-term sanitary use. Can freezing cause the washer to malfunction? A small amount of water remains in the inlet hose or drum tub after the completion of washing cycle. -
Page 25: Cleaning
Cleaning Follow these cleaning instructions for long-term sanitary use of washer. - Unplug the power cord before cleaning the washer. Violations may cause electric shocks or personal injuries. - Do not sprinkle water on the washer. Violations may cause short circuits or electric shocks. Warning ■... -
Page 26: Installation Guide
Installation Guide The washer is recommended to be installed by a professional service engineer. Install the washer without plugging in the power cord. Before installation After installation Perform a test run to identify any water leaks or abnormal noise. 2. Inspect wall 3. -
Page 27: Test Operation
n manual 4-1. Drill a hole through tile 4-2. Drill a hole into the retaining wall 5. Insert set anchors (4 holes) - Notch below the marking hole. - Set the hammer drill perpendicular to the wall - Insert set anchors into holes. pot. - Page 28 Installation Guide Follow the installation instructions to install the washer more conveniently. 15. Organize inlet and drain hoses and power cord 16. Mount the body - Organize inlet and drain hoses and power cord - Connect 4 nuts and bolts above and below after with molding and hose guide.
-
Page 29: When Malfunctions Are Suspected
When malfunctions are suspected - Some troubles are wrongly considered to be mechanical malfunctions although they are not. - If any malfunctions are suspected, you may contact the sales store or service center with inquiries. Problems Causes [1] The smell of excess waste in drainage flows back. You need to clean the drainage [1] Unpleaser smell for drum. -
Page 30: Before Calling For Service
Before calling for service - Press the button to suspend the operation of washer and then examine the following items. - Press the button again to resume operation. Problem/Display Checkpoints and Solutions - Is the power cord correctly connected to an electric outlet? - Is the power supply on? Washer is not No display... -
Page 31: Specifications And Wiring Diagram
Specifications and Wiring Diagram Model Wall-Mounted Front Load Washer Dimensions 550(W) X 600(H) X 292(D) Weight 16.5Kg Power 220~240V / 50Hz Max. Laundry Load Operating Water Pressure 98.1kPa~784kPa(1kgf/cm2~8kgf/cm2) Product specifications are subject to change without prior notice for the improvement of product quality. Wiring Diagram D-M301WP_INTENSIVE_호주향.indd 31 2014-02-03 오후... - Page 32 Wall-Mounted Front Load Washer Wall-Mounted Front Load Washer Please read the user manual before contacting the service center as call-out charges may apply to services on the use or installation of washer. D-M301WP_INTENSIVE_호주향.indd 32 2014-02-03 오후 4:18:37...
Need help?
Do you have a question about the DWD-M301WP and is the answer not in the manual?
Questions and answers