Advertisement
Istruzioni ed avvertenze per l'installazione e l'uso
Instructions and warnings for installation and use
Instructions et avertissements pour l'installation et l'usage
Instrucciones y advertencias para su instalación y uso
Anleitungen und Hinweise zu Installation und Einsatz
Instrukcje i zalecenia dotyczące instalacji i użytkowania
Instruções e advertências para a instalação e utilização
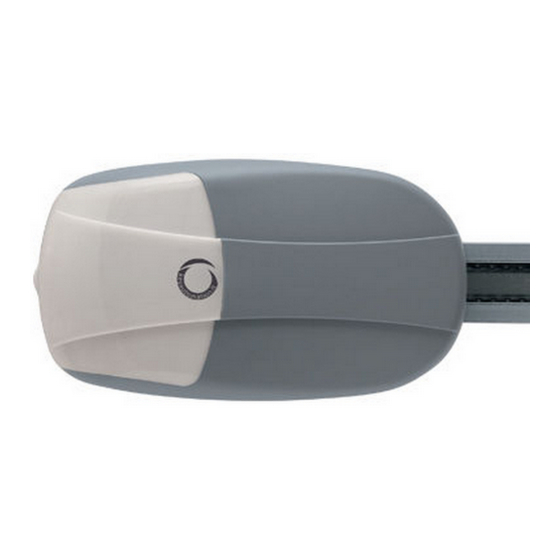
VIPER
Motoriduttore sezionale per automazione garage
Opener for sectional and up and over garage door
Motoréducteur sectionnél pour automation garage
Motorreductor seccional para automatismo garaje
Moto-redutor seccional para amolação garagem
Przekrojowa przekładnia zwalniająca do automatyki garażowej
Sektionalantrieb für Garagentorautomation
Advertisement
Table of Contents

Summary of Contents for Key Automation Viper
- Page 1 Anleitungen und Hinweise zu Installation und Einsatz Instrukcje i zalecenia dotyczące instalacji i użytkowania Instruções e advertências para a instalação e utilização VIPER Motoriduttore sezionale per automazione garage Opener for sectional and up and over garage door Motoréducteur sectionnél pour automation garage Motorreductor seccional para automatismo garaje Moto-redutor seccional para amolação garagem...
-
Page 2: Safety Warnings
If liquid spills into any part of the automation components, immedi- Read the instructions carefully before you start the installation. ately disconnect the power supply and contact the Key Automation Customer Service. The use of the automation under these condi- The design and manufacture of the devices making tions can be dangerous. -
Page 3: Product Overview
2 - PRODUCT OVERVIEW 2.1 Description of the product Viper has a built-in encoder, control unit and receiver. Viper is an electromechanical irreversible gear motor, suitable to The receiver has the possibility to select fix or rolling code. automate up and over doors up to 14 m and sectional doors up to The rail is chain driven, pre-assembled in one or three pieces. - Page 4 2.3 Models and characteristics CODE DESCRIPTION POWER GUIDE for sectional doors up to 10 mq with motor 24 Vdc and pre-assembled chain rail 3320 mm in SEZ7U 700Nm central with integrated receiver single piece for sectional doors up to 10 mq with motor 24 Vdc and chain rail 3320 mm into three pieces with SEZ7 700Nm...
-
Page 5: Preliminary Checks
2.5 List of cables needed Typical installation cables required for connection of various devices The cables used must be suitable for the installation; for example, are shown in cables list table. we recommend a H03VV-F type cable for indoor installation and H07RN-F for outdoor. - Page 6 4.2 Connection of the motor body to the guide Standard 90° rotated head 6x15 self tapping screw Guide Guide 6x15 self tapping screw U bracket U bracket lateral movement ring lateral movement ring 4.3 Installation of the guide and motor on the door Position the guide with reference to figure Wall MAX 40 cm...
-
Page 7: Description Of The Buttons
4.5 Wiring diagram WARNING - Before making connections verify that the installation is not powered Wiring diagram photocell, safety connection STOP and step/step command P/P The emergency STOP contact must be connected between no. 2 and no. 3 (contact normally closed NC) The step/step contact P/P must be connected between no. - Page 8 4.9 Setting of closing limit Press”+” to display “2” Press “P”, “2” will flash Press”+” Door closing Or press “-” Or door opening When the door closes and reaches the ideal position, after Attention!! In order to avoid false obstacles detection in closing while 2 seconds press the key “P”...
- Page 9 4.12 Setting reception mode The control unit is set for the radio control of all Key Automation transmitters. Press”+” to display “5” Press “P”, on the display ‘1” Press “+” o “-” to select the Press the key “P” to show “5”, flashes, to indicate that the set desired type of decoding and save the settings.
- Page 10 4.16 Opening command setting It is possible to change the functioning of the open/stop/close command to only open By enabling this function, the Step/Step command permits opening by accepting only re- opening during closing. With the function “7=1” auto- matic closure enabled at each command the automatic closing time is updated Press”+”...
-
Page 11: Troubleshooting
4.19 Troubleshooting Together with the warn on the display, the flashing light (if con- In this paragraph it is highlighted some malfunctions that may nected) will warn with a sequence of two short flashes, pause, two happen. short flashes Problem Causes Solution The automation system does not work... -
Page 12: Connection Sequence
6 - INSIGHTS 6.1 Battery charger connection 900KBPK Connection sequence: Viper can also function in the absence of main power supply by in- stalling 900KBPK without making any modifications to the system. • Disconnect the 230 VAC power supply • Connect 900KBPK to terminals CH+ and CH- .


Need help?
Do you have a question about the Viper and is the answer not in the manual?
Questions and answers