Table of Contents
Advertisement
Advertisement
Table of Contents

Related Manuals for Medeli DD516


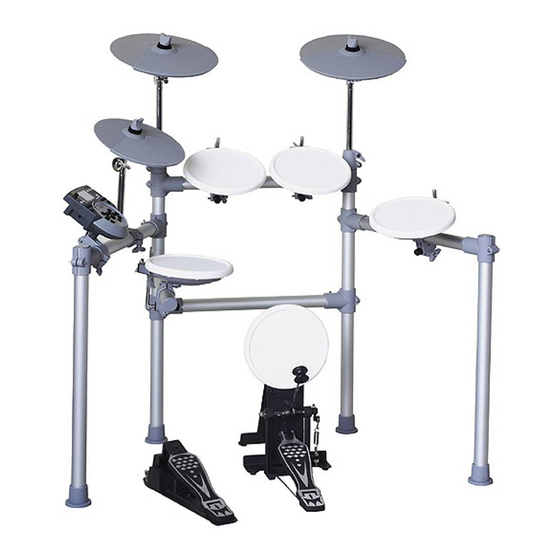
Summary of Contents for Medeli DD516
- Page 1 aw_DD516_Manual_G06_101108 2010 14:28:21...
- Page 2 INFORMATION FOR YOUR SAFETY! PRECAUTIONS THE FCC REGULATION WARNING (for USA) This equipment has been tested and found to comply with PLEASE READ CAREFULLY BEFORE PROCEEDING the limits for a Class B digital device, pursuant to Part 15 of the FCC Rules. Please keep this manual in a safe place for future reference.
-
Page 3: Table Of Contents
Contents Settings for Other Functions........15 Panel & Display Description Saving to a User Drum Kit........15 Front Panel..............4 Rear & Side Panel............5 Display................5 Making the Settings for Pads About Settings of Pads..........16 Quick Start Adjusting the Pad Sensitivity........17 Setting the Pad Threshold........17 Setup Eliminating Crosstalk between Pads......17 Connecting Pads and Pedals........6... -
Page 4: Panel & Display Description
Panel Description Front Panel 1. VOLUME Knob 9. CLICK Button Adjust the volume of phone and line output. Turn the metronome on or off and enter the Click menu in NORMAL mode. 2. START/STOP Button 10. DRUM OFF Button Start or stop playing. Mute the drum part of the pattern. -
Page 5: Rear & Side Panel
Panel Description Rear Panel & Side Panel 17. AUX IN Jack(1/8”) This stereo input jack is for an external sound source, such as an MP3 or CD player. 18. LINE OUTPUT Jacks(1/4”) Stereo output connection to an audio system or drum amplifier. -
Page 6: Setup
Setup Caution! To prevent electric shock and damage to the device, make sure the power is switched OFF on the drum and all related device before making any connection. Connecting Pads and Pedals Standard: KICK, SNARE, TOM1-3, CRASH1, RIDE, HIHAT, HIHAT CONTROL PEDAL Extended: CRASH2, TOM4 Using the provided cables, connect with kick, snare, tom1~tom3, ride, crash, hi-hat, hi-hat control triggers. -
Page 7: Connections
Connections Connecting an Audio Equipment When using an amplifier, connect the Output L/MONO and R jacks on the rear panel to the input of the amplifier. Note: For mono playback, use the L/MONO jack. For stereo playback, connect both L/MONO and R jacks. The line output volume is controlled by the VOLUME knob. -
Page 8: Performing
Performing Selecting a Drum Kit After powering up, the digital drum will be in KIT menu (KIT indicator ON ). The display should look like this: Use the [ ] and [ ] buttons to select the active kit. There are 45 kits in the digital drum: 29 preset kits (Kits 01-29) 16 user kits (Kits 30-45), the parameter display area will display as "U30~U45", with an additional letter "U". -
Page 9: Adjusting The Sensitivity Of A Pad
Performing Adjusting the Sensitivity of a Pad BEAT TEMPO You may wish to adjust the sensitivity of the pads according to UTILITY your playing style and desired dynamic range. UITILY Press the [UTILITY] button The UTILITY indicator appears. Strike a pad or press a pad select button to select the one whose sensitivity is to be adjusted. -
Page 10: Editing And Saving A Drum Kit
Editing and Saving a Drum Kit In KIT menu, you can modify the parameters as you like and save to the selected user kit. Adjusting the Volume of a Drum Kit Press the [KIT] or [PAGE] button. Select the Kit Volume page. Press the [ ] or [ ] button. -
Page 11: Playing Along With Songs
Playing Along with Songs Selecting and Playing Back a Song Press the [SONG] button. Switch to the SONG menu. Press the [ ] or [ ] button. Select the active song. The digital drum has many kinds of songs. Please refer to Song list. Press the [START/STOP] button. -
Page 12: Recording Your Performance
Recording Your Performance In RECORD menu, you can record pad performances and the song as accompaniment. Recording Your Performance Quickly Press the [RECORD] button. The [RECORD] LED will flash. The Metronome will be turned on automatically. The display will show: Press the [START/STOP] button or strike the pad. -
Page 13: Practicing With Patterns
Practicing with Patterns There are three types of patterns in LEARNING mode. Beat: Snare Practice Rhythm: Drums Practice Pattern: Drums Practice with accompaniment Selecting a Pattern and Practicing with it When you are in NORMAL mode, please press and hold the [PAGE/SELECT] button for 1 second. -
Page 14: Creating Your Own Drum Kit
Creating Your Own Drum Kit About the Drum Kits In KIT menu, you can select drum kits to play from the pads, and you can edit voices and their associated parameters, such as Pitch, Reverb Level, Volume, Pan, MIDI Note, etc. There are 45 kits in the digital drum: 29 preset kits (Kits 01-29) 16 user kits (Kits U30-U45) -
Page 15: About The Drum Instruments
Creating Your Own Drum Kit About the Drum Instruments The digital drum features 400 different drum instruments which are categorized into 9 separate groups, such as Acoustic Kick, Electric Kick, Acoustic Snare, Electric Snare, Percussion. You can individually adjust the volume, pan, pitch, reverb settings for instruments set to the pad. -
Page 16: Making The Settings For Pads
Making the Settings for Pads About Settings of Pads If the digital drum is not yet in UTILITY menu, press the [UTILITY] button to enter it. The UTILITY indicator will light up. You can use the [ ] or [ ] buttons to adjust parameters (as shown to the right ) for each pad as well as the rim sensitivity of the pad and the splash sensitivity of the Hi-Hat control pedal. -
Page 17: Adjusting The Pad Sensitivity
Making the Settings for Pads Adjusting the Pad Sensitivity Press the [PAGE] or [UTILITY] button, select Pad Sensitivity page. The display will show: Changes how a pad responds to your playing. At higher sensitivities, the pad will generate a louder signal, even when you play softly. -
Page 18: Setting Rim Sensitivity On Pads
Making the Settings for Pads Curve refers to how the trigger signal’s dynamic response relates to your pad hit. Curve1: The standard setting, this produces the most natural correspondence between playing dynamics and volume change. Curve2, 3: Compared to Curve1, strong dynamics produce a greater change. -
Page 19: Setting The Metronome
Setting the Metronome About Click The digital drum is equipped with a built-in metronome, which can be used by itself as a rhythm guide for practice, or in conjunction with the song playback or record functions. If the digital drum is not yet in CLICK menu, press the [CLICIK] button to enter it. -
Page 20: Playing Back Songs
Playing Back Songs About Songs There are 80 preset songs in the digital drum: 50 Looped Patterns 10 Looped Percussion Patterns 5 Hit Songs 15 Tap Songs Please refer to Song List. In SONG menu, you can select the HINT song number and adjust the volume of the song’s The sounds in the tap song are played back accompaniment and drum part. -
Page 21: Recording A Song
Recording a Song About Recording In NORMAL mode, the digital drum allows you to quickly record your performance as you play the pads. There are two ways to 1-45 start recording a new song: Press the [START/STOP] button Hit any pad On Recording Standby, you can use the [ ] or [ ] button to adjust the parameters(as shown to the right). -
Page 22: Practicing In Learning Mode
Practicing in Learning Mode About Learning Mode The LEARNING mode is a unique set of exercises specifically designed to help build speed, accuracy and stamina, as well as develop better drum skills. There are 42 practices in the digital drum: 20 Beats (Only Snare) 12 Rhythms (Only Drum, from Level1-Level6) 10 Patterns (from Level1-Level5) -
Page 23: Practicing With Rhythms
Practicing in Learning Mode Practicing with Rhythms If the digital drum is not yet in RHYTHM menu, press the [RHYTHM] button to enter it. You can adjust the parameters (as shown to the right). Press the [ ] or [ ] button to select the rhythm. Press the [PRACTICE] button to listen to the rhythm and follow it. -
Page 24: Recording And Scoring Your Practice
Practicing in Learning Mode Recording and Scoring Your Practice Press the [START/STOP] button, you can enter the score state. A measure count-in will be inserted before playing back the pattern so that you can practice in good time. When playing back the pattern, your performance will be recorded automatically. -
Page 25: Making The Setting For Midi
Making the Settings for MIDI About MIDI MIDI (Musical Instrument Digital Interface) is a standard that allows performance data and other information to be exchanged among electronic musical instruments and computers. With a MIDI cable connecting MIDI connectors equipped device, you can play multiple instruments with a single keyboard, have multiple instruments perform in ensemble, program the settings to change kits automatically to match the performance as the song progress, and more. -
Page 26: Connecting With An External Sound Device
Making the Settings for MIDI Connecting with an External Sound Device The digital drum transmission channel for the drum kit is fixed to Channel 10. It will output MIDI data generated by the triggers when hitting the pads or stepping on the Hi-Hat control pedal (Note ON/OFF, and Foot messages). Song playback data and metronome notes are not transmitted. -
Page 27: Prompt Messages
Prompt Messages There isn’t data in the digital drum's memory. There is full of data in the digital drum's memory. You can not record any data. You didn't record your practice in the Learning mode. Troubleshooting aw_DD516_Manual_G06_101108 2010 14:28:28... -
Page 28: Specifications
Specifications Maximum Polyphony Display Backlit Segment LCD Drum kits Connectors 45 (29 Preset Kits + 16 User Kits) 9 Trigger Input Jack, Phone Jack(1/8”, stereo), Aux In Jack(1/8”, stereo), General MIDI Kits 2 External Trigger Input Jack(1/4”, Tom4, Crash2), 11 GM Kits Output(1/4”, L/Mono, R), USB, MIDI IN, MIDI OUT Drum Instruments Control Buttons... -
Page 29: Kit/Voice/Song/Pattern/Parameter List
Drum Kit List PRESET KIT PRESET KIT Acoustic Tabla Standard 1 Latin Standard 2 Funk 1 Teckno 2 Funk 2 Fusion Acoustic Camco Standard 1 Brush Standard 2 Room Funk 1 Rock Funk 2 Pop Rock Fusion Jazz Camco Jazz Brush Brush Timpani Room... - Page 30 Drum Instrument List Name Classic Snare 1 Electronic Snare 4 1976 Tom 2 Acoustic Kick Classic Snare Rim 1 Electronic Snare 5 1976 Tom 3 Classic Snare 2 Electronic Snare 6 1976 Tom 4 Standard Kick 1 Classic Snare Rim 2 Electronic Snare 7 HipHop Tom 1 Standard Kick 2...
-
Page 31: Drum Instrument List
Drum Instrument List Standard 22” Ride Rim Metronome Click Cowbell 11 Cow Click 2 Brush Ride Scratch Tabla 1 Fm Click 1 Brush Ride Rim Scratch Push Tabla 2 Fm Click 2 Rock Ride DJ FX Tabla 3 High Q Zap Tabla 4 FX 1 Clean Pop Ride... - Page 32 GM Drum Kit List Note No. Standard 1 (bank 0 ) Standard 2 (bank 4 ) Room (bank 8 ) Rock (bank 16 ) 27-D#1 High Q <- <- <- 28 E1 Slap <- <- <- 29-F1 Scratch Push <- <- <- 30-F#1...
-
Page 33: Gm Drum Kit List
GM Drum Kit List 808 (bank 25 ) Note No. Funk (bank 17 ) Electronic (bank 24 ) House (bank 28 ) 27-D#1 <- <- <- <- 28 E1 <- <- <- <- 29-F1 <- <- <- <- 30-F#1 <- <- <- <-... - Page 34 GM Drum Kit List Note No. Jazz (bank 32 ) Brush (bank 40 ) Orchestra (bank 48 ) 27-D#1 <- <- Concert Hi-hat Close 28 E1 <- <- Concert Hi-hat Pedal 29-F1 <- <- Concert Hi-hat Open 30-F#1 <- <- Concert Ride 31-G1 <-...
- Page 35 GM Backing Instrument List aw_DD516_Manual_G06_101108 2010 14:28:29...
- Page 36 Song List Name Type Name Type Drum Intro Loop Mambo Loop Drum Main A Loop Latin Rock 1 Loop Drum Main B Loop Latin Pop 2 Loop Electronic&Funk Loop Guitar Bossa Loop Modern Pop Loop Country Blues Loop Fusion 1 Loop Rock Loop...
- Page 37 Pattern List Number Name Beat Tempo Measure Beat 1 Beat 2 Beat 3 Beat 4 Beat 5 Beat 6 Beat 7 Beat 8 Beat 9 Beat 10 Beat 11 Beat 12 Beat 13 Beat 14 Beat 15 Beat 16 Beat 17 Beat 18 Beat 19 Beat 20...
- Page 38 Parameter List NORMAL MODE 1—45 1—400/1—7 0—32 0—32 ON / OFF -8 -- +8 -12 -- +12 -8 -- +8 -12 -- +12 0—16 -12 -- +12 0—127 ON / OFF 1—80 1—80 0—32 0—32 0 9/2, 0 9/4, 0 9/8, 0 9/16 1-2, 3-8, 1-4, 1-8 1-12, 1-16 0—32 1—16...
-
Page 39: Midi Implementation Chart
MIDI Implementation Chart (drum kit part only) aw_DD516_Manual_G06_101108 2010 14:28:30... - Page 40 DD516_G06 aw_DD516_Manual_G06_101108 2010 14:28:30...
Need help?
Do you have a question about the DD516 and is the answer not in the manual?
Questions and answers