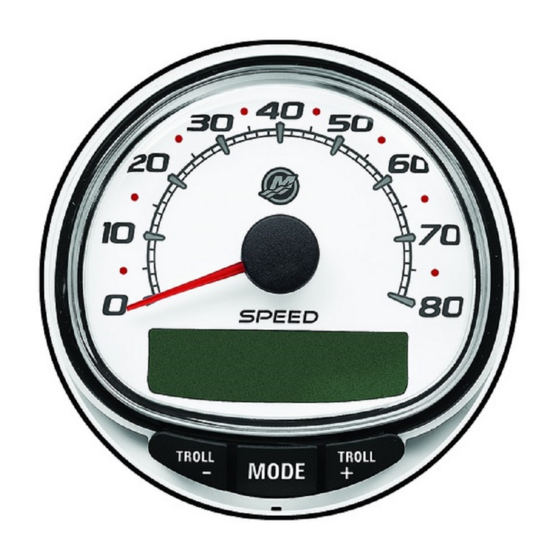
Mercury SC1000 User Manual
System tach/speedometer and smart tow tachometer
Hide thumbs
Also See for SC1000:
- Installation, operation and maintenance instructions (7 pages) ,
- Operation and maintenance manual (52 pages)
Table of Contents
Advertisement
Advertisement
Table of Contents

Related Manuals for Mercury SC1000


Summary of Contents for Mercury SC1000
-
Page 3: Table Of Contents
TABLE OF CONTENTS Basic Operation and Features Basic Operation and Features ...1 Master Reset...1 Auto Detection Engine Function...2 Display Screens...3 Alarm Warnings...4 Warning Display Screens...5 Warning System with Descriptive Text Alarm Warnings with Descriptive Text...9 System Speedometer Display Screens System Speedometer Display Screens...11 System Tachometer Display Screens System Tachometer Display Screens... - Page 4 TABLE OF CONTENTS Speedometer Calibration Speedometer Quick CAL Calibration...22 Speedometer CAL 1 Calibration...22 Speedometer CAL 2 Calibration ...24 Tachometer Calibration Tachometer Quick CAL Calibration...26 Tachometer CAL 1 Calibration...26 Tachometer CAL 2 Calibration...30...
-
Page 5: Basic Operation And Features
BASIC OPERATION AND FEATURES Basic Operation and Features RPM x 1000 SMART TOW RESET SELECT Smart Tow Tachometer Power up: Each gauge will power up when the ignition is turned on. The gauges will stay on as long as the ignition is on. Lights: Adjusts the brightness and contrast of the gauge. -
Page 6: Auto Detection Engine Function
BASIC OPERATION AND FEATURES IMPORTANT: Performing a master reset will reset the unit to the factory defaults, thus eliminating any installation and calibrations performed during set up of product. Press the "-" and "+" buttons simultaneously for approximately 10 seconds (until the graphic bars collide) to restore the unit to factory default settings. -
Page 7: Display Screens
BASIC OPERATION AND FEATURES Computer Diagnostic System (CDS) Display Screens Tachometer Display Screen Engine Break-in Engine Temperature Oil PSI Oil Pressure Trim and Water Pressure Water Pressure Battery Voltage and Engine Hours Trip Odometer Fuel Flow and Fuel Used % Fuel Remaining (Fuel Tank 1) Depth Speed/Sea Temperature Order through SPX... -
Page 8: Warning System
Alarm Warnings NOTE: Alarm warnings are displayed as shown when used with engines prior to Gen I (2007). RPM x 1000 RESET TROLL TROLL MODE REDUCE THROTTLE Display screen Engine Guardian System Alarm signal When a problem is detected, the name of the offending alarm appears on the display. -
Page 9: Warning Display Screens
WARNING SYSTEM Warning Display Screens When a problem is detected with the engine, the warning display screens will alert the operator to the potential problem. Refer to the Engine Operation, Maintenance, and Warranty Manual for explanation of the problem and the correct action to take. PROBLEM BATTERY ENGINE DATA BUS... - Page 10 NOTE: Not all screens may apply to your engine type. OVERHEAT PRESSURE OVERSPEED 7500 WATER IN FUEL IMPORTANT: Refer to the Engine Operation, Maintenance, and Warranty Manual for further explanation of the problem and the correct action to take. Contact your dealer if the problem persists. 1.
- Page 11 WARNING SYSTEM NOTE: Not all screens may apply to your engine type. FAULT IGNITION BATTERY ENGINE DATA BUS FAULT SENSOR 9. FAULT - IGNITION: A problem has developed in the ignition system. 10. BATTERY: The electrical system is not charging or the battery charge is low.
- Page 12 NOTE: Not all screens may apply to your engine type. FAULT OIL PRESSURE LOW FUEL LOW OIL 17. OIL PRESSURE: There is insufficient oil pressure. 18. LOW FUEL LEVEL The fuel level in the fuel tank is critically low. Stop for fuel immediately to avoid running out. 19.
-
Page 13: Warning System With Descriptive Text
WARNING SYSTEM WITH DESCRIPTIVE TEXT Alarm Warnings with Descriptive Text NOTE: Descriptive text alarm warning screens are displayed with Gen I (2007) engines and newer. RPM x 1000 SMART TOW RESET SELECT When a problem is detected, the "SYS FAULT" alarm appears on the display. - Page 14 WARNING SYSTEM WITH DESCRIPTIVE TEXT Alarm Warning with Descriptive Text STBD SYSTEM FAULT STBD SYSTEM FAULT <FAULTY COMPONENT> [ EXIT ] [ NEXT ] STBD SYSTEM FAULT <FAULT DESCRIPTION> [ EXIT ] [ NEXT ] STBD SYSTEM FAULT <CORRECTIVE ACTION> [ EXIT ] [ NEXT ] The top bar indicates the system with the...
-
Page 15: System Speedometer Display Screens
SYSTEM SPEEDOMETER DISPLAY SCREENS System Speedometer Display Screens NOTE: Not all screens may apply to your engine type. 5:30 FUEL RPM SYNCH PORT TRIM SYNCH PORT When the ignition is turned on, the speedometer will show the last screen that was displayed before the ignition was turned off. Press "MODE"... - Page 16 SYSTEM SPEEDOMETER DISPLAY SCREENS NOTE: Not all screens may apply to your engine type. ESTIMATED RANGE MILES INST TRIP MILES 42.3 STEERING ANGLE 6. Range: The estimated range is based on boat speed, fuel consumption and fuel remaining in the tank. The numbers displayed indicates an estimate of the distance you can travel with the remaining fuel.
-
Page 17: System Tachometer Display Screens
SYSTEM TACHOMETER DISPLAY SCREENS System Tachometer Display Screens BREAK-IN TIME TRIM TRIM 12.5 When the ignition is turned on, the tachometer will display the last screen that was displayed before the ignition was turned off. Press "MODE" to change display screens. You can revert back to the previous screen by pressing and holding "MODE"... - Page 18 SYSTEM TACHOMETER DISPLAY SCREENS NOTE: Not all screens may apply to your engine type. 12.5 VOLTS HOURS 12.2 FUEL USED 12.5 3500 SPEED SEA TEMP 7. Oil Pressure: Displays the engine oil pressure in "PSI" or "BAR". 8. Battery Voltage: Displays the voltage level (condition) of the battery.
-
Page 19: Smart Tow Tachometer Display Screens
SMART TOW TACHOMETER DISPLAY SCREENS Cruise Control Operation NOTE: Cruise control is only available with Gen I (2007) and newer engines. Increase set cruise speed Decrease set cruise speed Set cruise speed NOTE: Cruise control min/max range may change depending on engine type. -
Page 20: Turning The System On/Off
SMART TOW TACHOMETER DISPLAY SCREENS Press "SELECT" twice to exit the cruise control screen. TURNING THE SYSTEM ON/OFF 1000 RPM SET SMART + / - TO DISENGAGE TOW ON 1000 RPM SET SMART + / - TO DISENGAGE TOW OFF Increase set cruise speed Decrease set cruise speed Set cruise speed... -
Page 21: Launch Control Operation
SMART TOW TACHOMETER DISPLAY SCREENS Launch Control Operation NOTE: Launch control is only available with Gen I (2007) and newer engines. Raise launch control setting Lower launch control setting Set cruise RPM Launch control setting BASIC OPERATION Launch control determines how fast the engine accelerates to a set cruise speed. - Page 22 SMART TOW TACHOMETER DISPLAY SCREENS SETTING LAUNCH CONTROL 1. Press "+" or "-" to bring up the cruise control display screen. 2. Push the "SELECT" button to highlight "SET LAUNCH". 3. Push "+" to raise the setting and push "-" to lower the setting. 4.
-
Page 23: Troll Control
TROLL CONTROL Troll Control Operation NOTE: The troll control feature is only available on the System Tach/Speedometer. RPM x 1000 RESET MODE Troll Speed On 1500 1000 PUSH SELECT TO DISENGAGE Increase troll speed Decrease troll speed Actual RPM NOTE: Troll control may not be available on all engine models. NOTE: Troll control min/max range may change depending on engine type. - Page 24 The display screen will revert back to the previous screen after 5 seconds of inactivity. Push the "+" or "-" button to reactivate the troll control display screen. When the troll control is engaged and not in the troll control display screen, a flashing "TR"...
- Page 25 TROLL CONTROL 4. Use the "+" and "-" buttons to set the desired speed. Use "+" to increase the set speed and use "-" to decrease the set speed. 5. If the troll speed is set to a higher speed than the troll control can maintain, the "TROLL SPEED TOO FAST"...
-
Page 26: Speedometer Calibration
SPEEDOMETER CALIBRATION Speedometer Quick CAL Calibration SC1000 System Speedometer This calibration is for setting the lighting and contrast. 1. Press the "MODE" and "+" buttons simultaneously for two seconds to bring up the Quick Cal display screen. 2. Press the "-" or "+" button to select the option choice displayed in the [ ] brackets on the screen. -
Page 27: Display Units
SPEEDOMETER CALIBRATION 2. Press the "-" or "+" button to select the option choice displayed in the [ ] brackets on the screen. 3. Press "MODE" ["SAVE"] to save the setting and advance through the calibration selections. REMOTE LIGHTING AND CONTRAST REMOTE LCD LIGHT ? [ NO ] [SAVE]... -
Page 28: Simulator Mode
SPEEDOMETER CALIBRATION STEERING ANG. SCREEN ? [ NO ] [SAVE] TEMP/CLOCK SCREEN ? [ NO ] [SAVE] FUEL USED SCREEN ? ( NO ) ( YES ) (SAVE) TRIP SCREEN ( NO ) (SAVE) ( YES ) FUEL MGMNT SCREEN ( NO ) (SAVE) ( YES ) - Page 29 SPEEDOMETER CALIBRATION 2. Press the "-" or "+" button to select the option choice displayed in the [ ] brackets on the screen. 3. Press "MODE" ["SAVE"] to save the setting and advance through the calibration selections. CALIBRATION 2 EXTERNAL SENSORS (SKIP) CALIBRATION 2 EXTERNAL SENSORS...
-
Page 30: Tachometer Calibration
Tachometer Quick CAL Calibration RPM x 1000 SMART TOW RESET SELECT SC1000 Smart Tow Tachometer This calibration is for setting lighting and contrast. 1. Press the "MODE/SELECT" and "+" buttons simultaneously for approximately two seconds or until the "QUICK CAL"... - Page 31 TACHOMETER CALIBRATION 1. Press and hold the "MODE/SELECT" and "+" buttons for approximately seven seconds until the "CAL 1" screen appears. 2. Press the "-" or "+" button to select the option choice displayed in the [ ] brackets on the screen. 3.
- Page 32 TACHOMETER CALIBRATION Tachometer CAL 1 Calibration - Trim CALIBRATION 1 TRIM FULL DOWN THEN PRESS PLUS BUTTON [DFLT] [SKIP] CALIBRATION 1 TRIM FULL UP THEN PRESS PLUS BUTTON [DFLT] [SKIP] CALIBRATION 1 TRIM TO TRAILER POINT THEN PRESS PLUS BUTTON [DFLT] [SKIP] Tachometer CAL 1 Calibration - Display Units...
- Page 33 TACHOMETER CALIBRATION Tachometer CAL 1 Calibration - Display Screens TRIM AND PSI SCREEN ? [ NO ] [SAVE] WATER PSI SCREEN ? [ NO ] [SAVE] TRIM AND RPM SCREEN ? [ NO ] [SAVE] RPM SCREEN ? [ NO ] [SAVE] FUEL USED SCREEN ? [ NO ]...
-
Page 34: Tachometer Cal 2 Calibration
TACHOMETER CALIBRATION Tachometer CAL 2 Calibration This calibration configures the system sensor inputs. NOTE: The screens may vary depending upon the version of the gauge. 1. Press and hold the "MODE/SELECT" and "+" buttons for approximately ten seconds until the "CAL 2" screen appears. 2. -
Page 35: External Sensors
TACHOMETER CALIBRATION CAL2 Tachometer Calibration - Tank 1 and 2 Level Calibration CALIBRATING : EMPTY TANK THEN PRESS PLUS BUTTON [SKIP] CALIBRATING : FILL TO 1/4 THEN PRESS PLUS BUTTON [SKIP] CALIBRATING : FILL TO ½ THEN PRESS PLUS BUTTON [SKIP] CALIBRATING : FILL TO 3/4... - Page 36 TACHOMETER CALIBRATION CAL2 Tachometer Calibration - External Sensors CALIBRATION 2 EXTERNAL SENSORS TRIM SENSOR ? [ NO ] [SAVE] CALIBRATION 2 EXTERNAL SENSORS SEA TEMP ? [ NO ] [SAVE] CALIBRATION 2 EXTERNAL SENSORS STEERING SENSOR ? [ NO ] [SAVE] CALIBRATION 2 SPEED OPTION...
- Page 37 TACHOMETER CALIBRATION CAL2 Tachometer Calibration - External Sensors Enter a depth value. When the depth transducer CALIBRATION 2 DEPTH ALARM reads that value or below, the shallow water LEVEL = 2.5 FEET alarm will sound. Press "-" or "+" to calibrate the [DOWN] [SAVE] [ UP ]...
Need help?
Do you have a question about the SC1000 and is the answer not in the manual?
Questions and answers