Fluke TiS10 User Manual
Performance series thermal imagers
Hide thumbs
Also See for TiS10:
- Safety information (4 pages) ,
- Quick reference manual (2 pages) ,
- Quick start (2 pages)
Table of Contents
Advertisement
Quick Links
Advertisement
Table of Contents

Related Manuals for Fluke TiS10


Summary of Contents for Fluke TiS10
- Page 1 TiS10, TiS20, TiS40, TiS45 TiS50, TiS55, TiS60, TiS65 Performance Series Thermal Imagers Users Manual July 2015 © 2015 Fluke Corporation. All rights reserved. Specifications are subject to change without notice. All product names are trademarks of their respective companies.
- Page 2 LIMITED WARRANTY AND LIMITATION OF LIABILITY Each Fluke product is warranted to be free from defects in material and workmanship under normal use and service. The warranty period is two years and begins on the date of shipment. Parts, product repairs, and services are warranted for 90 days. This warranty extends only to the original buyer or end-user customer of a Fluke authorized reseller, and does not apply to fuses, disposable batteries, or to any product which, in Fluke's opinion, has been misused, altered, neglected, contaminated, or damaged by accident or abnormal conditions of operation or handling.
-
Page 3: Table Of Contents
Table of Contents Title Page Introduction ........................1 How to Contact Fluke ....................2 Safety Information ......................2 Operation in Extreme Conditions ................3 Radio Frequency Data ....................3 Accessories ........................5 SmartView Software ....................5 Before You Start ......................6 Battery ........................ - Page 4 TiS10, TiS20, TiS40, TiS45, TiS50, TiS55, TiS60, TiS65 Users Manual IR-PhotoNotes™ ....................... 12 Voice Annotation (Recording) ................... 13 Listen to a Voice Annotation (Recording) ..............14 Edit Captured Infrared Image ..................14 Save Captured Infrared Image .................. 14 Micro SD Memory Card ....................15 Temperature Measurement ...................
- Page 5 Contents (continued) Localization ......................31 Language ......................32 Wireless Connectivity ................... 32 Image Storage ...................... 33 Fluke Connect™ Wireless System ............... 33 Advanced Settings ....................35 Filename Prefix ....................35 Reset Filename ....................35 Factory Defaults ....................35 Imager Information ....................35 Adjust Parallax .....................
- Page 6 TiS10, TiS20, TiS40, TiS45, TiS50, TiS55, TiS60, TiS65 Users Manual...
- Page 7 List of Tables Table Title Page Symbols ..........................4 Accessories .......................... 5 Features and Controls ......................8 Palettes ..........................22 IR-Fusion Modes by Model ....................23...
- Page 8 TiS10, TiS20, TiS40, TiS45, TiS50, TiS55, TiS60, TiS65 Users Manual...
- Page 9 List of Figures Figure Title Page Laser Warning ........................2 Level and Span Settings ....................... 17...
- Page 10 TiS10, TiS20, TiS40, TiS45, TiS50, TiS55, TiS60, TiS65 Users Manual viii...
-
Page 11: Introduction
Introduction Image Presentation The Fluke TiS10, TiS20, TiS40, TiS45, TiS50, TiS55, • Standard Palettes and Ultra Contrast™ Palettes TiS60, and TiS65 Thermal Imagers (the Product or (availability varies by model) Imager) are handheld, infrared imaging cameras for use in multiple applications. These applications include ®... -
Page 12: How To Contact Fluke
To download SmartView software visit lens cover, see Figure 1. www.fluke.com/smartviewdownload. To download the Fluke Connect app, go to iTunes or Google play and download Fluke Connect. RAYONNEMENT LASER NE PAS REGARDER DANS LE FAISCEAU APPAREIL LASER DE CLASSE 2... -
Page 13: Operation In Extreme Conditions
• Replace the batteries when the low battery digital copies of the radio licenses on the Imager. indicator shows to prevent incorrect For more information, go to www.fluke.com and search for measurements. Radio Frequency Data for Class A. • Do not use the Product if it operates incorrectly. - Page 14 TiS10, TiS20, TiS40, TiS45, TiS50, TiS55, TiS60, TiS65 Users Manual Table 1 is a list of symbols used on the Imager and in this manual. Table 1. Symbols Symbol Description Symbol Description Risk of Danger. Important information. See WARNING. LASER RADIATION. Risk of eye ...
-
Page 15: Accessories
SmartView Mobile Software is also available for flexibility www.fluke.com/smartviewdownload. This software is away from your PC or in the field. intended for Fluke Imagers and contains features to analyze images, organize data and information, and make professional reports. SmartView allows audio annotations... -
Page 16: Before You Start
TiS10, TiS20, TiS40, TiS45, TiS50, TiS55, TiS60, TiS65 Users Manual Battery Before You Start Before you use the Imager for the first time, charge the Carefully unpack the items in the shipment box: battery for a minimum of 2.5 hours. The battery status shows on the four-segment charge indicator. -
Page 17: On-Imager Ac Power Socket
Performance Series Thermal Imagers Before You Start Keep the Imager attached to the charger until the , icon On-Imager AC Power Socket shows a full charge. If you remove the Imager from the 1. Connect the ac power adapter into an ac wall outlet charger before a full charge shows, it may have a reduced and connect the dc output to the Imager’s external run-time. -
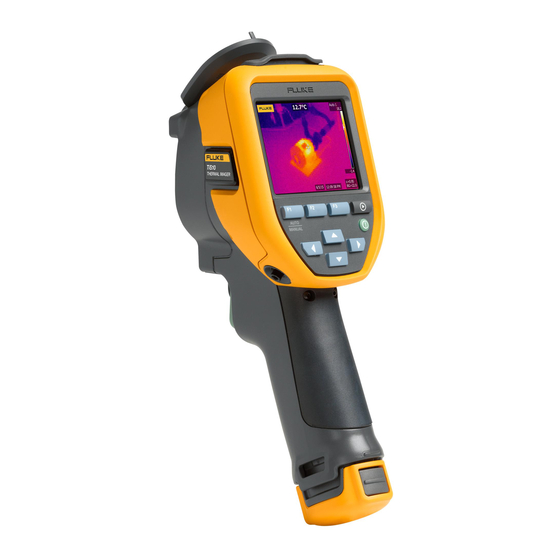
Page 18: Features And Controls
TiS10, TiS20, TiS40, TiS45, TiS50, TiS55, TiS60, TiS65 Users Manual Features and Controls Table 3 shows the Imager features and controls. Table 3. Features and Controls Item Description Arrow Buttons Function Buttons (F1, F2, and F3) Display ... - Page 19 Performance Series Thermal Imagers Before You Start Table 3. Features and Controls (cont.) Item Description Retractable Lens Cover Infrared Camera Lens Visual Light Camera Lens Laser Pointer (Models TiS45, TiS50, TiS55, TiS60, TiS65) Secondary Trigger Primary Trigger ...
-
Page 20: Power On And Off
TiS10, TiS20, TiS40, TiS45, TiS50, TiS55, TiS60, TiS65 Users Manual Controls for Image Capture Power On and Off The two-part trigger is located in the standard trigger To turn on or turn off the Imager, push and hold position for a pistol-grip device. The larger, green trigger is >3 seconds. -
Page 21: Control Buttons
Performance Series Thermal Imagers Before You Start In general, push: Control Buttons The function and cursor buttons are the primary controls. 1 to set the change and go back to the live view. These buttons move the cursor through the menu structure ... -
Page 22: How To Use The Menus
TiS10, TiS20, TiS40, TiS45, TiS50, TiS55, TiS60, TiS65 Users Manual How to Use the Menus Image Capture The menus, coupled with the function buttons and arrow Point the Imager at the target object. Make sure that the buttons, are the access point for: object is in focus. -
Page 23: Voice Annotation (Recording)
(audio) recording. This feature may not be available in all regions. (Not available 1. With an infrared image in the buffer, push to open on the TiS10 and TiS20 models.) the EDIT IMAGE menu. To record: 2. -
Page 24: Listen To A Voice Annotation (Recording)
TiS10, TiS20, TiS40, TiS45, TiS50, TiS55, TiS60, TiS65 Users Manual Listen to a Voice Annotation (Recording) Edit Captured Infrared Image Before you save a file, use the Imager to edit or modify the icon identifies each file that has a voice image. -
Page 25: Micro Sd Memory Card
Reflective objects result in lower than actual temperature measurements. These objects pose a burn hazard. More information is available on emissivity at http://www.fluke.com/emissivity http://www.fluke.com/emissivityexplanation. Fluke recommends the study of this topic to get the most accurate temperature measurements. -
Page 26: Menus
TiS10, TiS20, TiS40, TiS45, TiS50, TiS55, TiS60, TiS65 Users Manual 8. Push: Menus • 1 to set the change and go back to the live The menus are the access points for thermal image display, camera features, memory setup, and settings for view. - Page 27 Performance Series Thermal Imagers Menus Level for Manual Operation Mode Temperature Span for Manual Operation Mode When put into manual ranging, the level setting moves the When in manual mode, the span setting contracts or thermal span up or down within the total temperature expands in a selected palette in a temperature range range.
-
Page 28: Emissivity Adjustment
TiS10, TiS20, TiS40, TiS45, TiS50, TiS55, TiS60, TiS65 Users Manual Emissivity is set directly as a value, or from a list of Emissivity Adjustment emissivity values for some common materials. The correct emissivity values are important for the Imager to make the most accurate temperature measurement Note calculations. -
Page 29: Background (Reflected Background Temperature Compensation)
Performance Series Thermal Imagers Menus Background (Reflected Background Transmission/Transmittance Adjustment Temperature Compensation) (TiS45, TiS55, TiS65 only) Compensation for reflected background temperature is set When you do infrared inspections through infrared- in the Background tab. Very hot objects or very cold transparent windows (IR windows), not all of the infrared objects can affect the apparent temperature and energy emitted from the objects of interest is transmitted... -
Page 30: Spot Temperatures
TiS10, TiS20, TiS40, TiS45, TiS50, TiS55, TiS60, TiS65 Users Manual To set a Marker: Spot Temperatures 1. Push 2. The Spot Temperatures are floating HI and LO temperature indicators that move on the display as the 2. Push W/X to highlight Measurement. -
Page 31: Center Box
Performance Series Thermal Imagers Menus To set the size of the Center Box when enabled: Center Box For models TiS50, TiS55, TiS60, and TiS65, the Center 1. Push W/X to highlight Set Size. Box feature is an adjustable temperature measurement 2. -
Page 32: Image Menu
TiS10, TiS20, TiS40, TiS45, TiS50, TiS55, TiS60, TiS65 Users Manual Table 4. Palettes Image Menu The Image menu has controls for different features used in the presentation of the infrared image on the Imager's LCD and some saved image files. -
Page 33: Ir-Fusion Technology
5. Push 1 or Z to view the menu. IR-Fusion has different modes that vary by model, see 6. Push W/X to highlight Standard or Ultra Table 5. (IR-Fusion is not available with the TiS10 model.) Contrast. Table 5. IR-Fusion Modes by Model 7. -
Page 34: Color Alarms
TiS10, TiS20, TiS40, TiS45, TiS50, TiS55, TiS60, TiS65 Users Manual To set the IR-Fusion mode: level. The low-temperature (or dew point) color alarm shows a full visible image and only shows infrared 1. Push 2. information on objects or areas that are below the set apparent temperature (or set dew point) color alarm level. - Page 35 Performance Series Thermal Imagers Menus 4. Push: Set High-Temperature Color Alarm • 1 to set the change and go back to the live To set a high-temperature color alarm: view. 1. From the Color Alarm menu, push W/X to • 2 or Y to set the change and go back to the highlight the option: Set High Alarm.
-
Page 36: Display Graphics Presentation
Logo The options for how you view the on-screen graphics are A Fluke logo shows on the display and captured images. in the Display menu. These options are Display All, Details You can choose to turn on or turn off the logo: and Scale, Scale Only, and Image Only. -
Page 37: Camera Menu
Performance Series Thermal Imagers Menus Camera Menu Video The Camera menu has controls and options for secondary The TiS60 and TiS65 Imagers can record infrared and camera features such as auto focus, backlight level, and IR-Fusion™ to the SD card or internal memory in .is3 or laser pointer. -
Page 38: Auto Capture
TiS10, TiS20, TiS40, TiS45, TiS50, TiS55, TiS60, TiS65 Users Manual In the Auto Capture sub-menu, you will see these options: Auto Capture The Auto Capture feature allows you to set the Imager to • Start Capture: Executes the Auto Capture settings in capture and save an infrared image, or series of images, camera memory. -
Page 39: Memory Menu
Edit Image Files Memory Menu ® SmartView software and the Fluke Connect™ app allow The Memory Menu allows you to review captured images, you to edit .is2 image files that are stored in memory. audio and text annotations, and IR-PhotoNotes™. Files in memory are shown in a large preview format. -
Page 40: Settings Menu
Visit the Fluke website or contact memory card in different file formats. Image format Fluke to find out how to download SmartView analysis and selections are .bmp, .jpg, and .is2. These selections reporting software at no charge. -
Page 41: Auto Off
Performance Series Thermal Imagers Menus Date Auto Off The Auto Off timer is user-defined separately for the LCD The date can be displayed in one of two formats: and power. MM/DD/YY or DD/MM/YY. Note To set the date: Auto Off is automatically disabled when the 1. -
Page 42: Language
TiS10, TiS20, TiS40, TiS45, TiS50, TiS55, TiS60, TiS65 Users Manual 6. Push Y/Z to highlight hours or minutes. 2. When you opt in, SmartView opens up a browser window to the Fluke registration web page. The web The 12 hour format has a selection to set the time as page provides the Imager serial number, choice of AM or PM. -
Page 43: Image Storage
Hotspot/SSID is configured. 2. Push or X to change the setting. 4. Go to the Fluke Connect App and select "Thermal Imager" from the list. 3. Push to select the new storage setting. You are now able to take images on the Imager. - Page 44 TiS10, TiS20, TiS40, TiS45, TiS50, TiS55, TiS60, TiS65 Users Manual 3. Enter a Fluke Connect user ID with the onscreen 6. Push 1 to save the image and view the image on keyboard. If you have previously logged in, the history the phone app.
-
Page 45: Advanced Settings
Performance Series Thermal Imagers Menus Advanced Settings To show the Imager Info: Filename Prefix 1. Go to Settings > Advanced > Imager Info. The default filename starts with IR_. You have the option 2. Push W/X to scroll through the menu. to change this prefix to a different 3-character name with the keyboard. -
Page 46: Adjust Parallax
TiS10, TiS20, TiS40, TiS45, TiS50, TiS55, TiS60, TiS65 Users Manual 3. Push to view the information screen with a list of Lens Care Open Source Software Licenses. Caution 4. Push W/X to scroll to a specific license. To prevent damage to the infrared lens: 5. -
Page 47: Battery Care
• Connect the battery charger to the mains power • Do not store the batteries in extreme cold outlet before the Product or battery. environments. • Use only Fluke approved power adapters to • Do not attempt to charge the batteries in extreme cold charge the battery. environments. -
Page 48: General Specifications
TiS10, TiS20, TiS40, TiS45, TiS50, TiS55, TiS60, TiS65 Users Manual General Specifications Temperature Operating ............-10 °C to +50 °C (14 °F to 122 °F) Storage ............... -20 °C to +50 °C (-4 °F to +122 °F) Relative Humidity ..........10 % to 95 % non-condensing Altitude Operating ............ -
Page 49: Detailed Specifications
Temperature Measurements Temperature Range (not calibrated below -10 °C) TiS10 .............. -20 °C to +250 °C (-4 °F to +482 °F) TiS20, TiS40, TiS45 ........-20 °C to +350 °C (-4 °F to +662 °F) TiS50, TiS55 ........... -20 °C to +450 °C (-4 °F to +842 °F) TiS60, TiS65 ........... - Page 50 TiS10, TiS20, TiS40, TiS45, TiS50, TiS55, TiS60, TiS65 Users Manual Imaging Performance IFOV (spatial resolution) Distance to Spot TiS10 .............. 7.8 mRad, D:S 137:1 TiS20 .............. 5.2 mRad, D:S 206:1 TiS40, TiS45 ........... 3.9 mRad, D:S 275:1 TiS50, TiS55 ........... 2.8 mRad, D:S 377:1 TiS60, TiS65 ...........
- Page 51 Performance Series Thermal Imagers Detailed Specifications Level and Span Smooth Auto-Scaling and Manual scaling of level and span Fast auto setting/switching between manual and auto modes Fast auto rescale in manual mode Minimum Span (in manual mode) ....2.5 °C Minimum span (in auto mode) ......
- Page 52 TiS10, TiS20, TiS40, TiS45, TiS50, TiS55, TiS60, TiS65 Users Manual...
Need help?
Do you have a question about the TiS10 and is the answer not in the manual?
Questions and answers