Table of Contents

Related Manuals for Smarter tools AP-2000iQ


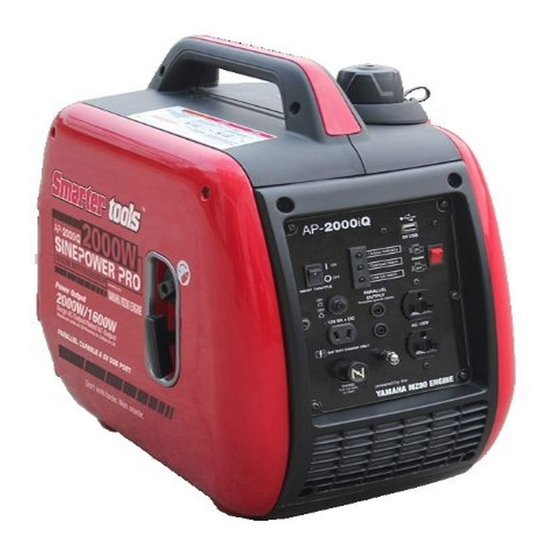
Summary of Contents for Smarter tools AP-2000iQ
- Page 1 AP-2000iQ Digital Inverter Generator O w ner’s Manual W ARNING! To R educe R is k of Injury, W ARNING! To R educe R is k of Injury, User Must R ead and Understand Ow ner’ s Manual Prior to Use.
- Page 2 Notes ____________________________________ ____________________________________ ____________________________________ ____________________________________ ____________________________________ ____________________________________ ____________________________________ ____________________________________ ____________________________________ ____________________________________ ____________________________________ ____________________________________ ____________________________________ ____________________________________ ____________________________________ ____________________________________ ____________________________________ ____________________________________ ____________________________________ ____________________________________ ____________________________________...
- Page 3 Record the model and serial numbers as well as date and place of purchase for future reference. Have this information available when ordering parts and when making technical or warranty inquiries. Smarter Tools Customer Service 1-888-241-8498 Model Number AP2000iQ Serial Number...
-
Page 4: Table Of Contents
Table of contents Introduction ......................05 General Precautions .................... 06 Carbon Monoxide ....................06 Gasoline and Oil ....................06 Hot Components ....................07 Work Area ......................08 Chemicals ......................08 Noise ........................08 Extension Cords ....................08 Specifications ...................... 09 Generator General Overview ................ -
Page 5: Introduction
This manual contains important information that you need to know and understand in order to assure YOUR SAFETY and PROPER OPERATION OF EQUIPMENT. The following symbols help you recognize this information. Please read the manual and pay attention to these sections. Instructions! Read and understand all of these safety instructions. -
Page 6: General Precautions
General Safety Precautions WARNING! FAILURE TO FOLLOW THESE INSTRUCTIONS CAN RESULT IN SEVERE INJURY OR DEATH. CAUTION: FAILURE TO FOLLOW THESE INSTRUCTIONS CAN ALSO RESULT IN DAMAGE TO THE EQUIPMENT AND/OR THE ITEM YOU ARE WORKING ON OR WITH. Carbon Monoxide •... -
Page 7: Hot Components
General Safety Precautions (cont’d) Gasoline and Oil (cont’d) • Gasoline fuel and fumes are flammable and potentially explosive. Use proper fuel storage and handling procedures. Always have multiple ABC class fire extinguishers nearby. • Keep the generator and surrounding area clean at all times. Keep the generator at least 5 feet away from buildings and other equipment during operation. -
Page 8: Chemicals
Chemicals • Avoid contact with hot fuel, oil, exhaust fumes, and hot solid surfaces. • Avoid body contact with fuels, oils, and lubricants used in the generator. If swallowed, seek medical treatment immediately. Do not induce vomiting if fuel is swallowed. -
Page 9: Specifications
Specifications 4-Stroke OHV Air Cooled Engine Type Single Cylinder CARB Certified Engine Displacement (cc) 80cc, 3.5HP Rated Watts 1600 Surge Watts 2000 Rated Frequency 60 Hz Rated Voltage Rated Current 13.3A Run Time 8 Hrs (at 50% load) Receptacles (qty.) Net/Gross Weight 47/51 lbs Noise Level (dB) -
Page 10: Generator General Overview
GENERAL OVERVIEW... -
Page 11: Engine Oil
CHECK THE ENGINE OIL LEVEL Use premium quality 4-stroke engine oil, certified to meet or exceed U.S. automobile manufacturer’s requirements for API Service Classification SG, SF. Select the appropriate viscosity for the average temperature in your area. TEMP STARTING TEMPERATURE RANGE Remove the maintenance access cover. -
Page 12: Fuel
CHECK THE FUEL LEVEL • Use unleaded gasoline only. • If the fuel level is low, refuel the fuel tank until the level increased to the specified mark. • Never use an oil/gasoline mixture or dirty gasoline. Avoid getting dirt, dust or water in the fuel tank. -
Page 13: Gasoline Containing Alcohol
GASOLINE CONTAINING ALCOHOL Do not use gasoline that contains more than 10% ethanol. Note: Fuel system damage or engine performance problems resulting from the use of fuels that contain higher percentages of alcohol are not covered under the warranty. CHECK THE AIR CLEANER Check the air cleaner element to be sure it is clean and in good condition. -
Page 14: Starting The Engine
WARNING! Never run the generator indoors or in a poorly ventilated area. Engine exhaust contains carbon monoxide, and odorless and deadly gas. STARTING THE ENGINE Make sure that all appliances are disconnected from the generator receptacles and that the generator is on a level surface before starting. Turn the ignition switch to the “ON”... -
Page 15: Altitude
HIGH ALTITUDE OPERATION At high altitude, the standard carburetor air-fuel mixture will be excessively rich. Performance will decrease, and fuel consumption will increase. SMART THROTTLE Engine speed is kept at idle automatically when the electrical appliance is not in use and it returns to the proper speed to power of the electrical load when electrical appliance is in use. -
Page 16: Ground Terminal
CAUTION: If modifications are made to the carburetor for high altitude operation, at an altitude lower than the carburetor is jetted for may result in reduced performance, overheating, and serious engine damage caused by an excessively lean air/fuel mixture. GROUND TERMINAL Be sure to ground the generator when the connected equipment is grounded. - Page 17 Electrical Safety Continued • Do not touch electrically energized parts of the generator and interconnecting cables or conductors with any part of the body, or with any non-insulated conductive object. • Avoid body contact with grounded surfaces such as pipes, radiators, ranges, and refrigerators.
-
Page 18: Ac Applications
When an electric motor is started, both the overload indicator LED (red) and the output indicator LED (green) may go on simultaneously. This is normal if the overload indicator LED (red) goes off after about four (4) seconds. If the overload indicator LED (red) stays on, please contact Smarter Tools. -
Page 19: Connecting The Battery Charging Cable
CONNECTING THE BATTERY CHARGING CABLE Before connecting the battery charging cable to a battery that is installed in a vehicle, disconnect the vehicle battery ground cable from the negative (-) battery terminal. Connect the charging cables to the DC outlet of the generator and then to the battery terminals. -
Page 20: Dc Circuit Breaker
DC CIRCUIT BREAKER The DC circuit breaker automatically shuts off the DC battery charging circuit when the DC charging circuit is overloaded, when there is a problem with the battery, or when the connections between the battery and the generator are improper. -
Page 21: Stopping The Engine
Stopping the Engine To stop the engine in an emergency, turn the fuel switch and the Ignition switch to the OFF position. Stopping the Generator Unplug cables. Turn the fuel petcock to the OFF position. (Fig. 12A) Turn the ignition switch to the OFF position. (Fig.12B) Fig. -
Page 22: Parallel Function
Parallel Function WARNING! Do not pair more than 2 generators. It is recommended to only use the Smarter Tools™ parallel output cable for parallel operation. CAUTION: While operating in parallel, only use the parallel cable outlet. DO NOT use the outlet on the control panel of the generator while operating in parallel. -
Page 23: Turning Off Generator While In Parallel
The exhaust contains poisonous carbon monoxide gas that can kill Use genuine Smarter Tools parts or their equivalent. The use of replacement parts which are not of equivalent quality may damage the generator. The purpose of the maintenance and adjustment schedule is to keep the generator in the best operating condition. -
Page 24: Changing Oil
CHANGING OIL Drain the oil while the engine is still warm to assure rapid and complete draining. Loosen the cover screw and remove the maintenance cover. (Fig. 13A) Remove the oil filler cap. (Fig. 13B) Drain dirty oil into a container thoroughly. Refill with the recommended oil, and check the oil level. -
Page 25: Spark Plug
AIR CLEANER CONTINUED Loosen the cover screws and remove the maintenance cover. (Fig. 14A) Remove the air cleaner cover. (Fig. 14B) Wash the filter in a non-flammable or high flash point solvent and dry it thoroughly. Soak the filter in clean engine oil and squeeze out the excess oil. Reinstall the air filter and the air cleaner cover. -
Page 26: Storing The Generator
SPARK PLUG SERVICE CONTINUED CAUTION: Make sure engine is cool before servicing or removing spark plug. Fig. 15A Fig 15B Fig 15C Storing the Generator To prevent fuel spill when transporting or during temporary storage, the generator should be secured upright in its normal operating position, with the engine switch OFF. -
Page 27: Troubleshooting
Storing the unit Continued Drain the fuel. a. Drain all gasoline from the fuel tank into an approved gasoline container. b. Turn the petcock to ON, and loosen the carburetor drain screw and drain the gasoline from the carburetor into a suitable container. c. - Page 28 2. Remove the spark plug and install the spark plug in the plug cap. 3. Set the plug electrode on the cylinder head. 4. Pull the recoil starter; sparks should jump across the gap. 5. If the engine still does not start, contact Smarter Tools.
-
Page 30: Parts Diagram
Parts diagram... - Page 31 Parts diagram continued...
-
Page 32: Parts Listing
Parts List Part Name Part Number Yamaha Engine (EPA & CARB) 44902001100E Phillips Pan Head Screws 6 * 16 B02210601667 449029980200.00 Rotor 449020011700.00 Hexagon Flange Nut M12X1.25 158010080200.00 Hexagon Head Screw M5X35 B02040503565 Stator Assembly 449020011500.00 Aligning Pin 8 * 12 449029880300.00 Rear Cover 449029990100.00... -
Page 33: Smart Throttle Switch
Part Name Part Number Body Base Plate 449029980100.00 Rear Damper 449029970100.00 Engine Damper 449029970200.00 M6 Hexagon Flange Nuts B04280600067 Damping Foot 449029970400.00 Hexagon Flange Bolts M6X20 B01330602067 Inverter Assembly 449020011800.00 Inverter Mounting Bracket Assembly 449020011200.00 Fuel Tank Damping Grommet 449029970500.00 Support Plate, Mounting Bracket Assembly 449020012000.00 Rectifiers KBP2506... -
Page 34: Fuel Tank Assembly
Part Name Part Number Oil Fill Access Cover Foam 449020311000.00 Oil Fill Access Cover 449029982100.00 Tether, Oil Fill Access Cover 449029971300.00 Tank Fill Rubber Insulator 449029971000.00 Handle Screw Cover 449029982300.00 Fuel Gauge Lens 449029981200.00 Spark Plug Access Cover 449029971100.00 Handle Inset 449029982200.00 Fuel Tank Assembly 449020990100.00... -
Page 35: Limited Warranty
Smarter Tools will register this warranty upon receipt of your Warranty Registration Card and a copy of your sales receipt from one of Smarter Tools' retail locations as proof of purchase. Please submit your warranty registration and your proof of purchase within fourteen (14) days of the date of purchase. - Page 36 This warranty does not apply to generators used for prime power in place of a utility. Limits of Implied Warranty and Consequential Damage Smarter Tools disclaims any obligation to cover any loss of time, use of this product, freight, or any incidental or consequential claim by anyone from using this generator. THIS...
- Page 37 YAMAHA MOTOR CORPORATION, U.S.A. SMALL OFF ROAD ENGINES CALIFORNIA EMISSION CONTROL WARRANTY YOUR WARRANTY RIGHTS AND OBLIGATIONS The California Air Resources Board and Yamaha Motor Corporation, U.S.A. are pleased to explain the emission control system warranty on your 2013 Small Off Road Engine (SORE).
- Page 38 2. All warranted parts are free from defects in material and workmanship for the warranty period of the SORE engine or the period prior to the first scheduled replacement point of the warranted part as required by the maintenance schedule, if applicable, whichever is less.
- Page 39 9. Engine components damaged due to a failure under warranty or a warranted part *The original spark plug(s) are warranted for the period of replacement indicated in the Owner's Manual and not the useful life of the SORE engine (see your Owner's Manual). DURING THE PERIOD OF THIS WARRANTY Yamaha Motor Corporation, U.S.A.
- Page 40 MANUFACTURER'S WARRANTY COVERAGE: The emissions control system is warranted for two years. If any emissions-related part on your EQUIPMENT is defective, the part will be repaired or replaced by Smarter Tools, Inc. OWNER'S WARRANTY RESPONSIBILITIES: -As the EQUIPMENT owner, you are responsible for the performance of the required maintenance listed in your owner's manual.
- Page 41 The use of any non-exempted add-on or modified parts by the ultimate purchaser will be grounds for disallowing a warranty claims. Smarter Tools, Inc. will not be liable to warrant failures of warranted parts caused by the use of a non-exempted add-on or modified part.
- Page 42 EMISSION WARRANTY PARTS LIST The repair or replacement of any warranted part otherwise eligible for warranty coverage may be excluded from such warranty coverage if Smarter Tools, Inc. demonstrates that the EQUIPMENT has been abused, neglected, or improperly maintained, and that such abuse, neglect, or improper maintenance was the direct cause of the need for repair or replacement of the part.
- Page 43 English...
Need help?
Do you have a question about the AP-2000iQ and is the answer not in the manual?
Questions and answers
Where can i buy a replacement fuel tank for my smart tool 2000 generator