
Related Manuals for Memorex iWake Mi4004


Summary of Contents for Memorex iWake Mi4004
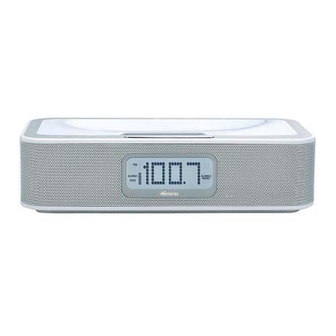
- Page 1 Mi4004 Suffix A User’s Guide iWake Clock Radio with Dual Alarm Before operating this product, please read these instructions completely.
-
Page 2: Safety Precautions
CAUTION: TO REDUCE THE RISK OF ELECTRIC SHOCK, DO NOT REMOVE COVER (OR BACK). NO USER- SERVICEABLE PARTS INSIDE. REFER SERVICING TO QUALIFIED SERVICE PERSONNEL. DANGEROUS VOLTAGE: The lightning flash with arrowhead symbol within an equilateral triangle is intended to alert the user to the presence of uninsulated dangerous voltage within the product’s enclosure that may be of sufficient magnitude to constitute a risk of electric shock to persons. -
Page 3: Surge Protectors
INFORMATION: This equipment complies with Class B digital device regulations. This equipment generates, uses and can radiate radio frequency energy and, if not installed and used in accordance with the instructions, may cause harmful interference to radio communications. However, there is no guarantee that interference will not occur in a particular installation. -
Page 4: Location Of Controls
FRONT/TOP 1. TUNE Up/Down/Skip n / o Buttons 2. iPod Dock with ® Connector & Interchangeable Universal Docks 3. VOLUME Up/Down Buttons 4. Power Button 5. iPod /LINE IN Button ® 6. AM/FM Button 7. Left Speaker 8. Display 9. TIME SET Button 10. - Page 5 REAR 1. DIMMER Switch 2. DC 13.5V IN Jack 3. LINE IN Jack 4. FM Wire Antenna 5. DST (Daylight Savings Time) Switch 6. Headphones Jack 7. Battery Compartment (Bottom of Unit)
-
Page 6: Volume Up Button
REMOTE 1. Battery Compartment (Side of Unit) 2. TUNE Down/Skip o Button 3. VOLUME Down Button 4. MODE Button NOTES: • The remote buttons function in the same way as the buttons on the main unit. To switch between modes (AM/FM, LINE IN or iPod •... -
Page 7: Power Source
AC CONNECTION Insert the small end of the AC adapter into the DC 13.5V IN jack (located on the rear of the unit). Connect the other end to a wall outlet having 120V AC, 60 Hz. AC Adapter, DC 13.5V Z NOTES: •... -
Page 8: Remote Battery Installation
REMOTE BATTERY INSTALLATION Follow these precautions when using batteries in this device: Use only the size and type of batteries specified. Be sure to follow the correct polarity when installing the batteries as indicated in the Battery Compartment. A reversed battery may cause damage to the device. - Page 9 Locate the correct iPod ® to use as shown on pages 16-17. Insert the dock into the cavity (as shown), making sure the tabs are facing front, and slip the tabs into place. If using the dock: Insert the iPod the holder.
-
Page 10: Operation
USING AN IPOD ® With an iPod connected (see ® previous page), turn the Mi4004 on by pressing the Power button (if it is not on already); “iPod” will appear in the display. NOTE: If the Mi4004 is in a mode other than iPod... -
Page 11: Using The Radio
USING THE RADIO Turn the Mi4004 on by pressing the Power button; "AM" or "FM" will appear in the display. Repeatedly press Up/Down/Skip n / o buttons to manually advance the frequency in the display up or down until the desired frequency appears. - Page 12 TO SET OR RESET THE ACTUAL TIME With the power off, press the TIME SET button; the time will blink. Press the TIME SET button (or wait approx. 5 seconds) and the time will be set. Within 5 seconds, press the MN (Minute) button 1 to set the present minute and the HR (Hour) button 2 to set the present hour.
-
Page 13: Continued On The Next Page
TO SET OR RESET THE ALARM TIME With the power off, press either the AL1 SET button 1 (to set Alarm 1) or AL2 SET button 2 (to set Alarm 2) ; the Alarm time will blink in the display. Repeatedly press the ALARM 1 1 or ALARM 2 2 button to select alarm off, alarm on for buzzer, radio... - Page 14 If set to iPod , insert the iPod ® page 8. Then, using the controls on the iPod select the track that you would like to wake to and put the iPod into Pause mode. DO NOT ® turn the iPod off;...
- Page 15 TO SHUT THE ALARM OFF If the alarm was set to BUZZ, press the ALARM 1 1 or ALARM 2 2 button (which corresponds to the alarm that was set) and the alarm will turn off and NOT be set for the next day. To set the alarm for the next day, press the ALARM 1 1 or ALARM 2 2 button repeatedly to select between alarm on for buzzer,...
-
Page 16: Dimmer Switch
SLEEP With the unit in the LINE IN, iPod Radio mode, press the SNOOZE/ SLEEP button; the SLEEP indicator and "10" will appear in the display for five seconds which indicates the unit will turn off after 10 minutes. Repeatedly press the SNOOZE/SLEEP button to select the SLEEP time, up to 60 minutes (i.e., "20"–turns off automatically after 20... - Page 17 IPOD UNIVERSAL DOCKS ® Locate your iPod in the chart on the next two pages and select the ® respective Universal Dock (the Universal Dock No. is engraved at the front of the Universal Docks as shown on the next page) to match with your iPod Insert the corresponding Universal Dock and your iPod described on page 8.
- Page 18 iPod ® NOTE: • The 5 holders provided with this unit are Universal Docks. IMPORTANT! The Universal Dock No. is engraved at the front of the docks. Please refer to the illustration below for the location of the Universal Dock No. Type Memory iPod...
-
Page 19: Troubleshooting Guide
If you experience a problem with this unit, check the chart below before calling for service. SYMPTOM No sound. AM or FM, no sound. AM/FM, poor sound. iPod mode, no sound. ® Time reset to “12:00”. Alarm does not turn on. CAUSE Volume is set to minimum. -
Page 20: Specifications
PLEASE VISIT OUR WEBSITE AT: WWW.MEMOREXELECTRONICS.COM OR CONTACT CUSTOMER SERVICE AT (954) 660-7100. PLEASE KEEP ALL PACKAGING MATERIAL FOR AT LEAST 90 DAYS IN CASE YOU NEED TO RETURN THIS PRODUCT TO YOUR PLACE OF PURCHASE OR MEMOREX. PARTS INTERNATIONAL AT 1-800-321-6993. SPECIFICATIONS ACCESSORIES,... - Page 21 Memcorp, Inc. Weston, FL Printed in Hong Kong Visit our website at www.memorexelectronics.com...
- Page 22 Mi4004 Suffix/Sujijo A User’s Guide Guía del Usario iWake Clock Radio with Dual Alarm Radio Reloj iWake con Alarma Dual Before operating this product, please read these instructions completely. Antes de operar este producto, sírvase leer este instructivo en su totalidad.
-
Page 23: Medidas De Seguridad
ADVERTENCIA: Para reducir el riesgo de descargas eléctricas no saque la cubierta o la tapa posterior. Allí no se encuentran partes que puedan ser reparadas por el usuario. Lleve su unidad a un Centro de Servicio Autorizado. ADVERTENCIA: La figura de la flecha con forma de rayo dentro de un triángulo está... - Page 24 INFORMACIÓN: Este equipo cumple con aparato digital de Clase B regulaciones. Este equipo genera, usa y puede irradiar energía de radiofrecuencia y, si no se instala y usa conforme a las instrucciones, puede generar interferencia dañina con las radiocomunicaciones. Sin embargo, no hay garantía de que no habrá...
-
Page 25: Ubicación De Los Controles
FRENTE/ARRIBA 1. Botones de Sintonizar Arriba/Abajo/Brincar n / o 2. Puerto para iPod conector y puertos universales intercambiables 3. Botones de aumentar/ disminuir volumen 4. Botón de encendido 5. Botón iPod /ENTRADA ® DE LÍNEA 6. Botón AM/FM 7. Bocina izquierda 8. - Page 26 ATRÁS 1. Interruptor del ATENUADOR 2. Enchufe de entrada de DC 13.5V 3. Enchufe de ENTRADA DE LÍNEA 4. Cable de Antena FM 5. Interruptor DST (horario de verano) 6. Enchufe de audífonos 7. Compartimiento de pilas (parte inferior de la unidad)
-
Page 27: Control Remoto
CONTROL REMOTO 1. Compartimiento de pilas (lado de unidad) 2. Botón Sintonizar Abajo/Brincar o 3. Botón de Aumentar volumen 4. Botón de Modo NOTAS: • Los botones del control remoto funcionan de la misma manera que los botones en la unidad principal. •... -
Page 28: Fuente De Energía
CONEXIÓN A CORRIENTE ELÉCTRICA Inserte el extremo pequeño del cable para adaptador en el enchufe de entrada DC 13.5V (ubicando atrás en la unidad). Conecte el otro extremo a un contacto de pared de 120V AC, 60 Hz. Adaptador AC, DC 13.5V Z NOTAS: •... -
Page 29: Instalación De Las Pilas En El Control Remoto
INSTALACIÓN DE LAS PILAS EN EL CONTROL REMOTO Cuando use baterías tome las siguientes precauciones: Use únicamente el tamaño de batería que indica el fabricante. Asegúrese de seguir la polaridad indicada en el compartimiento cuando instale su batería. De no hacerlo, usted puede dañar su unidad. No mezcle tipos de batería diferentes, por ejemplo alcalinas, con Carbono de Cinc, así... - Page 30 Ubique el puerto universal correcto para el iPod a ser usado como se muestra ® en las páginas 16-17. Introduzca el puerto en la cavidad (como se muestra), asegurándose de que las lengüetas apunten al frente y deslícelas hasta que queden en su lugar. Si utiliza el puerto: Inserte el iPod portador.
-
Page 31: Operación
USAR UN IPOD ® Con el iPod conectado (ver página ® previa), encienda la unidad Mi4004 presionando el botón de encendido (si no lo ha hecho); "iPod" aparecerá en el display. NOTA: Si la unidad Mi4004 está en un modo que no sea iPod el botón iPod /ENTRADA DE LÍNEA ®... - Page 32 USAR LA RADIO Para encender la unidad Mi4004, presione el botón de encendido; "AM" o "FM" aparecerá en el display. Presione repetidamente los botones Sintonizar Arriba/Abajo/Brincar avanzar manualmente la frecuencia en el display hacia arriba o abajo hasta que aparezca la frecuencia deseada. Para la sintonización automática, presione los botones Sintonizar Arriba/Abajo/Brincar y manténgalo presionado hasta que la...
- Page 33 AJUSTAR O REAJUSTAR LA HORA ACTUAL Con la unidad apagada, presione el botón de TIME SET [ajustar reloj]; la hora parpadeará. Presione el botón TIME SET [ajustar reloj] (o espere unos 5 segundos) y la hora estará fijada. presione el botón MN (minuto) 1 para fijar los minutos presentes y el botón HR (hora) 2 para fijar la hora presente.
- Page 34 FIJAR LA HORA DE LA ALARMA Con la unidad apagada, presione el botón AL1 SET 1 (para ajustar la Alarma 1) o AL2 SET 2 (para ajustar la Alarma 2); la hora de la Alarma parpadeará en el display. Presione repetidamente el botón ALARMA 1 1 o ALARMA 2 2 para seleccionar entre...
- Page 35 Si está en iPod , inserte el iPod ® muestra en la página 8. Luego, use los controles en el iPod , seleccione la pista con ® la que desea despertar y ponga el iPod modo de Pausa. NO apague el iPod que se apague solo.
- Page 36 APAGAR LA ALARMA Si la alarma está en BUZZ [zumbador], presione el botón ALARMA 1 1 o ALARMA 2 2 (que corresponde con la alarma que se puso) y la alarma se apagará y NO se pondrá para el día siguiente.
- Page 37 DORMIR Con la unidad en modo de ENTRADA DE LÍNEA, iPod o Radio, presione el ® botón SNOOZE/ [dormitar/dormir]; el indicador SLEEP [dormir] y "10" aparecerán en el display durante cinco segundos lo cual indica que la unidad se apagará después de 10 minutos.
- Page 38 PUERTOS UNIVERSALES DE IPOD Ubique su iPod en la tabla en las siguientes dos páginas y seleccione el ® puerto universal respectivo (el número del puerto universal está grabado en la parte delantera de éstos como se muestra en la siguiente página) que corresponde con su iPod así...
- Page 39 iPod ® NOTA: • Los 5 portadores provistos con esta unidad son Puertos universales. IMPORTANTE! El número del puerto universal está grabado en la parte delantera del puerto universal. Consulte la ilustración a continuación para ver la ubicación del número del puerto universal. Tipo Memoria N°...
-
Page 40: Guía De Diagnóstico
Si tiene problemas con esta unidad, revise la tabla a continuación antes de llamar a servicio. SÍNTOMA Sin sonido. AM o FM, sin sonido. Sonido deficiente en AM/FM. Modo iPod ® sonido. Hora se pone en "12:00". La alarma no se activa. -
Page 41: Especificaciones
COMUNÍQUESE CON SERVICIO AL CLIENTE AL (954) 660-7100. CONSERVE LOS MATERIALES DE EMPAQUE AL MENOS DURANTE REGRESAR EL PRODUCTO A SU DISTRIBUIDOR O A MEMOREX. PARA OBTENER PARTES Y ACCESORIOS, COMUNÍQUESE CON FOX INTERNATIONAL AL 1-800-321-6993. aviso. DÍAS SI ACASO... - Page 42 Memcorp, Inc. Weston, FL Impreso en Hong Kong Visite nuestro sitio web en www.memorexelectronics.com...
Need help?
Do you have a question about the iWake Mi4004 and is the answer not in the manual?
Questions and answers