Table of Contents
Advertisement
Advertisement
Table of Contents

Related Manuals for Samsung SDP-960


Summary of Contents for Samsung SDP-960
- Page 1 DIGITAL PRESENTER User Manual SDP-960...
- Page 2 Disclaimer Samsung Techwin makes the best to verify the integrity and correctness of the contents in this document, but no formal guarantee shall be provided. Use of this document and the subsequent results shall be entirely on the user’s own responsibility.
- Page 3 overview IMPORTANT SAFETY INSTRUCTIONS 1. Read these instructions. 2. Keep these instructions. 3. Heed all warnings. 4. Follow all instructions. 5. Do not use this apparatus near water. 6. Clean only with dry cloth. 7. Do not block any ventilation openings, Install in accordance with the manufacturer’s instructions. 8.
- Page 4 overview WARNING TO REDUCE THE RISK OF FIRE OR ELECTRIC SHOCK, DO NOT EXPOSE THIS PRODUCT TO RAIN OR MOISTURE. DO NOT INSERT ANY METALLIC OBJECT THROUGH THE VENTILATION GRILLS OR OTHER OPENNINGS ON THE EQUIPMENT. Apparatus shall not be exposed to dripping or splashing and that no objects filled with liquids, such as vases, shall be placed on the apparatus.
- Page 5 This equipment has been tested and found to comply with the limits for a Class A digital device, pursuant to part 15 of the FCC Rules. These limits are designed to provide reasonable protection against harmful interference when the equipment is operated in a commercial environment.
-
Page 6: Table Of Contents
overview CONTENTS OVERVIEW Important Safety Instructions Product Features What's Included Product at a Glance Front View Rear View Side View Control Panel Remote Control INSTALLATION & CONNECTION Preparations Getting Started Start Screen Connecting the I/O device Connecting the output device Connecting the additional device To connect to a PC that will be used as external input device... -
Page 7: Product Features
PRODUCT FEATURES • 1,300k-pixel High-Resolution & High-Definition Image Generates real-time video images at 30 frames per second and at 1,300k pixels high-resolution for live presentations. • 2D/3D Dual Noise Reduction Technology Equipped with our proprietary ISP chipset and 2D/3D dual noise reduction technology, this presentation system depicts vivid colors even in low light environments. -
Page 8: What's Included
RS-232C cables and adapter lenses from other brands may not be compatible with this product. Samsung Techwin cares for the environment at all product manufacturing stages, and is taking measures to provide customers with more environmentally friendly products. The Eco mark represents Samsung Techwin’s devotion to creating environmentally friendly products, and indicates that the product satisfies the EU RoHS Directive. -
Page 9: Product At A Glance
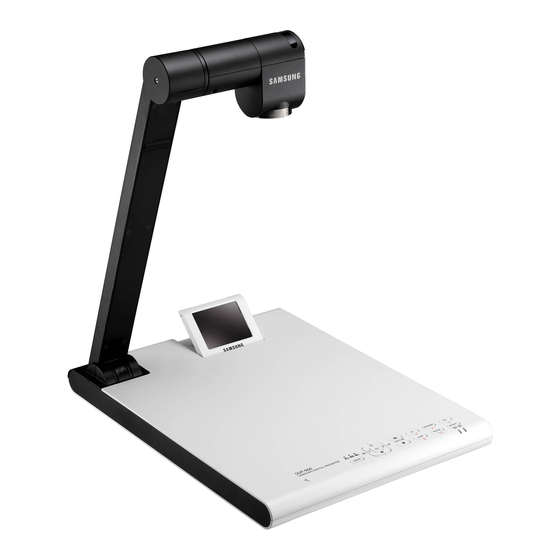
PRODUCT AT A GLANCE Front View Remote Reception System Lens Main Pole LED Lighting Preview LCD Control Panel Side Panel Rear Panel English... -
Page 10: Rear View
Connect this port to a computer that supports USB communications. You can use this port to supply power to an external device. * DC 12V OUT 0.6A The devices offered by Samsung Techwin can only be connected. Otherwise, it (optional) may cause a product failure. DC 12V IN Connect the power jack of the DC adapter to this port. -
Page 11: Side View
Side View RS-232C Item Description Power button Turn on or off the presenter. RS-232C Connect the RS-232C cable to this port. Connect an external microphone. External Microphone However, if you use an external microphone, the internal one will be disabled. Earphone Connect the earphone jack. -
Page 12: Control Panel
overview Control Panel MF/AWB CAPTURE MODE LAMP FREEZE INT/EXT Description Item LIVE LIST Video ¡£¢ The indicator for each mode turns on in blue. Switch to a selected mode ¤ However, you can switch to Photo (ª) or Video («) mode only if the storage device that you selected in the menu is inserted in the product. - Page 13 Description Item LIVE LIST Video Save the image as a photo (ª) or a video («) file However, this is available CAPTURE only if the storage device that you selected in the menu is inserted in the product. Auto Focus Page Up Play the previous file Manual Focus / Auto White...
-
Page 14: Remote Control
overview Remote Control Open menu (in Live mode) Run the selected menu (in the list of photos/videos) Play/Pause (video playback) Adjust the screen to brighter (in Live mode) Adjust the screen to darker (in Live mode) Move up (in the list of photos/videos) Move down (in the list of photos or videos) Volume Control (video playback) Volume Control (video playback) -
Page 15: Installation & Connection
installation & connection PREPARATIONS 1. Connect the necessary cables: VGA OUT, DVI OUT, USB and POWER. DVI OUT VGA OUT VGA OUT VGA IN 1 VGA IN 2 DC 12V OUT C-VIDEO DC 12V IN 0.6A VGA OUT VGA IN 1 VGA IN 2 DC 12V OUT C-VIDEO... -
Page 16: Getting Started
installation & connection GETTING STARTED If you press [q], both power indicator and status indicator around the [q] button will turn on in blue. Start Screen Display the current settings of the digital presenter Display the current settings of capture Display the status of SD(HC) card and the system operation status - SD(HC) CARD DETECTED : SD(HC) card is inserted. -
Page 17: Connecting The I/O Device
VGA IN 1 VGA IN 2 DC 12V OUT DC 12V IN C-VIDEO 0.6A Digital Presenter Depending on the D/A converter of SDP-960 or the A/D converter of the monitor, the colors of RGB and DVI output may differ. English... - Page 18 If using the USB cable for the connection, install the provided USB driver and SDP-960 Viewer on your PC. For more information, refer to the provided program manual. If using the RS-232C cable, no specific driver is provided. Obtain the necessary programs on your own.
-
Page 19: Connecting The Additional Device
Connecting the additional device ❖ SD(HC) Storage Device You can connect the SD(HC) storage device. If using SD(HC) or USB storage device, you must set CAPTURE SETTING MEMORY SEL. to SD(HC) or USB. 1. Face the metal side (golden finger) of the SD(HC) card upward before inserting it. 2. - Page 20 installation & connection ❖ USB Storage Device You can connect the USB storage device. 1. Face the bottom side of the USB storage device downward before inserting it. 2. You will see a message of “USB MEMORY READY”. Now you can use the photo or video capturing menu.
- Page 21 ❖ Audio/Microphone The audio or microphone jack is 3.5Ø in diameter. RS-232C If you use an external microphone, the internal one will be disabled. LINE INPUT is not supported. ❖ Kensington Lock Kensington lock is a theft-proof device that you can use to tie up the presenter to a fixed object such as showcase using a wire cable.
-
Page 22: To Connect To A Pc That Will Be Used As External Input Device
SDP-960 supports the bypass function. If you connect the power cable of the digital presenter, the video source from VGA IN 1 will be displayed automatically even if you do not turn on the presenter. (The bypass function is not available in VGA IN2.) -
Page 23: To Play The Video From An External Device
To play the video from an external device 1. Install the digital presenter in an appropriate position. 2. Select an input source. Press [ ³ ] on the control panel or on the remote control to select a desired source. Each time you press [+] the presenter plays the video source from between the external source and digital presenter. -
Page 24: Setup & Application
setup & application SETUP Output Resolution You can set a different resolution according to the output device (monitor, projector). • Resolutions available: - SXGA (1280x1024) 4:3 - UXGA (1600x1200) 4:3 UP-SCALED - WXGA (1280x800) 16:10 WIDE XGA - XGA (1024x768) 4:3 DOWN-SCALED - 720p (1280X720) 16:9 WINDOW CUT-OUT - 1080p (1920X1080) 16:9 WINDOW CUT-OUT - 720p (1280X720) 16:9 STRETCHED... -
Page 25: Image Adjustment
Image Adjustment ❖ White Balance (WB MODE) You can adjust the color tones of the image automatically in Live mode. 1. From the menu, select IMAGE ADJUSTMENT WB MODE. IMAGE ADJUSTMENT WB MODE ATW (Auto Tracking) AUTO IMG MODE IMAGE ANTI FLK. - Page 26 setup & application ❖ Noise Reduction (DNR) DNR stands for Digital Noise Reduction that provides a clear image through 2D/3D filtering. 1. From the menu, select IMAGE ADJUSTMENT DNR. IMAGE ADJUSTMENT WB MODE ATW (Auto Tracking) AUTO IMG MODE IMAGE ANTI FLK.
- Page 27 3. If you select CUSTOM, you will see the following sub menu items. CUSTOM IMAGE SETTING TONE VERY LOW COLOR HIGH SHARPNESS MIDDLE RETURN } • TONE : Select a gamma setting of luminance. Each time you press [+], the tone setting will switch to <VERY LOW LOW MIDDLE HIGH VERY HIGH>.
-
Page 28: Zoom In/Out
setup & application ❖ Mask Setting You can mask a portion or the whole of the screen so that it is hidden. 1. From the menu, select IMAGE ADJUSTMENT MASK SETTING. MASK SETTING TONE LEVEL 4 TYPE HORIZONTAL SIZE FULL RETURN }... - Page 29 ❖ Macro Mode You can make a short-distance recording (between 1cm and 5cm). 1. From the menu, select ZOOM/FOCUS MACRO MODE. ZOOM / FOCUS SETTING MACRO MODE MICROSCOPE MODE } D-ZOOM MAX x4 RETURN } 2. Perform Auto Focus or Manual Focus at a distance of between 1cm and 5cm, and check if the operation is performed properly.
- Page 30 setup & application 2. Present the microscopic adapter lens as close to the ocular piece of the focus-fixed microscope as possible, and adjust the position of the digital presenter so that the round shape on the screen is positioned at the center of the monitoring screen. 3.
-
Page 31: To Adjust The Focus
❖ Digital-Zoom (D-ZOOM) Specify the maximum factor of digital zooming. 1. From the menu, select ZOOM/FOCUS D-ZOOM. 2. Each time you press [+], the D-ZOOM max value is changed to <OFF MAX x4 MAX x8>. ZOOM / FOCUS SETTING MACRO MODE MICROSCOPE MODE } ... -
Page 32: To Adjust The Brightness
setup & application To adjust the brightness You can use the iris of the lens to adjust the brightness of the object. If the object is dark, adjust it to brighter while if it’s too bright, adjust it to darker. •... - Page 33 • TIME ELAPSE - Press [+] to specify the video recording time. (5MIN-1HOUR) • Select a storage device (MEORY SEL.) - Press [+] to select a desired storage device. The storage device will switch to SD(HC) USB. • PAGE DETECTION - The presenter can detect a moving book or paper on the screen and save it to SD(HC) card or USB storage device automatically.
- Page 34 setup & application 3. To capture the image, press [ª] on the control panel or the remote control. CAPTURE LAMP 4. To check the captured image, press [¤] to enter Still Image mode. 5. Still Image Mode Show the remaining free space of the inserted storage device. Show the current folder.
- Page 35 • Full Screen - In full screen mode, you can use the [_+] buttons to move to the previous or next picture. - Press [] to move to the top-listed file in the folder. Press [®] to move to the last-listed file in the folder. - To switch from full screen to still image mode, press [²].
- Page 36 setup & application 7. Video Mode Show the remaining free space of the inserted SD(HC) card. Show the current folder. Display the number of video clips stored in the current folder. Display the preview window of the selected video. (The thumbnail image is the last image of the capture video.) Provide a description (help) for each playback-related button.
- Page 37 • Playback Screen - The playback screen will be displayed in 640x480 (original size). - You can use the [_+] buttons to move forward or backward by 10 seconds. - To exit the play mode and return to the video mode, press [²]. Display the file name of the current video.
-
Page 38: Preset
setup & application ❖ Page Detection Setting 1. Expose the book or paper (that you want to auto save) to the screen. 2. From the menu, select CAPTURE SETTING PAGE DETECTION. 3. Align the book or paper with the on-screen guideline. 4. -
Page 39: Miscellaneous Setting
Miscellaneous Setting ❖ Freeze Mode 1. From the menu, select MISC. SETTING FREEZE. MISCELLANEOUS FUNCTION FREEZE ALL DISPLAY PC CTRL USB(HYBRID) USB MODE IMAGE USB TWAIN NO USE OSD INFO. SHOW ANYTIME PROTOCOL DEFAULT CVBS MODE NTSC SYSTEM INFO. } RETURN } 2. - Page 40 setup & application ❖ PC CTRL Mode 1. From the menu, select MISC. SETTING PC CTRL. MISCELLANEOUS FUNCTION FREEZE ALL DISPLAY PC CTRL USB(HYBRID) USB MODE IMAGE USB TWAIN NO USE OSD INFO. SHOW ANYTIME PROTOCOL DEFAULT CVBS MODE NTSC SYSTEM INFO.
- Page 41 2. Select a mode from IMAGE and DISK. • If selecting <IMAGE> - You can use the presenter-inserted SD(HC) card as a storage device in Freeze or Video mode. • If selecting <DISK> - You can use the presenter-inserted SD(HC) card as a removable storage device on your PC. ...
- Page 42 setup & application ❖ OSD INFO. Mode 1. From the menu, select MISC. SETTING OSD INFO.. MISCELLANEOUS FUNCTION FREEZE ALL DISPLAY PC CTRL USB(HYBRID) USB MODE IMAGE USB TWAIN NO USE OSD INFO. SHOW ANYTIME PROTOCOL DEFAULT CVBS MODE NTSC SYSTEM INFO.
-
Page 43: System Info. Setting
❖ CVBS (C-VIDEO) Mode Use this mode to match the output signal between connected device and CVBS (C-VIDEO). 1. From the menu, select MISC. SETTING CVBS MODE. MISCELLANEOUS FUNCTION FREEZE ALL DISPLAY PC CTRL USB(HYBRID) USB MODE IMAGE USB TWAIN NO USE OSD INFO. - Page 44 setup & application 4. Select YES. The update progress will be shown on the screen. It will take 5 to 10 minutes. SDP960 SYSTEM UPDATE! DON'T TURN OFF THE PRODUCT! If you unplug the power cable or turn off the device during the update, the device may not operate properly. Do never unplug the power cable before the update is completed.
- Page 45 ❖ System Reset Reset all the settings of the menus and file numbers to the factory default. 1. From the menu, select MISC. SETTING SYSTEM INFO.. SYSTEM INFORMATION SYSTEM UPDATE } SYSTEM RESET } RETURN } <VERSION INFORMATION> DATE : Apr 3 2011 TIME : 15:13:19 UCOM : V0.
-
Page 46: Various Screen Settings
setup & application Various Screen Settings ❖ To rotate the image You can rotate the image on the screen. Each time you press the [h] button on the remote control, the image will be rotated by 90°. (90°, 180°, 270°, back to 0°) ... - Page 47 ❖ To check all of the stored images and select one from them You can check all of the images stored in the current memory and select one from them. • Press and hold the [ c ] button on the remote control for more than 1 second. The whole images stored in the current memory will be listed.
-
Page 48: Appendix
XGA or SXGA, no image will be displayed on the screen.) Check if the output device has set a proper input source. Check if the SDP-960 program is installed on your PC properly. Check if there is a problem with your operating system of Windows XP. A lower USB communication with the PC version of Windows may cause a trouble. -
Page 49: Menu Settings & Default
MENU SETTINGS & DEFAULT Menu Item Default SXGA 1280X1024 4:3 UXGA 1600X1200 4:3 UP-SCALED WXGA 1280X800 16:10 WIDE XGA XGA 1024X768 4:3 DOWN-SCALED DVI/VGA OUTPUT SXGA 720p 1280X720 16:9 WINDOW CUT-OUT 1080p 1920X1080 16:9 WINDOW CUT-OUT 720p 1280X720 16:9 STRETCHED 1080p 1920X1080 16:9 STRETCHED WB MODE ATW(Auto Tracking)/AWB(KEY)/MANUAL WB... - Page 50 appendix Menu Item Default PIC FORMAT JPEG/BMP JPEG JPG QUALITY BEST/FINE/NORMAL FINE MOV QUALITY STANDARD/BEST STANDARD MIC MUTE ON/OFF TIME ELAPSE OFF/5MIN/10MIN/15MIN/20MIN/30MIN/45MIN/1HOUR CAPTURE SETTING MEMORY SEL. SD(HC)/USB SD(HC) PAGE DETECTION RESET FILE NUMBER PRESET-EXE PRESET1/PRESET2/PRESET3/PRESET4 PRESET. SETTING PRESET-SAV PRESET1/PRESET2/PRESET3/PRESET4 BOOT PRESET OFF/PRESET1/PRESET2/PRESET3/PRESET4 DVI/VGA/CVBS ONLY DVI/VGA/CVBS...
-
Page 51: Specifications
SPECIFICATIONS For enhanced performance, the product specification is subject to change without prior notice. Item Description Recording Lens F = 2.5(Wide) ~ 3.12(Tele), f = 4.1 ~ 24.6mm Effective Range Max : 420 X 336 mm (16.5"x11.7") Optical Lens Zoom x48 (motorized: 6X / digital: 8X) Focus Auto/Manual... - Page 52 appendix Item Description Still Image : Internal memory - Thumbnail 3 x 3 / External memory (SD(HC) card & USB storage) - Thumbnail 4 x 4 Play Video : Internal Movie Player Screen Division Available Internal Memory : 8 pictures (RAW image data), Storage Functions External : SD(HC) card (Max.
- Page 53 Item Description Operation Temperature +5°C ~ +35°C (+41°F ~ +95°F) Operation Humidity Below 90% Power rating 12V DC, 3.0A - In-use : 340 (W) x 490 (H) x 445 (D) / 13.39" (W) x 19.29" (H) x 17.52" (D) Dimension (WXHXD) - Off-use : 340 (W) x 66 (H) x 551 (D) / 13.39"...
- Page 54 SAMSUNG TECHWIN AMERICA Inc. SAMSUNG TECHWIN EUROPE LTD. 100 Challenger Rd. Suite 700 Ridgefield Park, NJ 07660 Samsung House, 1000 Hillswood Drive, Hillswood Business Toll Free : +1-877-213-1222 Direct : +1-201-325-6920 Park Chertsey, Surrey, UNITED KINGDOM KT16 OPS Fax : +1-201-373-0124...