
Related Manuals for Samil Power SP-SR-V5-EN


Summary of Contents for Samil Power SP-SR-V5-EN
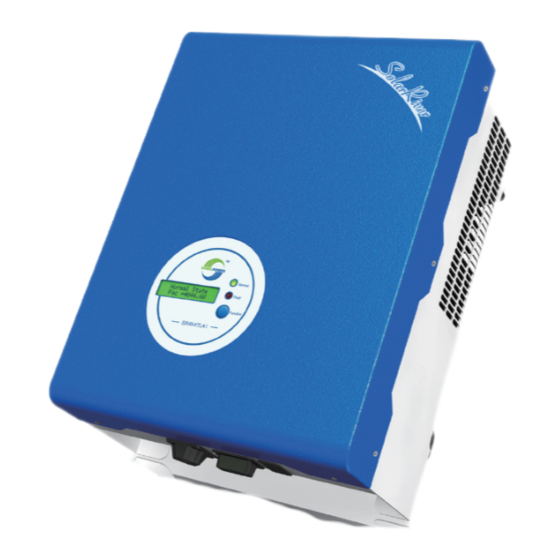
- Page 1 Samil Power Expert for PV Grid-tied Inverters SolarRiver PV Grid-tied Inverter Product Manual SP-SR-V5-EN...
-
Page 3: Copyright Declaration
(including software, etc.) , and no reproduc- tion or distribution of it in any form or by any means. All rights reserved.Samil Power reserves the right of final interpretation. This information is subject to changes without notice. -
Page 5: Table Of Contents
Contents NOTES ON THIS MANUAL ......................5 1.1 S ............................ 5 COPE OF ALIDITY 1.2 T ............................5 ARGET ROUP 1.3 S ............................5 YMBOLS SAFETY ............................6 2.1 A ..........................6 PPROPRIATE SAGE 2.2 I ......................6 MPORTANT AFETY NSTRUCTIONS 2.3 E ........................ - Page 6 9.1 T ........................... 32 ROUBLESHOOTING 9.2 R ........................... 34 OUTINE AINTENANCE 10 DECOMMISSIONING ........................ 35 10.1 D ........................35 ISMANTLING THE NVERTER 10.2 P ...............................35 ACKAGING 10.3 S ..............................35 TORAGE 10.4 D ..............................35 ISPOSAL 11 CONTACT SAMIL POWER ......................36...
-
Page 7: Notes On This Manual
This manual is an integral part of the inverter, Please read the product manual carefully before installation, operation or maintenance. Keep this product manual for future reference. 1.1 Scope of Validity This installation guide describes the assembly, installation, commissioning, maintenance and failure search of the following Samil Power SolarRiver Series inverters. SR1K5TLA1 SR2K2TLA1 SR2K8TLA1... -
Page 8: Safety
Note ! Grounding the PV generator. Comply with the local requirements for grounding the PV modules and the PV generator. Samil Power recommends connecting the generator frame and other electrically conductive surfaces in a manner which ensures continuous conduction and ground these in order to have... -
Page 9: Explanation Of Symbols
Safety 2.3 Explanation of Symbols This section gives an explanation of all the symbols shown on the inverter and on the type label. ● Symbols on the Inverter Symbol Explanation Danger to life due to high voltages in the inverter! There is residual voltage in the inverter. - Page 10 ● Before using the SolarRiver Series inverter, read all instructions and cautionary markings on the SolarRiver Series inverter, and all appropriate sections of this guide. ● Use only attachments recommended or sold by Samil Power. Doing otherwise may result in a risk of fire, electric shock, or injury to persons.
-
Page 11: Introduction
3 Introduction 3.1 Basic Features Congratulations on your purchase of a SolarRiver Series inverter from Samil Power. The SR Series inverter is one of the finest inverter on the market today, incorporating state-of-the-art technology, high reliability, and convenient control features. -
Page 12: Dimension And Weight
Introduction ● Terminals of PV inverter RS485 SF-SW AC Output RS232 DC Input Figure 3 Terminals of PV inverter(1.5 kW~2.8 kW) RS485 SF-SW AC Output RS232 DC Input Figure 4 Terminals of PV inverter(3.3 kW~5 kW) Caution ! About SF-SW. Risk of electric shock!Only authorized personnel is allowed to set the DIP switch. -
Page 13: Technical Data
Technical Data Normal Fault Function SR5KTLA1 329mm 180mm Figure 6 SR3K3TLA1/SR4K4TLA1/SR4K4TLA1-PT/SR5KTLA1 ● Weight Table 1 Weight Model SR1K5TLA1 SR2K2TLA1 SR2K8TLA1 SR3K3TLA1 SR4K4TLA1 SR4K4TLA1-PT SR5KTLA1 Weight [kg] 17.1 17.5 17.9 18.9 19.2 19.2 19.4 4 Technical Data 4.1 Input (DC) Model SR1K5TLA1 SR2K2TLA1 SR2K8TLA1... -
Page 14: Output (Ac)
Technical Data 4.2 Output (AC) Model SR1K5TLA1 SR2K2TLA1 SR2K8TLA1 SR3K3TLA1 SR4K4TLA1 SR4K4TLA1-PT SR5KTLA1 AC nominal power 1500 2000 2600 3000 4000 3680 4600 Max. AC power [W] 1650 2200 2800 3300 4400 3680 5000 Max. AC current [A] 13.8 Nominal AC voltage 230 / 180~270 * / range [V] AC grid frequency /... -
Page 15: General Data
Technical Data 4.4 General Data Model SR1K5TLA1 SR2K2TLA1 SR2K8TLA1 SR3K3TLA1 SR4K4TLA1 SR4K4TLA1-PT SR5KTLA1 Dimension 332 / 450 / 161 329 / 433 / 180 (W/H/D) [mm] Weight [kg] 17.1 17.5 17.9 18.9 19.2 19.2 19.4 Cooling concept Convection Convection Convection Convection Noise (typical) [dB] <30 <30... -
Page 16: Function
Function 5 Function Operation Mode 【 Stand-by Mode 】 The stand-by mode means that the inverter is ready to but still not connect to the grid. Under this mode, it will continue check if PV array has enough power to feedback into grid. -
Page 17: Installation
Installation 6 Installation 6.1 Packaging Project Type Description Remark Equipment PV Grid-tied Inverter 1 unit Accessories Backboard 1 pc Installation Kit Installation Kit 1 set include: M5 Accessories AC connector 1 pc flange nut, DC connector assembly 1 / 2 expansion Packing list 1 pc... -
Page 18: Installation Precaution
Installation 1.5-2.8 kW Inverter Backboard 3.3-5 kW Inverter Backboard Warning ! before installation and maintenance, AC and DC side doesn’t carry electricity, but if DC side is just disconnected, capacitance still contains electricity, so please wait for at least 5 minutes to ensure the capacitors completely release the energy and inverter is not electrified. -
Page 19: Preparation
Front 10cm Table 2 Available Space Size or high temperature inside the inverter. Please let users know that Samil Power will not compensate the fault caused by the above situation. 6.3 Preparation Below tools are needed before installation. Installation Tools Installation Tools: crimping pliers for binding post and RJ11, screwdriver and manual wrench and ф... -
Page 20: Connections Of The Pv Power System
Installation The depth of the holes should be about 30mm and should be the same. After removing the dust in the holes, measure the net depth of the holes. If the depth is more than 33mm or less than 27mm, the expansion tubes wouldn’t be installed and tightened. Expansion Screw Expansion Pipe Figure 7 Installation of Expansion Pipe... - Page 21 Installation SR series inverters (SR3K3TLA1/SR4K4TLA1/SR4K4TLA1-PT/SR5KTLA1 ) can be connected in series into 2-strings PV modules. Please select PV modules with excellent function and reliable quality. Open-circuit voltage of module arrays connected in series should be <Max. DC (Table 3) input voltage; operating voltage should be conformed to MPPT voltage range. Table 3 Max.
- Page 22 Installation AC Output ● SolarRiver series inverters are designed for single phase grid. Voltage range is from 180V to 260V (200V-270V for Australia), typical frequency is 50Hz. Other technical requests should comply with the requirement of local public grid. Table 4 Cable and Micro-breaker Requirement SR4K4TLA1 Model...
- Page 23 Installation 1.4% 2.5mm 4.0mm 6.0mm 8.0mm 1.2% 10.0mm 1.0% 0.8% 0.6% 0.4% 0.2% 0.0% 100m Length Figure 11 AC Cable Loss for SR3K3TLA1 This product has a professional IP66 AC waterproof connector. You have to wire AC by yourself. Please see figure 12 and 13 for AC connector disassembling guide. Figure 12 Disassembling AC Connector from Inverter Figure 13...
- Page 24 Installation Below shows the steps of wiring. Step1: Put the threaded sleeve and pressure screw through the AC wire (See figure 14). Figure 14 Step2: Wire the AC wire refer to below instructions. · Screw the green-yellow wire to the ground terminator in the AC Connector (Figure 15). Screw the blue wire to the N(Neutral) terminator in the AC Connector.
-
Page 25: Run The Inverter
Installation Step5: Screw down the pressure screw (Figure 18). Figure 18 Step6: Connect AC connector to inverter (Figure 19). Figure 19 6.6 Run the inverter ● Start inverter after checking all below steps. a. Make sure all the DC breaker and AC breaker are disconnect. b. -
Page 26: Operation Method
Operation Method greater than 100V (lowest start-up voltage) but less than 150V (lowest operating voltage). Checking: Inverter will check output environment automatically when DC output voltage of PV panels exceeds 150V and PV panels have enough energy to start inverter. Normal: Inverter begins to operate normally with green light on. -
Page 27: Lcd Function
Operation Method 7.2 LCD Function The function key is used to set the LCD. It can alternate among different parameters and different languages. Use Function Key to check and set inverter data SolarRiver 4.4KW Pac=x.xW Display on LCD at first Inverter will change into standby mode Waiting when the dc input >100V. - Page 28 Operation Method Initial State It display inverter’s model LCD will light on Normal State SolarRiver 4.4kW Pac=xxxx.xW Pac=xxxx.xW It display the total It display the version of the Energy software. Etotal=xx.xkwh Ver. V1.00 Pac=xxxx.xW Pac=xxxx.xW It display the today’s Language setting. Energy.
-
Page 29: Lcd Information
Operation Method (Press Function key to check data, it will go back to initial state after 10s) Lockup function as below: Language setting function as below: Udc=xx.xV Normal State Pac=xxxx.xW Pac=xxxx.xW Press the Function key for 10 times, Press the Function key for 5 it will display the language setting. - Page 30 Operation Method Flash Flash Upgrading software Checking Parameters Real-time Power Pac=xxxxW Real-time output power Calculate Energy Etotal=xxxxkwh Total energy feedback to grid Information Output Voltage Vac=xxx.xV Output voltage Output Frequency Freq.= xx.xHz Output frequency Output Current Iac=xx.xA Output Current PV Input Voltage Vpv= xxxV PV input voltage PV Input Current...
-
Page 31: Communication And Monitoring
Communication and Monitoring value DC Sensor Fault DC Sensor Fault Input DC detector failure Leakage current detecting circuit GFCI Failure GFCI Failure failure Others Lock Lock Froze the information Reconnect Reconnect Reconnect to grid after relay disconnect Inverter’s Version Ver xx.xx Version information 8 Communication and Monitoring 8.1 Communication Interface... - Page 32 Communication and Monitoring Figure 22 RS232 Communication Cable and Interface Table 6 RS232 Pin Definition Common (GND) Function One inverter can only be communicated with one PC at the same time through RS232 port. Thus this method is generally used for single inverter’s communication, for examples,software updating and serviceman’s testing.
- Page 33 Communication and Monitoring Table 7 RS485 Pin Definition Function ● Connections Select high-quality network cable, peel the isolation surface, Select 4 wires ( brown, white brown, orange, white orange), then follow the same order with the press pliers push into the 4-wire RJ11 crystal head.
-
Page 34: Troubleshooting
—Are the display panel and the communications cable properly connected and undamaged? Contact Samil Power Customer Service for further assistance. Please be prepared to describe details of your system installation and provide the model and serial number of the unit. - Page 35 Troubleshooting Table 9 Troubleshooting list Faults Diagnosis and Solutions -Waiting for one minute, grid will go back to normal working state. -Making sure that grid voltage and frequency complies with standards. Grid Faults -Or, please seek for help from us. -Off to grid.
-
Page 36: Routine Maintenance
Troubleshooting -Check the fan whether it is blocked . Fan Fault -Check the wire of fan whether it is normal . -Please seek for help from us if it can not go back to normal state . -Disconnect the PV (+), PV (-) with DC input, then reconnect them. Relay Failure -Please seek for help from us if it can not go back to normal state. -
Page 37: Decommissioning
Decommissioning ● Cooling fin cleaning To ensure inverter performance and long-period usage, back heat emitter needs to be left with available space, side fan cannot be covered with dust or snow as it will affect airflow. Please use compressing air, soft cloth or brush to clean cooling fin, not water, corrosive chemical substance or intense cleaning agent. -
Page 38: Contact Samil Power
Contact Samil Power 11 Contact Samil Power If you have any questions about SR series inverter, please call service support hotline: +86 510 83593131. Please keep following information to better our service for you. a. Inverter’s Model. b. Inverter’s Serial No.. - Page 40 Samil Power Expert for PV Grid-tied Inverters Samil Power Co., Ltd. Marketing & Sales Office Factory Add: No.1608, Huishan Ave. Huishan District, Wuxi Add: No.66 Taihangshan Road, City, Jiangsu Province, P.R.China 214174 Suyu Economic Development Zone, Suqian City, Jiangsu Province, P.R.China 223800...
Need help?
Do you have a question about the SP-SR-V5-EN and is the answer not in the manual?
Questions and answers