Melitta Mill & Brew MEMB1B, Mill & Brew MEMB1W User Manual
10 cup coffee maker
Hide thumbs
Also See for Mill & Brew MEMB1B, Mill & Brew MEMB1W:
- Use and care manual (12 pages) ,
- Use and care manual (25 pages)
Table of Contents
Advertisement
Advertisement
Table of Contents

Related Manuals for Melitta Mill & Brew MEMB1B, Mill & Brew MEMB1W


Summary of Contents for Melitta Mill & Brew MEMB1B, Mill & Brew MEMB1W
- Page 1 Mill & Brew ™ 10 CUP COFFEE MAKER Models MEMB1B, MEMB1W...
-
Page 2: Important Safeguards
When using electrical appliances, basic safety precautions should always be fol- lowed to reduce the risk of fire, electric shock, and/or injury to persons, including the following: 1. Read all instructions. 2. Do not touch hot surfaces. Use handles or knobs. 3. -
Page 3: Additional Important Safeguards
IMPORTANT SAFEGUARDS WARNING: This appliance generates heat and escaping steam during use. Proper precautions must be taken to prevent the risk of burns, fires, or other injury to persons or damage to property. 1. All users of this appliance must read and understand these Use & Care instructions before operating or cleaning this appliance. -
Page 4: Polarized Plug
Polarized Plug This appliance has a polarized plug (one blade is wider than the other). To reduce the risk of electric shock, this plug is intended to fit into a polarized outlet only one way. If the plug does not fit fully in the outlet, reverse the plug. -
Page 5: Getting To Know Your
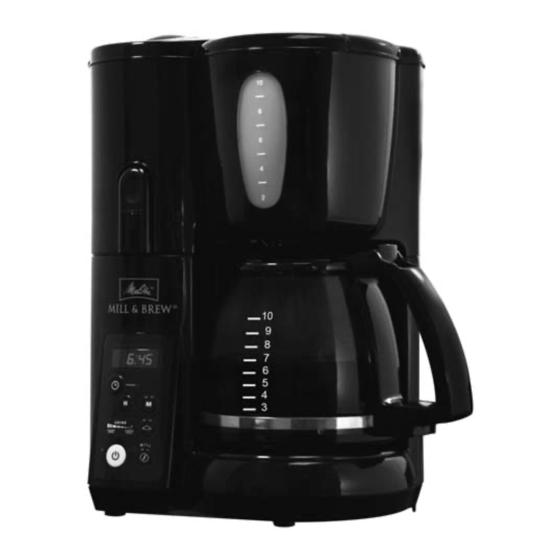
Getting To Know Your Mill & Brew Product may vary slightly from illustrations. FIGURE 1 FIGURE 3 FIGURE 1 1. Control Panel 2. LED Display 3. Lock Buttons 4. Mill & Brew™ Assembly (P/N 30643B blk; 30643 wht) 5. Mill & Brew™ Assembly Lock 6. -
Page 6: Setting The Clock
Before Brewing for the First Time CAUTION: To protect against electric shock, do not immerse the Coffee Maker or allow AC cord to come into contact with water or other liquids. 1. Carefully unpack your Coffee Maker. Remove any labels from the outer surfaces. -
Page 7: Operating Instructions
OPERATING INSTRUCTIONS Brewing Coffee - Immediate Start 1. Plug the appliance into a standard 120V AC electrical outlet. 2. Markings on the Carafe indicate the level of water required to brew the desired number of cups. Fill the Carafe with cold tap water. Close the Lid back into position. -
Page 8: Programming The Mill
Programming the Mill NOTE: If you desire a medium grind, your machine is automatically pre- set to 4 or a medium grind; refer to step 2 below. If you wish to pro- gram a finer or coarser grind, start with step 1. 1. - Page 9 Brewing Coffee - Programming Delay Timer 1. Follow steps 1 — 6 in BREWING COFFEE — IMMEDIATE START and 1-3 in PROGRAMMING THE MILL. 2. Be sure clock is set to the current time (see SETTING THE CLOCK instructions on Page 6). 3.
-
Page 10: Keep Warm Function
Auto Pause and Pour Feature The Auto Pause and Pour feature allows you to pour a cup of coffee before brewing is complete. Simply remove the Carafe from the Warming Plate. Always keep the Lid on the Carafe down when pouring the coffee. IMPORTANT: When using the Auto Pause and Pour feature while the Coffee Maker is still brewing, the Carafe must be replaced in its proper position on the Warming Plate within 20 seconds to prevent overflowing. -
Page 11: Hints For Best Results
Hints For Best Results • A clean Coffee Maker is essential for making great tasting coffee. Regular cleaning, as specified in the USER MAINTENANCE INSTRUCTIONS, is highly recommended. • Always use fresh, cold water in your Coffee Maker. • Do not add less than 4 cups (20 ounces) of water to the Water Reservoir. -
Page 12: User Maintenance Instructions
User Maintenance Instructions This appliance requires little maintenance. It contains no user serviceable parts. Do not try to repair it yourself. Any servicing that requires disassembly must be performed by a qualified appliance repair technician. Cleaning Instructions NOTE: Do not place anything other than water or the vinegar cleaning solution specified in this manual into the Water Reservoir. - Page 13 Mineral Deposits / Decalcifying Your Coffee Maker must be cleaned when you begin to notice excessive steaming or the brewing time increases considerably. This condition is caused by a buildup of lime and mineral deposits from your water. If the pumping action stops before all the water has been pumped out of the machine, then the appliance requires decalcification.
- Page 14 How To Decalcify Your Coffee Maker 1. Pour 1/2 cup of vinegar into the Carafe. Add cold water up to the 4 cup marking. Pour the water / vinegar mixture into the Water Reservoir and place empty Carafe onto the Warming Plate. 2.
- Page 15 NOTES...
-
Page 16: Limited One-Year Warranty
Warranty Coverage: This product is warranted to be free from defects in materials or workmanship for a period of one (1) year from the original purchase date. This product warranty is extended only to the original consumer purchaser of the product and is not transferable.
Need help?
Do you have a question about the Mill & Brew MEMB1B, Mill & Brew MEMB1W and is the answer not in the manual?
Questions and answers