Table of Contents
Advertisement
Quick Links
Advertisement
Table of Contents

Related Manuals for Xray T1 EVO2


Summary of Contents for Xray T1 EVO2
-
Page 2: Table Of Contents
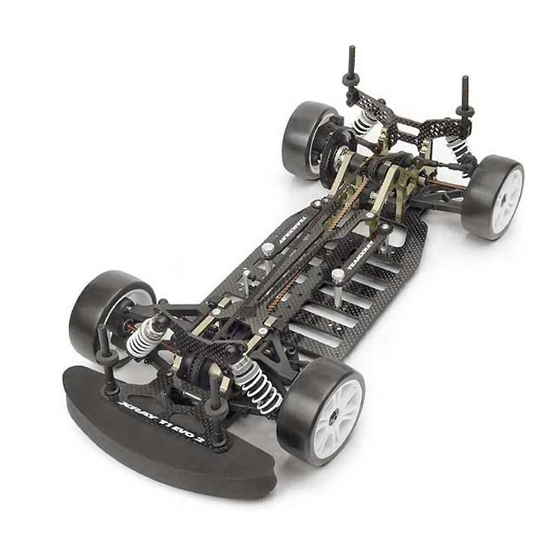
The design is focused on blending of extraordinary materials with racecar lineage to offer a responsive ride, luxurious elegant As the proud owner of an XRAY T1 EVO2, you are cordially invited to join TEAM design, finest quality, and best track performance. -
Page 3: Kit
• Ask your local hobby shop for any advice. • Please support your local hobby shop. We at XRAY Model Racing Cars support all local hobby dealers. Therefore we ask you, if at all possible, to purchase XRAY products at your hobby dealer and give them your support like we do. If you have difficulty finding XRAY products, please check out www.teamxray.com to get advice, or contact us via email at support@teamxray.com, or contact the XRAY... -
Page 4: Front & Rear Differential
1.FRONT & REAR DIFFERENTIAL 305050 305040 305010 309070 309370 309442 305082 305050 305090 305082 309020 305020 305050 30 5010 ALU DIFF LONG OUTPUT SHAFT HARD COATED 30 9020 BALL-BEARING MR85ZZ 5x8x2.5 (2) 30 5020 ALU DIFF SHORT OUTPUT SHAFT HARD COATED 30 9070 BALL-BEARING AXIAL F3-8 3x8x3.5 30 5040... -
Page 5: Front & Rear Differential
FRONT & REAR DIFFERENTIAL 1 1 . Hold the diff shaft with the installed pulley facing up. Place the other #309020 (BB 5x8) ball-bearing on the center stub on top of the other bearing. 2 2 . . Put a very thin coat of grease on the side of a diff washer, and place it on 309020 the long diff shaft. -
Page 6: Rear Transmission
2. REAR TRANSMISSION 303015 302040 309054 305000 305441 303040 302053 302070 302040 305511 302040 309335 309452 302070 305511 309045 305582 305570 309314 305540 309035 305431 302040 303025 301110 309343 30 2040 LOWER SUSPENSION HOLDER (SET 2+1+1) 30 9054 HIGH-SPEED BALL-BEARING 10 x 15 x 4 BLUE COVERED (2) 30 2070 ECCENTRIC NYLON HUB FOR BULKHEAD + COVERS (4+2) 30 9314... -
Page 7: Rear Transmission
REAR TRANSMISSION 6 6 . . Install the 16T fixed pulley and seat if over the pin. The fixed pulley and fixed pulley shim should be flush against the one-way pulley and the pin should not be visible. 7 7 . . Install the two #309314 (ST 6x12) cone washers, making sure they face the right way. - Page 8 3. REAR SUSPENSION 309351 307310 302080 309358 309354 309333 303111 303115 309425 OPTION 303230 309054 307350 307354 307351 307352 OPTION 305230 309452 309351 303210 303240 303220 303310 305240 305320 305310 305315 OPTION 30 2080 CASTER CLIPS SET - 4,3,2,1 MM (2) 30 5320 DRIVE SHAFT REAR - SPRING STEEL (2) 30 3111...
-
Page 9: Rear Suspension
REAR SUSPENSION 1 1 . . Release the pivot pin set screw to allow the arm to slide back and forth on the pin, so you can install the wheelbase clips on the pivot pin. 2 2 . . Install the #30 2080 wheelbase clips. Use only three clips (one each of 4mm, 3mm, and 2mm) on each arm. - Page 10 REAR SUSPENSION Assemble the rear turnbuckles by threading ball joints onto the ends of the spring steel turnbuckle. Note: The turnbuckle has a CCW thread on one end and a CW thread on the other end. 51.5 mm Adjust the turnbuckles to a length of 51.5 mm, measured end-to-end. 1 1 .
-
Page 11: Front Transmission
4. FRONT TRANSMISSION 309010 302551 302040 305431 302032 302040 309433 302025 302040 302070 309351 309054 302053 305000 308071 302060 309343 302065 OPTION 302015 302070 309335 30 2032 ALU NUT (2) 30 9054 HIGH-SPEED BALL-BEARING 10 x 15 x 4 BLUE COVERED (2) 30 2040 LOWER SUSPENSION HOLDER (SET 2+1+1) 30 9351... -
Page 12: Front Suspension
5. FRONT SUSPENSION 302080 302140 302220 309358 309425 302650 302130 307250 307251 307230 305240 OPTION 307212 305230 302111 305220 309354 309351 309054 302210 307254 307252 309452 305210 305215 OPTION 30 2080 CASTER CLIPS SET - 4+3+2+1 MM (2) 30 7230 FRONT WISHBONE PIVOT PIN UPPER - SPRING STEEL (2) 30 2111 SUSPENSION ARM FRONT LOWER EVO2... -
Page 13: Front Suspension
FRONT SUSPENSION 1 1 . . Slide a #309054 (BB 10x15) ball-bearing onto the wheel axle. 2 2 . . Insert the drive shaft through the steering block until the bearing on the axle is seated. Note the direction of installation from the diagram. 3 3 . -
Page 14: Servo Saver
6. SERVO SAVER 303450 302551 309010 302580 309414 302582 302501 302660 302610 302630 302650 302501 302501 302501 FACTORY PREASSEMBLED 30 2501 DUAL-ACKERMAN CENTRAL SERVO SAVER (SET) 30 2650 5 MM BALL END, WITH THREAD (6) 30 2551 SERVO SAVER PLASTIC COVER - EXCENTRIC (2) 30 2660 BALL JOINT 5 MM (6) 30 2580... -
Page 15: Servo Saver
SERVO SAVER Assemble the steering rods by threading ball joints onto the ends of the spring steel turnbuckle. Note: The turnbuckle has a CCW thread on the long end and a CW thread on the short end. Also note that the ball-joints should be 180-degrees to each other. Adjust the steering rods to the proper lengths as shown. - Page 16 WASHER 3.2 (10) Properly functioning shocks are one of the most important factors in the performance of your car. This XRAY shock set allows you to build four externally-adjustable or non- adjustable shocks. Both adjustable and non-adjustable shocks feature XRAY's unique keying system that positively locks the pistons to the shockrods.
-
Page 17: Shock Absorbers
SHOCK ABSORBERS 1 1 . . Insert the larger #308071 (O 5x1) O-ring onto the shock body, until it seats on the extended end of the shock body. 2 2 . . Lubricate the small #308070 (O 3.1x1.6) O-ring with a drop or 308070 two of shock oil. -
Page 18: Rear Final Assembly
30 9333 HEX SCREW SH M3x6 (10) 30 9334 HEX SCREW SH M3x8 (10) 30 8300 XRAY SHOCK ABSORBERS 30 9335 HEX SCREW SH M3x10 (10) Mount the #303091 rear shock tower onto the rear bulkhead with #309333 (SH M3x6) screws. -
Page 19: Front Final Assembly
HEX SCREW SFH M3x10 (10) 30 8300 XRAY SHOCK ABSORBERS 1 1 . . Place the #301200 lower nylon bumper over the front of the chassis. 2 2 . . Place a #309393 (N M3) nut into the hex recess atop the bumper. -
Page 20: Servo Saver, Battery Holder & Upper Deck Assembly
10. SERVO SAVER, BATTERY HOLDER & UPPER DECK ASSEMBLY 309343 301180 306140 306110 306150 309343 30 6110 BATTERY MOUNT STRAP - 2.5 GRAPHITE FOR 3 BATT. - (SET 2) 30 9343 HEX SCREW SFH M3x6 (10) 30 6140 BATTERY HOLDER MOUNT WITH BALL END (2) 30 1180 FLEXIBLE TOP DECK - GRAPHITE 30 6150... -
Page 21: Accessory Installation
11. ACCESSORY INSTALLATION 306310 309350 305724 SERVO 309334 306300 309400 309317 306200 309345 309334 305793 305790 OPTION 309332 309333 309345 803001 309310 309310 30 5724 PINION GEAR ALU HARD COATED 24T / 48 (INCLUDED) 30 9317 WASHER S 3.2 (10) 30 5720~34 PINION GEAR ALU HARD COATED 20T~34T / 48 (OPTION) 30 9332... -
Page 22: Accessory Installation
The XRAY T1 EVO2 is a top competition racecar, and therefore does not come supplied with tires and inserts; every track and race requires NOT INCLUDED different tires and inserts. - Page 23 - in the street. • Always turn off the receiver/speed control or disconnect XRAY T1 EVO2's battery pack before turning your transmitter off. Disregard of the above cautions may lead to accidents, personal injury, or •...
Need help?
Do you have a question about the T1 EVO2 and is the answer not in the manual?
Questions and answers