Table of Contents
Advertisement
Advertisement
Table of Contents

Related Manuals for Beko BKK 2154


Summary of Contents for Beko BKK 2154
- Page 2 This product has been produced in environmentally friendly, modern facilities...
- Page 3 Dear customer, We would like our product, which is manufactured in modern facilities and which has been subject to detailed quality control process, to provide you with the highest productivity. Therefore, we would like you to read this manual thoroughly before you start using the product and we would like you to keep it as a reference.
-
Page 4: Table Of Contents
Part 1: Safety Warnings / 3-4 Part 4: Maintenance and Cleaning / 16 Part 2: Technical Aspects of Part 5: Easy Storage ‹deas / 17-18 your machine / 5-6 Part 3: Using your machine / 7-15... -
Page 5: Part 1: Safety Warnings
Part 1: Safety Warnings When using electrical appliances, * Do not operate the appliance with * Blades are sharp. Handle basic safety precautions should a damaged cord or plug or after the carefully. When handling the chopper always be followed, including the appliance malfunctions, or is dropped blade , always hold it by the upper following:... - Page 6 Please read all the following (13) must be locked in place. * Children should be supervised to ensure that they do not play with the instructions carefully. * When operating blender (8), make appliance. sure that all attachments are first For your protection, Food Processor removed from food processor bowl Attention...
-
Page 7: Your Machine
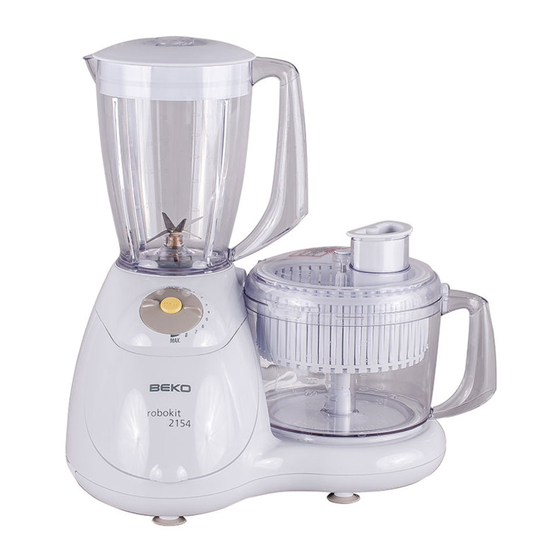
Part 2: Technical Aspects of your machine Voltage / Frequency : 230V ~ 50 Hz. Power : 700 W Max. Isolation Class Net weight : 4890 gr. Dimensions : 350 x 270 x 210 mm. - Page 8 Processor body Security cover Safety cover/blender location On/off/speed control dial/operation button Turbo/Pulse button Motor shaft Storage compartment Blender Blender lid Addition window lid Processor bowl Spindle Main lid Food pusher Storage dome Spatula Blade holder Fine shredding blade Coarse shredding blade Coarse slicing blade Fine slicing blade Chipping blade...
-
Page 9: Part 3: Using Your Machine
Part 3: Using your machine Control Panel Food Processing arrows face each other and the After properly locking the security CAUTION : Make sure that the unit security cover (2) is securely locked cover (2) in place, correctly locating is unplugged from power source before operating the appliance. - Page 10 Place the bowl (11) on the motor Always hold the chopping blade by Keep hands and utensils away from shaft (6). (There is no need to turn the upper plastic part. After using the cutting blade while chopping it - it will lock in place by itself) the chopping blade, always take it food, to reduce the risk of severe Place the chopping blade (23) on...
- Page 11 Processing Examples processed and the degree of The processing times indicated are fineness you require. approximate and also depend on the quality of the food to be Figure 9 Figure 10 Food Processing Product Recommended Levels Operation Times Meat 700g. 10 –...
- Page 12 Whipping • Place the bowl on the motor shaft. • For your safety, the pusher must • Attach the removable beater (27) stay in its place while operating the CAUTION: Make sure that the unit to the whisk arm attachmen (26). appliance.
- Page 13 Figure 20 Attention! Never use the whipping attachment for dough kneading. Do not immerse the whisk arm attachment into water. For cleaning, remove beaters (27) from the whisk arm by pulling it out. Replace the beaters after washing the beaters only. Figure 18 Figure 19...
- Page 14 Citrus Juicer CAUTION : Make sure that the unit • Make sure the security cover (2) is unplugged from power source is securely locked in its place (3) CAUTION : Always operate the and operating button is on “OFF” • Place the bowl on the motor shaft. juicer only at minimum speed (MIN) before inserting or removing •...
- Page 15 Continuous Slicer / Shredder • Place the blade of your choice on the blade - holder (17) CAUTION : Make sure that the unit • Place the blade holder (17) onto is unplugged from power source the bowl (Figure 25). and operating button is on”...
- Page 16 Blender • Place the lids of the blender (9, • When blending hot liquids, remove the small lid (10) CAUTION : Make sure the unit is • Recommended speed levels for • Avoid contact with moving parts at unplugged from power source and blending are between 5-Max.
- Page 17 Juice Extractor MAX. for juice extracting. pulp that remains in the filter, with • For your safety, always use the the help of the spatula (16) CAUTION : Make sure unit is pusher to press down the ingredient. • Do not put your fingers or other unplugged from power source and •...
-
Page 18: Cleaning
Part 4: Maintenance and Cleaning CAUTION : Make sure the unit is • Only the stainless steel blades Cleaning the blender unplugged from power and can be washed in the dishwasher. - Fill with sudsy warm water. operating button is on “OFF” before •... -
Page 19: Part 5: Easy Storage ‹Deas
Part 5: Easy Storage ‹deas • 4 pcs. of slicing, shredding blades can be stored on the storage • Spatula • 1 pc of French fries cutting disc dome.(15) You can also place this Can be placed on the spatula •... - Page 20 • Whisk arm can be stored on the storage • The power cord can be stored by • Removable beater compartment (7) which is on the pushing in to the inside of the main • Chopping blade main body. body. Figure 39 Figure 40 Figure 41...