
Related Manuals for Club Car DS 2004


Summary of Contents for Club Car DS 2004
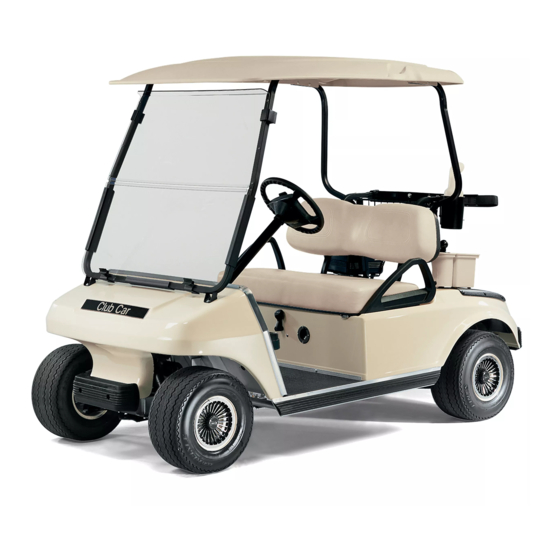
- Page 1 2004 MAINTENANCE SERVICE MANUAL DS GOLF CARS GASOLINE/ELECTRIC MANUAL NUMBER 102397601 EDITION CODE 1203B0312A...
- Page 3 If it appears that a service question is not answered in this manual, you may write to us at: Club Car, Inc.; P.O. Box 204658; Augusta, Georgia 30917-4658, USA, Attention: Technical Services, or contact a Club Car Tech- nical Service Representative at (706) 863-3000, extension 3580.
- Page 4 NOTE: This manual represents the most current information at the time of publication. Club Car, Inc. is continually working to further improve its vehicles and other products. These improvements may affect servicing procedures.
-
Page 5: Table Of Contents
CONTENTS SECTION 1 – SAFETY General Warning ..........................SECTION 2 – VEHICLE SPECIFICATIONS SECTION 3 – GENERAL INFORMATION Serial Number Identification ....................... Safety Committee ..........................Storage – Gasoline Vehicle ....................... Preparing the Gasoline Vehicle for Extended Off-Season Storage ..........Returning the Stored Gasoline Vehicle to Service ................. Storage –... - Page 6 Floor Mat ............................4-10 Floor Mat Removal ......................... 4-10 Floor Mat Installation ........................4-10 SECTION 5 – ACCELERATOR AND BRAKE PEDAL GROUP Throttle Input Device Identification ..................... Brake Pedal and Park Brake ......................Brake Pedal Removal ........................Brake Pedal Installation ......................... Park Brake Removal ........................
- Page 7 Steering Adjustment .......................... Rack and Pinion ..........................Rack and Pinion Removal ......................Rack and Pinion Disassembly ....................... Rack and Pinion Assembly ......................7-11 Rack and Pinion Installation ......................7-13 Tie Rod and Drag Link ........................7-13 Tie Rod and Drag Link Removal ....................7-13 Tie Rod and Drag Link Installation ....................
- Page 8 Leaf Springs ............................Leaf Spring Removal ........................Leaf Spring Installation ........................SECTION i – INDEX Page vi 2004 DS Golf Car Maintenance and Service Manual...
-
Page 9: Section 1 - Safety
SECTION 1 – SAFETY To ensure the safety of those servicing Club Car vehicles, and to protect the vehicles from possible damage resulting from improper service or maintenance, the procedures in this manual must be followed. It is important to note that throughout this manual there are statements labeled DANGER, WARNING, or CAUTION. - Page 10 SAFETY General Warning ∆ WARNING • Follow the procedures exactly as stated in this manual, and heed all DANGER, WARNING, and CAUTION statements in this manual as well as those on the vehicle. • Only trained technicians should service or repair the vehicle. Anyone doing even simple repairs or service should have knowledge and experience in electrical and mechanical repair.
- Page 11 SAFETY General Warning ∆ WARNING • Lift only one end of the vehicle at a time. Use a suitable lifting device (chain hoist or hydraulic floor jack) with 1000 lb. (454 kg) minimum lifting capacity. Do not use lifting device to hold vehicle in raised position.
-
Page 13: Section 2 - Vehicle Specifications
SECTION 2 – VEHICLE SPECIFICATIONS POWERDRIVE IQ SYSTEM SPECIFICATIONS SYSTEM 48 36-VOLT GASOLINE ELECTRIC ELECTRIC ELECTRIC POWER SOURCE Engine : 4 cycle, OHV, 286 cc, 9.0 hp rated, single • cylinder, air cooled, with pressure lubrication system Drive motor: Direct drive, 48 volts DC, series wound, •... -
Page 14: Specifications
VEHICLE SPECIFICATIONS POWERDRIVE IQ SYSTEM SPECIFICATIONS SYSTEM 48 36-VOLT GASOLINE ELECTRIC ELECTRIC ELECTRIC DIMENSIONS/WEIGHT, Continued: 47-1/4 in. 47-1/4 in. 47-1/4 in. 47-1/4 in. Overall width (120 cm) (120 cm) (120 cm) (120 cm) 48 in. 48 in. 48 in. 48 in. Overall height (at steering wheel) (122 cm) (122 cm) -
Page 15: Section 3 - General Information
• See General Warning, Section 1, Page 1-1. Important features unique to the different models covered in this manual are highlighted. Club Car, Inc. rec- ommends the owner/operator read and understand this manual and pay special attention to features specific to their vehicle(s). -
Page 16: Safety Committee
• Where golf cars should be driven. • Ensuring that proper warnings of driving hazards are displayed and visible. See below for list of signs available from Club Car Service Parts Department. • Who should and who should not drive golf cars. -
Page 17: Preparing The Gasoline Vehicle For Extended Off-Season Storage
GENERAL INFORMATION Storage – Gasoline Vehicle ∆ CAUTION • Batteries in a low state of charge will freeze at low temperatures. PREPARING THE GASOLINE VEHICLE FOR EXTENDED OFF-SEASON STORAGE 1. Batteries should be clean and free of corrosion. Wash tops and terminals of batteries with a solution of baking soda and water (1 cup (237 mL) baking soda per 1 gallon (3.8 L) of water). -
Page 18: Returning The Stored Gasoline Vehicle To Service
GENERAL INFORMATION Storage – Gasoline Vehicle Preparing the Gasoline Vehicle for Extended Off-Season Storage, Continued: 7. Perform semiannual periodic lubrication. See Periodic Lubrication Schedule, Section 10 – Periodic Maintenance, in the appropriate maintenance and service supplement. 8. Thoroughly clean front body, rear body, seats, engine compartment, and underside of vehicle. 9. -
Page 19: Storage - Electric Vehicle
GENERAL INFORMATION Storage – Electric Vehicle STORAGE – ELECTRIC VEHICLE See General Warning, Section 1, Page 1-1. ∆ WARNING • Turn the key switch OFF, remove the key, and leave the Forward/Reverse handle in the NEUTRAL position during storage. This is to prevent unintentionally starting the vehicle or a fire hazard. -
Page 20: Returning The Stored Electric Vehicle To Service
GENERAL INFORMATION Storage – Electric Vehicle RETURNING THE STORED ELECTRIC VEHICLE TO SERVICE 1. If necessary, connect batteries. 2. Fully charge batteries. 3. Adjust tire to recommended pressure. See Section 2 – Vehicle Specifications. 4. Perform the Pre-Operation and Daily Safety Checklist. See the vehicle owner’s manual. Page 3-6 2004 DS Golf Car Maintenance and Service Manual... -
Page 21: Section 4 - Body And Trim
A garden hose at normal residential water pressure is adequate. Club Car does not recommend any type of pressure washing or steam cleaning. Such a process (especially if the vehicle has an ArmorFlex rear body that is removed) will expose electrical components to moisture. -
Page 22: Front And Rear Body Repair
BODY AND TRIM Front and Rear Body Repair CAUTION • To prevent damage to the vehicle when removing difficult stains or heavy soiling, remove the seat bottom from the vehicle first. FRONT AND REAR BODY REPAIR See General Warning, Section 1, Page 1-1. STRESS LINES OR STREAKS Repeatedly flexing the ArmorFlex body can cause white stress lines or streaks in the finish. -
Page 23: Gouges, Punctures, Tears, Large Scratches, And Abrasions
Gouges, Punctures, Tears, Large Scratches, and Abrasions on page 4-3. 3. Using the brush provided with the touch-up paint (available from Club Car Service Parts – see following color chart), apply paint to the scratch. Multiple layers of paint may be required to fill the scratch. - Page 24 BODY AND TRIM Canopy Typical 2 places Typical 2 places REF. REF. Reference Seat Back Support Weldment REF. Figure 4-1 Canopy Assembly Page 4-4 2004 DS Golf Car Maintenance and Service Manual...
-
Page 25: Canopy Installation
BODY AND TRIM Front Body CANOPY INSTALLATION 1. Place the pads (12) on the front body and under the windshield frame mounting brackets (Figure 4-1, Page 4-4). Align the slots on the pads with the slots in the mounting brackets. 2. - Page 26 BODY AND TRIM Front Body Front Body Installation, Continued: 5. Place the pads (12) on the front body and under the windshield frame mounting brackets (Figure 4-1, Page 4-4). Align the slots on the pads with the slots in the mounting brackets. 6.
-
Page 27: Rear Body
BODY AND TRIM Rear Body REAR BODY See General Warning, Section 1, Page 1-1. REAR BODY REMOVAL NOTE: The rear bumper does not have to be removed to remove rear the body. 1. Remove the seat from the rear body. 2. - Page 28 BODY AND TRIM Rear Body Rear Body Removal, Continued: GRAY SENSE LEAD CHARGER WITH FUSE RECEPTACLE GRAY WIRE FROM OBC CHARGER RECEPTACLE 10-GAUGE BLACK 10-GAUGE WIRE TO OBC RED WIRE TO BATTERY Figure 4-5 PowerDrive Charger Receptacle Figure 4-6 V-Glide Charger Receptacle 8.
-
Page 29: Rear Body Installation
BODY AND TRIM Rear Body • Gasoline vehicles: NOTE: To remove the rear body, the choke button assembly does not have to be removed from the body. However, adjustment of the choke positioner may be necessary after the rear body is reinstalled. 8.3. -
Page 30: Floor Mat
BODY AND TRIM Floor Mat Rear Body Installation, Continued: 1.7. Gasoline vehicles only: Check the choke positioner for proper adjustment and adjust if necessary. Install fuel pump. See Section 14 – Fuel System, in the FE290 Maintenance and Service Sup- plement. -
Page 31: Section 5 - Accelerator And Brake Pedal Group
SECTION 5 – ACCELERATOR AND BRAKE PEDAL GROUP ∆ DANGER • See General Warning, Section 1, Page 1-1. ∆ WARNING • See General Warning, Section 1, Page 1-1. THROTTLE INPUT DEVICE IDENTIFICATION To service and adjust the pedal group properly, the accelerator type must be identified before work begins. All gasoline DS golf cars use the same type of pedal group;... -
Page 32: Brake Pedal Installation
ACCELERATOR AND BRAKE PEDAL GROUP Brake Pedal and Park Brake Brake Pedal Removal, Continued: 2. Place chocks under the rear wheels and lift the front end of the vehicle with a chain hoist or floor jack. Place jack stands under the front cross tube of the vehicle frame and lower the vehicle onto the jack stands. - Page 33 ACCELERATOR AND BRAKE PEDAL GROUP Brake Pedal and Park Brake TYPICAL 4 PLACES Service part brake pedal has second TYPICAL weldment. 2 PLACES Figure 5-4 Brake and Park Brake Pedal Assembly 2. Secure the equalizer rod (13) to the brake pedal assembly (8) with the clevis pin (14) and bow-tie pin (15) as shown (Figure 5-4, Page 5-3).
-
Page 34: Park Brake Removal
ACCELERATOR AND BRAKE PEDAL GROUP Brake Pedal and Park Brake Brake Pedal Installation, Continued: 5. Tighten the jam nut (3) while holding the adjustment nut (2) in the correct position (Figure 5-5, Page 5-4). 6. Adjust the pedal group. Refer to the appropriate adjustment procedure: •... -
Page 35: Park Brake Installation
ACCELERATOR AND BRAKE PEDAL GROUP Brake Pedal and Park Brake 3. Remove the park brake assembly. 3.1. To remove the park brake rod and pawl assembly (16 through 19 and 35), remove the push nut (18) and disconnect the ball joint sleeve (20) from the park brake pedal (24) (Figure 5-4, Page 5-3). See following NOTE. -
Page 36: Accelerator Pedal - Gasoline And Electric V-Glide Vehicles
ACCELERATOR AND BRAKE PEDAL GROUP Accelerator Pedal – Gasoline and Electric V-Glide Vehicles ACCELERATOR PEDAL – GASOLINE AND ELECTRIC V-GLIDE VEHICLES See General Warning, Section 1, Page 1-1. NOTE: Proper identification of the accelerator type is required before performing this procedure. See Throttle Input Device Identification on page 5-1. - Page 37 ACCELERATOR AND BRAKE PEDAL GROUP Accelerator Pedal – Gasoline and Electric V-Glide Vehicles FLOORBOARD REMOVED FOR CLARITY Figure 5-8 Accelerator Pedal Assembly – Gasoline Vehicles and V-Glide Wiper Switch (36-Volt) Vehicles 2004 DS Golf Car Maintenance and Service Manual Page 5-7...
-
Page 38: Accelerator Pedal Installation
ACCELERATOR AND BRAKE PEDAL GROUP Accelerator Pedal – Gasoline and Electric V-Glide Vehicles ACCELERATOR PEDAL INSTALLATION 1. If the accelerator pivot rod supports were replaced, position the supports (21) on the vehicle frame and install the four bolts (22), flat washers (8), and lock nuts (15). Finger-tighten nuts at this time (Figure 5-8, Page 5-7). -
Page 39: Accelerator Pedal - Electric Mcor Vehicles
ACCELERATOR AND BRAKE PEDAL GROUP Accelerator Pedal – Electric MCOR Vehicles ACCELERATOR PEDAL – ELECTRIC MCOR VEHICLES See General Warning, Section 1, Page 1-1. NOTE: Proper identification of the accelerator type is required before performing this procedure. See Throttle Input Device Identification on page 5-1. This sections pertains to electric MCOR vehicles only. - Page 40 ACCELERATOR AND BRAKE PEDAL GROUP Accelerator Pedal – Electric MCOR Vehicles Figure 5-10 Accelerator Pedal – Electric Vehicle with MCOR Page 5-10 2004 DS Golf Car Maintenance and Service Manual...
-
Page 41: Accelerator Pedal Installation
ACCELERATOR AND BRAKE PEDAL GROUP Accelerator Pedal – Electric MCOR Vehicles ACCELERATOR PEDAL INSTALLATION 1. If the accelerator pivot rod supports were replaced, position the supports (21) on the vehicle frame and install the four bolts (22), flat washers (16), and lock nuts (15) (Figure 5-10, Page 5-10). Finger-tighten hardware at this time. -
Page 42: Pedal Group Adjustment - Gasoline Vehicle
ACCELERATOR AND BRAKE PEDAL GROUP Pedal Group Adjustment – Gasoline Vehicle PEDAL GROUP ADJUSTMENT – GASOLINE VEHICLE See General Warning, Section 1, Page 1-1. 1. Disconnect the battery cables as instructed. See WARNING “To avoid unintentionally starting...” in General Warning, Section 1, Page 1-2. 2. - Page 43 ACCELERATOR AND BRAKE PEDAL GROUP Pedal Group Adjustment – Gasoline Vehicle 3. Adjust brake pedal free play. See following NOTE. NOTE: Brake pedal free play is the distance the brake pedal can be pressed before the brake actuator arm (at the brake cluster) moves. 3.1.
- Page 44 ACCELERATOR AND BRAKE PEDAL GROUP Pedal Group Adjustment – Gasoline Vehicle Pedal Group Adjustment – Gasoline Vehicle, Continued: CUTAWAY SIDE VIEW 0.060 inch (1.5 mm) BOTTOM VIEW Figure 5-16 Park Brake Ratchet/Pawl Gap Adjustment 4.3. With the park brake unlocked, measure and note the distance from the top of the accelerator pedal to the floorboard, and then lock the park brake (Figure 5-17, Page 5-14).
- Page 45 ACCELERATOR AND BRAKE PEDAL GROUP Pedal Group Adjustment – Gasoline Vehicle Figure 5-19 Brake Rod Adjustment Figure 5-20 Accelerator Pedal Height Adjustment 5. Adjust accelerator pedal height. 5.1. Loosen the nut and bolt (Figure 5-20, Page 5-15) securing the accelerator pedal to the pivot plate. 5.2.
- Page 46 ACCELERATOR AND BRAKE PEDAL GROUP Pedal Group Adjustment – Gasoline Vehicle Pedal Group Adjustment – Gasoline Vehicle, Continued: 6.2. Loosen the jam nuts (18) and disconnect the accelerator rod (17) at the accelerator pedal. Adjust the length of the rod (Figure 5-8, Page 5-7) to obtain an accelerator cable cam position of 14° as shown (Figure 5-22, Page 5-16).
-
Page 47: Pedal Group Adjustment - Electric Mcor Vehicles
ACCELERATOR AND BRAKE PEDAL GROUP Pedal Group Adjustment – Electric MCOR Vehicles PEDAL GROUP ADJUSTMENT – ELECTRIC MCOR VEHICLES See General Warning, Section 1, Page 1-1. NOTE: Proper identification of the accelerator type is required before performing this procedure. See Throttle Input Device Identification on page 5-1. - Page 48 ACCELERATOR AND BRAKE PEDAL GROUP Pedal Group Adjustment – Electric MCOR Vehicles Pedal Group Adjustment – Electric MCOR Vehicles, Continued: 3. Adjust brake pedal free play. See following NOTE. NOTE: Brake pedal free play is the distance the brake pedal can be pressed before the brake actuator arm (at the brake cluster) moves.
- Page 49 ACCELERATOR AND BRAKE PEDAL GROUP Pedal Group Adjustment – Electric MCOR Vehicles CUTAWAY SIDE VIEW 0.060 inch (1.5 mm) BOTTOM VIEW Figure 5-27 Park Brake Ratchet/Pawl Gap Adjustment 4.3. With the park brake unlocked, measure and note the distance from the top of the accelerator pedal to the floorboard, and then lock the park brake (Figure 5-28, Page 5-19).
- Page 50 ACCELERATOR AND BRAKE PEDAL GROUP Pedal Group Adjustment – Electric MCOR Vehicles Pedal Group Adjustment – Electric MCOR Vehicles, Continued: Figure 5-30 Brake Rod Adjustment Figure 5-31 Accelerator Pedal Height Adjustment 5. Adjust accelerator pedal height. 5.1. Loosen the nut and bolt (Figure 5-31, Page 5-20) securing the accelerator pedal to the pivot plate. 5.2.
-
Page 51: Pedal Group Adjustment - Electric V-Glide Vehicles
ACCELERATOR AND BRAKE PEDAL GROUP Pedal Group Adjustment – Electric V-Glide Vehicles PEDAL GROUP ADJUSTMENT – ELECTRIC V-GLIDE VEHICLES See General Warning, Section 1, Page 1-1. NOTE: Proper identification of the accelerator type is required before performing this procedure. See Throttle Input Device Identification on page 5-1. - Page 52 ACCELERATOR AND BRAKE PEDAL GROUP Pedal Group Adjustment – Electric V-Glide Vehicles Pedal Group Adjustment – Electric V-Glide Vehicles, Continued: 3. Adjust brake pedal free play. See following NOTE. NOTE: Brake pedal free play is the distance the brake pedal can be pressed before the brake actuator arm (at the brake cluster) moves.
- Page 53 ACCELERATOR AND BRAKE PEDAL GROUP Pedal Group Adjustment – Electric V-Glide Vehicles CUTAWAY SIDE VIEW 0.060 inch (1.5 mm) BOTTOM VIEW Figure 5-37 Park Brake Ratchet/Pawl Gap Adjustment NOTE: The accelerator rod must also be checked if the ratchet/pawl gap is adjusted. See step 6 of Pedal Group Adjustment –...
- Page 54 ACCELERATOR AND BRAKE PEDAL GROUP Pedal Group Adjustment – Electric V-Glide Vehicles Pedal Group Adjustment – Electric V-Glide Vehicles, Continued: Figure 5-40 Brake Rod Adjustment Figure 5-41 Accelerator Pedal Height Adjustment 5. Adjust accelerator pedal height. 5.1. Loosen the nut and bolt (Figure 5-41, Page 5-24) securing the accelerator pedal to the pivot plate. 5.2.
- Page 55 ACCELERATOR AND BRAKE PEDAL GROUP Pedal Group Adjustment – Electric V-Glide Vehicles FLOORBOARD REMOVED FOR CLARITY Figure 5-43 Accelerator Pedal Assembly – Gasoline Vehicles and V-Glide (36-Volt) Vehicles 2004 DS Golf Car Maintenance and Service Manual Page 5-25...
- Page 56 ACCELERATOR AND BRAKE PEDAL GROUP Pedal Group Adjustment – Electric V-Glide Vehicles Pedal Group Adjustment – Electric V-Glide Vehicles, Continued: 6. Adjust the accelerator rod. See following DANGER. ∆ DANGER • Before servicing, turn the key switch to OFF and place the Forward/Reverse handle in the NEUTRAL position.
-
Page 57: Section 6 - Wheel Brake Assemblies
SECTION 6 – WHEEL BRAKE ASSEMBLIES ∆ DANGER • See General Warning, Section 1, Page 1-1. ∆ WARNING • See General Warning, Section 1, Page 1-1. • Some aftermarket brake shoes contain asbestos fiber, and asbestos dust is created when these brake mechanisms are handled. - Page 58 WHEEL BRAKE ASSEMBLIES Brake Shoe Removal Brake Shoe Removal, Continued: Figure 6-1 Loosen Equalizer Retaining Nuts Figure 6-2 Remove Axle Retaining Ring 5.2. Insert a 1/2 inch x 5/8 inch cold chisel under the head of each pin and shear them off as illustrated (Figure 6-3, Page 6-2).
- Page 59 WHEEL BRAKE ASSEMBLIES Brake Shoe Removal TYPICAL 4 PLACES TYPICAL 4 PLACES TYPICAL 2 PLACES TYPICAL 2 PLACES GASOLINE VEHICLE ELECTRIC VEHICLE SEE SECTION 9 – REAR SUSPENSION FOR MOUNTING Figure 6-4 Self-adjusting Wheel Brake Assembly 2004 DS Golf Car Maintenance and Service Manual Page 6-3...
- Page 60 WHEEL BRAKE ASSEMBLIES Brake Shoe Removal Brake Shoe Removal, Continued: 7. Using needle nose pliers, turn the clip retainer pin (1) 90° to remove the shoe retainer clip (2) (Figure 6-5, Page 6-4). See following CAUTION. ∆ CAUTION • The brake shoes are under pressure and can release suddenly when brake shoe retainers are removed.
-
Page 61: Brake Assembly Cleaning
WHEEL BRAKE ASSEMBLIES Brake Assembly Cleaning BRAKE ASSEMBLY CLEANING See General Warning, Section 1, Page 1-1. See also Warning on Page 6-1. 1. Carefully clean the brake backing plate and all of its mechanical components. 2. Remove the rubber boot from backing plate and wipe with a clean damp cloth. 3. -
Page 62: Brake Shoe Installation
WHEEL BRAKE ASSEMBLIES Brake Shoe Installation Brake Assembly Cleaning, Continued: 17T STAMPING ON TRAILING SHOE Figure 6-11 Apply Grease To Brake Adjuster Figure 6-12 Install Adjuster Wheel, Trailing Shoe BRAKE SHOE INSTALLATION See General Warning, Section 1, Page 1-1. See also Warning on Page 6-1. 1. - Page 63 WHEEL BRAKE ASSEMBLIES Brake Shoe Installation 4. While maintaining spring attachment on both shoes, position tips of leading shoe in the mounting slots and then push shoe into place. Hold shoe in position and install retaining clip (Figure 6-15, Page 6-7). 5.
-
Page 64: Brake Adjustment
WHEEL BRAKE ASSEMBLIES Brake Adjustment Brake Shoe Installation, Continued: ∆ CAUTION • Before installing axle shaft, clean any residual oil from the exposed end of the axle tube and from the oil seal area. 8. Install the brake drum, and make sure that it is properly seated. See following NOTE. NOTE: If drum installation is difficult, the brake shoes may need to be adjusted vertically in the mounting slots. -
Page 65: Brake Cluster Installation
WHEEL BRAKE ASSEMBLIES Brake Cable Removal and Installation 5. Remove the axle. 5.1. Using 90° snap ring pliers (CCI P/N 1012560), remove the axle retaining ring (1) (Figure 6-2, Page 6-2). 5.2. Pull the axle shaft (2) from the axle tube (Figure 6-2, Page 6-2). 6. - Page 66 WHEEL BRAKE ASSEMBLIES Brake Cable Removal and Installation Brake Cable Removal, Continued: Figure 6-18 Loosen Brake Cables 4. Rotate the brake cable upward and pull cable end through hole in top of equalizer (4). 5. Remove E-clip from cable at vehicle frame (5) (Figure 6-18, Page 6-10). Remove cable from frame. 6.
-
Page 67: Section 7 - Steering And Front Suspension
SECTION 7 – STEERING AND FRONT SUSPENSION ∆ DANGER • See General Warning, Section 1, Page 1-1. ∆ WARNING • See General Warning, Section 1, Page 1-1. GENERAL INFORMATION Steering is controlled through a rack and pinion steering assembly that is connected by a steering column to a steering wheel. -
Page 68: Steering Wheel Installation
STEERING AND FRONT SUSPENSION Steering Column Steering Wheel Removal, Continued: 5.6. Remove the steering wheel nut (27) and the steering wheel (25) from the steering column (20) (Figure 7-3, Page 7-3). Figure 7-1 Steering Wheel Puller Figure 7-2 Steering Wheel Puller STEERING WHEEL INSTALLATION NOTE: To minimize corrosion and to make future removal of the steering wheel easier, apply a small amount of oil or anti-seize compound to steering shaft splines and taper before installing the steer-... - Page 69 STEERING AND FRONT SUSPENSION Steering Column TYPICAL 2 PLACES TYPICAL 2 PLACES TYPICAL 2 PLACES Figure 7-3 Steering Column 2004 DS Golf Car Maintenance and Service Manual Page 7-3...
- Page 70 STEERING AND FRONT SUSPENSION Steering Column Steering Column Removal, Continued: 4. Remove the center dash panel (Figure 7-4, Page 7-4). 4.1. Remove the plastic cap (1) covering the mounting screw (2) on each side of the center dash panel (3) (Figure 7-4, Page 7-4). 4.2.
-
Page 71: Steering Column Disassembly
STEERING AND FRONT SUSPENSION Steering Column STEERING COLUMN DISASSEMBLY 1. Remove screws (6) and mount (4 and 5) from steering column. Remove boot (12) (Figure 7-3, Page 7-3). 2. While supporting steering column (21) on a workbench, remove snap ring (13) from shaft.See following NOTE. -
Page 72: Steering Column Installation
STEERING AND FRONT SUSPENSION Steering Adjustment Steering Column Assembly, Continued: 3. Install the wedge (16), spring (15), washer (14), and snap ring (13) onto the bottom end of the steering shaft (19) (Figure 7-5, Page 7-5). 4. Insert the shaft (19) from the bottom of the steering tube (20) (Figure 7-3, Page 7-3). 5. - Page 73 STEERING AND FRONT SUSPENSION Steering Adjustment 2. Loosen the nuts (27 and 29) and turn the drag link (28) (Figure 7-9, Page 7-9) to adjust the drag link rod. Adjust the link rod with the steering wheel turned all the way to the right, so the passenger-side spindle stop lightly touches the passenger-side A-Plate.
-
Page 74: Rack And Pinion
STEERING AND FRONT SUSPENSION Rack and Pinion RACK AND PINION See General Warning, Section 1, Page 1-1. RACK AND PINION REMOVAL 1. Remove the front body as instructed in Section 4 – Body and Trim. 2. Remove the cotter pin (22) and ball joint retaining nut (25) (Figure 7-9, Page 7-9). 3. - Page 75 STEERING AND FRONT SUSPENSION Rack and Pinion TYPICAL 3 PLACES TYPICAL 3 PLACES Figure 7-9 Steering Gear 2004 DS Golf Car Maintenance and Service Manual Page 7-9...
- Page 76 STEERING AND FRONT SUSPENSION Rack and Pinion Rack and Pinion Disassembly, Continued: 11. If the ball bearing (9) has been damaged, remove the external snap ring (10) (Figure 7-9, Page 7-9) and press the bearing off (Figure 7-11, Page 7-10). PRESS RAM PINION GEAR BEARING...
-
Page 77: Rack And Pinion Assembly
STEERING AND FRONT SUSPENSION Rack and Pinion RACK AND PINION ASSEMBLY 1. Install a new tab washer (4) and an inner ball joint (3) (Figure 7-12, Page 7-10). Install the ball joint onto the rack by securing the rack in a vise using wood blocks between the rack and the jaws of the vise to protect the rack from damage. - Page 78 STEERING AND FRONT SUSPENSION Rack and Pinion Rack and Pinion Assembly, Continued: 12. Install the rack guide (13), pressure spring (14), and screw (16). The screw should be threaded in until a rotational torque of 10 in-lb (1.13 N·m) is achieved (Figure 7-9, Page 7-9). 12.1.
-
Page 79: Rack And Pinion Installation
STEERING AND FRONT SUSPENSION Tie Rod and Drag Link RACK AND PINION INSTALLATION 1. Position the steering gear box assembly on the shock and gear support and install the bolts (30), wash- ers (31), and nuts (32). Do not tighten the mounting bolts (Figure 7-9, Page 7-9). 2. -
Page 80: Front Suspension
STEERING AND FRONT SUSPENSION Front Suspension Tie Rod and Drag Link Installation, Continued: 3. Thread the drag link rod (28) all the way onto the threaded stud of the inner ball joint assembly (3) (right- hand threads) (Figure 7-9, Page 7-9). 4. - Page 81 STEERING AND FRONT SUSPENSION Front Suspension PROPER CAMBER Club Car ADJUSTMENT EQUAL SPACE BETWEEN TIRES AND FRAMING SQUARES 7 MM DEEP IMPROPER WELL SOCKET CAMBER Club Car ADJUSTMENT Club Car UNEQUAL SPACE BETWEEN TIRES AND FRAMING SQUARES Figure 7-16 Check Camber...
-
Page 82: Front Suspension Components
STEERING AND FRONT SUSPENSION Front Suspension Components Toe-in Adjustment, Continued: 6. If adjustment is necessary, loosen the jam nut on each tie rod ball joint and rotate the tie rod to increase or decrease toe-in (Figure 7-19, Page 7-15). See following CAUTION. CAUTION •... -
Page 83: Kingpin And Steering Spindle Removal
STEERING AND FRONT SUSPENSION Front Suspension Components KINGPIN AND STEERING SPINDLE REMOVAL 1. Remove the front hub. See Front Wheel Bearings and Hubs on page 7-20. 2. Remove cotter pins (22) and nuts (20), then remove ball joints from the spindles (Figure 7-20, Page 7-18). - Page 84 STEERING AND FRONT SUSPENSION Front Suspension Components TYPICAL 4 PLACES TYPICAL 3 PLACES TYPICAL 4 PLACES TYPICAL 3 PLACES Figure 7-20 Upper Front Suspension Assembly Page 7-18 2004 DS Golf Car Maintenance and Service Manual...
- Page 85 STEERING AND FRONT SUSPENSION Front Suspension Components PASSENGER SIDE ONLY TYPICAL 4 PLACES TYPICAL 4 PLACES Figure 7-21 Lower Front Suspension Assembly 2004 DS Golf Car Maintenance and Service Manual Page 7-19...
-
Page 86: Delta A-Plate Installation
STEERING AND FRONT SUSPENSION Front Wheel Bearings and Hubs DELTA A-PLATE INSTALLATION 1. Install the A-Plate in reverse order of removal. Tighten the A-Plate suspension bolts (10 and 24) to 20 ft- lb (27 N·m) (Figure 7-20, Page 7-18). 2. Tighten shock absorber mounting nut (9) to 20 ft-lb (27.1 N·m). 3. -
Page 87: Front Hub Installation
STEERING AND FRONT SUSPENSION Front Wheel Bearings and Hubs 5. Inspect the surface of the spindle shaft for surface damage. It should be clean and smooth. If severe pit- ting from rust or corrosion has occurred, replace the spindle assembly. See Kingpin and Steering Spin- dle Removal on page 7-17. -
Page 89: Section 8 - Wheels And Tires
SECTION 8 – WHEELS AND TIRES ∆ DANGER • See General Warning, Section 1, Page 1-1. ∆ WARNING • See General Warning, Section 1, Page 1-1. GENERAL INFORMATION Maximum tire life and good vehicle handling qualities are directly related to proper wheel and tire care. •... -
Page 90: Tire Repair
WHEELS AND TIRES Tires Tire Removal, Continued: 3. If possible, use a tire machine to remove the tire from the rim. 3.1. If a tire machine is not available, loosen both tire beads by applying pressure to the tire side walls and pushing the tire bead away from the rim flange and into the rim well (Figure 8-1, Page 8-2, Detail A). -
Page 91: Tire Installation
WHEELS AND TIRES Tires TIRE INSTALLATION ∆ WARNING • While mounting or inflating tire, keep hands, fingers, etc. from exposed areas between the tire bead and rim. 1. Clean both tire beads to remove dirt or other foreign matter. 2. Where the tire beads seat, clean the wheel rim with a wire brush. Wipe away any debris with a clean cloth. - Page 92 WHEELS AND TIRES Tires Tire Installation, Continued: 7. Quickly remove the air nozzle and install the valve core. 8. Adjust air pressure in tire to recommended pressure. See Section 2 – Vehicle Specifications. 9. Immerse the wheel and tire assembly in water to make sure there are no leaks. Page 8-4 2004 DS Golf Car Maintenance and Service Manual...
-
Page 93: Section 9 - Rear Suspension
SECTION 9 – REAR SUSPENSION ∆ DANGER • See General Warning, Section 1, Page 1-1. ∆ WARNING • See General Warning, Section 1, Page 1-1. GENERAL INFORMATION The rear suspension of the DS vehicle is completely independent. It consists of two leaf springs controlled by two shock absorbers mounted between the springs and the vehicle frame. - Page 94 REAR SUSPENSION Leaf Springs BRAKE CABLE HANGER MOUNTING GASOLINE VEHICLE ONLY TYPICAL ON EACH SIDE OF VEHICLE TYPICAL ON EACH SIDE OF VEHICLE BRAKE CABLE HANGER MOUNTING ELECTRIC VEHICLE ONLY TYPICAL 2 PLACES Figure 9-1 Rear Suspension Assembly and Mounting Page 9-2 2004 DS Golf Car Maintenance and Service Manual...
- Page 95 REAR SUSPENSION Leaf Springs Leaf Spring Removal, Continued: ∆ WARNING • Lift only one end of the vehicle at a time. Use a suitable lifting device (chain hoist or hydraulic floor jack) with 1000 lb. (454 kg) minimum lifting capacity. Do not use lifting device to hold vehicle in raised position.
-
Page 96: Leaf Spring Installation
REAR SUSPENSION Leaf Springs LEAF SPRING INSTALLATION 1. To install the springs, reverse the removal procedure. See following CAUTION. CAUTION • When positioning the spring on the transaxle, be sure to insert the locating bolt on the spring in the locating hole in the transaxle saddle. 2. - Page 97 INDEX seat ..............4-1 vehicle body ............4-1 accelerator column, steering pedal (gas, V-Glide) see steering column installation ............ 5-8 removal ............5-6 pedal (MCOR) installation ..........5-11 DANGER removal ............5-9 definition of ............1-1 pedal height adjustment electric (MCOR) .......... 5-20 electric (V-Glide) .........
- Page 98 INDEX repair components delta a-plate front and rear body installation ..........7-20 gouges, punctures, tears ......4-3 removal ...........7-17 kingpin and steering spindle minor impact damage/deformations ....4-2 installation ..........7-17 minor scratches and surface blemishes ..4-2 removal ...........7-17 stress lines or streaks ........4-2 leaf spring installation ..........7-16 tire ..............
- Page 99 2004 DS Golf Car Maintenance and Service Manual...
- Page 101 Club Car NOTES...
- Page 102 Club Car NOTES...
- Page 104 Golf Cars Club Car Inc. P.O. Box 204658 Augusta, GA 30917-4658...
Need help?
Do you have a question about the DS 2004 and is the answer not in the manual?
Questions and answers