
Summary of Contents for Mira Element SLT
- Page 1 MIRA ELEMENT SLT THERMOSTATIC MIXER INSTALLATION AND USER GUIDE These instructions must be left with the user.
-
Page 2: Table Of Contents
CONTENTS INTRODUCTION Introduction Thank you for purchasing a quality Mira product. To enjoy the full potential of your new product, please Guarantee take time to read this guide thoroughly, having Recommended Usage done so, keep it handy for future reference. -
Page 3: Guarantee
Guarantee SAFETY : WARNINGS For domestic installations, Mira Showers Mira thermostatic mixers are precision engineered guarantee the Mira Element SLT against any and should give continued safe and controlled defect in materials or workmanship for a period performance, provided: of five years from the date of purchase (shower 1. -
Page 4: Pack Contents
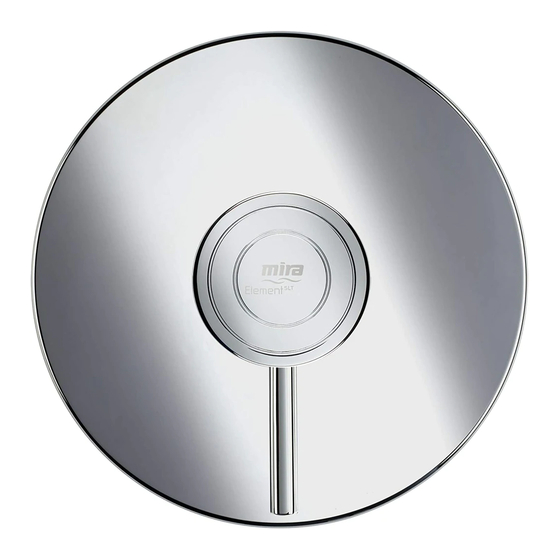
Built-in Thermostatic Mixer PACK CONTENTS 1 x Thermostatic Mixing Valve Tick the appropriate boxes to familiarise yourself (attached to the building-in shroud) with the part names and to confirm that all of the parts are included. Exposed Thermostatic Mixer 1 x Thermostatic Mixing Valve 1 x Control Assembly 3 x Compression Nuts 3 x Olives... -
Page 5: Specifications
Typical flow rates on high pressure systems (1 to 0.1 Bar (0.1 bar = 1 Metre head from cold 5 Bar) with 14 L/Min flow regulator fitted - Mira tank base to showerhead outlet). Element SLT with L14A Shower Fittings. -
Page 6: Dimensions
Dimensions Exposed Thermostatic Mixer Ø56 Built-in Thermostatic Mixer Ø183 59 - 80 45 - 56 Building-in Depth All dimensions in mm... -
Page 7: Installation
6. Decide on a suitable position for the Mixer. INSTALLATION The position of the Mixer and the Shower Fittings must provide a minimum gap of 25 mm Suitable Plumbing Systems between the spill-over level of the shower tray/ bath and the showerhead (refer to illustration). Gravity Fed: This is to prevent back-siphonage. -
Page 8: Exposed Thermostatic Mixer
Exposed Thermostatic Mixer 3. For solid walls drill the holes for the backplate with a 6 mm diameter drill and insert the wall Installing the Thermostatic Mixer plugs. Note! For other types of wall structure 1. The thermostatic mixer can be installed with alternative fixings may be required (not rear, rising or falling supply inlets. - Page 9 6. Remove the backplate from the mixer by 14. Fit the shower fittings, refer to your shower loosening the grubscrew with a 2.5 mm fittings installation and user guide for hexagonal key. instructions. 7. Secure the backplate to the wall using the Note! For high pressure systems (above screws.
-
Page 10: Built-In Thermostatic Mixer
Built-in Thermostatic Mixer 5. Cut away the plasterboard and/or brick work to the required depth. Solid Wall or Stud Partition Fixing Important! This depth ‘X’ will depend on the using Rear Mountings finished wall thickness e.g. tiles or facia board. Refer to the table for this measurement. - Page 11 6. Make sure that the mixer is level and central 13. Turn on the water supplies and check for in the hole and square to the finished wall leaks. surface (or the control components will not fit 14. Remove the two shroud screws and refit the correctly), then mark the positions of the fixing building-in shroud to the mixer.
-
Page 12: Panel Fixing Using Securing Brackets
Panel Fixing using Securing 7. Caution! It is essential at this point that the supply pipework is thoroughly Brackets flushed through before connection to the Note! For laminated panels the mixer must be mixer. Failure to do so may result in product positioned from the rear of the panel. malfunction and will not be covered under the guarantee. -
Page 13: Solid Wall Or Stud Partition Fixing Using Securing Brackets
Solid Wall or Stud Partition Fixing 4. Make sure that the mixer is level and mark the positions for the countersunk fixing holes on using Securing Brackets the wall. 1. Refer to section: ‘Solid Wall or Stud Partition 5. For solid walls drill two Ø6 mm holes for the Fixing using Rear Mountings’... - Page 14 18. Fit the concealing plate over the mixer making Minimum finished Finished Wall F13125 sure the slot is in the 6 o’clock position then wall surface gently push until it clips onto the concealing ring. Maximum finished 19. Fit the control lever to the mixer using the M4 wall surface x 8 securing screw, use the 2.5 mm hexagonal key (supplied) to ensure it is tightened fully.
-
Page 15: Rac Assembly
6. Place the RAC backplate over the outlet pipe Installation of the RAC Assembly with the arrow pointing up. The screw holes 1. Before the RAC assembly can be fitted you should be at 45° to the horizontal. must have first installed your built-in shower 7. -
Page 16: Reversed Inlet Supplies
REVERSED INLET SUPPLIES wall plugs. For other types of wall structure alternative fixings may be required (not The Mira Element SLT thermostatic mixer is supplied). If necessary, make a recess 6 mm supplied with inlet connections Hot - Left, Cold - deep to accept the wall plate for flush fitting of Right as standard. - Page 17 6. Remove the dome shroud, bearing and 12. Repeat the procedure to refit the lever insert chrome trim if fitted (Built in Models only). making sure that it re-engages correctly with the cartridge. 7. Fit the multi tool onto the cartridge nut and turn anticlockwise.
-
Page 18: Operation
COMMISSIONING OPERATION The Mira Element SLT thermostatic mixer is a Maximum Temperature Setting thermostatic shower control with a single control Before using the shower the maximum temperature lever for flow and temperature control. must be checked to make sure that it is at a Note! You will notice a subtle ‘click’... -
Page 19: Type 2 Valves
The thermostatic mixing valve will be installed in Models Designation such a position that maintenance of the TMV and Mira Element SLT LP-S, HP-S its valves and the commissioning and testing of Important! The fitting of any flow regulator the TMV can be undertaken. -
Page 20: Fault Diagnosis
FAULT DIAGNOSIS valves shall be verified against the original set temperature results once a year. When If you require a Mira trained service engineer or commissioning/testing is due the following agent, refer to section: ‘Customer Services’. performance checks shall be carried out. -
Page 21: Maintenance
Note! The cartridge contains no internally serviceable parts. If you require a Mira trained engineer or agent, refer to section: ‘Customer Service’. Lubricants Filter Silicone based lubricants must only be used on the rubber seals. - Page 22 4. Carefully unclip and remove the concealing plate from the backplate. Note! Use a screwdriver in the cutout to assist separation. 5. Unscrew the filter caps with the multi tool (supplied) or a 12 mm hexagonal wrench and remove the filters. Note! Use pliers to carefully remove the filters.
-
Page 23: Spare Parts
SPARE PARTS Exposed Thermostatic Mixer 1656.117 Inlet Connector Pack 1656.110 1656.113 Seal Pack - Identified A Backplate 1656.169 Screw Pack - Identified B 1062477 1656.115 Filter Pack (x2) Outlet Connector 1656.114 Pack 1656.111 Elbow Connector Elbow Cap Pack 1656.112 Elbow Assembly 1663.265 Flow Regulator Pack... -
Page 24: Built-In Thermostatic Mixer
Built-in Thermostatic Mixer 1595.150 Elbow Assembly (Both sides) 1595.149 1595.066 Outlet Connector Filter Pack (x2) Pack 1656.167 Trim Pack 1595.046 1656.160 Cartridge Seal Pack - Identified A 1656.168 Assembly Screw Pack - Identified B 1656.161 Overide Pack 1656.166 Dome Shroud Pack 1656.162 Control Lever... -
Page 25: Rac Assembly
RAC Assembly 450.20 RAC Mounting Pack 1663.265 Flow Regulator Pack 450.20 RAC Mounting Pack 1617.171 RAC Shroud... -
Page 26: Accessories
ACCESSORIES Genuine Mira accessories can be purchased direct from Mira Customer Services (our contact details can be found on the back cover of this guide) or from approved stockists or merchants. Eco Showerhead Everclear Showerhead Logic Showerhead Holder White - 2.1668.001 White - 2.1616.030... -
Page 27: Notes
NOTES... -
Page 28: Customer Service
You have the assurance of a Water or electrical supply, waste and isolation issues. fully trained Mira Technician, genuine Mira spare parts and a 12 month guarantee on any chargeable work done. Compensation for loss of use of the product or consequential loss of any kind.
Need help?
Do you have a question about the Element SLT and is the answer not in the manual?
Questions and answers