Table of Contents
Advertisement
Quick Links
Download this manual
See also:
User Manual
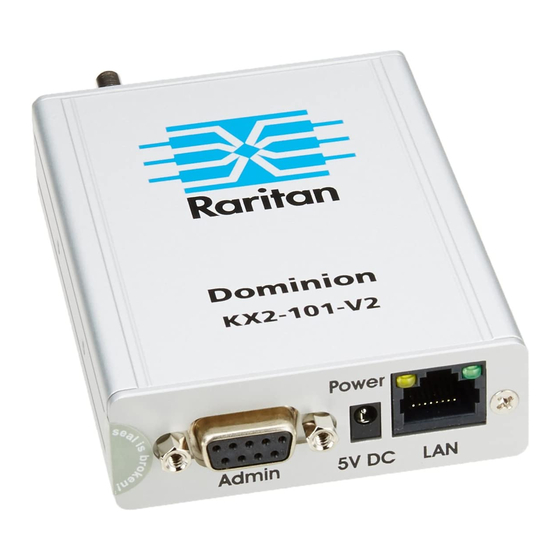
Dominion® KX II-101-V2
Quick Setup Guide
Thank you for your purchase of Dominion
For details on using KX II-101-V2, access online help from the application or the
your primary resource but a PDF version of the help is also available on the Support page.
Package Contents
Each KX II-101-V2 device ships with:
1 - KX II-101-V2 KVM over IP
1 - KVM cable
1 - Power adapter (AC/DC 5VDC with universal adapter)
1 - Mounting bracket kit
1 - Quick Setup Guide
1 - Release notes (if applicable)
QS R ule
Step 1: Configure the Target Server
Target Server Video Resolutions
For optimal bandwidth efficiency and video performance, a
target server running a graphical user interface such as
Windows, X-Windows, Solaris, and KDE should be configured
with desktop backgrounds set to a predominantly solid, light-
colored graphic.
Backgrounds featuring photos or complex gradients should be
avoided.
Ensure that the server's video resolution and refresh rate are
supported by the KX II-101-V2, and that the signal is non-
interlaced.
See KX II-101-V2 online help for a list of support target server
resolutions.
Mouse Modes
The KX II-101-V2 operates in several mouse modes: Absolute
™
Mouse Synchronization
, Intelligent Mouse mode and
Standard Mouse mode.
Note: Do not use an animated mouse while using Intelligent
Mouse mode.
Mouse parameters do not have to be altered for Absolute
Mouse Synchronization.
Dominion KX II-101-V2 Quick Setup Guide
QSG-KX2101V2-v3.6.0-0E-E 255-62-3058-00-RoHS
®
KX II-101-V2, the economical, full-featured, single-port digital KVM-over-IP device.
Support page
on the Raritan website. Online help is
For both the Standard and Intelligent Mouse modes, mouse
parameters must be set to specific values, which are
described in this section.
Mouse configurations will vary on different target operating
systems. Consult your OS documentation for additional
details.
Following are the mouse settings for various operating
systems.
These settings are configured on your target operating system
unless otherwise indicated.
See the KX II-101-V2 online help for details on configuring
these mouse settings.
Windows 7 and Windows Vista Mouse Settings
Configure these mouse settings in Windows 7
®
Windows Vista
:
Configure the motion settings:
Set the mouse motion speed setting to exactly the middle
speed
Disable the "Enhanced pointer precision" option
Disable animation and fade effects:
Animate controls and elements inside windows
Animate windows when minimizing and maximizing
Fade or slide menus into view
Fade or slide ToolTips into view
Fade out menu items after clicking
Windows XP, Windows 2003, Windows 2008 Mouse
Settings
Configure these mouse settings in Windows XP
Windows 2003
®
and Windows 2008
Configure the Motion settings:
®
and
®
,
®
:
1
Advertisement
Table of Contents

Related Manuals for Raritan Dominion KX II-101-V2


Summary of Contents for Raritan Dominion KX II-101-V2
- Page 1 For details on using KX II-101-V2, access online help from the application or the Support page on the Raritan website. Online help is your primary resource but a PDF version of the help is also available on the Support page.
-
Page 2: Step 2: Configure Network Firewall Settings
Go to the Style Manager, click on Mouse Settings and set Mouse Acceleration to 1.0 and Threshold to 3.0 QS R ule Target Server Use either the PS/2 or USB to connect to the target. Dominion KX II-101-V2 Quick Setup Guide QSG-KX2101V2-v3.6.0-0E-E 255-62-3058-00-RoHS... -
Page 3: Usb Configuration
4. Connect the USB keyboard and mouse directly to the target. Optional Use one DB9M to DB9F straight serial cable to connect from the KX II-101-V2 to the serial port on your PC or laptop. Dominion KX II-101-V2 Quick Setup Guide QSG-KX2101V2-v3.6.0-0E-E 255-62-3058-00-RoHS... - Page 4 DHCP 1. Once the unit has booted, enter the default username admin and password raritan. Click Login. 2. Enter the old password raritan, then enter and reenter a new password. Dominion KX II-101-V2 Quick Setup Guide QSG-KX2101V2-v3.6.0-0E-E 255-62-3058-00-RoHS...
- Page 5 IP Auto Configuration drop-down. the IPv6 address Up to 63 characters. Gateway IP Address Next, configure IPv6 and/or DNS settings. See IPv4 for details on leaving the selection set to None Dominion KX II-101-V2 Quick Setup Guide QSG-KX2101V2-v3.6.0-0E-E 255-62-3058-00-RoHS...
-
Page 6: Configure Date/Time Settings (Optional)
Protocol (NTP) server. DHCP is selected. The DNS information is then provided by the DHCP server that is used. When finished, click OK. Your KX II-101-V2 device is now network accessible. Dominion KX II-101-V2 Quick Setup Guide QSG-KX2101V2-v3.6.0-0E-E 255-62-3058-00-RoHS... - Page 7 IP Click OK. address for the device. You must follow this option with the ip command and the IP address, as shown in the following example: interface ipauto none Dominion KX II-101-V2 Quick Setup Guide QSG-KX2101V2-v3.6.0-0E-E 255-62-3058-00-RoHS...
-
Page 8: Step 5: Create And Install An Ssl Certificate
- Automatically assign QS R ule Step 5: Create and Install an SSL Certificate an IP address to the device on startup. Raritan strongly recommends you install your own SSL interface ipauto dhcp Certificate in each KX II-101-V2 device. ™ IP address... -
Page 9: Additional Information
Wizard. website for technical support contact information worldwide. Raritan's products use code licensed under the GPL and LGPL. You can request a copy of the open source code. For details, see the Open Source Software Statement at (http://www.raritan.com/about/legal-statements/open- source-software-statement/) on Raritan's website.
Need help?
Do you have a question about the Dominion KX II-101-V2 and is the answer not in the manual?
Questions and answers