Table of Contents
Advertisement
Quick Links
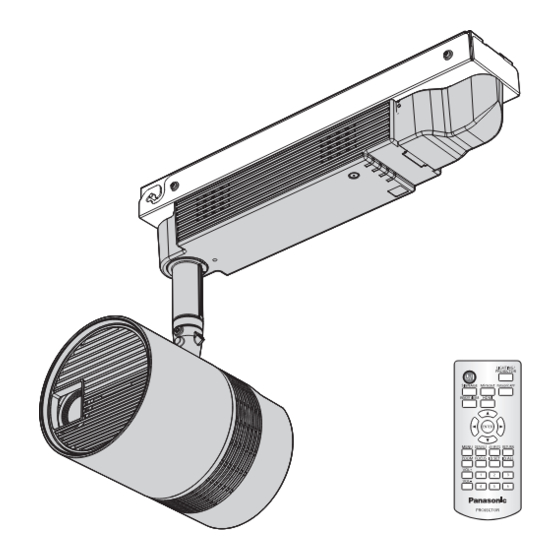
* Above illustration is shown in combination of this product and optional Ceiling Kit.
Thank you for purchasing this Panasonic product.
■ This product is used in combination with optional Ceiling Kit (Model No.: ET-JPC100BU/
ET-JPC100WU) or Floor Stand Kit (Model No.: ET-JPF100BU/ET-JPF100WU). This product
cannot be used by itself.
■ Before operating this product, please read the instructions carefully and save this manual
for future use.
■ Before using this product, be sure to read "Read this first!" ( x pages 4 to 11).
Operating Instructions
DLP™ Projector
PT-JW130FBU
Model No.
PT-JW130FWU
Functional Manual
Commercial Use
ENGLISH
TQBJ0831
Advertisement
Table of Contents

Related Manuals for Panasonic PT-JW130FWU


Summary of Contents for Panasonic PT-JW130FWU
-
Page 1: Operating Instructions
PT-JW130FWU * Above illustration is shown in combination of this product and optional Ceiling Kit. Thank you for purchasing this Panasonic product. ■ This product is used in combination with optional Ceiling Kit (Model No.: ET-JPC100BU/ ET-JPC100WU) or Floor Stand Kit (Model No.: ET-JPF100BU/ET-JPF100WU). This product cannot be used by itself. -
Page 2: Table Of Contents
Contents Contents Read this first! Using SD cards Notes on use Data protection Chapter 1 Preparation Cards that can be used with the projector Inserting an SD card Precautions for use Ejecting the SD card Cautions when installing Operating with the remote control Cautions when transporting Switching the projection mode Security... - Page 3 [NETWORK] menu [PROJECTOR NAME] Light source/temperature indicators [WIRED LAN] When an indicator lights up [WIRELESS LAN] Inspection and maintenance [NETWORK CONTROL] Before maintaining the projector [Panasonic APPLICATION] Maintenance [NETWORK STATUS] Inspection [Art-Net] Troubleshooting [DISPLAY OPTION] menu [HDMI IN] Chapter 7...
-
Page 4: Read This First
Read this first! Read this first! WARNING: THIS APPARATUS MUST BE EARTHED. WARNING: 1. Disconnect the power to the projector by turning off the power supply for the interior wiring or disconnecting the power plug from an outlet when this unit is not in use for a prolonged period of time. 2. - Page 5 Read this first! TQFX513 (Top of product) TQFX338AB 注意-開放時クラス4のレーザー放射 直接放射又は分散放射に眼又は皮膚を暴露させないこと CAUTION-CLASS 4 LASER RADIATION WHEN OPEN AVOID EYE OR SKIN EXPOSURE TO DIRECT OR SCATTERED RADIATION ATTENTION-RAYONNEMENT LASER DE CLASSE 4-EN CAS D'OUVERTURE EXPOSITION DANGEREUSE AU RAYONNEMENT DIRECT OU DIFFUS DES YEUX OU DE LA PEAU (Inside of product) CAUTION (When optional Floor Stand Kit is used)
- Page 6 • Consult the dealer or an experienced radio/BD technician for help. Any changes or modifications not expressly approved by Panasonic Corp. of North America could void the user’s authority to operate this device. This device is restricted to indoor use when operated in the 5.15 to 5.25 GHz frequency range.
- Page 7 Read this first! FCC NOTICE (USA and Canada) This device complies with Part 15 of FCC Rules and RSS-Gen of IC Rules. Operation is subject to the following two conditions: (1) This device may not cause harmful interference, and (2) this device must accept any interference received, including interference that may cause undesired operation of this device.
- Page 8 Inadequate installation may result in a fire, an electric shock, or a falling accident. f Work of electrical wiring must be performed by qualified personnel only. Use the installation kit (Ceiling Kit) specified by Panasonic when the projector is used by installing on the ceiling.
- Page 9 Read this first! WARNING: Secure the safety of a foothold when directly accessing the main unit of the projector if the projector is installed on the ceiling. You may tip over or fall down when adjusting the image position or inserting/removing the SD card, resulting in an injury.
- Page 10 Read this first! WARNING: r ACCESSORIES Do not use or handle the batteries improperly, and refer to the following. Failure to observe this will cause burns, batteries to leak, overheat, explode or catch fire. f Do not use unspecified batteries. f Do not use chargeable batteries.
- Page 11 Read this first! CAUTION: r ON USE/INSTALLATION Do not place the projector in extremely hot locations. Doing so will cause the outer casing or internal components to deteriorate, or result in fire. f Take particular care in locations exposed to direct sunlight or near heaters. Do not install the projector in a location where salt pollution or corrosive gas may occur.
- Page 12 PURPOSE. For details, refer to the license conditions included in the supplied CD-ROM. For customers who contacted the following contact center, Panasonic provides complete and machine-readable source code based on GPL V2.0, LGPL V2.1 or software licensed under other terms imposing source code disclosure obligations in actual expenses, together with information about each copyright owner, for a period of at least 3 years from the purchase of this product.
- Page 13 rReference pages f Reference pages in this manual are indicated as (x page 00). rTerms f In this manual, the “Wireless remote control unit” accessory is referred to as “Remote control”. f In this manual, the SD memory card and the SDHC memory card are referred to as “SD card”. ENGLISH - 13...
-
Page 14: Features Of The Projector
Features of the Projector Quick Steps For details, refer to the corresponding pages. 1. Install the projector in Variety of projection function combination with the optional accessory. ▶ The lighting mode just like a spotlight and (x page 35) the projector mode that can project image can be switched in just one touch. -
Page 15: Chapter 1 Preparation
Preparation Chapter 1 This chapter describes things you need to know or check before using the projector. ENGLISH - 15... -
Page 16: Precautions For Use
Chapter 1 Preparation — Precautions for use Precautions for use Cautions when installing rUse the projector in combination with the optional Ceiling Kit or Floor Stand Kit. To use the projector, the optional Ceiling Kit (Model No.: ET-JPC100WU, ET-JPC100BU) or Floor Stand Kit (Model No.: ET-JPF100WU, ET-JPF100BU) is required. - Page 17 Work of electrical wiring must be performed by qualified personnel only. f Panasonic takes no responsibility for any damage to the projector caused by mounting the product to ceiling in any method not specified by Panasonic or caused by inappropriate installation environment, even if the warranty period of the projector has not expired.
-
Page 18: Cautions When Transporting
Chapter 1 Preparation — Precautions for use f Prevent hot and cool air from the air conditioning system to blow directly to the ventilation ports (intake and exhaust) of the projector. Power supply unit Power supply unit 300 mm (11-13/16") or longer 300 mm (11-13/16") or longer Air intake port Air intake port... -
Page 19: Security
Make your password difficult to guess as much as possible. f Change your password periodically. f Panasonic Corporation or its affiliate companies will never ask for your password directly. Do not divulge your password in case you receive such inquiries. -
Page 20: Art-Net
Chapter 1 Preparation — Precautions for use rDo not use cell phone, television, or radio as much as possible close to the projector. Cell phone, television, or radio is using radio wave with different bandwidth from the projector, so there is no effect on the wireless LAN communication or the send/receive on these devices. -
Page 21: Disposal
Chapter 1 Preparation — Precautions for use f The projection lens of the projector is thermally affected by the light from the light source, making the focus unstable in the period just after switching on the power. The focus will stabilize after projection for more than 30 minutes has elapsed. -
Page 22: Accessories
Chapter 1 Preparation — Precautions for use Accessories Make sure that the following accessories are provided with your projector. Numbers enclosed in < > show the number of accessories. Wireless remote control unit <1> Connector secure lock <1> (N2QAYA000092) (TTRA0185) AAA/R03 or AAA/LR03 battery <2> Card slot cap <1>... -
Page 23: Optional Accessories
Floor Stand Kit set on a floor or flat surface. ET-JPF100BU Black *1 Used in combination with PT-JW130FWU. *2 Used in combination with PT-JW130FBU. Attention f Use the projector in combination with the optional Ceiling Kit or Floor Stand Kit. -
Page 24: About Your Projector
13 <Panasonic APP> button Switches the input to signage. (x page 46) Switches the input to Panasonic APPLICATION. (x page 46) When you press this button during the lighting mode, the mode When you press this button during the lighting mode, the mode... -
Page 25: Projector Body
Chapter 1 Preparation — About your projector g Make sure the polarities (+ and -) are correct when inserting the batteries. For other instructions, read the instructions related to batteries that are described in “Read this first!”. Caution label at the back of the remote control Note f The operating range of the remote control is approx. -
Page 26: Connecting Terminals
Chapter 1 Preparation — About your projector 15 Ball joint movable part 17 Ball joint 16 Shaft r Indicators ON(G)/ STANDBY(R) LIGHT TEMP Power indicator <ON (G)/STANDBY (R)> Temperature indicator <TEMP> Displays the status of the power. (x page 40) Displays the internal temperature status. (x page 200) Light source indicator <LIGHT>... -
Page 27: Preparing The Remote Control
Chapter 1 Preparation — Preparing the remote control Preparing the remote control Inserting and removing the batteries Fig. 1 Fig. 2 Open the cover. (Fig. 1) Insert the batteries and close the cover (insert the m side first). (Fig. 2) f When removing the batteries, perform the steps in reverse order. When using the multiple projectors When you use the multiple projectors together, you can control all the projectors simultaneously or each projector individually using single remote control, if a unique ID number is assigned to each projector. -
Page 28: Operating Range Of The Remote Control
Chapter 1 Preparation — Operating range of the remote control Operating range of the remote control The operating range of the remote control is maximum of approximately 7 m (22'11") in front of the remote control signal receiver and within the range shown in the following illustration. Remote control signal transmitter Remote control signal receiver Approx. -
Page 29: Chapter 2 Getting Started
Getting Started Chapter 2 This chapter describes things you need to do before using the projector such as the setup and connections. ENGLISH - 29... -
Page 30: Before The Installation
Chapter 2 Getting Started — Before the installation Before the installation This section describes the display method using the projector. Projection mode The projection mode of the projector can be switched to the lighting mode to use the projector as a spot light, or to the projector mode to project an image by pressing the <LIGHTING/PROJECTOR>... - Page 31 Chapter 2 Getting Started — Before the installation r Installation form when installing on the ceiling To project forward To project from rear (Using the translucent screen) A B C A B C Menu item Method Menu item Method [PROJECTION METHOD] [FRONT] [PROJECTION METHOD] [REAR]...
-
Page 32: Projection Direction
Chapter 2 Getting Started — Before the installation Note f Above illustrations for installation form are examples for explanation, and it may not be the actual condition of usage. Set the [SETUP] menu → [PROJECTION METHOD] (x page 67) and the [VERTICAL FLIP] (x page 67) according to the environment of the usage and the direction of the main unit. -
Page 33: Projection Dimensions
Chapter 2 Getting Started — Before the installation Projection dimensions Decide the installation position on the ceiling or the installation position on the floor referencing to the following illustrations and projection distance dimensions. The size and position of the projected image can be adjusted according to the area and position of the projection surface. -
Page 34: Projection Distance
Chapter 2 Getting Started — Before the installation Projection distance The dimension in the following table contains a slight error. Also, it is corrected to become smaller than the specified image size when [KEYSTONE] is used. r When the image aspect ratio is 16:10 (Unit: m) Projected image size Projection distance (L) -
Page 35: Setting Up
Chapter 2 Getting Started — Setting up Setting up Installing the projector This projector is used in combination with the optional Ceiling Kit or Floor Stand Kit. r When installing on the ceiling The optional Ceiling Kit is required to use the projector directly installed on a ceiling. f Be sure to use the Ceiling Kit specified for this projector. - Page 36 Chapter 2 Getting Started — Setting up Adjust the orientation of the main unit. f Adjust the ball joint movable part to the direction to tilt the main unit, and adjust the orientation of the main unit. Ball joint fixing screws Rotating fixing screw Ball joint movable part...
-
Page 37: Connecting
Chapter 2 Getting Started — Connecting Connecting Before connecting f Before connecting, carefully read the operating instructions for the external device to be connected. f Turn off the power of all devices before connecting cables. f Take note of the following points before connecting the cables. Failure to do so may result in malfunctions. g When connecting a cable to a device connected to the projector or the projector itself, touch any nearby metallic objects to eliminate static electricity from your body before performing work. -
Page 38: Attaching The Caps To The Connecting Terminals
Chapter 2 Getting Started — Connecting Attaching the caps to the connecting terminals It is recommended to attach the supplied terminal caps to the <HDMI IN> terminal and the <LAN> terminal where cables are not attached, and the supplied card slot cap to the SD card slot to prevent dust getting into the connecting terminals. -
Page 39: Chapter 3 Basic Operations
Basic Operations Chapter 3 This chapter describes basic operations to start with. ENGLISH - 39... -
Page 40: Turning On/Off The Projector
The power indicator <ON (G)/STANDBY (R)> blinks slowly in green while the AV mute is in use. f When the computer (including iPad/iPhone/iPod touch, Android terminals) performs a connection check on the projector using the Panasonic image transfer application software, the power indicator <ON (G)/STANDBY (R)> blinks in orange. 40 - ENGLISH... -
Page 41: Turning On The Projector
Chapter 3 Basic Operations — Turning on/off the projector Turning on the projector r When using the optional Ceiling Kit Turn on the power supply of the interior wiring that is connected to the projector. f The power indicator <ON (G)/STANDBY (R)> lights in red, and the projector enters the standby mode. Press the power <v/b>... - Page 42 Chapter 3 Basic Operations — Turning on/off the projector Press asqw on the remote control to adjust the focus. LENS FOCUS ADJUST Press the <MENU> button on the remote control to perform rest of the initial setting. Initial setting (display language) Select the language to show on the screen.
- Page 43 Chapter 3 Basic Operations — Turning on/off the projector Initial setting (standby mode) Set the operation mode during the standby. The default setting is [ECO] that keeps power consumption low during standby. If you use the network function during standby, set to [NORMAL]. If you want to keep the power consumption low during standby, and to perform operation of power-on via wired LAN, set to [NETWORK].
-
Page 44: Making Adjustments And Selections
(x page 46) When using the projector in the projector mode, press the <HDMI>, <MEMORY VIEWER>, <Miracast>, <Panasonic APP>, or <SIGNAGE> button on the remote control to select the input to project. (x page 46) Adjust the orientation of the main unit to adjust the projection position. - Page 45 Chapter 3 Basic Operations — Turning on/off the projector r When using the optional Floor Stand Kit Press the power <v/b> button. f The [POWER OFF(STANDBY)] confirmation screen is displayed. Press qw on the remote control to select [OK], and press the <ENTER> button. (Or press the power <v/b>...
-
Page 46: Projecting
Selecting the input (for projector mode) Switch the input to project. Press the <HDMI>, <MEMORY VIEWER>, <Miracast>, <Panasonic APP>, or <SIGNAGE> button on the remote control to select the input. f Image of the selected input is projected. -
Page 47: Adjusting The Projection
Chapter 3 Basic Operations — Projecting Adjusting the projection Adjust focus and zoom. Press the <FOCUS> or <ZOOM> button on the remote control. f <FOCUS> button: Adjusts focus. f <ZOOM> button: Adjusts zoom. Select each item and press asqw to adjust it. Note f When a projection position is required to be adjusted, adjust according to the steps described in “Adjusting the projection position”... -
Page 48: Using Sd Cards
Manage the contents in the SD card under your responsibility. It is recommended to take a backup of important data on other disc, etc. f Panasonic assumes no responsibility for loss of data recorded by yourself, or any other direct or indirect damage. -
Page 49: Inserting An Sd Card
Chapter 3 Basic Operations — Using SD cards Inserting an SD card Insert the card securely into the SD card slot with the front of the card facing upward, from the side with cut corner. SD card Attention f When using the miniSD memory card or the microSD memory card, always use the dedicated miniSD memory card adapter or the microSD memory card adapter, and insert/eject together with the adapter. -
Page 50: Operating With The Remote Control
Pressing these buttons during the lighting mode will switch to projector mode, and image from each input is displayed. f When the <HDMI>, <MEMORY VIEWER>, <Miracast>, <Panasonic APP>, or <LIGHTING/PROJECTOR> button is pressed during signage playback, the signage playback is stopped and switches to respective input or projection mode. -
Page 51: Adjusting The Volume
Chapter 3 Basic Operations — Operating with the remote control f To switch the input to anything other than the HDMI input, it may take tens of seconds to complete the switching. [Please wait...] is displayed on the projection screen when the switching takes time. Adjusting the volume The audio output volume can be adjusted. - Page 52 Chapter 3 Basic Operations — Operating with the remote control Note f Set the ID number of the projector from the [SETUP] menu → [PROJECTOR ID]. 52 - ENGLISH...
-
Page 53: Chapter 4 Settings
Settings Chapter 4 This chapter describes the settings and adjustments you can make using the on-screen menu. ENGLISH - 53... -
Page 54: Menu Navigation
Chapter 4 Settings — Menu navigation Menu navigation The on-screen menu (Menu) is used to perform various settings and adjustments of the projector. Navigating through the menu Operating procedure When the projection mode is set to the projector mode, the [LIGHTING] menu is not displayed. Press the <LIGHTING/PROJECTOR>... -
Page 55: Main Menu
Chapter 4 Settings — Menu navigation f For some items, press qw to display an individual adjustment screen with a bar scale as shown below. CONTRAST ADJUST Note f Pressing the <RETURN> or <MENU> button on the remote control while the menu screen is displayed returns the screen to the upper hierarchical menu. -
Page 56: Sub-Menu
Chapter 4 Settings — Menu navigation Main menu item Page [SETUP] [NETWORK] [DISPLAY OPTION] [DISPLAY LANGUAGE] [SECURITY] [TEST PATTERN] *1 Only in the lighting mode *2 Only in the projector mode Sub-menu The sub-menu of the selected main menu item is displayed, and you can set and adjust items in the sub-menu. The menu items displayed differ depending on the projection mode. -
Page 57: Display Option
Page [PROJECTOR NAME] [NAME1234] [WIRED LAN] ― [WIRELESS LAN] [M-DIRECT] [NETWORK CONTROL] ― [Panasonic APPLICATION] ― [NETWORK STATUS] ― [Art-Net] [OFF] *1 Differs depending on the product. *2 Only in the projector mode [DISPLAY OPTION] (Only in the projector mode) - Page 58 Chapter 4 Settings — Menu navigation [TEST PATTERN] (Only in the projector mode) Details (x page 90) 58 - ENGLISH...
-
Page 59: [Lighting] Menu
Chapter 4 Settings — [LIGHTING] menu [LIGHTING] menu (Only in the lighting mode) On the menu screen, select [LIGHTING] from the main menu, and select an item from the sub-menu. Refer to “Navigating through the menu” (x page 54) for the operation of the menu screen. f After selecting the item, press asqw to set. - Page 60 Chapter 4 Settings — [LIGHTING] menu Press qw or the <ENTER> button. f The [COLOR SETTING] individual adjustment screen is displayed. Press qw to select [USER1] to [USER5]. Press the <ENTER> button. f The [COLOR SETTING] screen is displayed. Press as to select [BASE COLOR SETTING]. Press the <ENTER>...
-
Page 61: [Dimmer]
Chapter 4 Settings — [LIGHTING] menu [DIMMER] Adjust the brightness. Press as to select [DIMMER]. Press qw or the <ENTER> button. f The [DIMMER] individual adjustment screen is displayed. Press qw to adjust the level. Operation Adjustment Range of adjustment Makes brighter. Press w. -
Page 62: [Picture] Menu
Chapter 4 Settings — [PICTURE] menu [PICTURE] menu (Only in the projector mode) On the menu screen, select [PICTURE] from the main menu, and select an item from the sub-menu. Refer to “Navigating through the menu” (x page 54) for the operation of the menu screen. f After selecting the item, press asqw to adjust. -
Page 63: [Brightness]
Chapter 4 Settings — [PICTURE] menu [BRIGHTNESS] Adjust the dark (black) part of the projected image. Press as to select [BRIGHTNESS]. Press qw or the <ENTER> button. f The [BRIGHTNESS] individual adjustment screen is displayed. Press qw to adjust the level. Operation Adjustment Range of adjustment... -
Page 64: [Dimmer]
Chapter 4 Settings — [PICTURE] menu f The [USER] setting is shared with [User P] in the Content Manager. Changes to the [USER] setting are also reflected in [User P]. (“[Color]” (x page 197)) Adjusting desired white balance Press as to select [COLOR TEMPERATURE]. Press qw or the <ENTER>... -
Page 65: [Memory Viewer] Menu
Chapter 4 Settings — [MEMORY VIEWER] menu [MEMORY VIEWER] menu (Only in the projector mode) On the menu screen, select [MEMORY VIEWER] from the main menu, and select an item from the sub- menu. Refer to “Navigating through the menu” (x page 54) for the operation of the menu screen. f After selecting the item, press asqw to set. -
Page 66: [Effect]
Chapter 4 Settings — [MEMORY VIEWER] menu f If you change the [INTERVAL] setting during playback on the Memory Viewer, the change will not be reflected on the projected image that is being played back. Return to the Memory Viewer screen in the thumbnail view or list view and restart playback. Refer to “Memory Viewer function”... -
Page 67: [Setup] Menu
Chapter 4 Settings — [SETUP] menu [SETUP] menu On the menu screen, select [SETUP] from the main menu, and select an item from the sub-menu. Refer to “Navigating through the menu” (x page 54) for the operation of the menu screen. f After selecting the item, press asqw to set. -
Page 68: [Keystone]
Chapter 4 Settings — [SETUP] menu Press as to select [ASPECT]. Press qw or the <ENTER> button. f The [ASPECT] individual adjustment screen is displayed. Press qw to switch the item. f The items will switch each time you press the button. [NORMAL] Displays images without changing the aspect ratio of the input signals. -
Page 69: [Signage]
Chapter 4 Settings — [SETUP] menu [CORNER CORRECTION] [UPPER LEFT] [UPPER RIGHT] [LOWER LEFT] [LOWER RIGHT] Note f Either one of the setting [HV CORRECTION] or [CORNER CORRECTION] is enabled. If the other item is adjusted after [HV CORRECTION] or [CORNER CORRECTION] has been adjusted, the previous setting value will be reset. f Pressing the <ENTER>... -
Page 70: [High Altitude Mode]
In addition, pressing each of the <HDMI>, <MEMORY VIEWER>, <Miracast>, <Panasonic APP>, or <LIGHTING/PROJECTOR> button while in signage playback stops signage playback and switches the input or projection mode to a corresponding one. -
Page 71: [Initial Startup]
Chapter 4 Settings — [SETUP] menu Setting [NO SIGNAL SHUT-OFF] (Only in the projector mode) This function automatically switches the power of the projector to standby if the input is HDMI and there is no input signal for a certain period of time. The time before switching to standby can be set. Press as to select [ECO MANAGEMENT]. -
Page 72: [Startup Input Select]
Keeps the projection mode and input that has been selected the last time. [HDMI] Sets the input to HDMI. [Miracast] Sets the input to Miracast. [Panasonic APPLICATION] Sets the input to Panasonic APPLICATION. [MEMORY VIEWER] Sets the input to Memory Viewer. [SIGNAGE] Sets the input to signage. [LIGHTING] Starts projecting in the lighting mode. -
Page 73: [Status]
Chapter 4 Settings — [SETUP] menu [STATUS] Display the status of the projector. Press as to select [STATUS]. Press the <ENTER> button. f The [STATUS] screen is displayed. Press qw to switch the pages. f The page will change each time you press the button. [INPUT] Displays the currently selected input. -
Page 74: [Save All User Data]
Chapter 4 Settings — [SETUP] menu Setting the date and time automatically To synchronize with the NTP server and adjust the date and time of the projector automatically, set [NTP SYNCHRONIZATION] to [ON]. NTP server is a device such as a computer which delivers the date and time data by NTP (Network Time Protocol). -
Page 75: [Initialize]
Chapter 4 Settings — [SETUP] menu Note f The projector will go into the standby mode to reflect the setting values when [LOAD ALL USER DATA] is executed. [INITIALIZE] Return various setting values to their factory default settings. Press as to select [INITIALIZE]. Press the <ENTER>... -
Page 76: [Network] Menu
Chapter 4 Settings — [NETWORK] menu [NETWORK] menu On the menu screen, select [NETWORK] from the main menu, and select an item from the sub-menu. Refer to “Navigating through the menu” (x page 54) for the operation of the menu screen. f After selecting the item, press asqw to set. -
Page 77: [Wireless Lan]
Select this item to use as a simple access point. The projector and a device such as a computer can be connected in the infrastructure mode without an access point. Wireless LAN connection can be established using “Wireless Manager ME6.2” or Panasonic’s [M-DIRECT] image transfer application software that supports iPad/iPhone/iPod touch, and Android terminals. - Page 78 Chapter 4 Settings — [NETWORK] menu [CHANNEL] [KEY] The same character string as SSID f The authentication method is fixed to WPA2-PSK and the encryption method is fixed to AES, and they cannot be changed. f Consult your network administrator before you change the values from the factory default. f If [KEY] is kept as the factory default value, information leak by a third party may occur.
- Page 79 The following settings are configured for [USER1], [USER2], and [USER3] as the factory default. [DHCP] [IP ADDRESS] 192.168.11.100 [SUBNET MASK] 255.255.255.0 [DEFAULT GATEWAY] 192.168.11.1 [DNS1]/[DNS2] (Blank) [SSID] Panasonic Projector [AUTHENTICATION] Open [ENCRYPTION] None Changing the [USER1]/[USER2]/[USER3] name Press as to select [WIRELESS LAN]. ENGLISH - 79...
-
Page 80: [Network Control]
Manager ME6.2” or image distribution by “Multi Projector Monitoring & Control Software”. Press as to select [Panasonic APPLICATION]. Press the <ENTER> button. f The [Panasonic APPLICATION] screen is displayed. Press as to select [LIVE MODE CUT IN]. 80 - ENGLISH... - Page 81 Refer to the Operating Instructions of “Wireless Manager ME6.2” for details. Multi-live mode can be used with Panasonic’s image transfer application software that supports iPad/iPhone/iPod touch, and Android terminals. Refer to the following URL for image transfer application software that supports iPad/iPhone/iPod touch, and Android terminals.
-
Page 82: [Network Status]
Chapter 4 Settings — [NETWORK] menu Press as to select [PASSWORD CHANGE]. Press the <ENTER> button. f The [PASSWORD CHANGE] screen is displayed. Press asqw to select a character, and press the <ENTER> button to enter. Press asqw to select [OK], and press the <ENTER> button. f To cancel, select [CANCEL]. - Page 83 Chapter 4 Settings — [NETWORK] menu Press as to select [Art-Net]. Press qw to switch the item. f The items will switch each time you press the button. [OFF] Disables the Art-Net function. [WIRED LAN] Uses the Art-Net function with wired LAN connection. [WIRELESS LAN] Uses the Art-Net function with wireless LAN connection.
- Page 84 Chapter 4 Settings — [NETWORK] menu Setting address for [WIRELESS LAN] Press as to select [Art-Net]. Press qw to select [WIRELESS LAN]. Press the <ENTER> button. f The [Art-Net (WIRELESS LAN)] screen (1/2) is displayed. Press as to select [DEVICE IP ADDRESS]. Press qw to switch the item.
- Page 85 Chapter 4 Settings — [NETWORK] menu Select the encryption method used for the communication between the projector and the network. Select this item not to use encryption. [NONE] It can be selected only when [AUTHENTICATION] is set to [OPEN] or [SHARED]. [WEP] Select this item when the encryption method is WEP.
-
Page 86: [Display Option] Menu
Chapter 4 Settings — [DISPLAY OPTION] menu [DISPLAY OPTION] menu (Only in the projector mode) On the menu screen, select [DISPLAY OPTION] from the main menu, and select an item from the sub- menu. Refer to “Navigating through the menu” (x page 54) for the operation of the menu screen. f After selecting the item, press asqw to set. -
Page 87: [Av Mute]
Chapter 4 Settings — [DISPLAY OPTION] menu Press the <ENTER> button. f The [ON-SCREEN DISPLAY] screen is displayed. Press as to select [WARNING MESSAGE]. Press qw to switch the item. f The items will switch each time you press the button. [ON] Displays the warning message. -
Page 88: [Display Language] Menu
Chapter 4 Settings — [DISPLAY LANGUAGE] menu [DISPLAY LANGUAGE] menu On the menu screen, select [DISPLAY LANGUAGE] from the main menu, and display the sub-menu. Refer to “Navigating through the menu” (x page 54) for the operation of the menu screen. f Press as to select a language, and press the <ENTER>... -
Page 89: [Security] Menu
Chapter 4 Settings — [SECURITY] menu [SECURITY] menu On the menu screen, select [SECURITY] from the main menu, and select an item from the sub-menu. Refer to “Navigating through the menu” (x page 54) for the operation of the menu screen. f When the projector is used for the first time Initial password: Press awsqawsq in order, and press the <ENTER>... -
Page 90: [Test Pattern] Menu
Chapter 4 Settings — [TEST PATTERN] menu [TEST PATTERN] menu (Only in the projector mode) On the menu screen, select [TEST PATTERN] from the main menu. Refer to “Navigating through the menu” (x page 54) for the operation of the menu screen. f Press qw to switch. -
Page 91: Chapter 5 Operations
Operations Chapter 5 This chapter describes how to use each function. ENGLISH - 91... -
Page 92: Memory Viewer Function
Chapter 5 Operations — Memory Viewer function Memory Viewer function Memory Viewer is a function that allows projection of still images or movies stored in an SD card. Files that can be played back with the Memory Viewer function The following still image/movie files can be played back on the projector. Extension Format Restriction... -
Page 93: Operating The Memory Viewer Screen
Chapter 5 Operations — Memory Viewer function f The cursor is placed on the folder list on the left of the screen. (Background color: orange) Example in thumbnail view Example in list view Note f The display view of the Memory Viewer screen (thumbnail or list view) can be set from the [MEMORY VIEWER] menu → [VIEW] (x page 65). - Page 94 Chapter 5 Operations — Memory Viewer function Note f While the Memory Viewer screen is displayed, every press of the <RETURN> button moves the cursor between the folder list and thumbnail/list view area. f The display order of thumbnails follows the settings in the [MEMORY VIEWER] menu → [SORT] (x page 65). f Still image/movie files in the specified folder can be played back by pressing the number (<1>...
-
Page 95: Playing Back Still Images
Chapter 5 Operations — Memory Viewer function Playing back still images This section describes the procedure using an operation example on the Memory Viewer screen in thumbnail view. Playback on the Memory Viewer screen in list view can be performed with the same procedure except for the file selection. -
Page 96: Playing Back Movies
Chapter 5 Operations — Memory Viewer function f The playback order follows the display order set in the [MEMORY VIEWER] menu → [SORT] (x page 65). Also in the cases where still image and movie files both exist in the same folder, they are played back according to the [SORT] setting. f The operation guide on the lower part of the playback screen can be hidden by setting the [MEMORY VIEWER] menu →... - Page 97 Chapter 5 Operations — Memory Viewer function f Pressing w during playback performs fast-forward playback. Every press of w increases the speed. (3 levels) f Pressing q during playback performs rewind playback. Every press of q increases the speed. (3 levels) f Pressing a plays back the file being played back from the beginning.
-
Page 98: Direct Playback
Chapter 5 Operations — Memory Viewer function Direct playback Still image/movie files in the specified folders of the SD card can be played back by pressing the number (<1> - <6>) buttons on the remote control. This operation is referred to as direct playback. Saving files for direct playback To perform direct playback, still image/movie files must be saved in the specified folders in advance. - Page 99 Chapter 5 Operations — Memory Viewer function Indicates that fast-forward playback is being performed in approximately x2 speed. (with audio) Indicates that fast-forward playback is being performed in approximately x5 speed. Indicates that fast-forward playback is being performed in approximately x10 speed. Indicates that playback is being paused.
-
Page 100: Network Connection
By using image transfer application software “Wireless Manager ME6.2” that supports Windows computers and Mac, and Panasonic’s image transfer application software that supports iPad/iPhone/iPod touch, and Android terminals, you can transfer images to the projector. Software, “Multi Projector Monitoring & Control Software”, which monitors and controls multiple projectors connected to the LAN is also supported. -
Page 101: When Connecting Via Wireless Lan
Chapter 5 Operations — Network connection Attention f When a LAN cable is directly connected to the projector, cabling must be made indoors. Note f A LAN cable is required to use the network function via wired LAN. f Use a straight or crossover LAN cable that is compatible with category 5 or higher. Whether either of straight/crossover cable or both cables can be used differ depending on the system configuration. - Page 102 (Example) Displaying copyright-protected contents (Example) Displaying on multiple screens Projector Projector Illustration of connection Miracast Miracast compatible device iPad/iPhone/iPod touch, Android terminal, and computer on which Panasonic’s image transfer application software has been installed Input Miracast Panasonic APPLICATION Communication IEEE802.11a/n IEEE802.11b/g/n method...
- Page 103 Chapter 5 Operations — Network connection [SSID] Panasonic Projector [DHCP] [IP ADDRESS] 192.168.11.100 [SUBNET MASK] 255.255.255.0 [USER1]/[USER2]/[USER3] [DEFAULT GATEWAY] 192.168.11.1 [AUTHENTICATION] Open [ENCRYPTION] None [DNS1]/[DNS2] None Setting for computer Turn on the computer. Configure network settings following the instructions of your network administrator.
-
Page 104: Web Control Function
Enter the IP address set on the projector into the URL entry field of the web browser. Enter the user name and the password. f The factory default setting of the user name is user1 (user rights)/admin1 (administrator rights) and the password is panasonic (lower case). 104 - ENGLISH... - Page 105 Chapter 5 Operations — Web control function Click the [OK] button. f The [Projector status] page is displayed. Note f If you use a web browser to control the projector, set [WEB CONTROL] to [ON] in [NETWORK CONTROL] (x page 80). f Do not start up multiple web browsers at the same time to make setting or control.
- Page 106 Chapter 5 Operations — Web control function Descriptions of items Page tab [Detailed set up] Switches pages by clicking this item. The [Detailed set up] page is displayed by clicking this item. [Status] [Change password] The status of the projector is displayed by clicking this item. The [Change password] page is displayed by clicking this item.
-
Page 107: Error Information Page
Chapter 5 Operations — Web control function Error information page When [Error (Detail)] appears in the self-diagnosis display of the [Projector status] screen, click it to display the error details. f The projector may go into the standby status to protect the projector depending on the contents of the error. Self-diagnosis result display Displays the item check results. - Page 108 Chapter 5 Operations — Web control function [Network status] page Click [Status] → [Network status]. The current network setting status is displayed. [WIRELESS LAN] [WIRED LAN] Displays the settings of wireless LAN. Displays the settings of wired LAN. [Access error log] page Click [Status] →...
- Page 109 Chapter 5 Operations — Web control function Note f [Access error log]/[E-mail error log] displays the recent several hundreds of accesses/requests. All information may not be displayed when many accesses/requests are made at a time. f When information in [Access error log]/[E-mail error log] exceeds a certain amount, they are erased from the oldest. f Check [Access error log]/[E-mail error log] periodically.
- Page 110 Chapter 5 Operations — Web control function g When the [SETUP] menu → [STARTUP INPUT SELECT] (x page 72) is set to [LAST USED] Turn off the power when the input other than Miracast is selected or when the projector is in the lighting mode. If the projector is in standby mode with Miracast input, switch the input to other than Miracast in the [Basic control] page before turning on the power.
- Page 111 Chapter 5 Operations — Web control function Setting desired color On the [Lighting control] page, click [USER1] to [USER5] in [COLOR SETTING]. [BASE COLOR SETTING] [Back] button Switches the setting of the base color. Returns to the previous screen. [RED], [GREEN], [BLUE] Adjusts the color based on the color selected in [BASE COLOR SETTING].
-
Page 112: Connecting With Wired Lan
Chapter 5 Operations — Web control function Connecting with wired LAN [DHCP ON], [DHCP OFF] [DNS1], [DNS2] To enable the DHCP client function, set [DHCP ON]. Enter the primary DNS/secondary DNS server address when you do not use a DHCP server. [IP ADDRESS] Available characters: Numbers (0 - 9), period (.) Enter the IP address when not using a DHCP server. -
Page 113: Adjust Clock] Page
Chapter 5 Operations — Web control function Connecting with wireless LAN (USER1 to USER3) [DHCP ON], [DHCP OFF] [SSID] To enable the DHCP client function, set [DHCP ON]. Enter the same string as the SSID registered to the access point. [IP ADDRESS] Enter the IP address when you do not use a DHCP server. - Page 114 Chapter 5 Operations — Web control function [Ping test] page Check whether the network is connected to the E-mail server, POP server, DNS server, etc. Click [Detailed set up] → [Ping test]. [Input IP address] Example of display when the connection has succeeded Enter the IP address of the server to be tested.
- Page 115 Chapter 5 Operations — Web control function [E-mail set up] page When a problem occurs, an E-mail can be sent to the E-mail addresses (up to two) that have been set beforehand. Click [Detailed set up] → [E-mail set up]. [ENABLE] [MINIMUM TIME] Change the minimum interval for the temperature warning Select [Enable] to use the E-mail function.
- Page 116 Chapter 5 Operations — Web control function [E-MAIL ADDRESS 2] 10 Settings of the conditions to send E-mail If you use the second E-mail address, enter the E-mail address Select the conditions to send E-mails to the second E-mail to send E-mails. address.
- Page 117 Chapter 5 Operations — Web control function [Authentication set up] page Set the authentication items when POP authentication or SMTP authentication is necessary to send an E-mail. Click [Detailed set up] → [Authentication set up]. [Auth] [Password] Select the authentication method specified by your Internet Enter the password for the POP server or the SMTP server.
- Page 118 Chapter 5 Operations — Web control function Contents of E-mail sent Example of the E-mail sent when E-mail is set The following E-mail is sent when the E-mail settings have been established. === Panasonic projector report(CONFIGURE) === Projector Type : JW130F Serial No...
- Page 119 Chapter 5 Operations — Web control function Example of the E-mail sent for an error The following E-mail is sent when an error has occurred. === Panasonic projector report(CONFIGURE) === Projector Type : JW130F Serial No : DA1234567 ----- check system -----...
- Page 120 Chapter 5 Operations — Web control function [Change password] page Click [Change password]. [Administrator] [Next] button Used to change the setting of the [Administrator]. Used to change the setting of the password. [User] Used to change the setting of the [User]. [Administrator] account [Account] [New][Password]...
- Page 121 Chapter 5 Operations — Web control function [User] account [Account] [New][Password] Displays the account to change. Enter the desired new password. (Up to 16 characters in single byte) [New][User name] Enter the desired new user name. (Up to 16 characters in single [New][Password(Retype)] byte) Enter the desired new password again.
- Page 122 Chapter 5 Operations — Web control function [Crestron Connected(TM)] page The projector can be monitored/controlled with Crestron Connected To start the Crestron Connected operation page from the web control screen, you need to access with the administrator rights. (For user rights, the [Crestron Connected(TM)] button is not displayed on the web control screen.) The operation page of Crestron Connected is displayed by clicking [Crestron Connected(TM)].
- Page 123 Chapter 5 Operations — Web control function [Tools] page Click the [Tools] tab on the operation page. [Control System] Network status Sets the information required for communicating with the Displays the settings of wired LAN. controller to be connected with the projector. [DHCP] Displays the current setting value.
- Page 124 Chapter 5 Operations — Web control function [Help] page Click the [Help] tab on the operation page. The [Help Desk] window is displayed. [Help Desk] Sends/receives messages to/from an administrator who uses Crestron Connected 124 - ENGLISH...
-
Page 125: Miracast Function
Chapter 5 Operations — Miracast function Miracast function This function connects a terminal compatible with Miracast to the projector via wireless LAN to display the terminal screen with the projector. Connecting a Miracast compatible terminal Press the <Miracast> button. f The input changes to Miracast, and the Miracast standby screen is displayed. Start the Miracast application on the Miracast compatible terminal. -
Page 126: Content Manager
Chapter 5 Operations — Content Manager Content Manager Content Manager has the following functions. f Signage playback function g Plays still image/movie/music files in the SD card, changes brightness of the light source, and turns off/on the power according to the registered schedule. g Plays still image/movie files in the SD card according to the slideshow setting. -
Page 127: Computers For The Signage Setting
Chapter 5 Operations — Content Manager Extension Audio codec Audio format Sample rate: Maximum 48 kHz Music MPEG-1/2 Audio Layer-3 Channel: Maximum 2 ch (MP3) Bit rate: Maximum 384 kbps Note f Some information for still image/movie/music files can be viewed with a computer where relevant files are accessible. Operation example g For Windows computer Right-click a file, and click [Properties]. -
Page 128: Description Of The Signage Playback Screen
Chapter 5 Operations — Content Manager Start playing the schedule. (x page 165) Note f When using the Content Manager, make sure to release the write protect switch of the SD card. (x page 48) f Data such as schedules, timetables, and contents created or registered with the Content Manager are saved in the “PRIVATE” folder in the SD card. - Page 129 Click [Login]. Enter the user name and the password. f The factory default setting of the user name is user1 (user rights)/admin1 (administrator rights) and the password is panasonic (lower case). Click the [OK] button. f The start screen is displayed.
-
Page 130: [Schedule]
The Content Manager of the projector can also be started from “Wireless Manager ME6.2” which is image transfer application software compatible with Windows computers and Mac, Panasonic image transfer application software compatible with iPad/iPhone/iPod touch and Android terminals, and “Multi Projector Monitoring & Control Software” which is software to monitor and control multiple projectors connected via LAN. - Page 131 Chapter 5 Operations — Content Manager Schedule screen Click [Schedule] on the start screen to display the schedule screen. [Operation] button Login rights information Click this to display the operational information page. Displays the logged in account rights. Check the information of the content being played or check the Calendar icon assigned schedule.
- Page 132 Chapter 5 Operations — Content Manager Creating a timetable Set the content details to be played in one day, playback time, and playback sequence as a timetable. r Timetable page Content selection tab Power supply content display icon Select the type of content to register in a timetable. This icon becomes yellow when selected, and displays the Clicking the tab changes the “Content list”...
- Page 133 Chapter 5 Operations — Content Manager r Procedure for creating timetables On the start screen, click [Schedule]. f The schedule screen is displayed. Click the [Timetable] button. f The timetable page is displayed. The following screen is an example when the Content Manager is used for the first time or new SD card is inserted.
- Page 134 Chapter 5 Operations — Content Manager Registering content in a timetable Register content in a timetable. r Timetable page Content selection tab Content list r [Content registration] screen When registering still image content When registering movie/external input content When registering playlist When registering music content When registering brightness content When registering power supply content...
- Page 135 Chapter 5 Operations — Content Manager [Duration] [Brightness] Select the radio button, and set the time to start the content Select the brightness to be reflected when playing image playback. content. [Effect] [Enter] button Set special effects used when changing the playback screen of Click this to confirm the settings.
- Page 136 Chapter 5 Operations — Content Manager Enter the timetable name. f Enter a name in the [Timetable name] field. Up to 24 characters in single byte can be input. [Timetable name] Click the [Save] button. f The created timetable is registered in the SD card. f A timetable ID is assigned automatically when the timetable is registered.
- Page 137 Chapter 5 Operations — Content Manager Timetable Make sure , and are not selected. f If any of the icons is displayed in yellow, click the icon to release the selection. Click f The mode changes to deletion mode. Select the image content to delete. f You can select multiple contents.
- Page 138 Chapter 5 Operations — Content Manager Click f The mode changes to deletion mode. Select the music content to delete. f You can select multiple contents. Click the [Delete] button. When the confirmation screen is displayed, click the [OK] button. f The selected music content is deleted from the timetable. Deleting brightness content registered in a timetable Delete brightness content registered in a timetable.
- Page 139 Chapter 5 Operations — Content Manager Click f The mode changes to deletion mode. Select the brightness content to delete. f You can select multiple contents. Click the [Delete] button. When the confirmation screen is displayed, click the [OK] button. f The selected brightness content is deleted from the timetable. Deleting power supply content registered in a timetable Delete power supply content registered in a timetable.
- Page 140 Chapter 5 Operations — Content Manager Click f The mode changes to deletion mode. Select the power supply content to delete. f You can select multiple contents. Click the [Delete] button. When the confirmation screen is displayed, click the [OK] button. f The selected power supply content is deleted from the timetable.
- Page 141 Chapter 5 Operations — Content Manager r [Content edit] screen When clicking still image content When clicking movie/external input content When clicking playlist When clicking music content When clicking brightness content When clicking power supply content [Content name] [Color] Displays the selected content name. Select the color setting to be reflected when playing image content.
- Page 142 Chapter 5 Operations — Content Manager the “Content list”. Displaying preview of timetable details Display the preview image of a timetable on the web browser of on the projection screen. Click the [Preview] button in the timetable page. f The preview mode selection screen is displayed. Select a preview mode, and click the [Start] button.
- Page 143 Chapter 5 Operations — Content Manager r Preview mode [WEB browser] f A preview screen like the following is displayed on the web browser. Operation icon Performance Switches to the previous content. Stops playback. Starts or pauses playback. The icon display changes depending on the playback state. Switches to the next content.
- Page 144 Chapter 5 Operations — Content Manager Editing the content list Register or delete still image/movie/music content to be registered in a timetable, and edit the registration information. Refer to the descriptions of the following items. f “Registering content in a content list” (x page 144) f “Deleting content registered in a content list”...
- Page 145 Chapter 5 Operations — Content Manager Select the content to register (1 file at a time), and click the [Open] button. f The content information entry screen is displayed. Enter any [Content name] and [Duration], and click the [Enter] button. f For [Content name], up to 24 characters in single byte can be input. f Even when the content name is different from the file name, the file name itself is not changed.
- Page 146 Chapter 5 Operations — Content Manager Note f The maximum number of still image/movie/music files that the Content Manager can control is 500 each. However, it may not be possible to register 500 files depending on the capacity of the SD card. Deleting content registered in a content list Delete unnecessary content from the SD card.
- Page 147 Chapter 5 Operations — Content Manager When the confirmation screen is displayed, click the [OK] button. f The selected content is deleted from the SD card. Note f If the content to be deleted is registered in a schedule or slideshow, the content cannot be deleted. f [CIRCULAR LIGHT1] and [CIRCULAR LIGHT2] in still image content cannot be deleted.
- Page 148 Chapter 5 Operations — Content Manager Creating a playlist Register, delete, or edit the playlist where multiple still image/movie/external input contents can be controlled together as a single content. Refer to the descriptions of the following items. f “Registering playlist” (x page 148) f “Editing a playlist”...
- Page 149 Chapter 5 Operations — Content Manager Click in the “Content list”. f The [Playlist edit] screen is displayed. Content selection tab On the [Playlist edit] screen, click the tab of the content to register in a playlist among the “Content selection tab”. f Clicking the tab changes the “Content list”...
- Page 150 Chapter 5 Operations — Content Manager f To continue to register content, go back to Step 3). f The total playback time of the contents registered in the “playlist” is displayed in [Total time]. f To make the playlist over again from the start, click the [Clear] button. All the contents in the “playlist” are deleted.
- Page 151 Chapter 5 Operations — Content Manager In the timetable page, click the [Playlist] tab among the “Content selection tab”. f The “Content list” shows the list of playlists. Playlist edit Content list Click in the “Content list”. f The mode changes to selection mode. Select a playlist you want to edit, and click the [Execute] button.
- Page 152 Chapter 5 Operations — Content Manager Deleting content registered in a playlist Delete the content registered in a playlist. Content registered in playlist deletion Click on the [Playlist edit] screen. f The mode changes to selection mode. Select the content to delete. f You can select multiple contents.
- Page 153 Chapter 5 Operations — Content Manager On the “playlist”, click the content of which setting you want to change. f The [Content edit] screen is displayed. Change [Duration] and [Effect], and click the [Enter] button. f Change the playback time and image effect settings. f The settings of the content on the “playlist”...
- Page 154 Chapter 5 Operations — Content Manager Click in the “Content list”. f The mode changes to selection mode. Select a playlist you want to duplicate, and click the [Execute] button. f The playlist name entry screen is displayed. Enter any [Playlist name], and click the [Enter] button. f For [Playlist name], up to 24 characters in single byte can be input.
- Page 155 Chapter 5 Operations — Content Manager In the timetable page, click the [Playlist] tab among the “Content selection tab”. f The “Content list” shows the list of playlists. Playlist edit Content list Click in the “Content list”. f The mode changes to selection mode. Select a playlist you want to preview, and click the [Execute] button.
- Page 156 Chapter 5 Operations — Content Manager Select a preview mode, and click the [Start] button. f When [WEB browser] is selected, the image is displayed on the web browser. f When [Projector] is selected, the image is displayed on the projection screen. Note f In the following cases, the projector mode [Projector] is not available.
- Page 157 Chapter 5 Operations — Content Manager f Regardless of the content setting, still image content is played for 10 seconds, movie/external input content is played for 20 seconds, and blank period is played for 10 seconds. f If paused during playback of still image content, or during a blank period between contents, the playback time of the content being paused is reset when it is resumed, and the content is played from the beginning.
- Page 158 Chapter 5 Operations — Content Manager r Procedure for setting the schedule On the start screen, click [Schedule]. f The schedule screen is displayed. f Set necessary timetable (contents to be played back in a day) in advance. Refer to “Creating a timetable” (x page 132) for details.
- Page 159 Chapter 5 Operations — Content Manager Registering a schedule Register schedules for the current week up to 12 weeks ahead. r Schedule page Calendar r Calendar Move to the previous month Calendar Displays the calendar of the previous month. Click a date to display the schedule of the week. Move to the next month [Every week] button Displays the calendar of the next month.
- Page 160 Chapter 5 Operations — Content Manager f When you click the [Every week] button, the “schedule” for day of the week is displayed. You can set the same timetable for a certain day of the week every week. In this case, the period in which the schedule can be registered is not restricted.
- Page 161 Chapter 5 Operations — Content Manager Deleting a schedule Delete an unnecessary schedule. Schedule deletion Click f The mode changes to deletion mode. Select a day or day of week to delete. f You can select multiple days or days of week. Click the [Delete] button.
- Page 162 Chapter 5 Operations — Content Manager Editing a timetable Change the contents to be played back in a day and the playback sequence and playback time registered in a timetable. Timetable edit Click of the timetable to edit. f The timetable page is displayed. Edit the timetable.
- Page 163 Chapter 5 Operations — Content Manager Click of the timetable to duplicate. f The timetable name entry screen is displayed. Enter the timetable name, and click the [Enter] button. f The timetable is duplicated. Deleting a timetable Delete a registered timetable. Timetable deletion Click f The mode changes to deletion mode.
- Page 164 Chapter 5 Operations — Content Manager Checking the contents of a timetable registered in a schedule Display the contents of a timetable assigned to the schedule you want to check. r Schedule page Schedule r [Assigned timetable] screen Timetable name Timetable duplication icon Displays the timetable name.
- Page 165 Chapter 5 Operations — Content Manager Playback status Playback screen Displays the status of signage playback (schedule/slideshow). Displays the still image/movie/external input content being played. Projector date and time Movie/external input content is displayed as an icon. Displays the date and time of the connected projector. Playback information Timetable name Displays the information of still image/movie/external input/...
- Page 166 Chapter 5 Operations — Content Manager Setting interruption playback Register the setting of content to be played back interrupting signage playback (schedule/slideshow) or play back the content. r [Interrupt list] screen [Operation] button [Stop] button Click this to return to the operational information page. Click this to stop interruption playback.
- Page 167 Chapter 5 Operations — Content Manager Click the [Interrupt] button. f The [Interrupt list] screen is displayed. Register the content for interruption playback and the playback schedule. f Register the still image content to be played back interrupting signage playback (schedule/slideshow) and set the schedule for interruption playback.
- Page 168 Chapter 5 Operations — Content Manager r [Interrupt registration] screen This is the screen displayed after selecting still image content to be used for interruption playback. Interrupted still image content name Interrupted still image content being selected Enter the interrupted still image content name. Displays the selected still image content.
- Page 169 Chapter 5 Operations — Content Manager Enter the interrupted still image content name, [Start], and [End] or [Duration]. f For an interrupted still image content name, up to 24 characters in single byte can be entered. Click the [Save] button. f It is registered in the interruption schedule. f The selected still image content is registered in the SD card.
- Page 170 Chapter 5 Operations — Content Manager Edit [Start], and [End] or [Duration]. Click the [Save] button. f The edited interruption schedule is registered by overwrite. Note f Interrupted still image content name cannot be edited. f If the playback time overlaps the existing registered interruption schedule, then the interruption cannot be saved. Duplicating a registered interruption schedule Duplicate a registered interruption schedule.
- Page 171 Chapter 5 Operations — Content Manager Click of the registered interruption schedule to be deleted. f The mode changes to deletion mode. Select the interruption schedule to be deleted. f You can select multiple interruption schedules. Click the [Delete] button. When the confirmation screen is displayed, click the [OK] button. f The selected interruption schedule is deleted.
- Page 172 Chapter 5 Operations — Content Manager Canceling the currently played interruption schedule Stop the current interruption playback and terminate the interruption schedule. You can use this function when you set the wrong timing to start interruption playback or set the wrong content, or when interruption playback is no longer necessary in the middle of the interruption playback.
- Page 173 Chapter 5 Operations — Content Manager r Schedule confirmation screen (timetable update) Timetable name Timetable Displays the timetable name. Displays the content registered in the timetable of the selected day. Timetable ID Displays the timetable ID. Display scale Sets the display scale for “Timetable”. r Procedure On the start screen, click [Schedule].
- Page 174 Chapter 5 Operations — Content Manager On the start screen, click [Schedule]. f The schedule screen is displayed. Click f The history screen is displayed. Check the content already played back. r Display contents of the history Icon Details Played Playback failed Playback stopped Interruption occurred Interruption playback...
- Page 175 Chapter 5 Operations — Content Manager Setting a schedule Perform system setting, data management, and login information setting for the schedule. On the start screen, click [Schedule]. f The schedule screen is displayed. Click f The setting screen is displayed. Setting selection tabs Select one of the setting selection tabs ([System setting]/[Data management]/[Login]).
- Page 176 Chapter 5 Operations — Content Manager Performing system settings Perform the system settings of schedule. r [System setting] page [Time of change-of-day] [Fixed loading time] Sets the time for the start of a day. Select whether to fix the loading time after starting the scheduled movie content till displaying the image on the [First day of week] projection screen.
- Page 177 Chapter 5 Operations — Content Manager Signage playback (schedule) resumes when power off/on registered in the schedule is performed, or the power <v/b> button on the [Enable] remote control or power supply control by a command is performed, and then the input switches to signage. [Power] Signage playback does not resume even when power off/on [Disable]...
- Page 178 Chapter 5 Operations — Content Manager Link to backup file Selected display Displays a list of links to backup files. When the link to a backup file is clicked, [Already selected] is displayed. Because this is displayed just by clicking a link without saving the relevant file, make sure to save all backup files.
- Page 179 Chapter 5 Operations — Content Manager Uploading a schedule Upload a backed up schedule from the client computer (only Windows computer/Mac are supported) to the projector. r [Data management] page Upload file [Add] button Upload data addition progress Adds upload target data. Displays the progress by comparing the number of saved data Click this to display the file selection screen.
- Page 180 Chapter 5 Operations — Content Manager Select a file you want to cancel upload, click [Delete]. f You can select multiple files. Click the [Upload] button. f The upload target schedule is registered in the SD card. Note f When the upload destination SD card contains the same day of the week schedule, or the same date schedule, the schedule is overwritten with the uploaded schedule.
-
Page 181: Playing Back The Schedule Simultaneously In Multiple Projectors
Chapter 5 Operations — Content Manager Playing back the schedule simultaneously in multiple projectors By synchronizing the date and time of the projector with the NTP server, you can meet the playback timing of the schedule among multiple projectors. Use this function when you set up multiple projectors of this model in the same floor or other close location and play back the same schedule. - Page 182 Chapter 5 Operations — Content Manager Duplicating data in SD card If you can eject the SD card where the source schedule has been registered, you can duplicate data in the SD card using the following procedure. Please note that the environment where data can be duplicated from the SD card to other SD cards is required.
- Page 183 Chapter 5 Operations — Content Manager f Upload the backed up schedules to all projectors for simultaneous playback. Acquiring and delivering schedules using “Multi Projector Monitoring & Control Software” Using “Multi Projector Monitoring & Control Software”, you can deliver and register the same schedules in other projectors while the SD card with the duplication source schedules is inserted in the SD card slot of the projector.
-
Page 184: [Slideshow]
Chapter 5 Operations — Content Manager Enabling [Fixed loading time] Even when the time of the projectors for simultaneous playback is synchronized, the loading time after starting playback till the image is actually displayed on the projection screen will differ among the projectors, depending on the movie content registered in the schedule. - Page 185 Chapter 5 Operations — Content Manager 13 Content in slideshow deletion icon (only for administrator 15 Playback/Pause icon (only for administrator rights) rights) Click this to start playing a slideshow or to pause it. Deletes contents registered in a slideshow. (“Deleting content 16 Stop icon (only for administrator rights) from a slideshow”...
- Page 186 Chapter 5 Operations — Content Manager f In a slideshow, you can register up to 100 contents (still image/movie files). f You cannot register contents other than still image/movie. f To add and register new contents to the “Content list”, refer to “Registering content” (x page 186). Editing the content list Register still image/movie contents to be used for the slideshow in the content list or delete them from the content list.
- Page 187 Chapter 5 Operations — Content Manager Select the content to register (1 file at a time), and click the [Open] button. f The content name entry screen is displayed. Enter any [Content name], and click the [Enter] button. f For [Content name], up to 24 characters in single byte can be entered. f Even when the content name is different from the file name, the file name itself is not changed.
- Page 188 Chapter 5 Operations — Content Manager Deleting content Delete unnecessary content from the SD card. Content selection tab Content list Click the tab of the content to be deleted from the “Content selection tab” ([Still] or [Video]). f Clicking the tab changes the “Content list” display. Content deletion Click f The mode changes to deletion mode.
- Page 189 Chapter 5 Operations — Content Manager Note f If the content to be deleted is registered in a schedule or slideshow, the content cannot be deleted. f [CIRCULAR LIGHT1] and [CIRCULAR LIGHT2] in still image content cannot be deleted. Setting a slideshow Make various settings of a slideshow.
- Page 190 Chapter 5 Operations — Content Manager Changing the order of contents Change the playback sequence of contents registered in a slideshow. Slideshow Move the content of which order you want to change using a drag-and-drop operation in the “Slideshow”. Click the [Save] button. f The edited slideshow setting is registered in the SD card.
- Page 191 Chapter 5 Operations — Content Manager Click in the “Slideshow”. f The mode changes to deletion mode. Select the content to delete. f You can select multiple contents. Click the [Delete] button. When the confirmation screen is displayed, click the [OK] button. Click the [Save] button.
-
Page 192: Registering A Lighting Pattern
Chapter 5 Operations — Content Manager Note f You cannot change movie content settings. The playback time of movie content in a slideshow is the required playback time of the movie content. Starting a slideshow Start playing a slideshow. Stop playback Start playback Click changes to... - Page 193 Chapter 5 Operations — Content Manager Log in to the Content Manager with administrator rights. f The start screen is displayed. Click [Slideshow]. f The slideshow screen is displayed. Content selection tab Click the [Still] tab among the “Content selection tab”. Content addition Click f The [Add content] screen is displayed.
- Page 194 Chapter 5 Operations — Content Manager Click f The file selection screen is displayed. Select the still image file to register (1 file at a time), and click the [Open] button. f The content name entry screen is displayed. Enter any [Content name], and click the [Enter] button. f For [Content name], up to 24 characters in single byte can be entered.
- Page 195 Chapter 5 Operations — Content Manager Deleting or changing registered patterns Delete lighting patterns (still image contents) no longer required, or replace them with other patterns. Content deletion Click f The mode changes to deletion mode. Select the content you want to delete or replace. f You can select multiple contents.
-
Page 196: [Effect]
Chapter 5 Operations — Content Manager Click f The [Add content] screen is displayed. Content addition Click on the [Add content] screen. f The file selection screen is displayed. Select the still image file of the pattern to be newly registered, and click the [Open] button. f To replace it with another pattern, prepare a still image file having the same file name as the one deleted. -
Page 197: [Color]
Chapter 5 Operations — Content Manager Note f The item name and the description for [Effect] indicate the operation when [PROJECTION METHOD] and [VERTICAL FLIP] is set so that the character in the projection can correctly be read. [Color] The following table shows the color settings to be reflected when playing image contents (still image/movie/ external input). - Page 198 Maintenance Chapter 6 This chapter describes troubleshooting and maintenance methods. 198 - ENGLISH...
-
Page 199: Light Source/Temperature Indicators
Chapter 6 Maintenance — Light source/temperature indicators Light source/temperature indicators When an indicator lights up If a problem should occur inside the projector, the light source indicator <LIGHT>/temperature indicator <TEMP> will inform you by lighting or blinking. Check the status of the indicators and remedy the indicated problems as follows. - Page 200 Chapter 6 Maintenance — Light source/temperature indicators Temperature indicator <TEMP> Blinking in red Blinking in red Indicator status Lighting in red (2 times) (3 times) Internal temperature is high (standby Status Internal temperature is high (warning). The internal cooling fan is not running. status).
-
Page 201: Inspection And Maintenance
Chapter 6 Maintenance — Inspection and maintenance Inspection and maintenance Before maintaining the projector Attention f Make sure to turn off the power before maintaining the projector. (x pages 40, 44) f When switching off the projector, make sure to follow the procedures in “Turning off the projector” (x page 44). WARNING Be sure to turn off the power of the track system before maintaining the projector. -
Page 202: Troubleshooting
Chapter 6 Maintenance — Troubleshooting Troubleshooting Review the following points. For details, see the corresponding pages. Problems Points to be checked Page f Is the power supply of the interior wiring turned on? ― f Is the plug of the power cord firmly inserted into the outlet? ―... -
Page 203: Faq
Chapter 6 Maintenance — FAQ Refer to the following when you have problems with the wireless LAN connection. The connection with the wireless LAN is lost. f Under certain reception conditions, the image may be disrupted. In such a case, try the following. g Move the device connected over the wireless LAN closer to the projector. - Page 204 Appendix Chapter 7 This chapter describes specifications and after-sales service for the projector. 204 - ENGLISH...
-
Page 205: Technical Information
Power supply status POWR? Power on condition query Preparing for switching off the projector HDMI INPT Input selection MEMORY VIEWER SIGNAGE Panasonic APPLICATION INPT? Input selection query Miracast LIGHTING AVMT AV mute control AV mute function off AVMT? AV mute function query... -
Page 206: Using Art-Net Function
Chapter 7 Appendix — Technical information PJLink security authentication The password used for PJLink is the same as that of the password set for web control. When using the projector without security authentication, do not set a password for web control. f For specifications related to PJLink, refer to the website of Japan Business Machine and Information System Industries Association. -
Page 207: Error Response
“xxxxxx:yyyyy:zzzzzzzz” xxxxxx Administrator rights user name for the web control (default user name is “admin1”) yyyyy Password of above administrator rights user (default password is “panasonic”) zzzzzzzz 8-byte random number obtained in Step 2) Command transmission method Transmit using the following command formats. - Page 208 Chapter 7 Appendix — Technical information When web control administrator rights password is not set (Non-protect mode) Connecting Obtain the IP address and port number (Initial set value = 1024) of the projector and request a connection to the projector. f Both the IP address and the port number can be obtained from the menu screen of the projector. IP address Obtain from the main menu →...
-
Page 209: Control Command
Power standby ― Power supply status STANDBY status query Power on condition HDMI MEMORY VIEWER Miracast Input/mode selection Panasonic APPLICATION SIGNAGE LIGHTING Light source power NORMAL setting Light source power setting query Runtime query 00000 - 99999 In hours... -
Page 210: Glossary Of Network Terms
Chapter 7 Appendix — Glossary of network terms Glossary of network terms Term Description Access point This is a signal station for relaying signals between the wireless LAN and the computer. A computer connected to the access point can communicate via the network connected to the access point. Abbreviation for Advanced Encryption Standard. - Page 211 Chapter 7 Appendix — Glossary of network terms Term Description WPA-EAP A standard of encryption method for wireless LAN. This is an encryption method for corporation, and WPA2-EAP encryption is performed using an external server. WPA-PSK A standard of encryption method for wireless LAN. This is advanced security than the WEP, and it has WPA2-PSK functions such as user authentication function and TKIP (encryption protocol) that will automatically change the encryption key every specified time.
-
Page 212: Specifications
*3 Measurement, measuring conditions and method of notation all comply with ISO21118 international standards. *4 Operations of the Panasonic SD memory card up to capacity of 2 GB and Panasonic SDHC memory card up to capacity of 32 GB are confirmed. -
Page 213: Dimensions
Chapter 7 Appendix — Specifications r Applicable scanning frequency/terminal/wireless LAN Model No. PT-JW130FBU/PT-JW130FWU 525p (480p), 625p (576p), 750 (720)/60p, 750 (720)/50p, 1125 (1080)/60p, 1125 (1080)/50p Applicable VGA60, SVGA56, SVGA60, XGA60, SXGA60, scanning HDMI signal 1280 x 720/50, 1280 x 720/60, frequency... -
Page 214: List Of Compatible Signals
Chapter 7 Appendix — Specifications List of compatible signals The following table specifies the HDMI input video signal that the projector can project. Scanning freq. Resolution Dot clock freq. Mode Plug and play Horizontal Vertical (Dots) (MHz) (kHz) (Hz) 525p (480p) 720 x 480 31.5 59.9... -
Page 215: Index
Number (<1> - <6>) buttons Cautions when installing [Color] [COLOR] [ON-SCREEN DISPLAY] [COLOR SETTING] On-screen menu [COLOR TEMPERATURE] Connecting via wireless LAN Connection <Panasonic APP> button 24, 50 Content list [Panasonic APPLICATION] Content Manager [PASSWORD] [CONTRAST] [PASSWORD CHANGE] Control commands via LAN [PATTERN]... - Page 216 These symbols are only valid in the European Union. If you wish to discard this product, please contact your local authorities or dealer and ask for the correct method of disposal. Panasonic Lighting Americas, Inc 51 Century Blvd., Suite 230 Nashville, TN 37214 Web Site : http://www.control2light.com/spaceplayer ©...