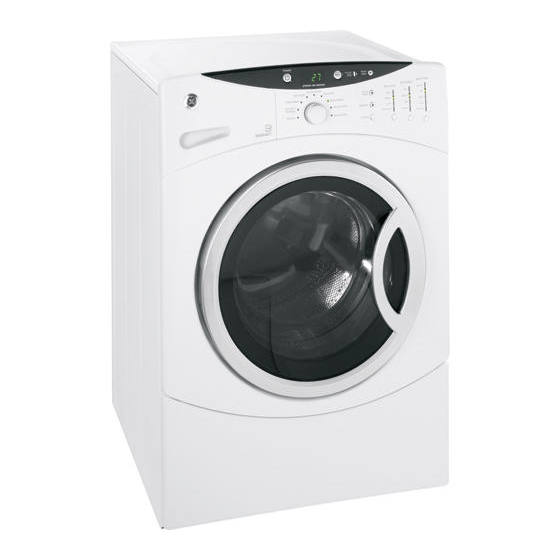
GE WBVH6240 Technical Service Manual
Front load washer
Hide thumbs
Also See for WBVH6240:
- Technical service manual (3 pages) ,
- Owner's manual & installation instructions (76 pages) ,
- Owner's manual & installation instructions (24 pages)

Related Manuals for GE WBVH6240


Summary of Contents for GE WBVH6240
- Page 1 GE Consumer & Industrial Technical Service Guide DECEMBER 2005 GE Front Load Washer WBVH6240 WCVH6260 WHDVH626 31-9135 GE Appliances General Electric Company Louisville, Kentucky 40225...
- Page 2 If grounding wires, screws, straps, clips, nuts, or washers used to complete a path to ground are removed for service, they must be returned to their original position and properly fastened. GE Consumer & Industrial Technical Service Guide Copyright © 2005 All rights reserved.
-
Page 3: Table Of Contents
Table of Contents Basic Wash Cycle ................................18 Component Locator Views ............................20 Control and Inverter Board Connections ....................... 22 Control Board ..................................25 Control Features ................................6 Control Panel ..................................24 Dampers ....................................46 Dispenser Assembly ................................ 29 Dispenser Motor ................................32 Door ....................................... -
Page 4: Nomenclature
Nomenclature Model Number W C V H 6 2 6 0 F 0 W W Brand Control W = General Electric Color Features WW - White GG - Granite Feature Packages B = Base Engineering Revision C = Contract/HPS Alpha or Numeric HD = Brand Feature Pack Model Year Capacity/Confi... -
Page 5: Introduction
Introduction The new GE Front Load Washer has the following features: • Energy Star Qualifi cation assures less energy waste and lower utility bills. • 10 wash cycles include a variety of fabric-specifi c settings, from Extra-Heavy Cottons to Easy-Care Colors. -
Page 6: Control Features
Control Features Model WBVH6240 11 10 WASH EXTRA RINSE SPIN DELAY DOOR LOCKED ELICATES CTIVE ANDWASH PEED TAIN RAIN & OLORS/ INSE & ORMAL HITES Model WCVH6260 11 10 WASH EXTRA RINSE SPIN DELAY DOOR LOCKED CTIVE ELICATES TAIN ANDWASH... - Page 7 Power Press to “wake up” the display. If the display is active, press to put the washer into standby mode. NOTE: Pressing POWER does not disconnect the appliance from the power supply. Wash Cycles The wash cycles are optimized for specific types of wash loads. The chart below will help you match the wash setting with the loads.
-
Page 8: Washer Features
Washer Features Cycle Signal Use the SIGNAL button to change the Press the button until you reach the volume of the end of cycle signal. desired volume. Prewash Prewash is an extra wash before the main wash. Use it for heavily soiled clothes or for clothes with a care label that recommends prewashing before washing. - Page 9 The Dispenser Drawer You may see water in the bleach and fabric softener Slowly open the dispenser drawer by pulling it out until it stops. compartments at the end of the cycle. This is a result of the flushing/siphoning action and is part of the normal operation of the washer.
-
Page 10: Using The Washer
If these parts are not available, they can be ordered by visiting our Website at www.GEAppliances.com or by calling 800.GE.CARES. Long Vacations: Be sure water supply is shut off at faucets. Drain all water from hoses if weather will be below freezing. - Page 11 Dispenser Drawer Area: Detergent and fabric softener may build up in the dispenser drawer. Residue should be removed once or twice a month. ■ Remove the drawer by first pulling it out until it stops. Then reach back into the left rear corner of the drawer cavity and press down firmly on the lock tab, pulling out the drawer.
-
Page 12: Pedestal Installation (Washer And Dryer)
Pedestal Installation (Washer and Dryer) Optional 12-in. high storage drawer pedestals with WARNING: Due to the size and weight of the dividers are available to provide convenience and washer or dryer, and to reduce the risk of personal extra storage space for detergent, dryer sheets and injury or damage, 2 people are required for proper other cleaning supplies. - Page 13 Pull the drawer out to its stop position. Place the pedestal against the bottom of the washer or dryer. Ensure that the drawer front is Remove the screws from the drawer slides. at the front of the washer or dryer. Slide the drawer out of the base and set it aside.
- Page 14 Screw locknuts onto the supplied leveling legs. Ensure that the slides are closed, then slide the Turn the nuts toward the bottom and against drawer into the opening. the rubber part of the leg. Align the drawer supports to the slides on each Install the leveling legs, with locknuts, in each side.
-
Page 15: Stacking Instructions
The GE front load washer is designed to allow cabinets, ceiling, etc. is 43 inches without certain models of the GE dryer to be placed on top pedestal, 55 inches with pedestal, and 84 (stacking). Dryer models that currently qualify for inches stacked. - Page 16 To stack the dryer: Remove the adhesive backing and fi rmly place the 4 rubber pads over the leg brackets. Caution: Do not lay dryer on its back. Use the packing material or a protective surface when laying dryer on its side. Carefully lay the dryer on its side.
- Page 17 Set the dryer upright using packing material or a WARNING! protective surface that ensures the brackets do not damage the fl oor. Do not push on the dryer after it is stacked on the washer. Pushing on the dryer may result in pinched Place and level the washer in the approximate fi...
-
Page 18: Basic Wash Cycle
Operation Overview Select the SPIN SPEED to change the fi nal spin speed Basic Wash Cycle of the cycles. Follow the fabric manufacturer's care label when selecting spin speed. Note: See for identifi cation Component Locator Views and location of washer components. Select the WASH TEMP to adjust the proper water temperature for the wash cycle. - Page 19 Cold: The available selection of spin speeds is controlled by cycle selection. • Cold water valve energized. For example: • Cold selection is tempered by default for main Spin Speed Whites Delicates wash. High 1000 rpm 525 rpm • Cold can be tempered by cycling of hot water Medium 750 rpm 450 rpm...
-
Page 20: Component Locator Views
Component Locator Views Top View Water Valve Outlet Hose Water Valve Line Filter 3-Way Pipe Dispenser Inlet Hose Nozzle Hose Water Level Control Dispenser Assembly Dispenser Vent Hose Thermistor Heating Element Front View Damper Motor Pump Outlet Hose Tub Drain Hose Inverter Pump (Continued Next Page) - Page 21 Component Locator Views (Con't) Tub Drive Pulley Belt Motor Dispenser Drawer – 21 –...
-
Page 22: Control And Inverter Board Connections
Control and Inverter Board Connections Control Board Door lock and line fi lter Door lock, heater, 120 VAC output to inverter, dispenser motor, hot and cold water valves WCL main level and overfl ow switches, heater, neutral output to inverter, and door lock Dispenser switch Hot and cold water valves and dispenser motor WCL foam switch and door switch... -
Page 23: Service Panel
Washer Components Service Panel Top Panel Removal of the service panel provides access to WARNING: Sharp edges may be exposed when servicing washer. Use caution to avoid injury and the pump cleanout, pump, tub drain hose, heater assembly, inverter, wire junction box, front dampers, wear Kevlar gloves or equivalent protection. -
Page 24: Control Panel
From inside the cabinet, lift and push forward to Control Panel release the bottom tab from the front bracket. The control panel is held in place with 5 Phillips- head screws and 5 tabs. To remove the control panel assembly: Remove the top panel. - Page 25 Control Board The control board is mounted in a housing that is attached to the inside of the control panel. The control board and housing are replaced as an assembly. The control board assembly is held in place by 4 Phillips- head screws and 3 tabs.
-
Page 26: Door Lock
To remove the control board assembly: Door Lock Remove the control panel. (See Control Panel The door lock contains a door switch and solenoid Pull the cycle knob off. operated locking and unlocking mechanism. A release ring, located at the bottom, allows for Remove the 4 Phillips-head screws that hold the manual unlocking of the door. -
Page 27: Door Strike
Use a long-nose pliers to grasp the wire loop at Note: The door latch is solenoid activated. It can the spring location and expand it to clear the remain locked after power is removed. gasket. To manually unlock door: Disconnect the washer from electrical supply. WARNING: To avoid injury, ensure all mechanical movement has stopped. -
Page 28: Front Panel
Front Panel Line Filter The front panel is hung on 2 hooks attached to The line fi lter helps to smooth out any fl uctuations in the cabinet and held in place with 4 Phillips-head voltage, protecting the control board and providing screws. -
Page 29: Dispenser Assembly
Caution: When testing the dispenser motor, DO Dispenser Assembly NOT remove the wiring harness from the dispenser motor unless replacing the motor assembly. The The dispenser assembly provides automatic motor assembly has a special locking connector dispensing of detergent, bleach, and fabric softener and the wiring harness will not stay reconnected if as long as the user fi... - Page 30 Caution: A small retainer for the dispenser motor wiring, located underneath the unused inlet, is fragile. To avoid breakage, use minimal outward pressure when releasing wiring. Inlet Hose Release the dispenser motor wiring from the retainer. Inlet Tube Remove the 2 Phillips-head screws that attach Tank Inlet the motor and clip to the dispenser tank.
- Page 31 Remove the 2 Phillips-head screws that hold the Remove the dispenser from the cabinet. dispenser to the front bracket. Caution: The water inlet pipe is fi rmly attached to the dispenser tank. Care must be taken to avoid damage to the dispenser tank. Remove the water inlet pipe by twisting and pulling outward.
-
Page 32: Dispenser Motor
Note: The inlet pipe seal is diffi cult to install, place a Dispenser Motor small amount of liquid soap on the seal. Install the inlet pipe in alignment with the indentation at the The dispenser is operated by a 120 VAC, 60 HZ. bottom of the dispenser tank. -
Page 33: Water Level Control
Water Level Control Operation Water Level Control When the machine is empty, the foam switch is The water level control is installed on the cabinet closed and the motor circuit is disabled. When the right side top brace. The water level control is main wash cycle is activated, the fi... -
Page 34: Water Valve
The overfl ow water level is approximately 6 inches To remove the water level control: above the door opening. Overfl ow protection will Remove the top panel. (See Top Panel occur at this water level. Press down the single tab, then disconnect each Overfl... -
Page 35: Pump
To remove the water valve: Pump Disconnect the 2 blue wires and the orange wire The pump consists of a 120 VAC, 60-Hz motor, from the cold water (C) solenoid. impeller, impeller housing, and a removable strainer that helps prevent foreign objects from entering the Disconnect the 2 blue wires and the brown wire pump impeller and drain outlet. - Page 36 To remove the pump: Disconnect the 2 wires from the pump. Remove the service panel. Outlet Caution: Under normal conditions, approximately Hose 1 quart of water will drain out when the pump Pump Wires cleanout is removed. Drain Hose Place a shallow pan under the drain cleanout. Turn the pump cleanout counterclockwise approximately 2 turns, then pull outward.
- Page 37 Heating Element Specifi cations: Heater Assembly • 120 VAC • The heater assembly is located above the pump, • 970 Watts and is accessed from the front of the washer. • Approximately 8 Approximately 8 Amps Amps • The heater assembly consists of a heating Approximately 15 Ω...
- Page 38 To replace the thermistor: To reinstall the heater assembly: Push the thermistor into the rubber gasket until Slide the heater assembly into the tub opening fully seated. and inside the bracket attached to the outer tub. Note: Ensure heater assembly is fully seated in the tub.
- Page 39 To remove the inverter: Inverter Remove the service panel. (See Service Panel The inverter receives commands from the control board and controls motor operation. The inverter is Press the 4 tabs inward and remove the junction enclosed in a protective housing and is located on box cover.
-
Page 40: Motor Assembly
Press the lock tab and remove the motor ground Motor Assembly wire. The motor assembly consists of a reversible, Remove the plastic wire tie that holds the motor variable speed, 3-phase induction DC motor, and wiring in place. sensor. The motor drives the tub drive pulley with a 7-rib belt. - Page 41 On the inverter board, check for an approximate Remove the belt by turning the tub drive pulley resistance value of 6 ohms between any two of and rolling the belt off the pulley. the three terminals: A to B (Blue to white) - 6 Ω •...
-
Page 42: Door
Note: The threaded plate can fall out of the Door recessed slot in the motor mount. Ensure this plate is reinserted in the slot upon reassembly. To remove the door components: Note: When reinstalling bolt, apply Locktite (Part # Remove the 4 Phillips-head screws that hold the WX5X1005) to bolt threads. - Page 43 Note: Place the door on a soft protected fl at surface Remove the 5 Phillips-head screws from the so that the door glass faces up. (The door should protect cover and ring. rest on the handle side) Release the 2 tabs that hold the protect cover Remove the 8 Phillips-head screws that hold the and ring from the door frame.
-
Page 44: Door Hinge
Caution: When reinstalling the door hinge, be sure Door Hinge to use the short screw on the top. Damage to the To remove the door hinge: dispenser inlet may result if the wrong screw length is used. Remove the door. (See Door Push the tub assembly back while pressing the Grasp the hinge pin with a pair of pliers and pull... - Page 45 Note: When reinstalling the nozzle to the gasket, it Pull the tub gasket off the outer tub lip. may be helpful to remove the nozzle from the hose. Ensure that the washer is placed on the outside and that the nozzle is aligned with the indent on the inside of the gasket.
-
Page 46: Dampers
Remove the pin that secures each damper to Dampers the chassis by pressing the lock tab while pulling the pin out. Each of the 4 dampers are secured to the outer tub by a gray upper bushing that locks in a slot in the Note: It may be helpful to tap the pins out with a outer tub. -
Page 47: Wash Basket
Remove the 3 (10-mm) hex-head screws and Wash Basket washers that hold the top counterweight to the outer tub. Lift the counterweight. The wash basket is contained inside the outer tub. The wash basket is rotated by a belt driven tub drive Note: When reinstalling the top counterweight, use pulley. -
Page 48: Heater Assembly
Disconnect the heater assembly wires. Installing Front Counterweights Remove the plastic wire tie that holds the heater When installing the front counterweights, make assembly wiring and the tub ground wire to the sure the short bolts are used to attach the top outer tub. -
Page 49: Outer Tub Assembly And Suspension
Remove the tub vent hose from the left rear of Outer Tub Assembly and Suspension the outer tub: The outer tub assembly is constructed in two halves Note: The tub vent hose is diffi cult to remove. and contains the wash basket. The bearing and seal assembly is part of the outer tub rear half. - Page 50 Remove the Phillips-head screw that holds the Lift the outer tub assembly up, then release the tub ground wire. Remove the ground wire from 2 suspension springs from the slotted plastic the outer tub wire guides. inserts in the cabinet top braces. Carefully remove the tub assembly out the front of the cabinet.
-
Page 51: Inverter
Service Test Mode The washer control has a service test mode that can be utilized by the service technician in order to test critical components and to access error codes. This test mode will help the service technician to quickly identify failed or improper operation of washer components. - Page 52 T e s t Press Displays Exit Mode Start/ Display defi nes model id (01-03). Always displays"---" when control Press Power. Pause board replaced. Proper model must be set when control board Returns to t01 replaced. Rotate knob until desired selection is displayed (01-03), then press and hold Start/Pause until beep.
-
Page 53: Error Codes
Error Codes Error Code Description Problem Possible Cause/Action Fill timeout - No Fill time exceeds • Ensure manual water supply valves are fully open. 8 minutes. fi ll/slow fi ll • Inspect inlet hoses for kinks/obstructions. • Inspect water valve screens for restriction. •... - Page 54 Error Code Description Problem Possible Cause/Action DC Fault - Inverter failure. • Non-recoverable error. Inverter • Replace inverter control board. Drive motor - Load too • Check Motor - t10 tumble, t11 spin, T14 spin. overload current heavy. • Check mechanical faults - check belt, basket, bearing - rotate basket by hand.
- Page 55 Error Code Description Problem Possible Cause/Action Under volts after Initial minimum • Check Motor - t10 tumble, t11 spin, t14 spin. start voltage not • Power down (unplug) washer, wait 30 seconds and received retry - if reoccurs, replace inverter. (Note: Cannot - motor does occur with open winding.) not run.
- Page 56 Error Code Description Problem Possible Cause/Action Door unlock Switch failure • Power down (unplug) machine, wait 30 seconds and switch failure occurs during retry. unlock. • Check wiring and connections between door lock and main control. • Check door lock switches and solenoid. •...
- Page 57 Error Code Description Problem Possible Cause/Action Water Water • Check water temperature sensor - t07. temperature temperature • Check integrity of wiring and connections between sensor shorted sensor shorted. main control and water temperature sensor. • Check integrity of water temperature sensor - replace if necessary.
-
Page 58: Schematic
Schematic (Continued Next Page) – 58 –... - Page 59 – 59 –...
-
Page 60: Warranty For 2005 Product
Any part of the washer which fails due to a defect in materials or workmanship. During this From the date of the full one-year warranty, GE will also provide, free of charge, all labor and related service costs original purchase to replace the defective part. -
Page 61: Warranty For 2006 And Later Product
This warranty is extended to the original purchaser and any succeeding owner for products purchased for home use within the USA. If the product is located in an area where service by a GE Authorized Servicer is not available, you may be responsible for a trip charge or you may be required to bring the product to an Authorized GE Service location for service.