Table of Contents
Advertisement
Advertisement
Table of Contents

Related Manuals for Canon Canoscan CS8000F


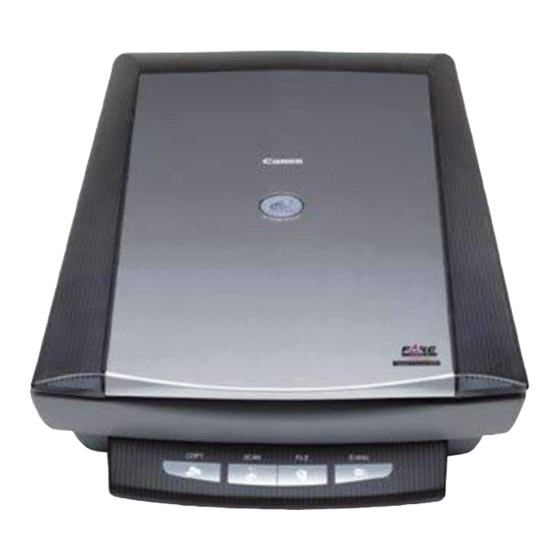
Summary of Contents for Canon Canoscan CS8000F
- Page 1 CS8000F SERVICE MANUAL Canon Copyright 2004, Canon U.S.A. This technical publication is the proprietary and confidential information of Canon U.S.A. which shall be retained for reference purposes by Authorized Service Facilities of Canon U.S.A. Its unauthorized use is prohibited.
- Page 2 SERVICE MANUAL REVISION 0 CanoScan 8000F 8131A001AA 8131A002AA 6683A003AA UYV000001- 8131A004AA 8131A005AA CAN/CLA 8131A006AA JY8-1321-00Z OCT. 2002 COPYRIGHT 2002 CANON INC. CANOSCAN 8000F REV.0 OCT. 2002 PRINTED IN JAPAN (IMPRIME AU JAPON)
- Page 3 COPYRIGHT © 2002 CANON INC. Printed in Japan Imprimè au Japon Use of this manual should be strictly supervised to avoid disclosure of confidential information. COPYRIGHT 2002 CANON INC. CANOSCAN 8000F REV.0 OCT. 2002 PRINTED IN JAPAN (IMPRIME AU JAPON)
-
Page 4: Table Of Contents
Document Glass Unit ... 3-3 C. Cautions When Attaching the C. Removing the Front Panel ... 3-6 Pulley Unit ......3-18 III. PCBs ......... 3-8 COPYRIGHT 2002 CANON INC. CANOSCAN 8000F REV.0 OCT. 2002 PRINTED IN JAPAN (IMPRIME AU JAPON) - Page 5 FIGURE 100 ......6-4 APPENDIX GENERAL CIRCUIT DIAGRAM ..A-1 III. CCD PCB CIRCUIT DIAGRAM ..A-9 II. MAIN PCB CIRCUIT DIAGRAM ... A-2 COPYRIGHT 2002 CANON INC. CANOSCAN 8000F REV.0 OCT. 2002 PRINTED IN JAPAN (IMPRIME AU JAPON)
- Page 6 B. Back View ......1-3 D. Scanning ......1-6 C. Rear View ......1-3 IV. CUSTOMER’S DAILY MAINTENANCE III. SETTING UP THE SCANNER ..1-4 ........... 1-9 COPYRIGHT 2002 CANON INC. CANOSCAN 8000F REV.0 OCT. 2002 PRINTED IN JAPAN (IMPRIME AU JAPON)
-
Page 7: Specifications
Dimensions : 284.0 (Width) x 498.0 (Depth) x 104.0 (Height) mm (Height to the document glass: 72.0mm) Weight : Approximately 4.6kg 1 - 1 COPYRIGHT 2002 CANON INC. CANOSCAN 8000F REV.0 OCT. 2002 PRINTED IN JAPAN (IMPRIME AU JAPON) -
Page 8: Parts Configuration
Film Adapter Unit r Document Glass t COPY Button y SCAN Button u FILE Button i E-MAIL Button o Alignment Mark Figure 1-1 1 - 2 COPYRIGHT 2002 CANON INC. CANOSCAN 8000F REV.0 OCT. 2002 PRINTED IN JAPAN (IMPRIME AU JAPON) -
Page 9: Back View
FAU Cable w FAU Connector e Power Connector r USB Connector Figure 1-2 C. Rear View q Lock Switch Figure 1-3 1 - 3 COPYRIGHT 2002 CANON INC. CANOSCAN 8000F REV.0 OCT. 2002 PRINTED IN JAPAN (IMPRIME AU JAPON) -
Page 10: Setting Up The Scanner
“unlock” mark to use the scanner. q Lock Switch Figure 1-4 Note : Ensure to lock the lock switch during transport. 1 - 4 COPYRIGHT 2002 CANON INC. CANOSCAN 8000F REV.0 OCT. 2002 PRINTED IN JAPAN (IMPRIME AU JAPON) -
Page 11: C. Connecting The Cables
3) Connect the AC adapter cable to the power connector on the scanner. q USB Connector w USB Cable e Power Connector r AC Adapter Figure 1-5 1 - 5 COPYRIGHT 2002 CANON INC. CANOSCAN 8000F REV.0 OCT. 2002 PRINTED IN JAPAN (IMPRIME AU JAPON) -
Page 12: D. Scanning
Figure 1-6 2) Close the document cover caring not to displace the original. 3) Send the scan command from the host computer. 1 - 6 COPYRIGHT 2002 CANON INC. CANOSCAN 8000F REV.0 OCT. 2002 PRINTED IN JAPAN (IMPRIME AU JAPON) - Page 13 Open the film holder on the film guide for film strips, insert the strip(s) face down and close the film holder. * Slides Place a slide face down in the film guide for slides. Figure 1-8 1 - 7 COPYRIGHT 2002 CANON INC. CANOSCAN 8000F REV.0 OCT. 2002 PRINTED IN JAPAN (IMPRIME AU JAPON)
- Page 14 3) Place the loaded film guide by aligning its leading tab with FILM mark on the document glass and close the document cover. q FILM Mark Figure 1-9 4) Send the scan command from the host computer. 1 - 8 COPYRIGHT 2002 CANON INC. CANOSCAN 8000F REV.0 OCT. 2002 PRINTED IN JAPAN (IMPRIME AU JAPON)
- Page 15 2) Wipe a dirt off the document glass with a soft clean cloth dampened with water and well wrung. 3) Thoroughly wipe water off the document glass with a dry cloth. 1 - 9 COPYRIGHT 2002 CANON INC. CANOSCAN 8000F REV.0 OCT. 2002 PRINTED IN JAPAN (IMPRIME AU JAPON)
- Page 16 C. FARE (Film Automatic Retouching C. Interface Connection ..2-18 and Enhancement) ....2-9 VI. POWER SUPPLY ....... 2-19 D. Motor Control Circuit ..2-11 COPYRIGHT 2002 CANON INC. CANOSCAN 8000F REV.0 OCT. 2002 PRINTED IN JAPAN (IMPRIME AU JAPON)
-
Page 17: Basic Operation
IR LED Scanning Lamp Scanning Unit Lens Optical System FARE Unit Drive Motor Host Computer Control Image Processing System System Figure 2-1 2 - 1 COPYRIGHT 2002 CANON INC. CANOSCAN 8000F REV.0 OCT. 2002 PRINTED IN JAPAN (IMPRIME AU JAPON) -
Page 18: Electrical System
Button PCB Inverter Scanner Button ASIC Power LED DRAM Analog IC CCD PCB Drive Motor Motor Driver FARE Unit Figure 2-2 2 - 2 COPYRIGHT 2002 CANON INC. CANOSCAN 8000F REV.0 OCT. 2002 PRINTED IN JAPAN (IMPRIME AU JAPON) - Page 19 4) Motor Driver Supplies power to the drive motor. 5) USB Controller Controls data transfer between the host computer and ASIC. 2 - 3 COPYRIGHT 2002 CANON INC. CANOSCAN 8000F REV.0 OCT. 2002 PRINTED IN JAPAN (IMPRIME AU JAPON)
-
Page 20: Main Pcb Input And Output
"H" when scanning unit is in Home Position home position Sensor JP8-1 OUT1B OUT1A Drive motor Drive motor drive signal OUT2A OUT2B Figure 2-3 2 - 4 COPYRIGHT 2002 CANON INC. CANOSCAN 8000F REV.0 OCT. 2002 PRINTED IN JAPAN (IMPRIME AU JAPON) -
Page 21: Document Scanning Sequence
Table 2-1 2 - 5 COPYRIGHT 2002 CANON INC. CANOSCAN 8000F REV.0 OCT. 2002 PRINTED IN JAPAN (IMPRIME AU JAPON) -
Page 22: Optical System
When using FARE function, infrared LED transmits a film after FAU lamp does, and FARE unit operates to scan the film. Scanning Lamp Lens FARE Unit Figure 2-5 2 - 6 COPYRIGHT 2002 CANON INC. CANOSCAN 8000F REV.0 OCT. 2002 PRINTED IN JAPAN (IMPRIME AU JAPON) -
Page 23: Lamp Lighting Circuit
Document Glass Scanning Lamp Lens FARE Unit Scanning Unit Main PCB LAMP Inverter Host ASIC Computer Figure 2-6 2 - 7 COPYRIGHT 2002 CANON INC. CANOSCAN 8000F REV.0 OCT. 2002 PRINTED IN JAPAN (IMPRIME AU JAPON) - Page 24 1st Diffusive Film Brightness Enhancement Film 2nd Diffusive Film Transparent Plate Scanner IRLED Scanning Unit ASIC Host Computer Main PCB Figure 2-7 2 - 8 COPYRIGHT 2002 CANON INC. CANOSCAN 8000F REV.0 OCT. 2002 PRINTED IN JAPAN (IMPRIME AU JAPON)
- Page 25 Accordingly, the image without scratches and dirt is reproduced. (FAU LAMP) (IR LED) Light Source Film Lens Scanned Image Figure 2-8 2 - 9 COPYRIGHT 2002 CANON INC. CANOSCAN 8000F REV.0 OCT. 2002 PRINTED IN JAPAN (IMPRIME AU JAPON)
- Page 26 Finally, the FAU lamp and infrared LED can scan a properly focused film. FAU Lamp IR LED IR LED Light Source Film Lens Refraction Glass (FARE Unit) Figure 2-9-1 Figure 2-9-2 Figure 2-9-3 2 - 10 COPYRIGHT 2002 CANON INC. CANOSCAN 8000F REV.0 OCT. 2002 PRINTED IN JAPAN (IMPRIME AU JAPON)
-
Page 27: Motor Control Circuit
Host Computer Control Program Main PCB OUT1B JP8-1 OUT1A Motor ASIC Drive Motor OUT2A Driver OUT2B Figure 2-10 2 - 11 COPYRIGHT 2002 CANON INC. CANOSCAN 8000F REV.0 OCT. 2002 PRINTED IN JAPAN (IMPRIME AU JAPON) -
Page 28: Image Processing
6-line CCD has two rows of staggered photosensitive devices for RGB each. The 6-line CCD therefore can scan at 1200dpi x 2 = 2400dpi. Figure 2-12 2 - 12 COPYRIGHT 2002 CANON INC. CANOSCAN 8000F REV.0 OCT. 2002 PRINTED IN JAPAN (IMPRIME AU JAPON) - Page 29 Image Data A/D Converter Blue Image Signal CCD_B Green Image Signal CCD_G Red Image Signal CCD_R Reference Voltage Vref Output Figure 2-14 2 - 13 COPYRIGHT 2002 CANON INC. CANOSCAN 8000F REV.0 OCT. 2002 PRINTED IN JAPAN (IMPRIME AU JAPON)
- Page 30 When converting resolution and scaling, the image quality tends to be reduced. To prevent the image quality reduction, filter processing is performed according to the resolution. Filter processing includes interpolation processing and averaging. 2 - 14 COPYRIGHT 2002 CANON INC. CANOSCAN 8000F REV.0 OCT. 2002 PRINTED IN JAPAN (IMPRIME AU JAPON)
- Page 31 Interpolation processing (A+B)/2 (B+C)/2 (C+D)/2 Image Density 1 pixel Interpolation processing Image Density 1 pixel Figure 2-15 2 - 15 COPYRIGHT 2002 CANON INC. CANOSCAN 8000F REV.0 OCT. 2002 PRINTED IN JAPAN (IMPRIME AU JAPON)
- Page 32 Output image data Thinned data reading data Output image data Averaged data=(A+B+C+D)/4 Figure 2-16 2 - 16 COPYRIGHT 2002 CANON INC. CANOSCAN 8000F REV.0 OCT. 2002 PRINTED IN JAPAN (IMPRIME AU JAPON)
-
Page 33: Control System
ASIC in the main PCB, the ASIC controls the whole electrical circuits and image processing of the scanner. Main PCB consists of ASIC, DRAM, USB controller, analog I/C and motor driver. 2 - 17 COPYRIGHT 2002 CANON INC. CANOSCAN 8000F REV.0 OCT. 2002 PRINTED IN JAPAN (IMPRIME AU JAPON) -
Page 34: Interface
USB connector has A plug for connecting to upper layer and B plug for connecting to lower layer. A Plug B Plug To Host Computer To Scanner Figure 2-18 2 - 18 COPYRIGHT 2002 CANON INC. CANOSCAN 8000F REV.0 OCT. 2002 PRINTED IN JAPAN (IMPRIME AU JAPON) -
Page 35: Power Supply
16.8V to 12V 12V to16.8V Linear Linear Regulator Regulator Drive Motor Driver Motor Inverter Scanning Lamp FAU Lamp Inverter IR LED Figure 2-19 2 - 19 COPYRIGHT 2002 CANON INC. CANOSCAN 8000F REV.0 OCT. 2002 PRINTED IN JAPAN (IMPRIME AU JAPON) - Page 36 Motor Unit ......3-16 C. Removing the Front Panel ... 3-6 C. Cautions When Attaching the III. PCBs ......... 3-8 Pulley Unit ......3-18 COPYRIGHT 2002 CANON INC. CANOSCAN 8000F REV.0 OCT. 2002 PRINTED IN JAPAN (IMPRIME AU JAPON)
-
Page 37: Parts Replacement
* Attach the parts in reverse order of the removing steps, unless otherwise specified. * After replacement, check the quantity and shape of the replaced parts. 3 - 1 COPYRIGHT 2002 CANON INC. CANOSCAN 8000F REV.0 OCT. 2002 PRINTED IN JAPAN (IMPRIME AU JAPON) -
Page 38: Externals
2) Lift the film adapter unit as shown in Figure 3-1 to remove it. q FAU Cable w Film Adapter Unit Figure 3-1 3 - 2 COPYRIGHT 2002 CANON INC. CANOSCAN 8000F REV.0 OCT. 2002 PRINTED IN JAPAN (IMPRIME AU JAPON) -
Page 39: Removing The Top Cover And
B. Removing the Top Cover and Document Glass Unit 1) Turn the scanner over and remove two screws. q Screw Figure 3-2 3 - 3 COPYRIGHT 2002 CANON INC. CANOSCAN 8000F REV.0 OCT. 2002 PRINTED IN JAPAN (IMPRIME AU JAPON) - Page 40 4) Rotate the top cover backward and remove the hook on the back to remove the top cover. q Screw w Top Cover e Hook (on the back) r Hooks (on both sides) Figure 3-3 3 - 4 COPYRIGHT 2002 CANON INC. CANOSCAN 8000F REV.0 OCT. 2002 PRINTED IN JAPAN (IMPRIME AU JAPON)
-
Page 41: Document Glass Unit
CHAPTER 3 5) Slide the document glass unit backward and lift to remove it. q Document Glass Unit Figure 3-4 3 - 5 COPYRIGHT 2002 CANON INC. CANOSCAN 8000F REV.0 OCT. 2002 PRINTED IN JAPAN (IMPRIME AU JAPON) -
Page 42: Removing The Front Panel
C. Removing the Front Panel 1) Turn the scanner over and remove two screws from the rear of the front panel. q Screw Figure 3-5 3 - 6 COPYRIGHT 2002 CANON INC. CANOSCAN 8000F REV.0 OCT. 2002 PRINTED IN JAPAN (IMPRIME AU JAPON) - Page 43 3) Press two hooks on both sides of the front panel inward to remove the front panel. q Button Cable w Front Panel Figure 3-6 4) Disconnect the button cable. 3 - 7 COPYRIGHT 2002 CANON INC. CANOSCAN 8000F REV.0 OCT. 2002 PRINTED IN JAPAN (IMPRIME AU JAPON)
-
Page 44: Removing The Main Pcb
Figure 3-7 Note: Do not lift the main PCB too much because the motor unit cable and button cable are connected. 3 - 8 COPYRIGHT 2002 CANON INC. CANOSCAN 8000F REV.0 OCT. 2002 PRINTED IN JAPAN (IMPRIME AU JAPON) -
Page 45: Removing The Button Pcb
1) Remove the film adapter unit, top cover, document glasss unit, and front panel. 2) Remove five screws from the button PCB to remove it. 3 - 9 COPYRIGHT 2002 CANON INC. CANOSCAN 8000F REV.0 OCT. 2002 PRINTED IN JAPAN (IMPRIME AU JAPON) -
Page 46: Optical System
Note: Lens and mirrors of the scanning unit are factory adjusted. Do not touch the lamp, mirrors, and CCD PCB (shaded area) of the scanning unit. Figure 3-9 3 - 10 COPYRIGHT 2002 CANON INC. CANOSCAN 8000F REV.0 OCT. 2002 PRINTED IN JAPAN (IMPRIME AU JAPON) - Page 47 4) Remove four screws from the motor cable cover to remove it. q Screw w Motor Cable Cover Figure 3-10 3 - 11 COPYRIGHT 2002 CANON INC. CANOSCAN 8000F REV.0 OCT. 2002 PRINTED IN JAPAN (IMPRIME AU JAPON)
-
Page 48: Motor Unit
6) Remove two screws from the motor unit in order of d-e in Figure 3-11 to remove it. q Pulley Unit w Motor Unit Figure 3-11 3 - 12 COPYRIGHT 2002 CANON INC. CANOSCAN 8000F REV.0 OCT. 2002 PRINTED IN JAPAN (IMPRIME AU JAPON) - Page 49 CHAPTER 3 7) Push the sliding rod backward and displace the front part to the side. Figure 3-12 3 - 13 COPYRIGHT 2002 CANON INC. CANOSCAN 8000F REV.0 OCT. 2002 PRINTED IN JAPAN (IMPRIME AU JAPON)
- Page 50 Sliding Rod Figure 3-13 Note: When lifting the scanning unit, displace the hook under the rail. q Rail w Hook Figure 3-14 3 - 14 COPYRIGHT 2002 CANON INC. CANOSCAN 8000F REV.0 OCT. 2002 PRINTED IN JAPAN (IMPRIME AU JAPON)
- Page 51 10) Remove a screw and separate the sliding rod from the motor unit. q Sliding Rod w Screw e Motor Unit Figure 3-15 3 - 15 COPYRIGHT 2002 CANON INC. CANOSCAN 8000F REV.0 OCT. 2002 PRINTED IN JAPAN (IMPRIME AU JAPON)
- Page 52 1) Apply grease (EM-50L) to the shaft of the gear when attaching the motor unit. Figure 3-16 2) Ground the motor unit cable as shown in Figure 3-17. Figure 3-17 3 - 16 COPYRIGHT 2002 CANON INC. CANOSCAN 8000F REV.0 OCT. 2002 PRINTED IN JAPAN (IMPRIME AU JAPON)
- Page 53 3) When fixing the motor unit to the bottom cover with two screws, make sure the motor unit is positioned by two embosses on the bottom cover. q Emboss Figure 3-18 3 - 17 COPYRIGHT 2002 CANON INC. CANOSCAN 8000F REV.0 OCT. 2002 PRINTED IN JAPAN (IMPRIME AU JAPON)
- Page 54 C. Cautions When Attaching the Pulley Unit 1) Apply grease (EM-50L) to the shaft of the idle pulley when attaching the pulley unit. Figure 3-19 3 - 18 COPYRIGHT 2002 CANON INC. CANOSCAN 8000F REV.0 OCT. 2002 PRINTED IN JAPAN (IMPRIME AU JAPON)
-
Page 55: Periodical Replacement
III. PERIODICAL SERVICING ... 4-1 IV. SPECIAL TOOLS ......4-1 PARTS ........4-1 II. CONSUMABLE PARTS SOLVENTS AND LUBRICANTS ..4-1 DURABILITY ......4-1 COPYRIGHT 2002 CANON INC. CANOSCAN 8000F REV.0 OCT. 2002 PRINTED IN JAPAN (IMPRIME AU JAPON) -
Page 56: Durability
Tool No. : HY9-0007 Usage : To be applied to the shaft of the gear of the motor unit and pulley unit. 4 - 1 COPYRIGHT 2002 CANON INC. CANOSCAN 8000F REV.0 OCT. 2002 PRINTED IN JAPAN (IMPRIME AU JAPON) - Page 57 D. Poor Image Quality ....5-5 II. TROUBLESHOOTING FLOWCHART E. Acoustic Noise ..... 5-5 ........... 5-2 IV. CANON SCANNER TEST ..... 5-6 A. Power LED Failure ....5-2 A. Outline ........ 5-6 B. Communication Failure ..5-3 B. Operating Environment ..5-6 III.
-
Page 58: Introduction
Moving a scanner from a cold place to a warm place can cause condensation on the metal parts, resulting in a faulty operation. 5 - 1 COPYRIGHT 2002 CANON INC. CANOSCAN 8000F REV.0 OCT. 2002 PRINTED IN JAPAN (IMPRIME AU JAPON) -
Page 59: Troubleshooting Flowchart
A. Power LED Failure Unlock Lock Switch Connect AC Adapter Power LED is ON ? Table 5-1 Connect USB cable Figure 5-2 Figure 5-1 5 - 2 COPYRIGHT 2002 CANON INC. CANOSCAN 8000F REV.0 OCT. 2002 PRINTED IN JAPAN (IMPRIME AU JAPON) -
Page 60: Communication Failure
Scanning Unit Table 5-3 failed to move ? Poor Table 5-4 image quality ? Acoustic noise Table 5-5 originated ? Figure 5-2 5 - 3 COPYRIGHT 2002 CANON INC. CANOSCAN 8000F REV.0 OCT. 2002 PRINTED IN JAPAN (IMPRIME AU JAPON) -
Page 61: Communication Failure
Replace the main PCB Scanner communication failure Main PCB Trial replacement Replace the scanning unit Scanning unit failure Scanning unit Trial replacement Table 5-2 5 - 4 COPYRIGHT 2002 CANON INC. CANOSCAN 8000F REV.0 OCT. 2002 PRINTED IN JAPAN (IMPRIME AU JAPON) -
Page 62: Scanning Unit Movement Failure
Dirt on sliding rod Visual check Document glass Replace the document glass Reference sheet is Trial replacement unit unit improperly positioned Table 5-5 5 - 5 COPYRIGHT 2002 CANON INC. CANOSCAN 8000F REV.0 OCT. 2002 PRINTED IN JAPAN (IMPRIME AU JAPON) -
Page 63: Canon Scanner Test
IV. CANON SCANNER TEST A. Outline Canon Scanner Test is a utility software to check if faulty operation of CanoScan 8000F is due to the hardware or the communication with the host computer. Windows : scantest.exe (English or Japanese is switched according to the language to be used in Windows.) -
Page 64: Functions
35mm sleeve negative film is scanned by FAU lamp and IR LED with FARE function, then saved as two image files in the folder of Canon Scanner Test. The film of 1 frame at upper right in the sleeve film holder is scanned at 1200 dpi fixed. -
Page 65: Functions Descriptions
: Product name of the scanner "CanoScan 8000F" * USB Version : USB version (USB1.1/USB2.0) that the scanner is operating with. 5 - 8 COPYRIGHT 2002 CANON INC. CANOSCAN 8000F REV.0 OCT. 2002 PRINTED IN JAPAN (IMPRIME AU JAPON) - Page 66 : Manufacturer name of the scanner "CANON" * Product ID : "IX-24035H"(CanoScan 8000F) * ROM Version : Firmware version of the control program of the scanner 5 - 9 COPYRIGHT 2002 CANON INC. CANOSCAN 8000F REV.0 OCT. 2002 PRINTED IN JAPAN (IMPRIME AU JAPON)
- Page 67 Select “Scanner self test” from the “Function” menu to display as shown in Figure 5-6 (Windows), Figure 5-7 (Macintosh). Figure 5-6 Figure 5-7 5 - 10 COPYRIGHT 2002 CANON INC. CANOSCAN 8000F REV.0 OCT. 2002 PRINTED IN JAPAN (IMPRIME AU JAPON)
- Page 68 Figure 5-8 (Windows), Figure 5-9 (Macintosh). Figure 5-8 Figure 5-9 When an error occurs, refer to “E. Error Message” to take a corrective action. 5 - 11 COPYRIGHT 2002 CANON INC. CANOSCAN 8000F REV.0 OCT. 2002 PRINTED IN JAPAN (IMPRIME AU JAPON)
- Page 69 Select “Scan” from the “Function” menu to display as shown in Figure 5-10 (Windows), Figure 5-11 (Macintosh). Figure 5-10 Figure 5-11 5 - 12 COPYRIGHT 2002 CANON INC. CANOSCAN 8000F REV.0 OCT. 2002 PRINTED IN JAPAN (IMPRIME AU JAPON)
- Page 70 When “Save to TIFF file” is selected for handling an scanned image, the file of “img0.tif” is saved in the folder of the Canon Scanner Test. When scan count is set at 2 or more, the file of “img0.tif”, “img1.tif”, “img2.tif” ... are saved.
- Page 71 Select “Film Scan” from the “Function” menu to display as shown in Figure 5-12 (Windows), Figure 5-13 (Macintosh). Figure 5-12 Figure 5-13 5 - 14 COPYRIGHT 2002 CANON INC. CANOSCAN 8000F REV.0 OCT. 2002 PRINTED IN JAPAN (IMPRIME AU JAPON)
- Page 72 FAU lamp and IR LED are saved. "Color24_0.tif" and "IR_0.tif" are saved in the folder of the Canon Scanner Test. IR.tif is an image of only dirt or dust on the film when FARE function is used. If FARE function does not normally work, IR.tif image appears all black. When scan count is set at 2 or more, the file of Color24_0.tif/IR_0.tif, Color24_1.tif/IR_1.tif...
-
Page 73: Error Message
Cause : Canon Scanner Test is started from a CD-ROM or write-protected HDD. Corrective Action : Copy the Canon Scanner Test on a writable HDD to use. 4. “Scanner has problem.” “Failed to execute scanner self test.”... -
Page 74: Parts Catalog
CHAPTER 6 PARTS CATALOG FIGURE 001 ......6-2 FIGURE 100 ......6-4 COPYRIGHT 2002 CANON INC. CANOSCAN 8000F REV.0 OCT. 2002 PRINTED IN JAPAN (IMPRIME AU JAPON) - Page 75 CanoScan 8000F 6 - 1 COPYRIGHT 2002 CANON INC. CANOSCAN 8000F REV.0 OCT. 2002 PRINTED IN JAPAN (IMPRIME AU JAPON)
- Page 76 ACCESSORY FIGURE 001 6 - 2 COPYRIGHT 2002 CANON INC. CANOSCAN 8000F REV.0 OCT. 2002 PRINTED IN JAPAN (IMPRIME AU JAPON)
- Page 77 KEY NO. 001-01 FE2-0017-000 CABLE, USB JAPAN, USA,CAN FE2-0018-000 ADAPTOR, AC FE2-0019-000 ADAPTOR, AC UK,HK FE2-0020-000 ADAPTOR, AC FE2-0021-000 ADAPTOR, AC 6 - 3 COPYRIGHT 2002 CANON INC. CANOSCAN 8000F REV.0 OCT. 2002 PRINTED IN JAPAN (IMPRIME AU JAPON)