
Related Manuals for Siemens ULTRASENSE WTXD5300US


Summary of Contents for Siemens ULTRASENSE WTXD5300US
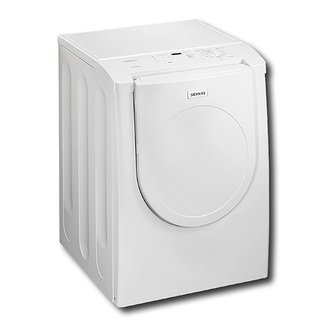
- Page 1 en Operating, Care and Installation Instructions Notice d'utilisation, de maintenance et d'installation es Operación, cuidado e instrucciones para la instalación...
- Page 4 Definitions DANGER DANGER Information WARNING WARNING CAUTION CAUTION...
-
Page 5: Important Safety Instructions
IMPORTANT SAFETY INSTRUCTIONS DANGER... - Page 6 GROUNDING WARNING INSTRUCTIONS For U.S.A. KEEP THESE INSTRUCTIONS FOR Notes: FUTURE REFERENCE. For CANADA SAVE THESE INSTRUCTIONS...
-
Page 7: Installation Instructions
INSTALLATION INSTRUCTIONS Introduction Information Before installing concerning waste the dryer disposal Unpacking the appliance Disposal of the packaging WARNING DANGER CAUTION U.S.A. Canada Disposal of the old appliance DANGER Supplied components For U.S.A. CAUTION CAUTION... -
Page 8: Installation Location
Installation location WARNING Dimension Weight 27.0" (686 mm) 125 lbs (56 k ) (56 kg) 31.8" (808 mm) with 37.2" (945 mm) packaging packaging 19.7" (500 mm)/ 143 lbs angle 170 - 180° (64 kg) Closet Sides 0" (O mm) 12"... -
Page 9: Electrical Connection
Electrical connection WARNING WARNING For CANADA Connecting 4 wire power supply cord For U.S.A. 1 - terminal block 2 - grounding strap 3 - Angle bracket for strain relief clamp... -
Page 10: Exhaust Air Connection
Exhaust air connection WARNING Additional grounding procedure Connecting 3 wire power supply cord Grounding instruction WARNING Exhaust air outlet on the dryer... - Page 11 Exhaust air outlet on the rear of the appliance (standard) Exhaust air outlet on the side (optional) Exhaust air outlet on the underside of the appliance (optional) Exhaust vent hood Ductwork Number of Rigid Duct Flexible Duct 90° Turns or Elbows 56 ft.
- Page 12 Accessories Dryer rack Left hinge kit WZ20360 Side exhaust kit WZ20390 WZ20365 Note: Bottom exhaust kit WZ20370 Note:...
-
Page 13: Installation
Installation Check list before step by step using the dryer Preparing to transport the dryer step by step CAUTION... -
Page 14: Operating Instructions
OPERATING INSTRUCTIONS Your new dryer... - Page 15 Panel start/stop button Buttons for options delicates signal Display Indicator light (LED) Program selector Indicator lights (LED)
-
Page 16: Summary Of Instructions
Selecting a program Using the dryer rack Summary of (Option, see page 11) instructions WARNING Choose an option... Preparing the dryer ...and start the dryer. Switch off the dryer... -
Page 17: Safety Information
Before switching on the dryer Safety Protection information of the environment DANGER Tips on saving energy Using the dryer Drain the laundry thoroughly! DANGER EXPLOSION HAZARD! Risk of explosion! Use optimum load! Protecting the dryer Clean filter! Risk of dryer tipping over! Ventilate the room! Do not dry unsuitable materials! - Page 18 Before using Temporary Laundry the dryer for disconnection Identification the first time of the dryer of fabrics Drying tips...
-
Page 19: Program Selection
Time programs Indicator of program sequence Program selection Automatic programs Options Regular/Cotton delicates permanent press signal signal Type start Short tone damp dry Sequence of medium length tones Sequence of short tones Mal operation Sequence of long tones Warning of Sequence of long tones malfunction... -
Page 20: Program Selection Table
Program selection table Automatic programs For Cottons and coloreds made of cotton or linen. regular/cotton" Press delicates" button for temperature sensitive textiles. Automatic program For laundry, Bed linen, table linen, towels which is to be ironed damp dry Bed linen and table linen, towels, T shirts, sports shirts, overalls T shirts, sports shirts, dresses, trousers, overalls, underwear Terry towels, kitchen towels, hand towels, bed linen, underwear, cotton which is not to be ironed... -
Page 21: Operation
Operation Using the dryer start damp dry... -
Page 22: Using The Dryer Rack
Using the dryer rack (Option, see page 11) CAUTION Inserting the dryer rack Drying laundry items on the dryer rack... - Page 23 Drying shoes on the dryer rack: Choose a time program Laundry type Required drying time Thin woolen pullover 80 min. (approx. 0,8lbs/350 g) (e.g. 60 + 20 min) Thick woolen pullover 90-120 min. (approx. 1,9lbs/850 g) (e.g. 60 + 40 min) Skirt 60-90 min.
-
Page 24: Cleaning And Care
Cleaning the moisture sensor Cleaning and care Cleaning the dryer DANGER RISK OF EXPLOSION! CAUTION Cleaning the bearing shield Cleaning the lint filter Cleaning the exhaust duct CAUTION... -
Page 25: Change The Light Bulb
Change the light bulb Troubleshooting DANGER Problem Possible cause Remedial action E:01 E:03... - Page 26 Problem Possible cause Remedial action E:03 SERVICE and REPAIR CAUTION CAUTION 1 866 447 4363.
-
Page 27: Statement Of Warranties Siemens Clothes Dryers
LENGTH OF WARRANTY SCOPE OF WARRANTY 1 Year Full Limited Warranty Siemens will repair or replace, free of charge, any component part that is From Date of Installation* proven defective under conditions of normal home use, labor and shipping costs included. Warranty repair service must be performed by an authorized Siemens Service Center. - Page 29 Définitions DANGER DANGER Information Avertisse ment AVERTISSEMENT Prudence PRUDENCE...
-
Page 30: Instructions De Sécurité Importantes
INSTRUCTIONS DE SÉCURITÉ IMPORTANTES DANGER... -
Page 32: Instructions D'installation
Instructions d'installation Introduction Informations sur Avant d'installer la mise au rebut le sèche linge Mise au rebut de l'emballage Déballage de l'appareil Avertisse DANGER ment Prudence Etats Unis Mise au rebut de l'ancien appareil DANGER Accessoires fournis Canada Pour les Etats Unis Prudence Prudence... - Page 33 Lieu d'installation Avertisse ment Dimensions Poids 27.0" (686 mm) 125 lbs (56 k ) (56 kg) 31,8" (808 mm) avec 37,2" (945 mm) l'emballage l emballage 19,7" (500 mm) 143 lbs angle 170 180° (64 kg) Placard Côtés 0" (0 mm) Dessus 12"...
-
Page 34: Branchement Électrique
Branchement Pour les Etats Unis Branchement d'un cordon d'alimentation électrique à 4 fils électrique Avertisse ment Avertisse 1 - Boîtier à bornes 2 - Bande de raccordement à la terre ment 3 - Fixation destinée au frein à câble Pour le CANADA... - Page 35 Branchement d'un cordon Procédure additionnelle de d'alimentation électrique à 3 fils raccordement à la terre Instructions de raccordement à la terre Avertisse ment...
-
Page 36: Raccordement Du Conduit D'échappement
Raccordement du Conduit d'échappement conduit d'échappement Avertisse ment Orifice de sortie d'air sur le sèche linge Orifice de sortie d'air situé à l'arrière de l'appareil (standard) Orifice de sortie d'air sur le côté (option) Orifice de sortie d'air sur la face inférieure (option) - Page 37 Hotte d'échappement Nombre de Conduit Conduit virages ou rigide flexible coudes à 90° 66 ft. 45 ft. (2011 cm) (1372 cm) 56 ft. 36 ft. (1707 cm) (1097 cm) 48 ft. 29 ft. (1463 cm) (884 cm) 39 ft. 22 ft. (1189 cm) (671 cm) 30 ft.
- Page 38 Accessoires Tiroir de séchage Charnières gauches en kit WZ20360 Kit de sortie par le côté WZ20390 WZ20365 Remarque : Kit de sortie par le bas. WZ20370 Remarque :...
- Page 39 Installation pas à pas Check list préalable à l'emploi du sèche linge Préparation pas à pas au transport du sèche linge Prudence...
-
Page 40: Instructions D'utilisation
INSTRUCTIONS D'UTILISATION Présentation de votre nouveau sèche linge. -
Page 41: Le Bandeau De Commande
Le bandeau de commande Bouton start/Pause Boutons des options delicates signal Ecran Voyant indicateur (LED) Programmateur Voyant indicateur (LED) -
Page 42: Résumé Des Instructions
Sélection d'un Utilisation du tiroir de programme séchage Résumé des (Accessoire, voir page 37) instructions Avertisse ment Choisir une option... Préparation du sèche linge ...et faire démarrer le sèche linge. Eteindre le sèche linge. - Page 44 Avant d'utiliser Débranche le sèche linge ment pour la temporaire du première fois sèche linge Conseils pour le séchage Linge Détermination de la nature du tissu...
-
Page 45: Sélection Du Programme
Sélection du programme Programmes Programmes assortis automatiques d'une durée Linge normal/Coton Linge infroissable... -
Page 46: Indicateur De Déroulement Du Programme
Options Indicateur de déroulement du programme delicates signal signal Type Départ Signal bref Humide Séquence de tons d'une longueur moyenne Séquence de tons courts Dysfonctionne Séquence de tons ment longs Alarme de Séquence de tons dérangement longs... - Page 47 Tableau de sélection des programmes Programmes automatiques regular/cottons Pour le linge, damp dry regular dry very dry extra dry permanent press Pour le linge, damp dry regular dry very dry Programmes assortis d'une durée time dry 20 min, 40 min, 60 min 20 min, 40 min, 60 min air fluff...
- Page 48 Utilisation Utilisation du sèche linge start damp...
-
Page 49: Utilisation Du Tiroir De Séchage
Insertion du tiroir de séchage Utilisation du tiroir de séchage (Accessoire, voir page 37) Prudence... - Page 50 Sécher des pièces de linge sur le Type de linge Durée de séchage tiroir Pullover en laine mince 80 min. (approx. 0,8 lbs/350 g) (par ex. 60 + 20 mn) Pullover en laine épais 90 120 min. (approx. 1,9 lbs/850 g) (par ex.
-
Page 51: Nettoyage Et Entretien
Nettoyage et entretien Nettoyage du Nettoyage du conduit sèche linge d'échappement DANGER Prudence RISQUE D'EXPLOSION ! Prudence Nettoyage des capteurs d'humidité Nettoyage du filtre à peluches... -
Page 52: Dérangement Et Remèdes
Nettoyage de Changer l'ampoule de la flasque l'éclairage Dérangement et remèdes DANGER Problème Cause possible Remède... - Page 53 Problème Cause possible Remède E:01 E:03...
-
Page 54: Service Et Réparations
SERVICE ET RÉPARATIONS Prudence PRUDENCE 1 866 447 4363. -
Page 55: Exclusions De Garantie
à compter de la date d'installation* défaillante dans les conditions normales d'utilisation domestique, frais de main d' uvre et d'expédition inclus. Les réparations sous garantie devront être effectuées par un Centre Siemens du Service Après Vente (SAV). 2 ans de garantie limitée Siemens fournira gratuitement les pièces de rechange de toute pièce... - Page 57 Definiciones Peligro PELIGRO Advertencia ADVERTENCIA Información Cuidado CUIDADO...
-
Page 58: Instrucciones Importantes De Seguridad
INSTRUCCIONES IMPORTANTES DE SEGURIDAD Peligro... -
Page 59: Instrucciones Para La Puesta A Tierra
En Estados Unidos Advertencia INSTRUCCIONES PARA LA PUESTA A TIERRA Para CANADA Notas: CONSERVE ESTAS INSTRUCCIONES PARA CONSULTAS POSTERIORES. CONSERVE ESTAS INSTRUCCIONES... -
Page 60: Instrucciones Para La Instalación
INSTRUCCIONES PARA LA INSTALACIÓN Introducción Antes de instalar el secador Desembalaje del electrodoméstico Desecho de electrodomésticos viejos Advertencia Peligro Cuidado Estados Unidos Canadá Volumen de entrega Información sobre En Estados Unidos eliminación de Cuidado residuos Eliminación del embalaje Peligro Cuidado... - Page 61 Emplazamiento Advertencia Medidas Peso 27,0" (686 mm) 125 lbs (56 k ) (56 kg) 31,8" (808 mm) 37,2" (954 mm) embalaje embalaje 19,7" (500 mm)/ 143 lbs ángulo 170 - 180° (64 kg) Retrete A los lados 0" (0 mm) Arriba 12"...
-
Page 62: Conexión Eléctrica
Conexión eléctrica En Estados Unidos Conexión a través de un cable de 4 conductores Advertencia Advertencia Para CANADA 1 - Bornera 2 - Rabillo de conexión a tierra 3 - Brida en ángulo con descarga de tracción... - Page 63 Conexión mediante un cable de alimentación de tres conductores Procedimientos de puesta a tierra adicionales Instrucciones para la conexión a tierra Advertencia...
-
Page 64: Conexión Del Tubo De Aire De Salida
Conexión del tubo de Tubería aire de salida Advertencia Salida de aire en la parte posterior del electrodoméstico (estándar) Salida de aire en el costado del electrodoméstico (opción) Salida de aire en la parte inferior del electrodoméstico (opción) Salida de aire del secador... - Page 65 Juego de salida inferior Número de Tubo Tubo codos de rígido flexible 90 ° WZ20370 66 ft. 45 ft. Nota: (2011 cm) (1372 cm) 56 ft. 36 ft. Partes necesarias (1707 cm) (1097 cm) 48 ft. 29 ft. Canastilla para secar (1463 cm) (884 cm) 39 ft.
- Page 66 La instalación paso a paso Preparar el secador para el transporte, paso a paso Cuidado Lista a controlar antes de usar el secador...
-
Page 67: Instrucciones De Funcionamiento
INSTRUCCIONES DE FUNCIONAMIENTO Su nuevo secador... -
Page 68: Panel De Manejo
Panel de manejo Botón start/stop Botones para seleccionar las opciones delicates (Ropa fina) signal (Señal) Display Luz indicadora (LED) Selector de programa Luces indicadoras... - Page 69 Selección de un Uso de la canastilla programa Resumen de (Accesorio, ver página 64) instrucciones Advertencia Seleccionar una opción... Preparación del secador ...a poner en funcionamiento el secador. Apagar el secador...
-
Page 70: Protección Del Medio Ambiente
Antes de encender su secador Informaciones Protección para su del medio seguridad ambiente Consejos para la racionalización Peligro de energía Uso del secador ¡Escurra la ropa prolijamente! Peligro ¡PELIGRO DE EXPLOSIÓNES! ¡Peligro de explosión! ¡Utilice la carga óptima! Protección del ¡Limpie el filtro! secador ¡Ventile el ambiente de... -
Page 71: Primera Vez
Consejos para el secado Antes de usar Desconexión el secador por temporal del primera vez secador Ropa Identificación de prendas... -
Page 72: Selección Del Programa
Selección del programa Programas Señal Tipo temporizados Fallo en el Secuencia de funcionamiento sonidos prolongados Advertencia de mal Secuencia de funcionamiento sonidos prolongados Programas automáticos Indicador de estado del programa regular/cotton (Normal/algodón) Opciones permanent press (Estampados) delicates (Ropa fina) signal (Señal) Señal Tipo Arranque... - Page 73 Tabla de selección de programas Programas automáticos regular/cotton Para ropa que, damp dry regular dry very dry extra dry permanent press Para ropa que, damp dry regular dry very dry Programas temporizados time dry 20 min, 40 min, 60 min 20 min, 40 min, 60 min air fluff...
- Page 74 Funciona miento Uso del secador start...
-
Page 75: Uso De La Canastilla
Uso de la canastilla (Accesorio, ver página 64) Cuidado Colocar la canastilla para secar... - Page 76 Secar prendas de ropa sobre Tipo de ropa Tiempo de secado la canastilla requerido Suéter de lana fina 80 min. (aprox. 0,8 lbs/350 gr) (p. ej. 60 + 20 min) Suéter de lana gruesa 90 a 120 min. (aprox. 1,9 lbs/850 gr) (p.
-
Page 77: Limpieza Y Cuidado
Limpieza y cuidado Limpieza del secador Limpiar el tubo de aire de salida Peligro Cuidado ¡PELIGRO DE EXPLOSIONES! Cuidado Limpiar el filtro para pelusas... -
Page 78: Limpieza De La Protección Del Rodamiento
Limpiar el sensor de Limpieza de la Cambiar la lamparilla humedad protección del rodamiento... -
Page 79: Localización De Fallos
Localización de fallos Peligro Problema Causa posible Remedio E:01 E:03... -
Page 80: Servicio Y Reparaciones
Problema Causa posible Remedio E:03 SERVICIO y REPARACIONES Cuidado CUIDADO 1 866 447 4363. -
Page 81: Declaración De Garantía Para Secadores Para Ropa Siemens
Alcances de la garantía Amplia garantía limitada a un año Siemens se hará cargo libre de costos de la reparación o reemplazo de a partir de la fecha de instalación * cualquier componente que presente defectos en condiciones de uso domiciliario normal, incluyendo los costos de mano de obra y transporte.