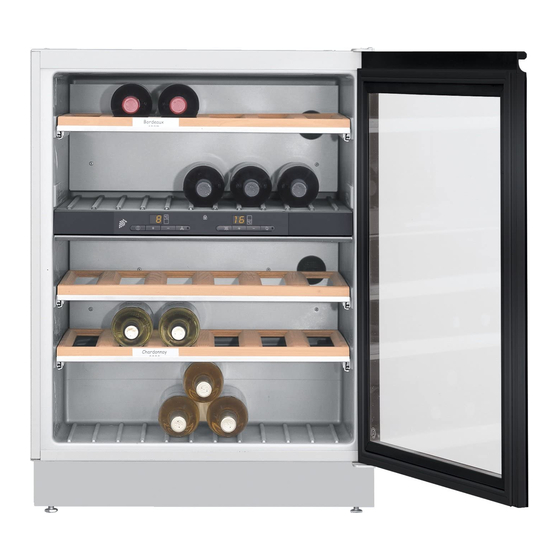
Miele KWT 4154 UG-1 Operating And Installation Manual
Under counter wine storage unit
Hide thumbs
Also See for KWT 4154 UG-1:
- Operating and installation manual (36 pages) ,
- Operating and installation manual (36 pages)

Related Manuals for Miele KWT 4154 UG-1


Summary of Contents for Miele KWT 4154 UG-1
- Page 1 Operating and Installation Instructions Under Counter Wine Storage Unit KWT 4154 UG-1 en - US, CA To prevent accidents and machine damage read these instructions before installation or use. M.-Nr. 07 508 850...
-
Page 2: Table Of Contents
Contents IMPORTANT SAFETY INSTRUCTIONS....... . . 4 Guide to the Wine Storage Unit ........7 Before use . - Page 3 Contents Changing the door hinging ......... 30 Under-counter installation .
-
Page 4: Important Safety Instructions
IMPORTANT SAFETY INSTRUCTIONS Electrical safety When using the appliance, follow basic safety precautions, including the Before installation, make sure that following: the voltage and frequency listed on the data plate correspond with the Read all instructions before installation household electrical supply. This data and use to prevent accidents and must correspond to prevent injury and machine damage. - Page 5 Installation and repair work should vicinity of this or any other appliance. be performed by a Miele authorized Do not use any oils or grease on the service technician. Work by unqualified door seal, as these will cause the seal...
- Page 6 IMPORTANT SAFETY INSTRUCTIONS Disposal of your old appliance Before disposing of an old appliance, first make the door latch or lock unusable. Take off the doors. Leave the shelves in place so that children may not easily climb inside. Consult with your municipal policy on recycling.
-
Page 7: Guide To The Wine Storage Unit
Guide to the Wine Storage Unit a Interior lighting b Insulation shelf for thermal separation c Wooden shelf with decorative strip for descriptive labels d Active charcoal filter e Condensate channel and drain hole... - Page 8 Guide to the Wine Storage Unit Control panel a On/Off s button e Safety lock indicator light b Temperature display for upper zone f Off button for Alarm c Temperature selector buttons for g Temperature display for lower zone upper zone h Temperature selector buttons for (+ for warmer;...
-
Page 9: Before Use
Before use Before using for the first time Turning the appliance off ^ Clean the inside of the appliance and ^ Press the On/Off button until the the accessories with a mild solution control panel go out. of warm water and liquid dish soap. The cooling system turns off. -
Page 10: Optimum Temperature And Air Quality
Optimum temperature and air quality Wine will continue to mature depending Insulation panels for thermal on the surrounding conditions. The separation length of time which wine can be kept The unit has a fixed insulation panel in good condition will therefore depend that divides the interior into two not only on the temperature but also on sections. -
Page 11: Setting The Temperature
Optimum temperature and air quality ^ Press the temperature selector (+/-) When pressing the buttons, the buttons for the upper zone to select following changes will appear in the either Fahrenheit °F or Celsius °C: respective temperature display: ^ To save the setting, press the –... -
Page 12: Temperature Display
Optimum temperature and air quality ^ Press the constant humidity button Temperature display again. During normal operating, the ^ appears in the display. temperature displays indicate the temperatures inside the unit. ^ The display brightness cannot be set The temperature display will flash if: using the + / - buttons for the upper temperature zone. -
Page 13: Humidity
Optimum temperature and air quality Humidity Turning on In a conventional refrigerator, the If you would like to use the unit for humidity levels are too low for storing long-term wine storage, turn on the wines. High humidity levels (60 - 70 %) DynaCool function. - Page 14 Optimum temperature and air quality Air exchange through the activate charcoal filter External air passes through the filter before entering the unit. The active charcoal filter ensures that only clean, odor-free air enters the unit, creating additional protection against odor contamination. The filter will need to be changed periodically, or when odors are present in the unit.
-
Page 15: Interior Lighting
Interior lighting Adjusting the brightness Do not remove the light covers for The brightness of the interior lighting the display lighting. Should the can be adjusted. lighting covers be damaged or need ^ Press and hold the interior lighting to be removed due to damage, do not look directly or with an optical button. -
Page 16: Storing Wine Bottles
– Before serving, rosé and red wine of the shelves from above. bottles should spend at least two Additional labels are available from hours upright and open, to reach Miele. optimal drinking temperature. Sparkling wine and champagnes should be chilled briefly in the refrigerator before serving. -
Page 17: Alarm
Alarm Door alarm The appliance is equipped with an alarm system, to ensure that the If the door has been left open for more temperature does not rise or fall than approx. 60 seconds, the alarm will unnoticed because of energy loss or an sound. -
Page 18: Safety Lock
Safety Lock ^ Press the constant humidity button to The safety lock can be activated to prevent the appliance from being save the setting. turned off inadvertently. The safety lock indicator light will light up when the safety lock is Activating / Deactivating the safety activated. -
Page 19: Defrosting
Defrosting During normal operation, condensate and frost can form on the rear wall of the refrigerator and drawers. You do not need to remove this build-up, it will defrost and evaporate automatically with the heat generated by the appliance. -
Page 20: Cleaning And Care
Cleaning and care Before cleaning To reduce the risk of electrical ^ Unplug the power cord. shock, disconnect the appliance ^ Remove any bottles from the from the power supply by shutting off the power main, tripping the appliance and store it in a cool place. circuit breaker or unplugging the ^ Take out any removable parts, power cord before maintenance. -
Page 21: Door Seal
^ Clean the door seal with water only and dry thoroughly. Active charcoal filters Replacement filters are available from Miele. ^ Turn the filters 90° clockwise or counter-clockwise. ^ Remove the filters. ^ Insert the new filters with the handle in the vertical position. -
Page 22: Frequently Asked Questions
Frequently asked questions With the aid of the following guide minor problems can be corrected without a ser- vice call. Repairs should only be carried out by a qualified and trained person in strict accordance with local and national safety regulations. Unauthorized repairs could cause personal injury or machine damage and may void the warranty. - Page 23 Only temperatures within the range of the appliance display can be shown. If the temperature is not within this range, a bar will be displayed instead. "F0" or "F1" appears in the temperature display. A fault has occurred. Contact Miele Technical Service. What if the appliance cannot be turned off? Possible fault Solution The safety lock has been activated.
- Page 24 Frequently asked questions The appliance is making noises. Issue Possible fault Solution Brrrrr... Humming noise made by the These noises are not a compressor. This noise can fault. get louder for brief periods The noise of the when the motor is switching compressor and the coolant circulating in the system is unavoidable.
-
Page 25: After Sales Service
Miele appliance. Please note that unless expressly approved in writing by the Miele Ser- vice department, Extended Service Contracts offered by other providers for Miele products will not be recognized by Miele. -
Page 27: Installation Instructions
Installation instructions To prevent accidents and machine damage read these instructions before installation or use. -
Page 28: Caring For The Environment
Caring for the environment Disposal of packing materials Disposal of an old appliance The cardboard box and packing Old appliances contain materials that materials are biodegradable and can be recycled. Please contact your recyclable. Please recycle. local recycling center about the possibility of recycling these materials. -
Page 29: Installation
Installation Ventilation In areas with a tropical climate (over The air at the back of the appliance 100°F/38°C and more than 70% air gets warm. The appliance housing unit humidity) the wine cooler must only must be constructed to allow sufficient be operated in air conditioned space for ventilation. -
Page 30: Changing The Door Hinging
Changing the door hinging The appliance is supplied right-hand hinged. If left-hand door hinging is required, follow the instructions below. ^ Unscrew the top hinge plate e, turn it around, and refit it on the opposite side. ^ Close the door, and unscrew the top ^ Unscrew the lower hinge plate f. - Page 31 Changing the door hinging ^ Replace the plug h and the hinge pin guide i in the top of the opposite door. ^ Hang the door on the lower hinge pin j, and close the door k. ^ Refit the top hinge pin l through the hinge pin plate into the door.
-
Page 32: Under-Counter Installation
Under-counter installation Appliance dimensions Preparing the appliance ^ Carefully tip the appliance backward. ^ Attach the toe-kick panel a, and loosely tighten the screws b. ^ Arrange the panel a over the long holes in the appliance door recess. ^ Tighten the screws b onto the panel * The overall height can be increased by 2"... -
Page 33: Fitting The Appliance Into Place
Under-counter installation Fitting the appliance into place ^ Slide the appliance into the installation niche. Ensure that the power cord does not get caught. Be sure the power outlet remains accessible. ^ Using the fixing strip and screws, secure the appliance into place. -
Page 34: Electrical Connection
If there are any questions regarding the electrical connection of this appliance to the power supply, please consult a licensed electrician or call the Miele Technical Service. U1-800-999-1360 V1-800-565-6435... - Page 36 Alteration rights reserved / 4609 M.-Nr. 07 508 850 / 02 KWT 4154 UG-1 For the most updated manual see the Miele web site.