Table of Contents
Advertisement
Advertisement
Table of Contents

Related Manuals for Yamaha MT1X


Summary of Contents for Yamaha MT1X
- Page 1 YAMAHA ® AUTHORIZED PRODUCT MANUAL...
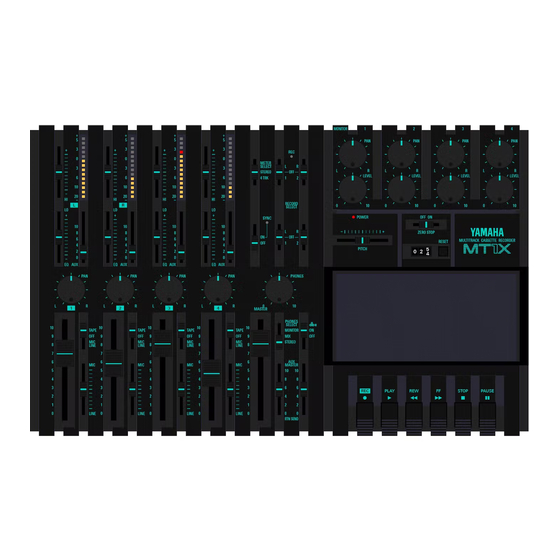
- Page 2 YAMAHA MULTITRACK CASSETTE RECORDER OPERATING MANUAL...
-
Page 3: Table Of Contents
MT1X makes it easy for you to produce high quality multitrack recordings. Besides use as a multitrack recorder, the MT1X can also be used as a PA mixer for small performances, as well as for editing soundtracks for videos. -
Page 4: Before Operation
B E F O R E O P E R A T I O N PLEASE NOTE THE FOLLOWING PRECAUTIONS: • ABOUT CASSETTE TAPE This unit is designed to be used only with Chrome- position tape, and will not work properly with Ferri- chrome tape formulations. -
Page 5: The Difference Between Tracks And Channels
(stereo left and right) on each side of the tape. WHAT IS A MULTITRACK CASSETTE RECORDER? The difference between the MT1X multitrack cassette recorder and a conventional stereo cassette deck is shown below. CONVENTIONAL STEREO CASSETTE DECK... -
Page 6: The Controls And Their Functions
THE CONTROLS AND THEIR FUNCTIONS This section explains the names and functions of all the knobs, sliders, and switches for the mixer, recorder, meter/ monitor, and connector sections. Familiarize yourself with them in order to take full advantage of the MT1X’s versatile functions. - Page 7 GAIN CONTROLS The controls adjust the input level of the channel to match the output level of a microphone or instrument connected to input jack -50db is possible. Adjust the output level of the microphone or instrument as outlined in its instruction b o o k l e t .
- Page 8 AUX CONTROLS The MT1X is equipped with an AUX SEND jack acoustic effects are desired on a certain channel, reverbs or delay effects can be connected between these jacks to provide only the desired effect to the desired channel. Amplified monitor speakers can also be connected to the AUX SEND jack.
-
Page 9: Recorder Section
AUX MASTER SEND CONTROL This control adjusts the level of the effect-mixed signals from each channel (adjusted by each AUX control as well as the AUX signal for monitoring use. The final output is through the AUX SEND jack AUX RETURN CONTROL This control adjusts the input level of effects or sub- mixers connected to the AUX RTN jack effect in relation to the sound can be set with this... - Page 10 REW SWlTCH (REWIND) Use this switch to rewind the tape. Pressing it when the MT1X is in the PLAY mode enables you to hear the sound of the tape while it rewinds. This feature is use- ful for finding the beginning of a song or other recorded material.
-
Page 11: Meter And Monitor Section
METER AND MONITOR SECTION METER SELECT SWITCH This switch is used to select the signal for level indica- tion by the Peak Level Meters STEREO Position: The level of the signal output through the ST OUT jacks is indicated. The meter on the far left shows the level of the Left channel of the stereo signal, while the second meter from the left shows the level of the Right channel. - Page 12 PHONES SELECT SWITCH You can plug a set of headphones into the PHONES jack is used to select the signal to be monitored. Control the volume level with the PHONES volume control STEREO Position: Put the switch in this position to monitor the signal output through the ST OUT jacks nels of the stereo signal will be heard through the headphones.
-
Page 13: Connector Section
MONITOR LEVEL CONTROLS When setting the PHONES SELECT Switch MONITOR position, these level controls are used for each track to achieve a level balance for easy monitoring. Use these controls freely and independently to maintain a desired level balance during overdubbing operations, when the addition of a new signal changes the volume. - Page 14 These jacks can also be used as follows. The MT1X can be used as a sub-mixer, with the out- put sent to a main mixer through this jack.
-
Page 15: Connection Example
CONNECTION EXAMPLES BASIC CONNECTION LAYOUT FOR MULTITRACK RECORDING... -
Page 16: About Cassette Tapes
• Playing tapes recorded on other cassette recorders When playing Normal-position tapes, or tapes encoded with Dolby B noise reduction the MT1X, the following steps are advised: 1) Playing Normal-position tapes — move the HI equalizer fader in the “ + ” direction to boost the high frequencies until the sound is satisfactory. -
Page 17: Attaching The Strap
WHEN USING THE BATTERY PACK With the optional PA11 Battery Pack, the MT1X can be operated by batteries in places where there is no AC outlet available. Here’s how to set it up. • PUTTING IN THE BATTERIES Slide off the battery cover on the bottom of the bat- tery pack. -
Page 18: Multitrack Recording Techniques
However, the MT1X is limited in the number of effects which can be used during mixdown, so it’s best to use them dur- ing the initial recording stages. -
Page 19: Multitrack Recording
Though many will be recording with electronic drums, the basic approach is the same. The MT1X has four input jacks, enabling the setting up of the four microphones for recording, as shown in the diagram. Through the MT1X’s mixing section, the sounds recorded by these microphones are mixed down onto track 1. - Page 20 4~9. Turn the power switches on for the effect and microphones, and then turn the MT1X “ON”. The POWER indicator will light. 3. Setting up the recorder section Press the RESET switch to return the counter to “000".
- Page 21 4. Setting the monitor and meter sections Set the PHONES SELECT switch to the “STEREO” position. Set the PHONES volume to around “7”. Make sure the METER SELECT switch is in the “4 TRK” position. 5. Adjusting the input level Set all of the input switches to the MIC/LINE position.
- Page 22 6. Adjusting level balance and equalization characteristics Adjust channel faders 1 ~4 to achieve the desired recording level balance. Adjust the equalizers for 1~4 to obtain the desired sound character for each individual channel. (If you’re thinking of ping-ponging these tracks after- wards, it’s a good idea to add a little boost on the HIGH EQ because high frequencies can be slightly diminished during the ping-pong re-recording...
- Page 23 8. Post recording check Return all switches and controls to their normal positions. Set the PHONES SELECT switch to the “MONITOR” position, turn MONITOR LEVEL control 1 to “7’: then turn the PHONES volume control to about “7”. Make sure the METER SELECT switch is set to “4 TRK".
- Page 24 This is true with all electrified musical instruments. Another idea is to use the Yamaha GC2020 comp/limiter. In addition to the compresser and limiter functions, the noise gate function can prove to be very convenient.
- Page 25 — Bass guitar recording procedure — 1. Connections Connect everything through input jack 2 as follows. If the GC2020 is being used, connect it between the amplifier and input jack 2. When not using a bass amp, the use of a direct box is recommended.
- Page 26 Equalizer controls Set by the reading on the level meter Push up to about “7” Set after setting equalization 4. Adjusting the Input level Set the input selector switch to the MIC/LINE position. Push input fader 2 up to about “7”. Start playing the bass guitar, and slide gain control 2 towards the “MIC”...
- Page 27 RECORDING THE RHYTHM GUITAR Record the rhythm guitar on track 3 to synch with the drums on track 1 and the bass guitar on track 2. Record- ing preparations and operations are the same as when recording the bass guitar. If effects are being used, con- nect them just before the input jack.
- Page 28 — Ping-pong Recording Procedure — Equalizer controls 1. Setting the recorder Set the RECORD SELECT switch to the “R” posi- tion to mix the sound of the drums, bass guitar, and rhythm guitar through the stereo buss. The REC in- dicator will flash.
- Page 29 However, this sort of operation requires a blank section of tape on a track. NOTE: The RECORD SELECT switches of the MT1X can be operated by the optional FS-1 Foot Switch. The RECORD SELECT switch for the track to be redone must be set, and then it can be the foot can be used to “punch in”...
- Page 30 — Signal Path during Punch-in/Punch-out Operation — Before and after the punch-in, the sound from tracks 1-4 plus the new sounds to be recorded can be monitored. However, during the punch-in, only the sound from tracks 1, 2, and 4 plus the new sound being recorded can be monitored.
- Page 31 — Punch-in/Punch-out Procedure — 1. Connections Connect the vocal microphone through input jack 3. If the FS-1 Foot Switch is being used, connect it to the PUNCH IN/OUT jack. 2. Setting the recorder If the FS-1 Foot Switch is connected, set RECORD SELECT switch 3 to the “3”...
- Page 32 4. Setting input levels Set input select switch 3 to “MIC/LlNE”. Set both input fader 3 and the MASTER fader to “7”. Slide gain control 3 in the “MIC” direction, stop- ping when the “+3” LED indicator on the. level meter third from the left flashes occasionally on music peaks.
- Page 33 MIXDOWN (TRACKDOWN) It’s now time for the mixdown. Often called “trackdown” or “remix”, mixdown is when all the four recorded tracks are mixed to achieve a certain sound’ balance in level, effects, and stereo positioning, and then recorded onto one side of a cassette tape in mono or stereo. This tape is the final “master”.
- Page 34 Rewind the tape. 4. Recording Press the PLAY switch of the MT1X at the same time you start recording with the stereo tape deck. After the recording is finished, play back the mixed down tape. How does it sound? You can keep re- peating the mixdown process, varying the levels, equalizations, and effect level balance until you’re...
-
Page 35: Sync-Recording
Here’s how it works. The YMC 10 converts the MIDI synchronizing signal from the RX15 to FSK signal, which is recorded on track 1 of the MT1X. In order to operate the RX15 by the FSK signal recorded on track 1, connect everything like this: With the SYNC switch “ON”, press the PLAY... -
Page 36: Editing Video Soundtracks
Using the MT1X to edit down a good soundtrack for your video is a great idea, and will result in a video that sounds surprisingly professional. You’ll find this capabili- ty useful to produce a promotional video for your group. -
Page 37: Block Diagram
BLOCK DIAGRAM NOTE: When the REC button is engaged, the panel switches can be used to individually order recording on only those channels with RECORD SELECT not switched “OFF”. -
Page 38: Specifications
Model Description : multitrack cassette recorder Mechanical Descriptions Tape : standard cassette; CrO Heads : hard permalloy 4-channel rec/play head Tape speed : 4.75 cm/sec Pitch control : + / - 1 0 % Wow & flutter : 0.05% WRMS Fast forward/rewind time : about 100 seconds (C-60 tape) : DC servo... -
Page 39: Introduction To The Accessories
INTRODUCTION TO THE ACCESSORIES... -
Page 40: Service
SERVICE The MTlX is supported by Yamaha’s worldwide network of factory trained and qualified dealer service personnel. In the event of a problem, contact your nearest Yamaha dealer. - Page 41 SINCE 1887 NIPPON GAKKI CO., LTD. HAMAMATSU, JAPAN...
- Page 42 YAMAHA ® Yamaha Corporation of America 6600 Orangethorpe Avenue, P.O. Box 6600, Buena Park, CA 90622-6600 5/15/98 28791 MT1X OM MT1X OM Recyclable Recycled...