Bosch DIVAR IP all-in-one 7000 3U Quick Installation Manual
Hide thumbs
Also See for DIVAR IP all-in-one 7000 3U:
- Installation manual (52 pages) ,
- User manual (20 pages)

Related Manuals for Bosch DIVAR IP all-in-one 7000 3U


Summary of Contents for Bosch DIVAR IP all-in-one 7000 3U
- Page 1 DIVAR IP all‑in‑one 7000 3U DIP‑73G0‑00N | DIP‑73G8‑16HD | DIP‑73GC‑16HD Quick installation guide...
-
Page 3: Table Of Contents
DIVAR IP all-in-one 7000 3U Table of contents | en Table of contents Safety Safety message explanation General safety precautions Electrical safety precautions ESD precautions Operating precautions Notices FCC and ICES compliance Data security precautions Use latest software Introduction Parts included... -
Page 4: Safety
| Safety DIVAR IP all-in-one 7000 3U Safety Observe the safety precautions in this chapter. Safety message explanation Warning! Indicates a hazardous situation which, if not avoided, could result in death or serious injury. Caution! Indicates a hazardous situation which, if not avoided, could result in minor or moderate injury. - Page 5 DIVAR IP all-in-one 7000 3U Safety | en Warning! Interruption of mains supply: Voltage is applied as soon as the mains plug is inserted into the mains socket. However, for devices with a mains switch, the device is only ready for operation when the mains switch (ON/OFF) is in the ON position.
- Page 6 | Safety DIVAR IP all-in-one 7000 3U – Never spill liquid of any kind on the device. – Take precautions to protect the device from power and lightning surges. – Unless qualified, do not attempt to service a damaged device yourself. Refer all servicing to qualified service personnel.
-
Page 7: Electrical Safety Precautions
SELV circuits. – If safe operation of the unit cannot be ensured, remove it from service and secure it to prevent unauthorized operation. In such cases, have the unit checked by Bosch Security Systems. –... -
Page 8: Esd Precautions
Notice! Video loss is inherent to digital video recording; therefore, Bosch Security Systems cannot be held liable for any damage that results from missing video information. To minimize the risk of losing information, we recommend multiple, redundant recording systems, and a procedure to back up all analog and digital information. -
Page 9: Fcc And Ices Compliance
DIVAR IP all-in-one 7000 3U Safety | en Disposal Your Bosch product has been developed and manufactured using high-quality materials and components that can be reused. This symbol means that electronic and electrical devices that have reached the end of their working life must be disposed of separately from household waste. -
Page 10: Use Latest Software
OS security updates. – Limiting local network access to trusted devices is strongly suggested. Details are described in the Technical note Network Authentication 802.1X and in the Bosch IP Video and Data Security Guidebook, available in the online product catalog. –... -
Page 11: Introduction
DIVAR IP all-in-one 7000 3U Introduction | en Introduction This manual is written for professional system integrators and PC technicians. It provides information for the installation of the chassis. The installation should be done by experienced and qualified technicians only. -
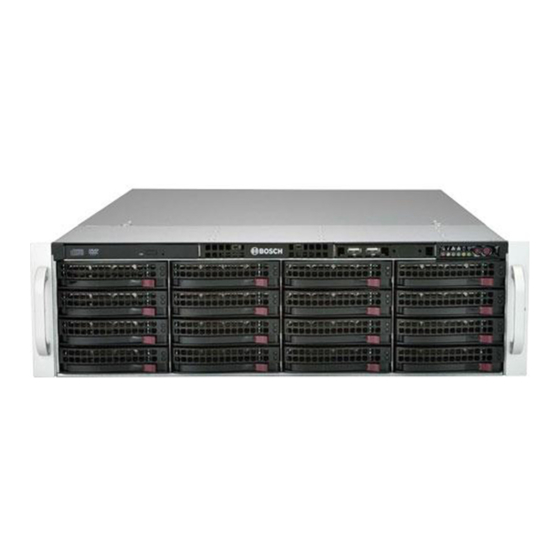
Page 12: System Overview
| System overview DIVAR IP all-in-one 7000 3U System overview The chassis includes a control panel on the front that features power buttons and status monitoring LEDs. On the rear there are various I/O ports as well as power supply modules. - Page 13 DIVAR IP all-in-one 7000 3U System overview | en IPMI LAN 3 USB ports 3.1 Gen 2 (Type A) USB port 3.1 Gen 2 (Type C) 2 LAN ports (teamed) Note: Do not change the teaming mode! VGA display output (disabled)
- Page 14 | System overview DIVAR IP all-in-one 7000 3U Description This LED indicates network activity on GLAN2 when flashing. NIC2 This LED indicates network activity on GLAN1 when flashing. NIC1 This LED indicates activity on the HDDs or peripheral drives when flashing.
- Page 15 DIVAR IP all-in-one 7000 3U System overview | en LED color LED state Description Blinking The system power supply temperature has reached 63 °C. The system will automatically turn off when the power supply temperature reaches 70 °C and restart when the power supply temperature goes below 60 °C.
-
Page 16: Preparing For Installation
| Preparing for installation DIVAR IP all-in-one 7000 3U Preparing for installation Read this section in its entirety before you begin the installation. Choosing the installation location – Place the system near at least one grounded power outlet. –... -
Page 17: Installation Considerations
DIVAR IP all-in-one 7000 3U Preparing for installation | en – Always keep the rack’s front door and all panels and components on the system closed when not servicing to maintain proper cooling. Installation considerations Ambient operating temperature If installed in a closed or multi-unit rack assembly, the ambient operating temperature of the rack environment may be greater than the ambient temperature of the room. -
Page 18: Rack Installation
| Rack installation DIVAR IP all-in-one 7000 3U Rack installation This section provides information on installing the chassis into a rack unit. There are a variety of rack units on the market, which may mean the assembly procedure will differ slightly. Also refer to the installation instructions that came with the rack unit you are using. -
Page 19: Installing The Inner Rails On The Chassis
DIVAR IP all-in-one 7000 3U Rack installation | en Press the quick-release tab. Separate the inner rail extension from the outer rail assembly. Installing the inner rails on the chassis The chassis includes a set of inner rails in two sections: inner rails and inner rail extensions. -
Page 20: Installing The Outer Rails To The Rack
| Rack installation DIVAR IP all-in-one 7000 3U Installing the outer rails to the rack Outer rails attach to the rack and hold the chassis in place. The outer rails for the chassis extend between 30 inches and 33 inches. - Page 21 DIVAR IP all-in-one 7000 3U Rack installation | en Installing the chassis in a standard rack To install the chassis in a standard rack: Extend the outer rails. Align the inner rails of the chassis with the outer rails on the rack.
-
Page 22: Installing A Sata Hard Drive
| Installing a SATA hard drive DIVAR IP all-in-one 7000 3U Installing a SATA hard drive The unit has hot-swappable hard drives, which can be removed without turning off the system. The hard drives are mounted in hard drive carriers to simplify their installation and removal from the chassis. -
Page 23: Installing A Hard Drive Into A Hard Drive Carrier
DIVAR IP all-in-one 7000 3U Installing a SATA hard drive | en Installing a hard drive into a hard drive carrier To install a hard drive into a hard drive carrier: Remove the screws which secure the dummy drive to the hard drive carrier. -
Page 24: Installing A Hard Drive Carrier Into A Front Drive Bay
DIVAR IP all-in-one 7000 3U Notice! Bosch recommends using the respective Bosch hard disk drives. The hard disk drives as one of the critical component are carefully selected by Bosch based on available failure rates. Hard disk drives not delivered from Bosch are not supported. -
Page 25: Turning On The System
Plug the power cord from the power supply unit into a high-quality power strip that offers protection from electrical noise and power surges. Bosch recommends to use an uninterruptible power supply (UPS). Push the power button on the control panel to turn on the system. -
Page 26: System Setup
| System setup DIVAR IP all-in-one 7000 3U System setup The DIVAR IP all-in-one 7000 systems are based on the operating system Microsoft Windows Server IoT 2019 for Storage Standard. The operating system provides an user interface for initial server configuration, unified storage appliance management, simplified setup and storage management, and support for Microsoft iSCSI Software Target. -
Page 27: Preparing Hard Drives For Video Recording
DIVAR IP all-in-one 7000 3U System setup | en – iSCSI storage expansion for a BVMS or VRM system, which runs on a different hardware. Notice! Recorded video streams need to be configured in a way that the maximum bandwidth of the system (BVMS/VRM base system plus iSCSI storage expansions) is not exceeded. -
Page 28: Recovering The Unit
| System setup DIVAR IP all-in-one 7000 3U 12. Click Next to continue. The Create Virtual Drive - Virtual drive settings dialog box is displayed. 13. Apply the following settings: – Initialization state: Fast Initialization – Strip size: 64 KB –... -
Page 29: Additional Documentation And Client Software
DIVAR IP all-in-one 7000 3U Additional documentation and client software | en Additional documentation and client software For more information, software downloads, and documentation, visit http:// www.boschsecurity.com and go to the respective product page in the product catalog. You can find the latest software and available upgrade packages in the Download Area of Bosch Security and Safety Systems under: https://downloadstore.boschsecurity.com/... - Page 30 | Additional documentation and client software DIVAR IP all-in-one 7000 3U 2021.10 | V02 | DOC Bosch Security Systems B.V. Quick installation guide...
- Page 32 Bosch Security Systems B.V. Torenallee 49 5617 BA Eindhoven Netherlands www.boschsecurity.com © Bosch Security Systems B.V., 2021 202110281649...