Sony HAR-D1000 Operating Instructions Manual
Hard disc audio recorder
Hide thumbs
Also See for HAR-D1000:
- Operating instructions manual (20 pages) ,
- Service manual (68 pages)
Table of Contents
Advertisement
4-236-703-13(1)
Hard Disc
Audio Recorder
Operating Instructions
Owner's Record
The model and serial numbers are located on the rear of the unit. Record the serial number
in the space provided below. Refer to them whenever you call upon your Sony dealer
regarding this product.
Model No. HAR-D1000
Serial No. ___________
HAR-D1000
© 2001 Sony Corporation
Advertisement
Table of Contents

Related Manuals for Sony HAR-D1000


Summary of Contents for Sony HAR-D1000
- Page 1 Owner’s Record The model and serial numbers are located on the rear of the unit. Record the serial number in the space provided below. Refer to them whenever you call upon your Sony dealer regarding this product. Model No. HAR-D1000 Serial No.
- Page 2 Subpart B of Part 15 of FCC Rules. If you have any questions about this product, you may call; Sony customer Information Center 1-800-488-7669. The Number below is for the FCC related matters only. Regulatory Information...
-
Page 3: Table Of Contents
Table of Contents Parts Identification Front Panel ... 4 Rear Panel ... 4 Remote Control ... 5 Overview Getting Started Inserting batteries into the remote ... 7 Hooking up the system ... 7 Playing CDs Loading a CD ... 9 Playing a CD ––... -
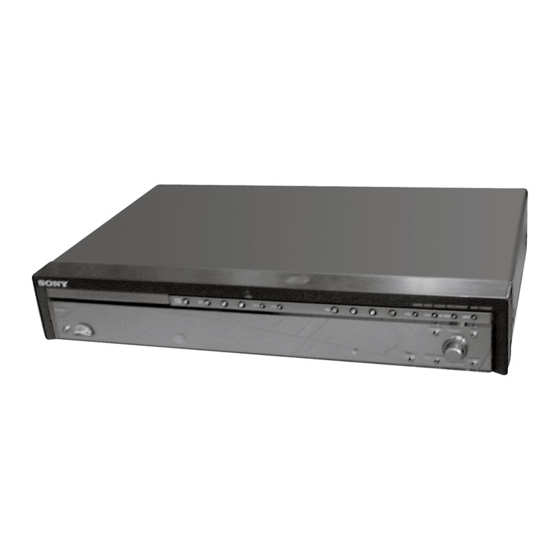
Page 4: Parts Identification
Parts Identification The items are arranged in alphabetical order. Refer to the pages indicated in parentheses ( ) for details. Front Panel STANDBY ALBUM dial qk (12 - 18, 20 - 27, 29 - 31) CD SYNC qf (13, 31) CD H 4 (9, 11, 14) CD X 5 (9) CD x 6 (8, 9, 13, 14) -
Page 5: Remote Control
Remote Control ALBUM 8 (13, 14, 18, 19) ALBUM +/– qk (12 - 18, 20 - 26, 28 - 31) CD SYNCHRO qd (13, 31) CLEAR 0 (11, 16, 17, 28) DISPLAY wj (10, 19, 22) HIGH-LIGHT qa (22) INFO wk (20) INPUT wd (8, 13) Letter/Numeric buttons 7 (10, 11, 13, 14, 18, 19, 28) -
Page 6: Overview
• The recorded music is limited to private use only. Use of the music beyond this limit requires permission of the copyright holders. • Sony is not responsible for any loss that may arise from lost data. • Recording to the hard disc should be considered as a temporary means of storing audio data. -
Page 7: Getting Started
Getting Started Inserting batteries into the remote You can control the recorder using the supplied remote. Insert two R6 (size AA) batteries by matching the + and – on the batteries to the diagram inside the battery compartment. Insert the negative (–) end first, then push in and down until the positive (+) end clicks into position. - Page 8 Hooking up the system (continued) Notes • When you connect via the DIGITAL OPTICAL IN connector, noise may occur when you play CD software other than music, such as a CD-ROM. • If “Din Unlock” or “Cannot Copy” flashes in the display, recording via the DIGITAL OPTICAL IN connector is not possible.
-
Page 9: Playing Cds
Playing CDs Loading a CD Turn on the amplifier and set the source selector to the position for this recorder. Press @/1 to turn on the recorder. The STANDBY indicator turns off. Press OPEN/CLOSE A. The disc tray slides out. Load a disc on the disc tray with the label side up. -
Page 10: Using The Cd Display
Playing a CD (continued) Select a track directly* Find a point in a track Remove the CD * When you directly locate a track numbered over 10, press >10 before entering a two-digit track number. When you press the >10 button, two bars appear if the CD contains 10 to 99 tracks. -
Page 11: Programming The Cd Tracks
Programming the CD tracks You can specify the playback order of the tracks on a CD and create your own programs containing up to 25 tracks. When using the remote, set SELECT to CD. While the recorder is stopped, press PLAY MODE on the remote repeatedly until “PROGRAM”... -
Page 12: Recording To Hdd
Recording to HDD Notes on recording Before recording • You cannot select a play list as the recording destination. • You cannot record over an existing track. If you select an album with existing tracks as the recording destination, the recorder automatically starts recording from the end of the existing tracks. -
Page 13: Recording To The Hdd
Press MENU/NO. Press CD SYNC. When “Sync Normal” was selected, “CD SYNCHRO – Normal –” appears in the display. When “Sync High” was selected, “CD SYNCHRO – High –” appears in the display. The HDD stands by for recording and the CD stands by for playback. -
Page 14: Recording The Current Cd Track
Recording to the HDD (continued) Press HDD z. “REC” appears in the display. The HDD stands by for recording. To change the album position, turn ALBUM dial (or press ALBUM +/– on the remote repeatedly). When using the remote, press ALBUM and the numeric button(s) to enter the position directly (see page 19). -
Page 15: Recording Tips
Recording tips –– Marking track numbers/Smart Space/Adjusting the recording level When using the remote, set SELECT to HDD. Marking track numbers while recording You can marking track numbers either manually or automatically while recording. By marking track numbers at specific points, you can quickly locate the points later or edit the HDD easily. - Page 16 Recording tips (continued) Turn ALBUM dial (or press ALBUM +/– on the remote repeatedly) until “LS(T) –XXdB” appears in the display, then press ALBUM dial or YES. Turn ALBUM dial (or press ALBUM +/– on the remote repeatedly) to select the level, then press ALBUM dial or YES.
-
Page 17: Adjusting The Recording Level
Turn ALBUM dial (or press ALBUM +/– on the remote repeatedly) until “S.Space On” (or “S.Space Off”) appears in the display, then press ALBUM dial or YES. Turn ALBUM dial (or press ALBUM +/– on the remote) to select the setting, then press ALBUM dial or YES. -
Page 18: Playing The Hdd
Playing the HDD Playing the HDD –– Normal Play/Shuffle Play/Repeat Play This recorder lets you play the HDD in different play modes. When using the remote, set SELECT to HDD. Turn on the amplifier and set the source selector to the position for this recorder. -
Page 19: Using The Hdd Display
When you directly locate a track numbered over 10, press >10 before entering a two-digit or three- digit track number. When you press the >10 button, two bars appear if the album contains 10 to 99 tracks or three bars appear if the album contains 100 or more tracks. -
Page 20: Playing A Track In A Play List
Using the HDD display (continued) During normal playback Press TIME on the remote repeatedly. Each time you press the button, the display changes as follows: Current track number and elapsed playing time of the track t Current track number and remaining time of the track t Remaining time of the entire album (Normal Play only) When you press the INFO button on the remote, the... -
Page 21: Locating A Desired Album Or Track
Locating a desired album or track –– Keyword Search/Highlight Play When using the remote, set SELECT to HDD. Searching by keywords (Keyword Search) You can easily find desired albums or tracks on the HDD if they have been named. While the recorder is stopped, press SEARCH/CHAR (or SEARCH on the remote). -
Page 22: Highlight Play
Locating a desired album or track (continued) By pressing the DISPLAY button, you can check more information about the current item. Each time you press the button, the lower part of the display changes as follows: Album or track name t Album (and track) number Tips •... -
Page 23: Editing Recorded Hdd
Editing Recorded HDD Before editing You can edit an HDD track only when the HDD play mode is Normal Play. To cancel the last edit Use Undo function to cancel the last edit and restore the contents of the HDD to the condition before the edit. -
Page 24: Dividing Recorded Tracks
Erasing recordings (continued) Erasing all tracks in an album (Album Erase) Do the procedure below to erase all tracks, track names, album name and artist name at once. While the recorder is stopped, playing or paused, press MENU/NO after selecting the album you want to edit. “Edit Menu”... -
Page 25: Combining Recorded Tracks
Tips • You can divide a track while recording. For details, see “Marking track numbers while recording” on page 15. • If you divide a track with a Highlight position, the track with the Highlight position becomes the representative track. If you divide a track in the middle of the Highlight position, the 10 seconds up to the dividing point automatically become the new Highlight position, and the track containing the... -
Page 26: Moving Recorded Tracks Or Albums
Moving recorded tracks or albums –– Move Function You can use this function to change the order of any track or album on the HDD. When using the remote, set SELECT to HDD. Moving recorded tracks When you move tracks, the tracks are automatically renumbered. -
Page 27: Assigning A Title Or Artist Name To
Assigning a title or artist name to a track, album or play list –– Name Function You can enter a title or artist name for albums and play lists as well as for individual tracks. Name can consist of uppercase and lowercase letters, numbers and symbols. - Page 28 Assigning a title or artist name to a track, album or play list (continued) Repeat steps 5 through 7 to enter the rest of the name. To change a character Press HDD l/L repeatedly until the character you want to change flashes, then repeat steps 5 and 6.
-
Page 29: Undoing The Last Edit
Erasing a title or artist name You can use this function to erase a title or artist name. While the recorder is stopped, playing or paused, press MENU/NO after selecting the album you want to edit. “Edit Menu” appears in the display. Turn ALBUM dial (or press ALBUM +/–... -
Page 30: Other Functions
“Sleep” in Setup Menu. Recording from a CD changer If you have a Sony CD changer in which 200, 300 or 400 CDs can be inserted and which is equipped with the CONTROL A1II (or CONTROL A1) jack, after connecting the changer and an amplifier, follow the procedure below. - Page 31 Connect components to the recorder. (see also “Hooking up the system” on page 7) After turning on the CD changer, load the desired CDs into the CD changer. Press MENU/NO. “Edit Menu” appears in the display. Turn ALBUM dial (or press ALBUM +/– on the remote repeatedly) until “Setup?”...
-
Page 32: Additional Information
If you have any questions or problems concerning your recorder, please consult your nearest Sony dealer. Notes on CDs On handling CDs • To keep the CD clean, handle the CD by its edge. -
Page 33: Notes On Handling The Hard Disc
If you experience any of the following difficulties while using the recorder, use this troubleshooting guide to help you remedy the problem. Should any problem persist, consult your nearest Sony dealer. General There is no sound. • Check that the recorder is connected securely. -
Page 34: Display Messages
DIGITAL OPTICAL IN connector, the digital connecting cable was unplugged or the digital component turned off. Drive Error Consult your nearest Sony dealer. Drive Full! Recording tracks is not possible because there is not enough recordable space on the HDD or the maximum number of recordable tracks has been reached. -
Page 35: Setup Menu Table
Erasing The recorder is erasing data from the HDD. Do not disconnect the power cord. Format Error Consult your nearest Sony dealer. Impossible You tried to make an impossible editing or recording operation. Name Full! The naming capacity of the HDD has reached its limit (about 127 characters). -
Page 36: Specifications
Sony Corporation Printed in Malaysia Audio connecting cord (2) Remote commander (remote) (1) Sony R6 (size AA) battery (2) USB cable (1) Be sure to use the supplied USB cable with ferrite cores when connecting to a computer. “M-crew for HAR-D1000” CD-ROM (1) “M-crew for HAR-D1000”...