
Related Manuals for GE 29879


Summary of Contents for GE 29879
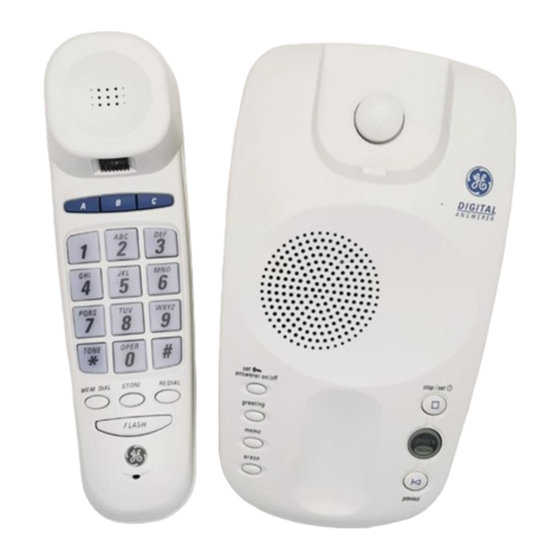
- Page 1 All manuals and user guides at all-guides.com 29879 Trimline Phone with Digital Answering System User's Guide We bring good things to life.
-
Page 2: Interference Information
All manuals and user guides at all-guides.com FCC R EGISTRATION NFORMATION Your telephone equipment is registered with the Federal Communications Commission and is in compliance with parts 15 and 68, FCC Rules and Regulations. 1 Notification to the Local Telephone Company On the bottom of this equipment is a label indicating, among other information, the FCC Registration number and Ringer Equivalence Number (REN) for the equipment. -
Page 3: Table Of Contents
All manuals and user guides at all-guides.com ABLE OF ONTENTS ......21 FCC R ..2 LAYING ESSAGES EGISTRATION NFORMATION ....23 .... 2 RASING ESSAGES NTERFERENCE NFORMATION ....... 23 ........4 EAVING A NTRODUCTION ......24 ......4 ECORD EFORE EGIN ...... -
Page 4: Introduction
All manuals and user guides at all-guides.com NTRODUCTION Your Digital Answering System is designed to give you flexibility in use and high quality performance. To get the most from your new Answering System, we suggest that you take a few minutes right now to read through this instruction manual. -
Page 5: Modular
All manuals and user guides at all-guides.com ODULAR EQUIREMENTS You need an RJ11 type modular jack, which is the most common type of phone jack and might look like the one pictured here. If you don’t have a modular jack, call your local phone company to find out how to get one installed. - Page 6 All manuals and user guides at all-guides.com NSTALLATION CAUTION: • Always disconnect phone cords from the wall outlets before battery installation or replacement. • Never install telephone wiring during a lightning storm. • Never touch uninsulated telephone wires or terminals, unless the telephone line has been disconnected at the network interface.
- Page 7 All manuals and user guides at all-guides.com 4. Plug the two-prong end of the AC power supply into an AC outlet and the other end into the POWER 9V DC jack on the bottom of the unit. The unit beeps three times and is ready for setup or to answer calls with the default greeting and settings.
-
Page 8: Wall Mount Installation
All manuals and user guides at all-guides.com OUNT NSTALLATION The phone with digital answering system can be mounted on a wall phone plate (not included). 1. Plug the phone cord into the phone jack on the bottom of the unit, and wrap the extra phone line around the bottom of the base. - Page 9 All manuals and user guides at all-guides.com 5. Slip the mounting holes over the wall plate posts and slide the unit down firmly into place. 6. Set the TONE/PULSE switch on the side of the handset to TONE for touch- tone service or PULSE for rotary service.
-
Page 10: Important Instructions For Moving The Unit
All manuals and user guides at all-guides.com MPORTANT INSTRUCTIONS FOR MOVING THE UNIT To move the answering system to a different location in the house, follow these instructions: 1. Disconnect the phone line or any phones you may have connected to the unit. -
Page 11: Setup
All manuals and user guides at all-guides.com ETUP ECORDING THE REETING Before using your new answering system, you should record a greeting (the announcement callers hear when the answering system answers a call). If you don't record a greeting, you will hear a default greeting which says, "Record message after tone."... - Page 12 All manuals and user guides at all-guides.com 2. Hold down the GREETING button. Record after the tone. 3. Release the GREETING button when you finish. The greeting will playback automatically. NOTE: Your recording time should not be less than 2 seconds. Otherwise the unit will return to the default greeting.
-
Page 13: Hanging The Ettings
All manuals and user guides at all-guides.com HANGING THE ETTINGS This function allows you to change the Time/Day, Rings to Answer, and Security Code settings. ETTING THE This setting allows you to set the current day and time for the Time/Day stamp attached to each message. -
Page 14: Hour
All manuals and user guides at all-guides.com 1. If you just set and stored the day, skip to step 3. If you haven’t stored any other settings, press and hold the TIME SET button for three seconds, then release. 2. Press and release TIME SET after the unit announces the current hour setting (this bypasses the day setting). -
Page 15: Minutes
All manuals and user guides at all-guides.com INUTES 1. If you have just set and stored the hour, skip to step 3. If you have not stored any other settings, press and hold the TIME SET button for three seconds, then release. 2. -
Page 16: Etting The
All manuals and user guides at all-guides.com ETTING THE INGS TO NSWER This setting allows you to select the number of times the unit rings before answering a call. The setting (2, 4, Toll Saver) can be selected with a switch located on the side of the base unit. -
Page 17: Setting The Security Code
All manuals and user guides at all-guides.com ETTING THE ECURITY This setting allows you to change the factory-set default security code used to access your answering system from a remote location. The default code is 123. 1. Press and hold SECURITY SET (ANSWERER ON/OFF) for three seconds, then release. - Page 18 All manuals and user guides at all-guides.com 4. To store the first number, press and release the SECURITY SET (ANSWERER ON/OFF) button. The unit announces, “Security code ( the current security code) To set security code, press NEXT...press SECURITY SET (ANSWERER ON/OFF) to continue.”...
-
Page 19: Answerering System Operation
All manuals and user guides at all-guides.com NSWERING YSTEM PERATION DJUSTING THE OLUME Use the sliding switch on the side of the base to increase or decrease the volume. NSWER NDICATOR The answering system ON/OFF indicator lets you know whether or not your answering system is on or off. -
Page 20: Messages Indicator
All manuals and user guides at all-guides.com ESSAGES NDICATOR The MESSAGES indicator lets you know when you have new or old messages. • Indicator is on The answering system is ON, but there is no new message. • Indicator is off The answering system is turned off, but you might still have a message •... -
Page 21: Playing Messages
All manuals and user guides at all-guides.com LAYING ESSAGES You may play back old or new messages. To hear all messages, including new messages, press and release the PLAY button. • To playback messages, press and release the PLAY button. •... - Page 22 All manuals and user guides at all-guides.com • To skip to the beginning of the next message, press and release the NEXT button. • To erase a message while it is playing, press and release the ERASE button. The answering system announces, “ Message Erased ” to confirm the message has been erased.
-
Page 23: Erasing
All manuals and user guides at all-guides.com RASING ESSAGES When the answering system isn’t playing or recording messages, press and hold the ERASE button until you hear the “ All Messages Erased ” announcement. If you do not have any messages, the unit will announce, “Zero Messages. -
Page 24: 2-Way
All manuals and user guides at all-guides.com ECORD To record a phone conversation, press and release the MEMO button. Press the MEMO button again or the STOP button when finished. A phone must be off the hook to record. The unit treats the 2-way recorded conver- sation as a message, and the MESSAGES indicator (PLAY/NEXT button) will flash. -
Page 25: Remote Access
All manuals and user guides at all-guides.com EMOTE CCESS You can access your answering system from any touch-tone phone by entering your 3-digit security code (the default security code is 123, but you can change it.) Be aware that remote functions do not work with rotary or push-button, pulse-dialing phones. -
Page 26: Telephone
All manuals and user guides at all-guides.com ELEPHONE ASICS ETTING INGER OLUME The RINGER switch is located on the side of the base. Set it to HI, LO, or OFF. REMEMBER: If you want the phone to ring, the RINGER switch must be set to HI or LO or the phone will not ring for incoming calls. -
Page 27: Tone Dialing
All manuals and user guides at all-guides.com EMPORARY IALING If you have Pulse (rotary) service, and want to access customer calling services that require Tone dialing, such as getting information from a local bank, you can use this feature. 1. Press the tone button ( * ) after you have connected to the service to enable Tone dialing. -
Page 28: Flash
All manuals and user guides at all-guides.com LASH Press the FLASH button instead of using the hook switch to activate customer calling services such as call waiting or call transfer, which are provided by your local phone company. EDIAL You may redial the last number you called by pressing the REDIAL button after you hear a dial tone. -
Page 29: Tips
All manuals and user guides at all-guides.com ROUBLESHOOTING • Check all cabling to make sure that all connections are secure and not damaged. • Check hook switch: Does it fully extend when handset is lifted from cradle? HONE • Check the dial mode in the set up menu. Is it set to TONE, which may not be compatible with your local dialing service? HONE •... - Page 30 All manuals and user guides at all-guides.com NCOMING UTGOING OICE OLUME • Are other phones off the hook at the same time? If so, this is a normal condition as volume drops when additional phones are used at once. EEDBACK LUTTER IALING IN ULSE...
- Page 31 All manuals and user guides at all-guides.com ’ ESPOND TO EMOTE OMMANDS • You must use a touch-tone phone. • You must enter the correct security code. • Did the unit hang up? If you take no action for a period of time, the unit automatically hangs up.
- Page 32 All manuals and user guides at all-guides.com NNOUNCES ATTERY • Install a new 9-volt alkaline battery. ESSAGES NDICATOR LASHES APIDLY • Memory is full. Erase some messages. REETING ONTINUES TO FTER AN XTENSION HONE IS ICKED • This is normal operation. Auto disconnect is delayed for 2 seconds after the unit answers a call.
-
Page 33: Care
All manuals and user guides at all-guides.com ENERAL RODUCT To keep your answerer working and looking good, follow these guidelines: • Avoid putting it near heating appliances and devices that generate electrical noise (for example, motors or fluorescent lamps). • DO NOT expose to direct sunlight or moisture. •... - Page 34 All manuals and user guides at all-guides.com NDEX Adjusting the Volume 19 Hour 14 Answer On/Off Indicator 19 Answering System Operation 19 Important instructions for moving the unit: 10 Before You Begin 4 Incoming Message Length 16 Installation 6 Installing the Battery 5 Interference Information 2 Changing the Settings 13 Introduction 4...
- Page 35 All manuals and user guides at all-guides.com Recording the Greeting 11 Telephone Basics 26 Redial 28 Temporary Tone Dialing 27 Remote Access 25 To access your answering system 25 Remote Access Card 37 Toll Saver 16 Tone/Pulse Dialing 26 Troubleshooting Tips 29 Screening Calls (Auto Disconnect Feature) 24 Service 33...
- Page 36 All manuals and user guides at all-guides.com IMITED ARRANTY What your warranty covers: • Any defect in materials or workmanship. For how long after your purchase: • One year. (The warranty period for rental units begins with the first rental or 45 days from date of shipment to the rental firm, whichever comes first.) What we will do: •...
-
Page 37: Card
All manuals and user guides at all-guides.com EMOTE CCESS Cut out this remote access card so that you can take it with you to help you use the remote features. FOLD Press: Play messages ......1 Repeat current message .... 7 (press two times to play previous message) Skip to next message .... - Page 38 All manuals and user guides at all-guides.com ATLINKS USA, Inc. 10330 North Meridian Street Model 29879 Indianapolis, IN 46290 15680500 (Rev. 0 E/S) © 2001 ATLINKS USA, Inc. 01-02 Trademark(s) ® Registered Marca(s) Registrada(s) Printed in China...
- Page 39 All manuals and user guides at all-guides.com 29879 Teléfono Ligero con Sistema de Contestador Digital Guía del Usuario Creamos cosas buenas para la vida...
- Page 40 All manuals and user guides at all-guides.com NFORMACIÓN EGISTRO A LA Su equipo telefónico de la ha sido registrado con la Comisión Federal de Comunicaciones (FCC) y está en acuerdo con las Partes 15 y 68 de las Regulaciones y Reglas de la FCC. Notificación a la Compañía Telefónica Local Al fondo de este equipo Ud.
- Page 41 All manuals and user guides at all-guides.com ABLA DE ONTENIDO ....21 NFORMACIÓN EGISTRO A EPRODUCIR ENSAJES FCC ........2 ORRAR TODOS LOS ..2 ......23 NFORMACIÓN DE NTERFERENCIAS ENSAJES ........4 ..... 23 NTRODUCCIÓN EJAR UN ECADO ......4 NTES DE OMENZAR RABAR EN...
-
Page 42: Ntroducción
All manuals and user guides at all-guides.com NTRODUCCIÓN Su Sistema de Contestador Digital está diseñado para darle flexibilidad de uso y la más alta calidad de funcionamiento. Para aprovechar al máximo su nuevo sistema de contestador digital, le sugerimos que se tome unos minutos ahora mismo para leer este manual de instrucciones. -
Page 43: Requisitos De Conexión
All manuals and user guides at all-guides.com EQUISITOS DE CONEXIÓN Para conectar el teléfono se necesita un enchufe modular RJ11, que es el tipo de enchufe más común y se parece al ilustrado. Si usted no tiene este tipo de enchufe, llame a su compañía telefónica local para preguntar cómo conseguirlo. -
Page 44: Instalación
All manuals and user guides at all-guides.com NSTALACIÓN CUIDADO: • Siempre desconecte los cables telefónicos de los enchufes de pared antes de instalar o cambiar la batería. • Nunca instale el cableado del teléfono durante una tormenta de relámpagos. • Nunca toque alambres telefónicos o terminales que no estén aislados, a menos de que la línea telefónica haya sido desconectada en la interfaz de la red. - Page 45 All manuals and user guides at all-guides.com 4. Conecte el del cable de corriente AC con los dos dientes de contacto en un enchufe de corriente AC de pared, y el otro extremo en el enchufe marcado “POWER 9V DC” , localizado en la parte de abajo del aparato. El aparato emite tres tonos indicando que está...
-
Page 46: Instalación Sobre Pared
All manuals and user guides at all-guides.com NSTALACIÓN SOBRE ARED Su teléfono con sistema de contestador digital puede ser montado sobra una pared con una placa de montaje (no incluida). 1. Conecte el cable telefónico en el enchufe localizado en la parte de abajo del aparato, y enhebre el exceso de línea telefónica en la parte de abajo de la base. - Page 47 All manuals and user guides at all-guides.com 5. Deslice los agujeros para montaje sobre los postes de la placa y empuje el aparato hacia abajo a que entre en su sitio. 6. Coloque el selector de tono/pulso (“TONE/PULSE”) en el costado del auricular en la posición de tono (“TONE”) para servicio de tono (“touch- tone”), o de pulso (“PULSE”) para servicio rotatorio.
-
Page 48: Instrucciones Importantes Para
All manuals and user guides at all-guides.com NSTRUCCIONES MPORTANTES PARA OVER EL ONTESTADOR Para mover el contestador a una localización diferente dentro de la casa, siga las siguientes instrucciones: 1. Desconecte la línea telefónica o los teléfonos que pudiera tener conectados al aparato. -
Page 49: Para Grabar El Saludo
All manuals and user guides at all-guides.com ROGRAMACIÓN ARA GRABAR EL SALUDO Antes de usar su nuevo sistema de contestador, usted debe de grabar un saludo (el anuncio que la persona que llama escucha cuando su sistema de contestador contesta una llamada). Si usted no graba un saludo, las personas que llaman escucharán el saludo por omisión (pre-programado de fábrica) que dice, “Grabe su mensaje después del tono”. - Page 50 All manuals and user guides at all-guides.com 2. Sostenga oprimido el botón de saludo (“GREETING”). Grabe su mensaje después del tono. 3. Suelte el botón de saludo (“GREETING”) una vez que haya terminado. El mensaje se reproducirá automáticamente. NOTA: Su tiempo de grabado no debe ser menos de 2 segundos. De otra manera el aparato regresará...
-
Page 51: Para Cambiar Las Programaciones
All manuals and user guides at all-guides.com AMBIAR LAS ROGRAMACIONES Esta función le permite cambiar la Hora/Día, Timbres para Contestar, y las programaciones de Códigos de Seguridad. ARA PROGRAMAR LA ÍA Esta programación le permite programar la información de Hora/Fecha que acompaña a cada Mensaje. -
Page 52: Hora
All manuals and user guides at all-guides.com 1. Si usted acaba de programar y almacenar el día, salte al paso 3. Si usted no ha almacenado ninguna otra programación, oprima y sostenga el botón “TIME SET” durante tres segundos, y después suelte. 2. -
Page 53: Minutos
All manuals and user guides at all-guides.com INUTOS 1. Si usted acaba de programar y almacenar la hora, salte al paso 3. Si usted no ha almacenado ninguna otra programación, oprima y sostenga el botón “TIME SET” durante tres segundos, y después suelte. 2. -
Page 54: Para Programart
All manuals and user guides at all-guides.com ROGRAMAR IMBRES PARA ONTESTAR Esta programación le permite seleccionar el número de timbres antes de que el aparato conteste una llamada. La programación (2, 4 o Ahorrador de Cargos) puede ser seleccionada con un selector localizado al costado de la base del aparato. -
Page 55: Para Programar El Código De
All manuals and user guides at all-guides.com ROGRAMAR EL ÓDIGO DE EGURIDAD Esta programación le permite cambiar el código de seguridad programado de fábrica que se usa para tener acceso a su sistema de contestador desde una localización remota. El código de seguridad programado de fábrica es 123. - Page 56 All manuals and user guides at all-guides.com 4. Para almacenar el primer número, oprima y suelte el botón (SECURITY SET “ANSWERER ON/OFF”). El aparato anuncia “Security code” (la programación actual del código) “To set security code, press “NEXT”…press SECURITY SET (“ANSWERER ON/OFF”) to continue” (para programar el código de seguridad oprima “NEXT”...
-
Page 57: Peración Del
All manuals and user guides at all-guides.com PERACIÓN DEL ISTEMA DE ONTESTADOR JUSTAR EL OLUMEN Utilice el selector localizado al costado del aparato para aumentar o disminuir el volumen. NDICADOR DE CTIVADO ESACTIVADO DEL ONTESTADOR El indicador “ON/OFF” del sistema de contestador le permite saber si su sistema de contestador está... -
Page 58: Indicadores De Mensajes
All manuals and user guides at all-guides.com NDICADORES DE ENSAJES El indicador de mensajes (“MESSAGES”) le hace saber cuando tiene mensajes nuevos o viejos. • El Indicador está activado El sistema de contestador está activado (ON), pero no hay mensajes nuevos. •... -
Page 59: Ensajes
All manuals and user guides at all-guides.com EPRODUCIR ENSAJES Usted puede reproducir mensajes viejos o nuevos. Para escuchar todos los mensajes, incluyendo los nuevos, oprima y suelte el botón “PLAY” . • Para reproducir mensajes, oprima y suelte el botón “PLAY” . •... - Page 60 All manuals and user guides at all-guides.com • Para saltar al principio del siguiente mensaje, oprima y suelte el botón “NEXT” . • Para borrar un mensaje mientras se reproduce, oprima y suelte el botón “ERASE” . El contestador anuncia “Message Erased” (Mensaje Borrado) para confirmar que el mensaje ha sido borrado.
-
Page 61: Orrar Todos Los
All manuals and user guides at all-guides.com ORRAR TODOS LOS ENSAJES Cuando el contestador no está reproduciendo o grabando mensajes, oprima y sostenga el botón “ERASE” hasta que usted escuche la indicación “All Messages Erased” (Todos los Mensajes se han Borrado). Si usted no tiene ningún mensaje, el aparato anunciará... -
Page 62: Forma
All manuals and user guides at all-guides.com RABAR EN ORMA IRECCIONAL Para grabar una conversación telefónica, oprima y suelte el botón “MEMO” . Oprima nuevamente el botón “MEMO” o el botón “STOP” cuando haya terminado. Un teléfono debe estar descolgado para grabar. El aparato trata esta grabación bi-direccional como si fuera un mensaje, y el indicador de mensajes (“MESSAGES”) (botón “PLAY/NEXT”) parpadeará. - Page 63 All manuals and user guides at all-guides.com CCESO EMOTO Usted puede tener acceso a su sistema de contestador desde cualquier teléfono con modalidad para marcar por tono en otra localización, simplemente inscribiendo su código de seguridad de 3 dígitos (el código programado de fábrica es 123, pero usted puede cambiarlo).
-
Page 64: Llamadas (Función Desconectar )
All manuals and user guides at all-guides.com UNCIONES ÁSICAS DEL ELÉFONO ROGRAMAR EL OLUMEN DEL IMBRE El selector del timbre (“RINGER”) está localizado a un costado de la base. Se puede programar a tres niveles: “HI” , “LO” , u “OFF” . RECUERDE: Si usted quiere que el teléfono timbre, el selector del timbre (“RINGER”) debe estar programado en “HI”... -
Page 65: Temporal
All manuals and user guides at all-guides.com UNCIÓN DE EMPORAL Si usted tiene servicio de pulso (rotatorio), y quiere tener acceso a los servicios al cliente que requieren servicio para marcar por tono – TONE- (touch-tone), como para obtener información de un banco local, usted puede utilizar esta función. -
Page 66: Servicios ("Flash")
All manuals and user guides at all-guides.com (“FLASH”) OTÓN PARA ERVICIOS Oprima el botón “FLASH” en lugar del gancho para colgar para activar los servicios telefónicos personalizados como el “call waiting” (llamada en espera) o “call transfer” (transferencia de llamada), que son disponibles a través de su compañía telefónica local. -
Page 67: Roblemas
All manuals and user guides at all-guides.com OLUCIÓN DE ROBLEMAS O HAY ONO DE ARCAR • Verifique todo el cableado para asegurarse de que todas las conexiones están firmemente aseguradas y no dañadas. • Cheque el gancho de colgar (hook switch): ¿Regresa a su lugar completamente cuando el auricular es descolgado? L TELÉFONO NO DA LÍNEA HACIA AFUERA •... - Page 68 All manuals and user guides at all-guides.com OLUMEN DE OZ EN LAS LAMADAS NTRANTES COMO EN LAS ALIENTES ESTÁ MUY • ¿Están otras extensiones descolgadas al mismo tiempo? Si es así, esta es una condición normal porque el volumen disminuye cuando más extensiones se usan al mismo tiempo.
- Page 69 All manuals and user guides at all-guides.com ESPONDE A LOS OMANDOS DEL ONTROL EMOTO • Usted debe utilizar un teléfono de tono (touch-tone). • Usted debe inscribir el código de seguridad correcto. • ¿El aparato colgó? Si usted no oprime ningún botón durante un período de tiempo, el aparato cuelga automáticamente.
- Page 70 All manuals and user guides at all-guides.com L APARATO ANUNCIA QUE LA BATERÍA ESTA BAJA • Instale una batería nueva de 9 voltios. NDICADOR DE ENSAJES ARPADEA ÁPIDAMENTE • La memoria está llena. Borre algunos mensajes. ALUDO CONTINÚA EPRODUCIÉNDOSE NCLUSO ESPUÉS DE QUE EVANTA UNA XTENSIÓN...
-
Page 71: Uidado General Del Producto
All manuals and user guides at all-guides.com UIDADO GENERAL DEL PRODUCTO Para mantener su contestador funcionando bien y con buena apariencia, observe las siguientes pautas: • Evite poner el teléfono cerca de calentadores (calefactores) de ambiente y dispositivos que generen interferencia eléctrica ejemplo, motores o lámparas fluorescentes). - Page 72 All manuals and user guides at all-guides.com Í NDICE Indicador de Activado/Desactivado del Acceso Remoto 25 Contestador 19 Acceso Remoto Tarjeta 37 Indicadores de Mensajes 20 Ahorrador de Cargos 16 Información de Interferencias 2 Antes de Comenzar 4 Información Del Registro a la FCC 2 Instalación 6 Instalación de la Batería 5 Botón para Servicios (“FLASH”) 28...
- Page 73 All manuals and user guides at all-guides.com Para grabar el saludo 11 Para Grabar en Forma Bi-Direccional 24 Requisitos de conexión 5 Para Marcar por Tono/Pulso 26 Para Programar el Código de Seguridad 17 Para Programar el Volumen del Solución de Problemas 29 Timbre 26 Para programar la Hora/Día 13 Para Programar Timbres para...
- Page 74 All manuals and user guides at all-guides.com ARANTÍA LIMITADA Lo que cubre su garantía: • Cualquier defecto en material o mano de obra. Por cuánto tiempo después de la compra: • Un año. (El periodo de garantía para unidades arrendadas se inicia con la primera renta o 45 días de la fecha del embarque a la firma de arrendamiento, lo que ocurra primero).
-
Page 75: Tarjeta
All manuals and user guides at all-guides.com CCESO EMOTO ARJETA Recorte esta tarjeta con las funciones del control remoto para que usted pueda llevarla consigo. DOBLAR Para: Oprima: Reproducir los mensajes ....1 Reproducir el mensaje actual ..7 (oprima dos veces para reproducir el anterior) Saltar al siguiente mensaje .. - Page 76 All manuals and user guides at all-guides.com ATLINKS USA, Inc. 10330 North Meridian Street Modelo 29879 Indianapolis, IN 46290 15680500 (Rev. 0 E/S) © 2001 ATLINKS USA, Inc. 01-02 Trademark(s) ® Registered Marca(s) Registrada(s) Impreso en China...