
Related Manuals for LG LMVM2085SB


Summary of Contents for LG LMVM2085SB
-
Page 1: Microwave Oven
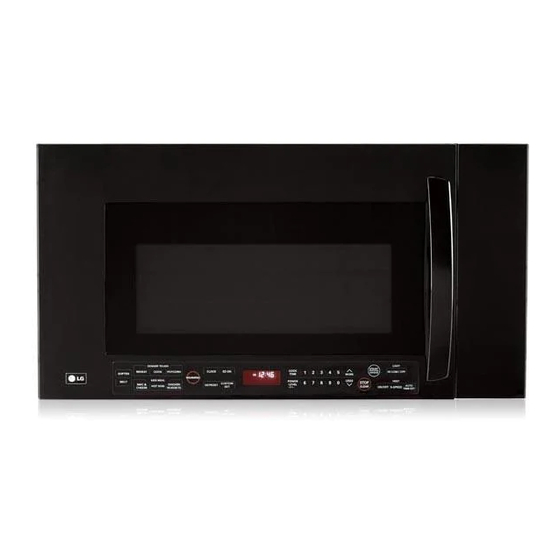
MICROWAVE OVEN OWNER’S MANUAL PLEASE READ THIS OWNER’S MANUAL THOROUGHLY BEFORE OPERATING. LMVM2085SB LMVM2085SW P/NO.: MFL56516407 LMVM2085ST Printed in China... -
Page 2: Precautions To Avoid Possible Exposure To Excessive Microwave Energy
Thank you for purchasing a LG microwave oven. Please record the model number and serial number of this unit for future reference. We also suggest you record the details of your contact with LG (LG Electronics U.S.A., Inc.) concerning this unit. -
Page 3: Table Of Contents
Installation Instructions for Glass Tray ... 9 Using Oblong Dish ... 9 Control Panel Features ... 10 USING YOUR MICROWAVE OVEN ... 12 Learn About Your Microwave Oven ... 12 Clock ... 12 Vent Auto Time Set ... 12 Vent Fan ... 12 Light Hi/Low/Off ... -
Page 4: Safety
IMPORTANT SAFETY INSTRUCTIONS The safety instructions below will tell you how to use your oven and avoid harm to yourself or damage to your oven. WARNING - To reduce the risk of burns, electric shock, fire, injury to persons, or exposure to excessive microwave energy. -
Page 5: Save These Instructions
• Relocate the Microwave Oven with respect to the receiver. • Move the microwave oven away from the receiver. • Plug the microwave oven into a different outlet so that the microwave oven and the receiver are on different branch circuits. -
Page 6: Understanding Your Microwave Oven
The oven is designed to operate on a Standard 120V/60Hz household outlet. Be sure the circuit is at least 15A or 20A and the microwave oven is the only appliance on the circuit. It is not designed for 50Hz or any circuit other than a 120V/60Hz circuit. -
Page 7: Microwave Oven Features
Lock System Window with Metal Shield Cooktop/Countertop Light Your microwave oven is designed to make your cooking experience as enjoyable and productive as possible. To get you up and running quickly, the following is a list of the oven’s basic features: 1. -
Page 8: Installing Glass Tray
4,5) 1. Glass Tray 2. Rotating Ring 3. Guide Tray 4. Shaft The glass tray moves in both direction and turns to help cook food more evenly. Do not operate the microwave oven without the glass tray in place. -
Page 9: Installation Instructions For Glass Tray
UNDERSTANDING YOUR MICROWAVE OVEN INSTALLATION INSTRUCTIONS FOR GLASS TRAY To Install: 1. Place the guide tray on the oven cavity bottom. The rollers on the shaft should fit inside the guide tray bottom groove. (see figure 1, 2-1, 2-2) 2. Place the rotating ring on the guide tray. (see figure 3) 3. -
Page 10: Control Panel Features
CONTROL PANEL FEATURES Your microwave oven control panel lets you select the desired cooking function quickly and easily. All you have to do is touch the necessary Command pad. The following is a list of all the Command and Number pads... - Page 11 6. POPCORN: Touch this pad when popping popcorn in your microwave oven. The oven’s sensor will tell the oven how long to cook depending on the amount of humidity it detects from the popcorn.
-
Page 12: Using Your Microwave Oven
Touch ON/OFF to turn off fan when desired. NOTE: If the temperature from the range or cooktop below the microwave oven gets too hot, the exhaust fan in the microwave oven hood will automatically turn to Level 4 setting to protect the oven. -
Page 13: Kids Meal
WARMING LAMP You can keep cooked food warm in your microwave oven. The Warming Lamp keeps food warm at a desired temperature controlled by the heating element and the fan installed on the upper side. -
Page 14: Custom Set
When the cook time is over, four beeps will sound and COOK END will display. MICROWAVE POWER LEVELS Your microwave oven has 10 cook power levels to let you cook or heat a wide variety of foods. Example: To cook food for 7 minutes 30 seconds at... -
Page 15: Cooking Guide For Lower Power Levels
USING YOUR MICROWAVE OVEN COOKING GUIDE FOR LOWER POWER LEVELS The 10 power levels in addition to HIGH allow you to choose the best power level for the food you are cooking. Below are listed all the power levels, examples of foods best cooked at each level, and the amount of microwave power you are using. -
Page 16: Sensor Operating Instructions
4. Be sure the outside of the cooking container and the inside of the microwave oven are dry before placing food in the oven. Beads of moisture turning into steam can mislead the sensor. -
Page 17: Sensor Cook
USING YOUR MICROWAVE OVEN SENSOR COOK Using SENSOR COOK lets you heat common microwave-prepared foods without needing to program times and Cook Powers. SENSOR COOK has preset Cook Power for 7 food categories. Example: To cook rice. 1. Touch COOK. -
Page 18: Sensor Cook Table
USING YOUR MICROWAVE OVEN SENSOR COOK TABLE CATEGORY Baked Potato Pierce each potato with a fork and place on the oven tray around the edge, at least one inch apart. Prepare as desired, wash and leave residual water on the vegetables. -
Page 19: Kitchen Timer
USING YOUR MICROWAVE OVEN KITCHEN TIMER You can use your microwave oven as a timer. Use the Timer for timing up to 99 minutes, 99 seconds. Example: To count 3 minutes. 1. Touch STOP/CLEAR. 2. Touch KITCHEN TIMER. 3 0 0 3. -
Page 20: Soften Table
USING YOUR MICROWAVE OVEN SOFTEN TABLE CATEGORY Butter Unwrap and place on the rack over the glass tray. Butter will be at room temperature and ready for use in recipe. Ice Cream Place on the rack over the glass tray. -
Page 21: Defrost
USING YOUR MICROWAVE OVEN DEFROST Four defrost choices are preset in the oven. The defrost feature provides you with the best defrosting method for frozen foods, because the oven automatically sets the defrosting times for each food item according to the weight you enter. -
Page 22: Defrost Tips
USING YOUR MICROWAVE OVEN DEFROST TIPS • When using DEFROST, the weight to be entered is the net weight in pounds and tenths of pounds (the weight of the food minus the container). • Use DEFROST only for raw food. DEFROST gives best results when food to be thawed is a minimum of 0°F... -
Page 23: Cooking
GETTING THE BEST COOKING RESULTS To get the best results from your microwave oven, read and follow the guidelines below. ● Storage Temperature: Foods taken from the freezer or refrigerator take longer to cook than the same foods at room temperature. -
Page 24: Appetizers/Sauces/Soups
Wait until party time to add the spreads. Place a paper towel under the crackers while they cook in the microwave oven to absorb extra moisture. ● Arrange individual appetizers in a circle for even cooking. -
Page 25: Meat Cooking Table
Add desired seasonings and cover with waxed paper. RARE (135°F) Turn meat over halfway through cooking and shield if 11-13 minutes necessary. Remove roast from microwave oven when per pound desired temperature is reached. Let stand covered with foil MEDIUM (155°F) 15 minutes. -
Page 26: Chicken
CHICKEN Cooking Poultry: General Directions ● Prepare the poultry for cooking. - Defrost completely. - Arrange poultry pieces with thicker pieces at the outside edge of the baking dish. When cooking legs, arrange them like the spokes of a wheel. - Cover the baking dish with waxed paper to reduce spattering. -
Page 27: Pasta And Rice
PASTA AND RICE Microwave cooking and conventional cooking of pasta, rice, and cereal require about the same amount of time,but the microwave is a more convenient method because you can cook and serve in the same dish. There is no stirring needed and leftover pasta tastes just like fresh cooked when reheated in the microwave oven. -
Page 28: Caring For Your Microwave Oven
CARING FOR YOUR MICROWAVE OVEN CARING FOR YOUR MICROWAVE OVEN To make sure your microwave oven looks good and works well for a long time, you should maintain it properly. For proper care, please follow these instructions carefully. For interior surfaces: Wash often with warm, sudsy water and a sponge or soft cloth. -
Page 29: Metal Rack
The filter will turn black or could be damaged. 4. To reinstall the filter,slide it into the back slot,then push up to lock. 5. Plug in microwave oven or reconnect power. NOTE:Do not operate the hood without the filter in place. -
Page 30: Charcoal Filter Replacement
2. Remove the lamp cover mounting screws. 3. Replace bulb(s) with 20~40 watt appliance bulb(s). 4. Replace lamp cover, and mounting screws. 5. Plug in microwave oven or reconnect power. OVEN AND WARMING LAMP LIGHT REPLACEMENT 1. Unplug microwave oven or disconnect power. -
Page 31: Cooking Utensils
WOOD: Wooden bowls and boards will dry out and may split or crack when you use them in the microwave oven. Baskets react in the same way. TIGHTLY COVERED UTENSILS: Be sure to leave openings for steam to escape from covered utensils. -
Page 32: Troubleshooting
• check that timer was not started instead of a cooking function. • If the temperature gets too hot around the microwave oven, the fan in the vent hood will automatically turn on at the LEVEL 4 setting to cool the oven. -
Page 33: Questions And Answers
You can also use special microwave poppers. When using a popper, be sure to follow manufacturer’s directions. Do not pop popcorn in glass utensils. Steam is normally produced during cooking. The microwave oven has been designed to vent this steam out the top vent. ANSWER... -
Page 34: Limited Warranty
Model: LMVM2085SB / LMVM2085SW / LMVM2085ST LG Electronics Inc. will repair or replace your product, at LG’s option, if it proves to be defective in material or workmanship under normal use, during the warranty period set forth below, effective from the date of original consumer purchase of the product.