Table of Contents
Advertisement
Available languages
Available languages
Quick Links
이 도면은 LG전자의 자산으로 불법유출시 관계법과 회사규정에 의해 처벌됨
Privileged & Confidential by LG Electronics
CTQ Table
CTQ Table은 현재의 수준을 알기 위해서 CTQ 정보를 항상 보완 및 추가해야 한다.
상세 Spec.
Z(Sigma Level)
치수
공차 Tolerance
NO
항목 Item
+
-
3
4
Dimension
1
2
3
4
作业
材质
颜色
封面 : 150g
01
BLACK+GRAY
148*210*76页
内部 : 70g
변경내용
시방번호
기호
SYM
REVISION
ECO.NO.
7
8
9
1
0
1
1
1
2
판단근거
Data
Reason
5
6
A,B,C
결과 Result
尺寸
语言
折叠方法
English+Spanish
S2
Mexico适用
년월일
서명
변경내용
기호
SYM
DATE
SIGNED
REVISION
1
2
3
4
5
6
备注
시방번호
년월일
서명
금형제작처
Maker
Manufacturer
ECO.NO.
DATE
SIGNED
합
의
란
01
Work
TA
Site
Qty
Spec.
WORKING SPECIFICATIONS
1. Printed contents should be satisfied with the film provided by LGE Design Dept.
2. Overall printing condition and appearance satisfied with standard sample provided by LGE for approval.
3. The number behind "S" followed by folding method means the number of staple work.
ECO-DESIGN SPECIFICATIONS
1. The part should not contain prohibited substances (
and details should be complied with LG(10)-A-9023.
注记:
制作基准:
1. 印刷内容需要与设计确认的一致。
2. 整个印刷条件和印刷效果应与设计所同意的标准样品一致。
3. S后面的数字表示装订针的个数。
ECO-设计基准:
1. 此部品不得添加禁止物质 (
细节请遵照供应商指南及相关标准L
양산처
자료실/3D(UG)확인
UNITS
mm
SCALE
Confirm
DRW/DSN
CHKD
CHKD
RELATION C.NO
치수구분
각도
O
ANGLE
J
K
L M
N
DIMENSION
CLASSIFICATION
JKL
MN
치
수
10 or less
0.05 0.2 0.3
0.5
0.7
1계
6계
허
over 10 ~ 30 or less
0.1
0.3
0.5
0.8
1.2
용
30 ~ 50
0.2
0.4
0.6
1.1
2.0
오
30"
2계
50 ~ 150
0.3
0.6
0.8
1.4
2.5
차
150 ~ 300
0.4
0.8
1.0
1.7
3.5
15"
1계
+
- mm
300 ~ 500
0.6
1.2
1.5
2.0
4.5
0.8
1.6
2.0
2.5
6
500 over
5"
30"
No PART NUMBER DESCRIPTION SPECIFICATION MAKER REMARKER
Pb, Cd, Cr+6, Hg, PBB, PBDE, DEHP, BBP, DBP, DIBP)
Pb, Cd, Cr+6, Hg, PBB, PBDE, DEHP, BBP, DBP, DIBP
)
G(10)-A-9023,
特别是墨水中不得添加Pb Cd
01
PRINTING S-ALL GGRD S4-Q12JA3A1 Mexico
Work
Spec
Manual,Owners
N/S
APPD
TITLE
DWG.
MFL705005
도번
발
구
배
Advertisement
Chapters
Table of Contents

Related Manuals for LG VX122CX


Summary of Contents for LG VX122CX
- Page 1 치수구분 각도 이 도면은 LG전자의 자산으로 불법유출시 관계법과 회사규정에 의해 처벌됨 발 ANGLE Privileged & Confidential by LG Electronics 구 DIMENSION CLASSIFICATION 배 치 Work CTQ Table 수 10 or less 0.05 0.2 0.3 1계 6계 판단근거 CTQ Table은 현재의 수준을 알기 위해서 CTQ 정보를 항상 보완 및 추가해야 한다.
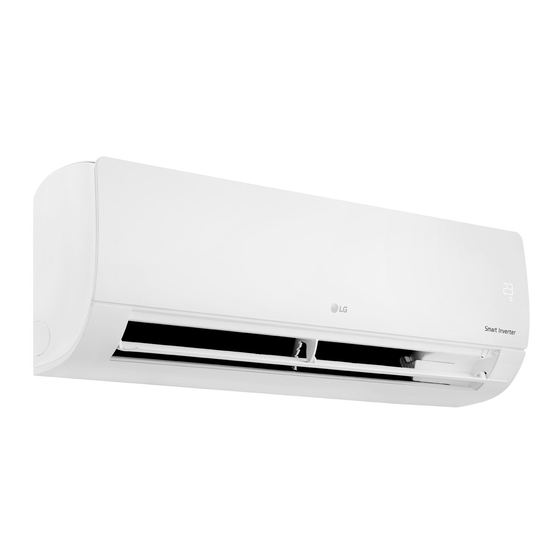
- Page 2 Read this owner's manual thoroughly before operating the appliance and keep it handy for reference at all times. TYPE : WALL MOUNTED EN English SP Español MODELS Indoor Unit Outdoor Unit VX122CX NJM0 (S4NQ12JA3A1) VX122CX USM0 (S4UQ12JA3A1) www.lg.com P/NO : MFL70500501 Copyright © 2017 LG Electronics Inc. All Rights Reserved. Rev.00_171124...
-
Page 3: Table Of Contents
TABLE OF CONTENTS This manual may contain images or content different from the model you purchased. This manual is subject to revision by the manufacturer. SAFETY INSTRUCTIONS ........... 3 IMPORTANT SAFETY INSTRUCTIONS ..........3 OPERATION ............... 11 Notes for Operation ................11 Parts and Functions ................ -
Page 4: Safety Instructions
SAFETY INSTRUCTIONS The following safety guidelines are intended to prevent unforeseen risks or damage from unsafe or incorrect operation of the appliance. The guidelines are separated into ‘WARNING’ and ‘CAUTION’ as described below. This symbol is displayed to indicate matters and operations that can cause risk. - Page 5 Children in the Household This appliance is not intended for use by persons (including children) with reduced physical, sensory or mental capabilities, or lack of experience and knowledge, unless they have been given supervision or instruction concerning use of the appliance by a person responsible for their safety.
- Page 6 •Install dedicated electric outlet and circuit breaker before using the air conditioner. •Do not connect the ground wire to a gas pipe, a lightning rod, or a telephone ground wire. Operation •Be sure to use only those parts listed in the service parts list. Never attempt to modify the equipment.
- Page 7 •Do not block the inlet or outlet of air flow. •Do not insert hands or other objects through the air inlet or outlet while the air conditioner is operating. •Make sure that the power cable is neither dirty, loose, nor broken. •Never touch, operate, or repair the air conditioner with wet hands.
- Page 8 Technical Safety •Installation or repairs made by unauthorized persons can pose hazards to you and others. •The information contained in the manual is intended for use by a qualified service technician who is familiar with the safety procedures and equipped with the proper tools and test instruments.
- Page 9 CAUTION To reduce the risk of minor injury to persons, malfunction, or damage to the product or property when using this product, follow basic precautions, including the following: Installation •Do not install the air conditioner in an area where it is directly exposed to sea wind (salt spray).
- Page 10 Operation •Remove the batteries if the remote control is not to be used for an extended period of time. •Make sure that the filter is installed before operating the air conditioner. •Be sure to check if there is a refrigerant leak after installing or repairing the air conditioner.
- Page 11 Maintenance •Never touch the metal parts of the air conditioner when removing the air filter. •Use a sturdy stool or ladder when cleaning, maintaining, or repairing the air conditioner at a height. •Never use strong cleaning agents or solvents when cleaning the air conditioner or spray water.
-
Page 12: Operation
OPERATION Notes for Operation Suggestion for Energy Saving • Do not cool excessively indoors. This may be harmful for your health and may consume more electricity. • Block sunlight with blinds or curtains while you are operating the air conditioner. •... -
Page 13: Wireless Remote Control
Wireless Remote Control Operating Method Point the remote control towards the signal Inserting Batteries receiver at the right side of the air conditioner to operate it. If the display screen of the remote control begins to fade, replace the batteries. Insert AAA (1.5 V) batteries before using the remote control. - Page 14 Setting the Current Time Operating the Air Conditioner without the Remote Control Insert batteries. You can use the ON/OFF button of the indoor • The icon below blinks at the bottom of the unit to operate the air conditioner when the display screen.
- Page 15 Using Wireless Remote Control You can operate the air conditioner more conveniently with the remote control. Display Description Button Screen To turn on/off the air conditioner. To adjust the desired room temperature in cooling, heating or auto changeover mode. To select the cooling mode. To select the heating mode.
- Page 16 Display Description Button Screen To turn on/off air conditioner automatically at desired time. TIMER SET/ To set/cancel the special functions and CANCEL timer. To cancel the timer settings. CANCEL To adjust time. *LIGHT To set the brightness of the display on the indoor unit.
- Page 17 Display Description Button Screen To purify the air by removing particles that enters the indoor unit. To reduce noise from outdoor units. To keep your skin moisturized by generating ion clusters. To lower indoor humidity quickly. To maintain a minimum room FUNC.
-
Page 18: Restarting The Air Conditioner Automatically
Restarting the Air Conditioner Using the Mode Function Automatically This function allows you to select the desired function. When the air conditioner is turned on again after a power failure, this function restores the Cooling Only Model previous settings. Disabling Auto Restart Cooling Mode Open the front cover (Type2) or horizontal vane (Type1). - Page 19 Heating Mode Fan Mode This mode only circulates the indoor air without Turn the appliance on. changing the room temperature. Turn the appliance on. Press MODE button repeatedly to select the Heating Mode. Press MODE button repeatedly to select the •...
-
Page 20: Using The Jet Mode Function
Auto Operation (Artificial Using the Jet Mode Function Intelligence) Changing Room Temperature Quickly Cooling Only Model This mode automatically sets the fan speed and This function allows you to cool indoor air temperature depending on the room quickly during the summer or warm it quickly temperature. -
Page 21: Using The Fan Speed Function
Using the Fan Speed Using the Air Flow Direction Function Function Adjusting the Fan Speed This function adjusts the direction of the air flow vertically (horizontally). • Press FAN SPEED button repeatedly to adjust • Press ) button repeatedly and select the fan speed. -
Page 22: Setting The On/Off Timer
Setting the On/Off Timer Setting the Off Timer This function sets the air conditioner to turn on/ Press button repeatedly. off automatically at desired time. TIMER • The icon below blinks at the bottom of the display screen. Setting the On Timer Press button repeatedly. -
Page 23: Using The Sleep Function (Optional)
Using the Sleep Function Using the Simple Timer (Optional) Function (Optional) This function turns off the air conditioner This function turns off the air conditioner automatically when you go to sleep. automatically when you go to sleep. Turn the appliance on. Turn the appliance on. -
Page 24: Using The Energy Display Function (Optional)
Using the Energy Display Using the Light Off Function Function (Optional) (Optional) This function displays the amount of electricity Display Screen Brightness generated on the indoor display as the product You can set the brightness of the indoor unit operates. display screen. -
Page 25: Using The Energy Saving Function (Optional)
Using the Energy Saving Using the Energy Control Function (Optional) Function (Optional) This function minimizes power consumption Turn the appliance on. during Cooling and increases the set temperature to the optimal level for a more comfortable environment. The temperature Press ENERGY CTRL button. automatically settles at 22 °C if desired •... -
Page 26: Using The Comfort Sleep Function (Optional)
Using the Comfort Sleep Using Special Functions Function (Optional) Turn the appliance on. This function sets optimal air current, air flow, and timer to help comfortable sleep. Press FUNC button repeatedly to select the • This function is available with Cooling, desired function. - Page 27 Canceling Special Functions Using the Silent Function This function prevents potential claims by Press FUNC button repeatedly to select the neighbors, reducing noise from outdoor units. desired function. is displayed on the display screen. • Press SET/CANCEL button to cancel the NOTE function.
- Page 28 Using the Low Heating Function Using the Auto Clean Function This function operates the heating system to In the Cooling and Dehumidification Mode, maintain a minimum room temperature and moisture is generated inside the indoor unit. prevent objects in the room from freezing where This function removes such moisture.
-
Page 29: Smart Functions
• For appliances with the logo manual. Check the distance between the appliance • LG SmartThinQ is not responsible for any and the wireless router (Wi-Fi network). network connection problems or any faults, malfunctions, or errors caused by network • If the distance between the appliance and connection. - Page 30 Installing LG SmartThinQ Using the Application Select the appliance in the application and Search for the LG SmartThinQ application from connect it to a Wi-Fi network. the Google Play Store or Apple App Store on a smart phone. Follow instructions to download and install the application.
- Page 31 Select the air conditioner in dashboard. LG Electronics will also provide open source code to you on CD-ROM for a charge covering Press Start Smart Diagnosis button. the cost of performing such distribution (such as the cost of media, shipping, and handling) upon email request to opensource@lge.com.
-
Page 32: Maintenance
MAINTENANCE WARNING • Before cleaning or performing maintenance, disconnect the power supply and wait until the fan stops. If the air conditioner will not be used for an extended period of time, dry the air conditioner to maintain it in best condition. Clean the product regularly to maintain optimal performance and to prevent possible breakdown. - Page 33 Type Description Interval Air filter Clean with a vacuum or hand wash. 2 weeks Triple filter Clean with a vaccum or brush. Every 3 months 3M filter Clean with a vaccum or brush. Every 6 months Ionizer (Optional) Use dry cotton bud to remove any dust. Every 6 months Clean the Indoor unit surface by using a soft, dry cloth.
-
Page 34: Clean The Air Filter
Clean the Air Filter Push down hooks to assemble the air filter. Clean the air filters once every 2 weeks, or more, if necessary. NOTE • The air filter can be broken when it is bended. • When the air filter is not assembled correctly, Check the side of the front cover for correct dust and other substances come into the assembly of the air filter. -
Page 35: Clean The 3M And Triple Filter (Optional)
Clean the 3M and Triple Filter Insert the 3M and Triple filter. (Optional) Turn off the power and unplug the power Type1 cord. Remove the air filters from the indoor unit. Remove the 3M and Triple filter from the indoor unit. Type2 Type1 Assemble the air filters. -
Page 36: Troubleshooting
TROUBLESHOOTING Self-diagnosis Function This product has a built-in self-diagnosis function. If an error occurs, the lamp of the indoor unit will blink in 2 second intervals. If this occurs, contact your local dealer or service center. Before Calling for Service Please check the following before you contact the service center. - Page 37 Problem Possible Causes Corrective Action • Make sure that there are no curtains, Air is not circulating properly. blinds, or pieces of furniture blocking the front of the air conditioner. • Clean the air filter once every 2 weeks. The air filter is dirty. •...
- Page 38 • Some functions may not be supported, depending on the model. Cooling Heating Model Voltage Frequency Power Current Power Current NOR. 1 095 W/ NOR. 6,20 A/ VX122CX NJM0,USM0 220 V ~ 60 Hz MAX. 1 280 W MAX. 7,20 A...
- Page 39 Memo...
- Page 40 Lea este manual del propietario detenidamente antes de operar el aparato y consérvelo a su alcance para consultarlo en cualquier momento. TIPO: DE MONTAJE EN PARED MODELOS UNIDAD EVAPORADORA UNIDAD CONDENSADORA VX122CX NJM0 (S4NQ12JA3A1) VX122CX USM0 (S4UQ12JA3A1) www.lg.com Copyright © 2017 LG Electronics Inc. Todos los derechos reservados.
- Page 41 ÍNDICE Este manual puede contener imagenes o contenido diferente al del modelo que ha comprado. Este manual está sujeto a revisiones por parte del fabricante. INSTRUCCIONES DE SEGURIDAD ........3 INSTRUCCIONES IMPORTANTES DE SEGURIDAD ......3 FUNCIONAMIENTO ............11 Notas para la operación ............... 11 Piezas y funciones ................
-
Page 42: Instrucciones De Seguridad
INSTRUCCIONES DE SEGURIDAD Las siguientes pautas de seguridad sirven para evitar daños o riesgos imprevistos generados por una operación incorrecta del producto. Las directrices se dividen entre "ADVERTENCIA" y "PRECAUCIÓN", tal como se describe a continuación. Este símbolo se muestra para indicar cuestiones y funcionamientos que pueden resultar riesgosos. - Page 43 Niños en el hogar Este aparato no está diseñado para ser utilizado por personas (incluidos niños) con capacidades físicas, sensoriales o mentales disminuidas o con falta de experiencia y conocimiento, a menos que una persona responsable de su seguridad los supervise o los instruya acerca del uso del mismo.
- Page 44 •Instale un disyuntor y un tomacorriente exclusivos para el artefacto antes de usar el aire acondicionado. •No conecte el cable de puesta a tierra a una tubería de gas, un pararrayos o un cable telefónico subterráneo. Operación •Asegúrese de utilizar solo las piezas que figuran en la lista de piezas de servicio.
- Page 45 •No bloquee la entrada ni la salida del flujo de aire. •No introduzca las manos u otros objetos a través de la entrada o salida de aire mientras el aire acondicionado se encuentra funcionando. •Asegúrese de que el cable de alimentación no esté sucio, flojo o roto.
- Page 46 Seguridad técnica •La instalación o las reparaciones realizadas por personas no autorizadas pueden generar riesgos para usted y los demás. •La información contenida en este manual está destinada a ser utilizada por un técnico calificado, familiarizado con los procedimientos de seguridad y equipado con las herramientas y los instrumentos de prueba adecuados.
- Page 47 PRECAUCIÓN Para reducir el riesgo de lesiones personales leves, mal funcionamiento o daños al producto o la propiedad al usar este artefacto, siga las precauciones básicas de seguridad, incluidas las siguientes: Instalación •No instale el aparato de aire acondicionado en una zona en la que se encuentre expuesto directamente a la brisa marina (rocío salino).
- Page 48 Operación •Retire las pilas del control remoto si no lo va a utilizar durante un período prolongado. •Asegúrese de que el filtro esté instalado antes de utilizar el aire acondicionado. •Asegúrese de verificar si hay una fuga de refrigerante después de instalar o reparar el aire acondicionado.
- Page 49 Mantenimiento •Nunca toque las partes metálicas del aire acondicionado cuando retire el filtro de aire. •Utilice un banco resistente o una escalera para limpiar, mantener o reparar el aire acondicionado ubicado en lo alto. •Nunca utilice solventes o productos de limpieza fuertes para limpiar el aire acondicionado ni lo rocíe con agua.
-
Page 50: Funcionamiento
FUNCIONAMIENTO Notas para la operación Sugerencias para el ahorro de energía • No enfríe excesivamente el interior. Esto puede ser perjudicial para su salud y consumir más electricidad. • Bloquee la luz del sol con persianas o cortinas mientras el aire acondicionado se encuentre en funcionamiento. -
Page 51: Control Remoto Inalámbrico
Control remoto inalámbrico Método de operación Apunte el control remoto hacia el receptor de Inserción de las baterías señal, ubicado en el lado derecho del aire acondicionado, para operarlo. Si la pantalla del control remoto comienza a hacerse tenue, cambie las baterías. Coloque baterías AAA (1,5 Vcc) antes de utilizar el control remoto. - Page 52 Configuración de la hora actual Operación del aire acondicionado sin el control remoto Inserte las baterías. Puede utilizar el botón ON/OFF de la unidad • El siguiente ícono parpadea en la parte interior para operar el aire acondicionado inferior de la pantalla de visualización. cuando no disponga del control remoto.
- Page 53 Uso del control remoto inalámbrico Puede operar el aire acondicionado con mayor comodidad utilizando el control remoto. Pantalla Descripción Botón visualización Para encender/apagar el aire acondicionado. Para ajustar la temperatura ambiente deseada en modo de enfriamiento, calefacción o cambio automático. Para seleccionar el modo de MODE SPEED...
- Page 54 Pantalla Botón Descripción visualización Para que el aire acondicionado se encienda/apague automáticamente en TIMER el momento deseado. SET/ Para establecer/cancelar las funciones CANCEL especiales y el temporizador. Para cancelar las configuraciones del temporizador. CANCEL Para configurar la hora. MODE SPEED TEMP *LIGHT Para configurar el brillo de la pantalla...
- Page 55 Pantalla Botón Descripción visualización Para purificar el aire quitando las partículas que ingresan en la unidad interior. Para reducir el sonido de las unidades exteriores. Para mantener su piel hidratada mediante la generación de grupos de iones. MODE SPEED Para reducir la humedad interior TEMP rápidamente.
-
Page 56: Reinicio Automático Del Aire Acondicionado
Reinicio automático del aire Uso de la Función Modo acondicionado Esta función le permite seleccionar la función deseada. Cuando el aire acondicionado se enciende nuevamente después de un corte de energía, Modelo solo frío esta función restaura la configuración previa. Desactivación del reinicio Modo Enfriamiento automático... - Page 57 Modo Calefacción Modo Ventilador Este modo solo recircula el aire del interior sin Encienda el aparato. cambiar la temperatura del ambiente. Encienda el aparato. Presione el botón MODE repetidamente para seleccionar el modo Calefacción. Presione el botón MODE repetidamente • En la pantalla de visualización, aparece para seleccionar el modo Ventilador.
-
Page 58: Uso De La Función De Modo Jet
Operación automática Uso de la función de Modo (Inteligencia artificial, IA) Cambio rápido de la temperatura Modelo solo frío ambiente En este modo, la velocidad del ventilador y la temperatura se ajustan automáticamente, según Esta función le permite enfriar el aire del interior la temperatura ambiente. -
Page 59: Uso De La Función De Velocidad Del Ventilador
Uso de la función de Uso de la función de Velocidad del ventilador Dirección del flujo de aire Configuración de la velocidad del Esta función ajusta la dirección del flujo de aire de manera vertical (horizontal). ventilador • Presione el botón ) repetidamente y SWING SWING... -
Page 60: Configuración Del Temporizador De Encendido/Apagado
Configuración del Configuración del temporizador de apagado temporizador de Encendido/ Apagado Presione el botón repetidamente. TIMER Esta función configura el aire acondicionado • El siguiente ícono parpadea en la parte para que se encienda/apague automáticamente inferior de la pantalla de visualización. en el momento deseado. -
Page 61: Uso De La Función Sleep (Opcional)
Uso de la función Sleep Uso de la función (opcional) Temporizador simple (opcional) Esta función apaga el aire acondicionado de forma automática cuando usted se va a dormir. Esta función apaga el aire acondicionado de forma automática cuando usted se va a dormir. Encienda el aparato. -
Page 62: Uso De La Función Visualización De Energía (Opcional)
Uso de la función Uso de la función de Luz Visualización de energía apagada (opcional) (opcional) Brillo de la pantalla de visualización Esta función muestra en la pantalla de la unidad interior la cantidad de electricidad Puede configurar el brillo de la pantalla de generada mientras funciona el producto. -
Page 63: Uso De La Función Ahorro De Energía (Opcional)
Uso de la función Ahorro de Uso de la función Control de energía (opcional) energía (opcional) Esta función minimiza el consumo de energía Encienda el aparato. durante el enfriamiento y aumenta al nivel óptimo la temperatura establecida, para así crear un ambiente más confortable. La Presione el botón ENERGY CTRL. -
Page 64: Uso De La Función Sueño Confortable (Opcional)
Uso de la función Sueño Uso de funciones especiales confortable (opcional) Encienda el aparato. Esta función establece la corriente de aire, el flujo de aire y el temporizador óptimos para Presione el botón FUNC repetidamente ayudarlo a tener un sueño confortable. para seleccionar la función deseada. - Page 65 Cancelación de funciones Uso de la función de Silencio especiales Esta función evita posibles quejas por parte de los vecinos al reducir el ruido de las unidades Presione el botón FUNC repetidamente exteriores. para seleccionar la función deseada. • En la pantalla de visualización, aparece Presione el botón SET/CANCEL para NOTA cancelar la función.
- Page 66 Uso de la función Baja Uso de la función Autolimpieza calefacción En los modos Enfriamiento y Deshumidificación, se genera humedad dentro de la unidad interior. Esta función activa el sistema de calefacción Esta función elimina esa humedad. para mantener una temperatura mínima en el ambiente y evitar que los objetos de la •...
-
Page 67: Funciones Inteligentes
Revise la distancia entre el electrodoméstico y el enrutador inalámbrico • LG SmartThinQ no es responsable de ningún (Red Wi-Fi). problema de conexión de red ni de errores, fallos o anomalías causadas por la misma. - Page 68 Cómo instalar LG SmartThinQ Usando la Aplicación Seleccione el electrodoméstico en la Busque la aplicación LG SmartThinQ en la aplicación y conéctelo a una red Wi-Fi. tienda Google Play Store o Apple App Store desde un teléfono inteligente. Sigue las instrucciones para descargar e instalar la Seleccione el menú...
- Page 69 Adicional al código fuente, todos los términos Diagnosis™. de referencia de la licencia, renuncias de garantía y notificaciones de derechos de autor Abra la aplicación LG SmartThinQ en el están disponibles para descarga. teléfono inteligente. LG Electrónicos también le puede proveer el código de fuente abierta en un CD por un cargo...
-
Page 70: Mantenimiento
MANTENIMIENTO ADVERTENCIA • Antes de limpiar o realizar el mantenimiento, desconecte el suministro de electricidad y espere que el ventilador se detenga. Si el aire acondicionado no va a ser utilizado durante un período prolongado, seque el producto para mantenerlo en las mejores condiciones. Limpie el producto con regularidad para que mantenga un desempeño óptimo y para evitar posibles averías. - Page 71 Tipo Descripción Intervalo Filtro de aire Limpie con aspiradora o lave a mano. 2 semanas Filtro triple Limpie con aspiradora o cepillo. Cada 3 meses Filtro 3M Limpie con aspiradora o cepillo. Cada 6 meses Ionizador Utilice un hisopo de algodón seco para quitar el polvo. Cada 6 meses (opcional) Limpie la superficie de la unidad interior con un paño...
-
Page 72: Limpie El Filtro De Aire
Limpie el filtro de aire Presione los ganchos hacia abajo para armar el filtro de aire. Limpie los filtros de aire cada 2 semanas o con más frecuencia si es necesario. NOTA • El filtro de aire puede romperse si se dobla. •... -
Page 73: Limpie El Filtro 3M Y El Filtro Tiple (Opcional)
Limpie el filtro 3M y el filtro Inserte el filtro 3M y el filtro triple. tiple (Opcional) Desconecte la electricidad y desenchufe el Tipo 1 cable de alimentación. Retire los filtros de aire de la unidad interior. Retire el filtro 3M y el filtro triple de la Tipo 2 unidad interior. -
Page 74: Resolución De Problemas
RESOLUCIÓN DE PROBLEMAS Función de autodiagnóstico Este producto tiene una función de autodiagnóstico incorporada. Si se produce un error, la luz de la unidad interior parpadea en intervalos de 2 segundos. Si esto ocurre, póngase en contacto con un distribuidor local o con el centro de servicio. Antes de llamar al servicio técnico Verifique lo siguiente antes de comunicarse con el centro de servicio. - Page 75 Problema Causas posibles Acción correctiva • Asegúrese de que no haya cortinas, El aire no circula persianas o muebles bloqueando el correctamente. frente del aire acondicionado. • Limpie el filtro de aire cada 2 semanas. El filtro de aire está sucio. •...
- Page 76 NOTA • Dependiendo del modelo, algunas funciones pueden no admitirse. Refrigeración Calefacción Modelo Voltaje Frecuencia Potencia Corriente Potencia Corriente NOR. 1 095 W/ NOR. 6,20 A/ VX122CX NJM0,USM0 220 V ~ 60 Hz MAX. 1 280 W MAX. 7,20 A...
- Page 77 LG ELECTRONICS MEXICO, S.A. DE C.V. Sor Juana lnés de la Cruz No. 555 Col. San Lorenzo Industrial Tlalnepantla de Baz, Estado de México C.P. 54033 Tel. 55-5321 1919 Página web http://www.lg.com.mx...