
Related Manuals for Hitachi DS225


Summary of Contents for Hitachi DS225
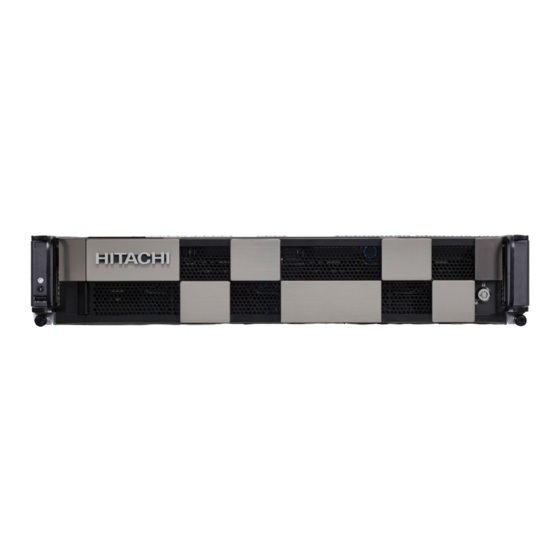
- Page 1 Hitachi Advanced Server DS225 Hardware Guide This guide provides the system overview and specifications Hitachi Advanced Server OS22 includjng hardware component descriptions. MK-97HAS013-01 January 2019...
- Page 2 Notlee : tt'ladll proauas aro seMCe$<:anbeoroeradonlyunc1er.-ie term s and CX>Mlt:ons 011he applleet>le Httacl'lagreements. 1lle U9e or Httachl prodix:ts governed blf1he terms 01 your agreemems w1h Hitachi vamara Cotporst . By U$1f'l 9 thts 90t;ware, you agree that )'OU •e responSlble Acqt.irlng...
-
Page 3: Table Of Contents
ABLE OF ONTENTS ABLE OF ONTENTS About the System Introduction ............1-1 System Features. - Page 4 ONVENTIONS Conventions Several different typographic conventions are used throughout this manual. Refer to the following examples for common usage. Bold type face denotes menu items, buttons and application names. Italic type face denotes references to other sections, and the names of the folders, menus, programs, and files.
- Page 5 RECAUTIONARY EASURES Precautionary Measures Read all caution and safety statements in this document before performing any of the instructions. To reduce the risk of bodily injury, electrical shock, fire, and equipment damage, read and observe all warnings and precautions in this chapter before installing or maintaining your system.
- Page 6 RECAUTIONARY EASURES Table 1: Warning and Cautions (Continued) The enclosure is designed to carry only the weight of the system sled. Do not use this equipment as a workspace. Do not place additional load onto any equipment in this system. Indicates two people are required to safely handle the system.
- Page 7 RECAUTIONARY EASURES Equipment Handling Practices Reduce the risk of personal injury or equipment damage: Conform to local occupational health and safety requirements when moving and lifting equipment. Use mechanical assistance or other suitable assistance when moving and lifting equipment.
- Page 8 RECAUTIONARY EASURES Rack Mount Warnings The following installation guidelines are required by UL for maintaining safety compliance when installing your system into a rack. The equipment rack must be anchored to an unmovable support to prevent it from tipping when your system or piece of equipment is extended from it. The equipment rack must be installed according to the rack manufacturer's instructions.
- Page 9 RECAUTIONARY EASURES Electrostatic Discharge (ESD) CAUTION! CAN DAMAGE DRIVES BOARDS AND OTHER PARTS E RECOMMEND THAT YOU PERFORM ALL PROCEDURES AT AN WORKSTATION F ONE IS NOT AVAILABLE PROVIDE SOME PROTECTION BY WEARING AN ANTI STATIC WRIST STRAP ATTACHED TO CHASSIS GROUND ANY UNPAINTED METAL SURFACE ON YOUR SERVER WHEN HANDLING PARTS...
- Page 10 RECAUTIONARY EASURES specified in this manual. Use of other products / components will void the UL listing and other regulatory approvals of the product and will most likely result in non-compliance with product regulations in the region(s) in which the product is sold. System power on/off: To remove power from system, you must remove the system from rack.
- Page 11 RECAUTIONARY EASURES The system is designed to operate in a typical office environment. Choose a site that is: Clean and free of airborne particles (other than normal room dust). Well ventilated and away from sources of heat including direct sunlight. ...
- Page 12 About the System Chapter 1 This section introduces the system, its different configuration(s) and the main features.
-
Page 13: Introduction
Compact and Optimized 2U Accelerator Server Architecture to Propel Data Center Transformation. With Hitachi Vantara’s excellent system designs, your system can accommodate sufficient compute, accelerator, and storage resources by conquering thermal/ mechanical challenges due to its high performance processors and dual-width accelerators. - Page 14 BOUT THE YSTEM YSTEM EATURES Note: The system supports: 1600W and 2200W Platinum redundant PSU, 200-240Vac 50/60Hz, AC/ HVDC. Specifications Table 1: System Specifications PECIFICATIONS ESCRIPTION Form factor 2U rack mount 438mm x 87.5 mm x 797.9 mm Chassis dimensions (W x H x D) 17.24"...
- Page 15 BOUT THE YSTEM YSTEM EATURES Table 1: System Specifications (Continued) PECIFICATIONS ESCRIPTION SKU1 O PTION Front Storage (8) 3.5”/2.5” SATA – Front BP Back Expansion Slots [CPU0] (1) OCP Mezz x16 (can switch to PCH if not using OCP mezz) ...
- Page 16 BOUT THE YSTEM YSTEM EATURES Table 1: System Specifications (Continued) PECIFICATIONS ESCRIPTION SKU3 O PTION Front Storage (4) 3.5"/2.5" SATA + (4) NVMe x4 – Front BP SKU3/Front Storage/ Back Expansion Slots Back Expansion Slots [CPU0] (1) OCP Mezz x16 (can switch to PCH if not using OCP mezz) ...
- Page 17 BOUT THE YSTEM YSTEM EATURES Table 1: System Specifications (Continued) PECIFICATIONS ESCRIPTION Operating temperature: 5°C to 35°C (41°F to 95°F)* Non-operating temperature: -40°C to 70°C (-40°F to 158°F) Operating environment Operating relative humidity: 20% to 85%RH Non-operating relative humidity: 10% to 95%RH *Your system can support SSD only while installing four Tesla V100 cards.
-
Page 18: Package Contents
BOUT YOUR YSTEM ACKAGE ONTENTS 1.2 Package Contents (1) DS225 system (2) processor heat sinks (2) power supply units (optional) (2) power cords (optional) Note: For exact shipping contents, contact your Hitachi Vantara sales representative. -
Page 19: A Tour Of The System
BOUT THE YSTEM OUR OF THE YSTEM 1.3 A Tour of the System System Overview The server is available as a 3.5” storage drive configuration. The 3.5” storage drive configuration system overview is displayed in the following image: GPU3 Riser Assembly GPU1 GPU4 GPU2... -
Page 20: System Front View
BOUT THE YSTEM YSTEM RONT Table 2: Component Overview ESCRIPTION Front control panel See Front Control Panel (FCP) on page 1-11 Two server handles used for pulling the system out of the rack CAUTION! Handle ANDLES ARE DESIGNED FOR THE EXTENSION OF THE SYSTEM FROM THE RACK ANDLES ARE NOT DESIGNED TO CARRY THE WEIGHT OF THE SYSTEM O NOT USE THE HANDLES TO MOVE OR LIFT THE SYSTEM... - Page 21 BOUT THE YSTEM YSTEM RONT Table 3: Front Panel View ESCRIPTION Thumb screw Secure the system to rack frame Housing up to eight 3.5” storage drive: SKU 1- [ 8 x SFF ] (8) 3.5”/2.5” SATA – Front BP SKU 2- [ 8 x SFF ] (8) 3.5”/2.5”...
- Page 22 BOUT THE YSTEM YSTEM RONT Table 4: Intel® VMD PCIe Root Port BIOS Setup Option Table* HDD S CPU S VMD P OCKET TACK *See Enabling the Intel® VMD Technology on page 1-15 for more information. 1-10...
-
Page 23: Front Control Panel (Fcp)
BOUT THE YSTEM YSTEM Front Control Panel (FCP) The FCP includes the components listed in Figure 1-3, which are described in Table 5. Figure 1-3. Front Control Panel and Connectors Table 5: Front Control Panel Definition ESCRIPTION Power on / off Power button with Blue on - S0 system power on;... -
Page 24: System Back I/O
BOUT THE YSTEM YSTEM Table 6: System Back View EATURE ESCRIPTION Power sub-system Main power supply unit (PSU1). See Power Sub-System on page 1-13. System I/O ports See System Back I/O on page 1-12 Expansion slot Support OCP 2.0 mezzanine card installation (CPU0) Power sub-system Main power supply unit (PSU0). -
Page 25: Power Sub-System
LED S BOUT THE YSTEM TATUS EFINITIONS Power Sub-System PSU LED Figure 1-6. PSU to Mainboard Module Description A single power supply unit (default) is supplied in the system. A secondary PSU is available for redundancy functionality. Table 8: Power Supply Units by Model AC I NPUT (2) 1600W/2200W 86mm Platinum redundant... -
Page 26: Bmc Management Port Leds
LED S BOUT THE YSTEM TATUS EFINITIONS Power LED Status LED ID LED Figure 1-7. Front Control Panel LEDs Table 10: Front Control Panel LEDs Behavior OLOR ONDITION ESCRIPTION System S0 power on Power LED Blue System S5 power off Blinking Unit selected for identification Identification... -
Page 27: Storage Drive Led
® VMD T BOUT THE YSTEM NABLING THE NTEL ECHNOLOGY Table 11: RJ45 LED Description (Continued) ONDITION CTIVITY 10M active link Blinking green Storage Drive LED Front 3.5” Storage Drive LED Status Behavior Status / Fault LED Active LED Figure 1-9. 3.5” Storage Drive LED Identification The following LED behavior table represents LED conditions. - Page 28 ® VMD T BOUT THE YSTEM NABLING THE NTEL ECHNOLOGY Press the right arrow key until “Socket Configuration” is selected and press the down arrow key until “IIO Configuration” is selected. Press the down arrow key until “Intel® VMD technology” is selected. Press up or down arrow key to select CPU socket0 or CPU socket1.
-
Page 29: Enabling Platform Trusted Technology (Ptt)
(PTT) BOUT THE YSTEM NABLING LATFORM RUSTED ECHNOLOGY Table 1.1: Intel® VMD on Socket X Screen Description (Continued) ETUP PTIONS ESCRIPTION OMMENTS Intel® VMD for Volume Enable/Disable Intel® Volume [Disable] Management Device for Management Device Technology in this [Enable] PStack1 Stack. - Page 30 TPM C BOUT THE YSTEM ONFIGURATION ETTINGS Now you can setup the TPM configuration. Table 1.2: Configuration on Trusted Computing Screen Description ETUP PTIONS ESCRIPTION OMMENTS TPM 2.0 Device Information only. Displays Found current TPM Status. Information only. Displays Active PCR banks current active PCR banks.