
Related Manuals for Miele CM 5310 Series


Summary of Contents for Miele CM 5310 Series
- Page 1 Operating instructions Coffee machine To avoid the risk of accidents or damage to the appliance it is essential to read these instructions before it is installed and used for the first time. en-GB M.-Nr. 11 551 630...
-
Page 2: Caring For The Environment
Please dispose of it at your local community waste collection / recycling centre for electrical and electronic appliances, or contact your dealer or Miele for advice. You are also responsible for deleting any personal data that may be stored on the appliance being disposed of. Please... -
Page 3: Table Of Contents
Contents Caring for the environment ................Warning and Safety instructions..............Product description ..................15 Controls and indicators ..................16 Accessories ....................... 17 Operation......................18 Before using for the first time ................19 Water hardness....................21 Filling the water container ................22 Filling the coffee bean container .............. - Page 4 Contents Changing drinks within a profile ................35 Making drinks stored in a profile ................. 35 Changing the name ..................... 35 Deleting a profile ....................35 Setting when the profile should change (Change profile) ........36 Settings ......................37 Displaying and changing Settings............... 37 Language......................
- Page 5 Contents After sales service and warranty ..............66 Contact in the event of a fault ................66 Warranty ......................66 Saving energy ....................67 Mains connection cable..................68 Installation......................69 Dimensions ......................70 Technical data....................71...
-
Page 6: Warning And Safety Instructions
Miele cannot be held liable for injury or damage caused by non- compliance with these instructions. Keep these operating instructions in a safe place and pass them... - Page 7 Warning and Safety instructions Correct application This coffee machine is intended for home use. This coffee machine is not intended for outdoor use. This coffee machine must not be used at altitudes above 2000 m. It must only be used as a domestic appliance to make espresso, cappuccino, latte macchiato etc.
- Page 8 Warning and Safety instructions Safety with children Danger of burning and scalding on the dispensing spouts. Children's skin is far more sensitive to high temperatures than that of adults. Ensure children do not touch hot surfaces of the coffee machine or place parts of their body under the dispensing spouts.
- Page 9 Warning and Safety instructions Technical safety A damaged coffee machine is dangerous. Check it for any visible damage before setting it up. Never attempt to use a damaged coffee machine. To avoid the risk of damage to the machine, make sure the connection data (voltage and frequency) on the data plate corresponds to the household supply, before connecting the machine to the mains supply.
- Page 10 Miele authorised service technician. Otherwise the warranty is invalidated. Miele can only guarantee the safety of the machine when original Miele spare parts are used. Faulty components must only be replaced by genuine Miele original spare parts.
- Page 11 Warning and Safety instructions Correct use Danger of burning and scalding on the dispensing spouts. The liquids and steam dispensed are very hot. Keep well away from the area underneath the spouts when hot liquids and steam are being dispensed. Do not touch hot components.
- Page 12 Warning and Safety instructions Do not use any caramelised ready ground coffee. The sugar in the coffee will stick to and block the brew unit of the coffee machine. The cleaning tablets for degreasing the brew unit will not remove this type of deposit.
- Page 13 Descale the coffee machine regularly depending on the water hardness level in your area. Descale the machine more frequently in areas with very hard water. Miele cannot be held liable for damage arising from insufficient descaling, the use of incorrect descaling agent or the use of descaling agent which is not of the appropriate concentration.
- Page 14 Warning and Safety instructions For machines with stainless steel surfaces: Do not use sticky notes, adhesive tape, masking tape or other types of adhesive on the stainless steel surfaces. Stainless steel surfaces are susceptible to scratching. Even magnets can cause scratches.
-
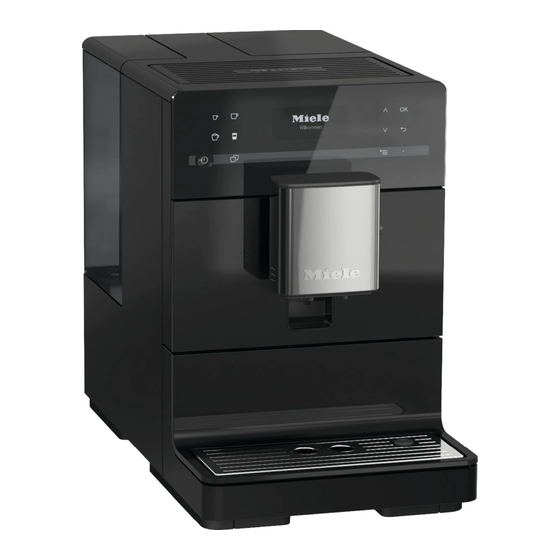
Page 15: Product Description
Product description a Lower panel with drip tray cover g Grinder setting (behind the appliance door) b Central spout with Cappuccinatore h Brew unit (behind the appliance and hot water spout door) c On/Off button i Park position for milk tube d Control panel j Drip tray with lid and waste e Water container... -
Page 16: Controls And Indicators
Sensor control For showing information about the Other drinks current action or status (CM 5410, CM 5510, Profiles d Optical interface CM 5710) (For Miele Customer Service Maintenance Department only) Parameters Settings e Sensor controls For scrolling through lists, selecting j “2 portions” sensor entries or changing values For dispensing 2 portions of a drink... -
Page 17: Accessories
These products and other useful Optional accessories accessories can be ordered via the Miele accessories and cleaning and Miele webshop, from Miele (see back conditioning products are available for cover for contact details) or from your your coffee machine. Miele dealer. -
Page 18: Operation
A bar Select drink on the right-hand side of the display indicates that further options or text are Miele available. To select an option, keep pressing the Select drink arrow buttons ... -
Page 19: Before Using For The First Time
Touch the On/Off button . cover into the lower panel. Place the coffee machine on a level The welcome message Miele – flat surface that is not sensitive to Wilkommen will appear on the display water (see “Installation”). - Page 20 Before using for the first time Please note that the full aroma of the coffee and typical crema will not develop fully until several coffees have been made. To ensure that any coffee residues from the factory testing process are removed from the brewing system, please throw away the first 2 cups of coffee when using the coffee...
-
Page 21: Water Hardness
Water hardness Water hardness is an indication of the Setting the water hardness amount of minerals dissolved in water. Touch the sensor control. The more minerals in the water, the higher the water hardness. The harder Select Settings | Water hardness the water is, the more frequently the... -
Page 22: Filling The Water Container
Filling the water container Replace the water container and Risk to health due to close the lid. contaminated water. Bacteria can develop in water which Make sure that the water container has been sitting in the water handle is on the right so that the lid container for too long and is a risk to can close properly. -
Page 23: Filling The Coffee Bean Container
Filling the coffee bean container Coffee or espresso can be made from whole roasted coffee beans which are freshly ground in the coffee machine for each portion. This requires the coffee bean container to be filled with coffee beans. Alternatively, you can make coffee drinks with ready ground coffee. -
Page 24: Switching On And Off
Switching on and off Switching the coffee machine Switching the coffee machine Touch the On/Off button . Touch the On/Off button . The appliance heats up and rinses the If the coffee machine has been used for pipework. Hot water will run out of the making a drink it will rinse itself before central spout. -
Page 25: Adjusting The Central Spout To The Correct Cup Height
Adjusting the central spout to the correct cup height You can adjust the central spout to suit the height of the cup you are using so that the coffee or espresso will not cool down as quickly and the crema will have a better consistency. -
Page 26: Making Drinks
Making drinks - Caffè latte consists of espresso and Danger of burning and scalding hot milk. on the dispensing spouts. Hot milk or milk froth can also be The liquids and steam dispensed are made. very hot and can cause scalding. Keep well away from the area Preparing milk underneath the spouts when hot... -
Page 27: Using Milk Cartons Or Bottles
Making drinks Using milk cartons or bottles Tip: The Miele milk container is the perfect addition to Miele coffee machines if you make a lot of coffees with milk. The milk container is dishwasher-safe and easy to store in the fridge after use. Good milk froth can only be made with cold milk (< 10 °C). -
Page 28: 2 Portions (Sensor Control )
Miele for the “Coffee pot” function. The CJ JUG vacuum flask is available to order via the Miele webshop, from Miele (see back cover for contact details) or from your Miele dealer. -
Page 29: Making Coffee Drinks With Ground Coffee
Making drinks Making coffee drinks with ground coffee To make drinks using ready ground coffee, add a portion of ground coffee to the ground coffee chute. This allows you to make a decaffeinated coffee if the bean container is already filled with regular coffee beans, for example. -
Page 30: Dispensing Hot Water (Cm 5410, Cm 5510, Cm 5710)
Making drinks Dispensing hot water (CM 5410, CM 5510, CM 5710) Please note that the water dispensed is not hot enough for making black tea. Place a suitable container centrally underneath the central spout. Touch the sensor control. Select | Other drinks Hot water confirm with OK. -
Page 31: Grinder Setting
Grinder setting When the beans are ground correctly, the coffee or espresso will flow evenly into the cup with a good crema. The crema should have an even hazelnut brown colour. The grinder setting you select will be used for all coffee drinks. There are various ways to tell whether the coffee grinder is set correctly. -
Page 32: Quantity Of Coffee, Brew Temperature And Pre-Brewing
Quantity of coffee, brew temperature and pre-brewing You can set the quantity of coffee, the Increase the amount of coffee so that brewing temperature and pre-brewing more ground coffee is brewed. for each drink individually. To do this, The amount of coffee is too high, if first select the drink from the Parameters menu and then adjust the drink... -
Page 33: Portion Size
Portion size The flavour of the coffee produced Cancelling portion size programming depends not only on the type of coffee, Touch the drinks sensor control again but also on the amount of water used. or the sensor control for drinks You can programme the amount of from Other drinks... - Page 34 Portion size Changing the portion sizes in the Parameters menu You can only change the portion sizes for Long coffee, Caffè Latte, hot milk and milk froth via the Parameters menu. Place a suitable container underneath the central spout. ...
-
Page 35: Profiles
(CM 5410, CM 5510, CM 5710) The name of the selected profile is shown in the top left of the display. In addition to the Miele drinks menu (Miele profile), you can create individual You can now change the drinks profiles to cater for different tastes and individually. -
Page 36: Setting When The Profile Should Change (Change Profile)
- Manually: The selected profile will remain active until you select another one. - After each use: The machine will revert to the Miele profile whenever a drink is dispensed. - When switched on: The Miele profile will be displayed whenever the coffee... -
Page 37: Settings
Settings Displaying and changing Info (display information) Settings You can display the number of drinks dispensed so far and how many more The drinks menu is displayed. can be dispensed until the maintenance Touch the sensor control. programmes have to be run. ... -
Page 38: Demo Mode (Showroom Programme)
Settings The following will not be reset: - The number of drinks dispensed and the appliance status (No. of portions until appliance needs descaling, ... brew unit needs degreasing) - Language - Profiles and the associated drinks (CM 5410, CM 5510, CM 5710) Demo mode (showroom programme) Do not activate this setting for domestic use. -
Page 39: Cleaning And Care
Cleaning and care Risk to health due to inadequate cleaning Heat and moisture inside the coffee machine can cause coffee residues to become mouldy and/or milk residues to go off and pose a risk to health. Carefully clean the coffee machine regularly. Overview of cleaning intervals Recommended frequency What do I have to clean / maintain? -
Page 40: Cleaning By Hand Or In The Dishwasher
Cleaning and care Cleaning by hand or in the Risk of damage as a result of dishwasher excessively high dishwasher temperatures. The brew unit is not dishwasher Components may be ruined (e.g. safe. may become warped) if washed in a Clean the brew unit by hand only dishwasher at temperatures higher under warm running water. -
Page 41: Unsuitable Cleaning Agents
Cleaning and care Unsuitable cleaning agents Danger of burning and scalding on hot components or by hot liquids. Contact with unsuitable cleaning Components can become very hot agents can alter or discolour the during operation. Touching hot external surfaces. All surfaces are components can cause burning. -
Page 42: Waste Container, Drip Tray And Drip Tray Cover
Cleaning and care - melamine eraser blocks Waste container, drip tray and drip tray cover - sharp metal scrapers - steel wool or stainless steel wire Clean the drip tray and waste scourers container every day to avoid unpleasant smells and mildew. The waste container is located in the drip tray. -
Page 43: Cleaning The Water Container
Cleaning and care Cleaning the water container Clean the lower panel by hand only using hot water, a little washing up Clean the water container every day. liquid and a soft cloth. You can clean the water container in the All other parts are dishwasher-safe. -
Page 44: Central Spout
Cleaning and care Central spout Clean the central spout’s stainless steel cover by hand only, using warm water and a little washing-up liquid. All other parts are dishwasher-safe. Unscrew the cap. Remove the sealing ring and the filter. Clean all parts thoroughly. Rinse all parts carefully under running water. - Page 45 Cleaning and care Clean any blockages in the milk pipework under running water with the special brush supplied: Insert the brush in the pipework. Move it back and forth until all milk residue has been removed. Reassembling the central spout The dispensing unit is easier to reassemble if the individual parts are dampened with water beforehand.
-
Page 46: Milk Pipework
Cleaning and care Milk pipework Bean container and ground coffee chute Risk to health due to inadequate cleaning. Danger of injury from the grinder! Milk naturally contains bacteria. Heat Switch off the machine and and moisture inside the coffee disconnect it from the power supply machine can cause these bacteria to before cleaning the bean container. -
Page 47: Cleaning The Casing
If you have made a coffee drink, the Tip: You can also clean the appliance coffee machine will rinse the coffee front with the Miele all purpose pipework automatically before microfibre cloth. switching off. You can also start the function manually. - Page 48 Miele coffee machines and prevents subsequent damage. It is available to order via the Miele webshop, the Miele Customer Service Department (see the end of this booklet for contact details) or from your Miele dealer.
-
Page 49: Degreasing The Brew Unit And Cleaning Inside
Miele coffee machines and prevent subsequent damage. Miele cleaning tablets can be ordered via the Miele webshop, from Miele (see back cover for contact details) or from your Miele dealer. The maintenance programme for degreasing the brew unit lasts for approx. 15 minutes. - Page 50 Cleaning and care The maintenance programme will then When you have removed the brew start. unit, do not change the position of the handle on the brew unit. Follow the instructions in the display. Clean the brew unit by hand under Cleaning the brew unit and interior warm running water without using Clean the brew unit by hand only...
- Page 51 Cleaning and care Clean the inside of the coffee Press the button under the handle of machine. Make sure that the areas the brew unit and, whilst doing so, highlighted in the illustration are turn the handle to the right . cleaned especially well.
-
Page 52: Descaling The Machine
You can switch the coffee machine off if Miele descaling tablets are available to you do not want to carry out the order via the Miele webshop, from the descaling programme at this point in Miele Customer Service Department time. You can not make any drinks until (see the end of this booklet for contact the machine has been descaled. - Page 53 Cleaning and care residue remains in the water container. Fill the water container to the mark with fresh tap water. The descaling process is complete when the drinks menu appears. Place 1 descaling tablet in the water container. Fill the water container to the mark with lukewarm water.
-
Page 54: Transporting The Machine
Transporting the machine If you are not going to use the coffee Danger of burning and scalding machine for an extended period of time, on the dispensing spouts. e.g. whilst on holiday, or if it needs to Hot steam can cause scalding. be moved, a number of procedures will Keep well away from the area need be carried out to ensure its safety. -
Page 55: Problem Solving Guide
Follow the instructions which appear in the display to remedy the problem. If after this, the fault message appears in the display again, contact Miele Service. Problem Cause and remedy F1, F2, There is an internal fault. - Page 56 Problem solving guide Problem Cause and remedy F73 or The brew unit cannot be positioned correctly. Check the brew unit Switch the coffee machine off with the On/ Off button . Switch off at the wall socket and unplug the coffee machine.
- Page 57 Problem solving guide Problem Cause and remedy Too much ground coffee There is too much ground coffee in the coffee chute. The brew unit cannot compact ground coffee if more than two level spoonfuls of ground coffee are added to the coffee chute. The ground coffee will be emptied into the waste container and the fault message will appear in the display.
-
Page 58: Unusual Performance Of The Coffee Machine
Switch off at the wall socket and unplug the coffee machine. Contact a qualified electrician or the Miele Customer Service Department. The coffee machine The switch-off time programmed using the timer has turns off suddenly. - Page 59 Problem solving guide Problem Cause and remedy The water container is Droplets of water have settled between the water empty. container and the side walls of the casing, or this Fill and replace the water container has not area is damp (see illustration). appeared in the display.
- Page 60 Problem solving guide Problem Cause and remedy After switching on the This is not a fault. machine the message When the drip tray and waste container are Empty the drip tray and the emptied, the internal counter is not reset after the waste container appears coffee machine has been switched off.
- Page 61 Problem solving guide Problem Cause and remedy Fill the bean container This is not a fault. pears in the display Confirm the message with OK. even though the bean Insufficient coffee beans are getting into the grinder. container has just been Have you used a dark roast? filled.
- Page 62 Problem solving guide Problem Cause and remedy The descaling process The descaling process cannot be stopped once the was started by mistake. “OK” sensor has been touched. Descaling must be continued through to completion. This is a safety precaution to make sure the machine is descaled correctly.
- Page 63 Problem solving guide Problem Cause and remedy Coffee grounds have This is not a fault. settled on the lid of the The movement of the brew unit during the brewing drip tray and in the in- process can cause some ground coffee to fall terior around the brew around it.
-
Page 64: Unsatisfactory Results
Problem solving guide Unsatisfactory results Problem Cause and remedy The coffee is not hot The cup has not been pre-heated. enough. The smaller the cup and the thicker its sides, the more important it is to pre-heat it. Pre-heat the cup, for example, with hot water. The brewing temperature has been set too low. - Page 65 Problem solving guide Problem Cause and remedy The coffee grinder The coffee bean container has become empty during makes a louder noise the grinding process. than usual. Fill the coffee bean container with fresh beans. There may be foreign objects such as plastic or stones in amongst the coffee beans.
-
Page 66: After Sales Service And Warranty
In the event of any faults which you For information on the appliance cannot remedy yourself, please contact warranty specific to your country please your Miele dealer or the Miele Customer contact Miele. See back cover for Service Department. address. -
Page 67: Saving Energy
Saving energy The following tips can help you save energy and money as well as care for the environment: - Operate the coffee machine in Eco mode (default setting). - The coffee machine’s energy consumption may increase if you change the settings for the timer. appears in This setting uses more energy the display. -
Page 68: Mains Connection Cable
Mains connection cable Before connecting the coffee machine, The coffee machine must not be used make sure that the connection data on with “energy saving plugs”. These the data plate (voltage and frequency) reduce the amount of energy supplied matches the mains electricity supply. to the machine, causing it to overheat. -
Page 69: Installation
*INSTALLATION* Installation If the machine is installed in a niche, the Danger of overheating due to niche must provide the following insufficient ventilation. minimum dimensions: If the coffee machine is not sufficiently ventilated, the appliance Height 510 mm can overheat. Width 450 mm Please ensure that there is adequate... -
Page 70: Dimensions
*INSTALLATION* Dimensions a = 241 mm b = 360 mm c = 460 mm... -
Page 71: Technical Data
Technical data Electricity consumption in standby < 0.5 Watt mode (default setting): Pump pressure: max. 15 bar Through-flow heater: 1 stainless steel thermo block Dimensions (W x H x D): 241 x 360 x 460 mm Net weight: 9.48 kg Connection cable length: 120 cm Water container 1.3 l capacity: Bean container 200 g capacity: Waste container max. 6 portions of coffee grounds capacity: Central spout: Height adjustable from 80–135 mm... - Page 75 Tel: +65 6735 1191 Fax. +971 4 3418 852 Fax: 011-46 900 001 Fax: +65 6735 1161 800-MIELE (64353) E-mail: customercare@miele.in E-Mail: info@miele.com.sg E-Mail: info@miele.ae Internet: www.miele.in Internet: www.miele.sg Website: www.miele.ae Manufacturer: Miele & Cie. KG, Carl-Miele-Straße 29, 33332 Gütersloh, Germany...
- Page 76 CM 5310, CM 5410, CM 5510, CM 5710 en-GB M.-Nr. 11 551 630 / 00...