Cisco IP DECT 6800 Series Hardware Installation
Hide thumbs
Also See for IP DECT 6800 Series:
- User manual (96 pages) ,
- Manual (15 pages) ,
- Quick start manual (2 pages)
Advertisement
Hardware Installation
•
•
•
•
•
•
•
•
Installation Requirements
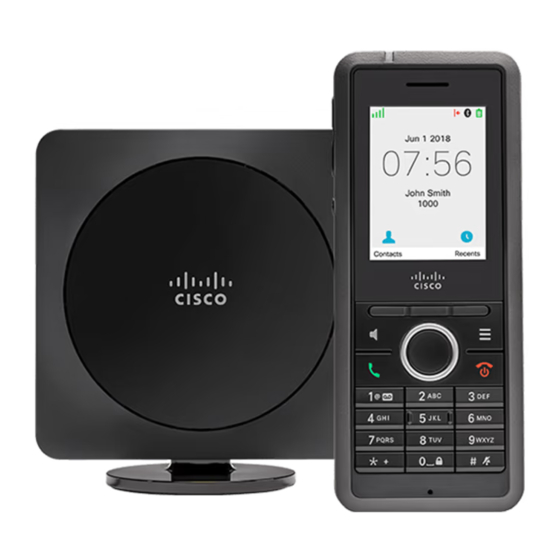
The Cisco IP DECT 6800 Series is made up of the following hardware:
• Cisco IP DECT Phone 6825 Handset
• Cisco IP DECT Phone 6825 Ruggedized Handset
• Cisco IP DECT 210 Multi-Cell Base Station
Before you begin to set up the Cisco IP DECT 6800 Series system:
• Determine the number of users (handsets) that are required.
• Determine the number of phone lines (numbers) that are required. Each user can have up to 2 lines and
• Given the number of handsets, determine the number of base stations required, based on:
Installation Requirements, on page 1
Install the Base Station, on page 5
Mount the Base Station on the Ceiling, on page 6
Mount the Base Station on a Desk, on page 9
Mount the Base Station on the Wall, on page 10
Install the Battery in the Handset, on page 13
Set Up the Charging Cradle, on page 16
Charge the Handset Battery, on page 17
2 concurrent calls.
• Estimated simultaneous handset usage
You can have up to 30 handsets registered on each base station. However, the number of active
calls the base station can handle is limited by the codec.
Hardware Installation
1
Advertisement

Related Manuals for Cisco IP DECT 6800 Series


Summary of Contents for Cisco IP DECT 6800 Series
-
Page 1: Table Of Contents
• Charge the Handset Battery, on page 17 Installation Requirements The Cisco IP DECT 6800 Series is made up of the following hardware: • Cisco IP DECT Phone 6825 Handset • Cisco IP DECT Phone 6825 Ruggedized Handset • Cisco IP DECT 210 Multi-Cell Base Station Before you begin to set up the Cisco IP DECT 6800 Series system: •... - Page 2 Hardware Installation Installation Requirements Table 1: Codec and Number of Active Handsets Supported Band Codec Number of Active Calls Narrowband G.711 10 calls for single base station configuration G.726 8 calls for multicell configuration (see note) Wideband G.722 OPUS Note If a user turns on Push to Talk, the base station can only support 6 active calls with the narrowband codec and 3 calls with the wideband codec.
- Page 3 • Determine that the base stations are placed so that handsets can communicate. Make sure that the coverage is optimal for your users. With the Cisco IP DECT 210 Multi-Cell Base Station, you can add additional base stations to improve coverage.
- Page 4 Hardware Installation Base Station Package Contents Figure 2: Multicell Network Base Station Package Contents Your base station package has the following contents: • Base station • Base station stand • Ethernet cable • Regional power adapter • USB-to-power jack cable •...
-
Page 5: Install The Base Station
Hardware Installation Install the Base Station Install the Base Station When the base station connects to the network, the LEDs light to indicate the network status: • Green—Connected. • Amber—Connection in progress. • Red, flashing—Can't connect to the network. • Red, solid—Network connection resetting. Use this procedure to check that the base station and the network can communicate with each other, before you mount the base station in the chosen location. -
Page 6: Mount The Base Station On The Ceiling
Hardware Installation Mount the Base Station on the Ceiling Mount the Base Station on the Ceiling You can mount the base station on a ceiling. The base station has a custom ceiling mount bracket that you can install on the ceiling. You need to order the ceiling mount bracket. Figure 3: Ceiling Mount Bracket Each base station has a range of up to 984 feet (300 meters). - Page 7 Hardware Installation Mount the Base Station on the Ceiling Step 3 Install the plugs as described by the manufacturer. Step 4 Install the screws through the bracket and into the plugs. Step 5 Connect the Ethernet cable to the device and route the cable through the slot in the device. Step 6 Plug the power adapter into the device and route the cable through the slot in the device.
- Page 8 Hardware Installation Mount the Base Station on the Ceiling This diagram shows the way you turn the device to lock it into the mounting bracket. Step 8 Plug the Ethernet cable into the LAN port. Hardware Installation...
-
Page 9: Mount The Base Station On A Desk
Hardware Installation Mount the Base Station on a Desk Step 9 If required, plug the power adapter into the electrical outlet. What to do next Configure the Base Station Mount the Base Station on a Desk You can place the base station on a desk or other horizontal surface (for example, a book shelf). Select a location where the base station won't be easily knocked off. -
Page 10: Mount The Base Station On The Wall
Hardware Installation Mount the Base Station on the Wall Step 4 Plug the Ethernet cable into the LAN port. Step 5 If required, plug the power adapter into the electrical outlet. What to do next Configure the Base Station Mount the Base Station on the Wall You can mount the base station on a wall. - Page 11 Hardware Installation Mount the Base Station on the Wall • Ensure that the base station can communicate with the network (see Install the Base Station, on page 5). After it can communicate and the LED is green, you can unplug the cables. Determine the best placement, taking into account the coverage area and the building construction materials.
- Page 12 Hardware Installation Mount the Base Station on the Wall • With the ceiling mount bracket: Hold the bracket over the holes and screw in the screws until the bracket doesn't move. Step 5 Connect the Ethernet cable to the base station and route the cable through the slot in the base station. Step 6 Plug the power adapter into the device and route the cable through the slot in the device.
-
Page 13: Install The Battery In The Handset
Install the Battery in the Handset • With the ceiling mount bracket: Hold the device with the lettering in the Cisco logo on the bottom and turn slightly right. Align the slots on the underside of the device with the hooks on the bracket, press the device into the bracket, and turn it left until the device is attached. - Page 14 Hardware Installation Install the Battery in the Handset Step 2 Remove the battery from the handset. Step 3 Remove the plastic over the contacts. Hardware Installation...
- Page 15 Hardware Installation Install the Battery in the Handset Step 4 Place the battery under the clip and drop it into the compartment. The battery contacts are on the top left edge of the battery and the top left edge of the battery compartment. Ensure that the contacts meet and that the battery is seated in the compartment.
-
Page 16: Set Up The Charging Cradle
Hardware Installation Set Up the Charging Cradle What to do next Before you use the handset, you need to charge it. See Charge the Handset Battery, on page Set Up the Charging Cradle You use the charging cradle to charge the handset. The cradle has a built-in USB cable that plugs into the power adapter. -
Page 17: Charge The Handset Battery
Hardware Installation Charge the Handset Battery Charge the Handset Battery You use the handset charger to charge the handset battery. Note The battery comes partially charged, but you should charge it for a minimum of 10 hours before you use it for the first time. - Page 18 Hardware Installation Charge the Handset Battery Hardware Installation...