Table of Contents
Advertisement
Advertisement
Table of Contents

Related Manuals for Toshiba D-R160SB


Summary of Contents for Toshiba D-R160SB
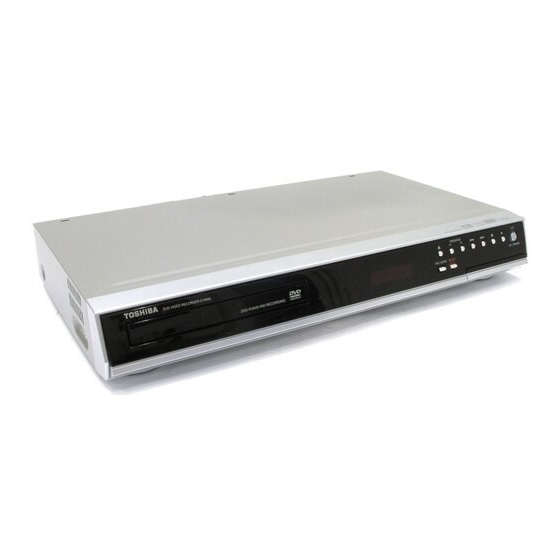
- Page 1 D-R160SB ® PROGRAM I /y ON/STANDBY REC MODE 1VMN22575 / E7B71BD 2006...
-
Page 2: Introduction
Introduction Precautions WARNING: TO REDUCE THE RISK OF FIRE OR ELECTRIC SHOCK, DO NOT EXPOSE THIS APPLIANCE TO RAIN OR MOISTURE. CAUTION RISK OF ELECTRIC SHOCK DO NOT OPEN CAUTION: TO REDUCE THE RISK OF ELECTRIC SHOCK, DO NOT REMOVE COVER (OR BACK). NO USER SERVICEABLE PARTS INSIDE. -
Page 3: Declaration Of Conformity
73 / 23 / EEC CE Marking: 93 / 68 / EEC We declare that the following product: DVD VIDEO RECORDER, Model D-R160SB is in compliance with following Regulations. EN55013: 2001+A1:2003, EN55020: 2002+A1:2003, EN61000-3-2: 2000, EN61000-3-3: 1995 + A1: 2001 EN60065: 2002 EN60825-1 Edition 1.2: 2001... -
Page 4: Installation Location
Introduction Precautions (cont’d) Installation Location For safety and optimum performance of this unit: ● Install the unit in a horizontal and stable position. ● Do not place anything directly on top of the unit. ● Do not place the unit directly on top of the TV. ●... - Page 5 Maintenance ■ CLEANING THE UNIT ● Use a soft cloth slightly moistened with a mild detergent solution. Do not use a solution containing alcohol, spirits, ammonia or abrasive. ■ CLEANING DISCS ● If a disc becomes dirty, clean it with a cleaning cloth.
-
Page 6: Table Of Contents
Introduction Table of contents Introduction ■ Precautions ......2 ■ Table of contents ......6 ■... - Page 7 Playback ■ Basic playback ......64 Playing back a DVD-RW / DVD-R ....Playing back a DVD-VIDEO / Video CD / CD.
-
Page 8: Features
Introduction Features Along with playing back CDs and recording, editing, and playing back DVDs, this unit offers you the following features. Recording The unit is compatible with DVD-RW discs which are recordable repeatedly, and DVD-R discs which are recordable only once. ■... -
Page 9: Choosing A Disc
• Handle the disc according to the disc instruction manual. • Toshiba cannot guarantee that all discs bearing the DVD or CD logos will operate as expected. Additionally, Toshiba cannot guarantee that discs recorded in this device will operate properly in other DVD players, recorders and/or personal computer drives. - Page 10 • This player cannot play the DVD-R discs recorded in VR mode (Video Recording Format). • Toshiba is not liable for any damage or loss caused directly or indirectly by the malfunction of this recorder, including, without limitation, any one of the following: •...
- Page 11 Because of problems and errors that can occur during the creation of DVD and CD software and/or the manufacture of DVD and CD discs, Toshiba cannot guarantee that product will play every feature of every DVD bearing the DVD logo and/or every CD bearing the CD logo. As one of the creators of DVD technology, Toshiba DVD players are manufactured using the highest standards of quality, and as a result, such incompatibilities are rare.
-
Page 12: Structure Of Disc Contents
Introduction Choosing a disc (cont’d) Structure of disc contents Normally, DVD video discs are divided into titles, and the titles are subdivided into chapters. Video CDs/Audio CDs are divided into tracks. DVD video disc Title 1 Chapter 1 Chapter 2 Chapter 1 Video CD/Audio CD Track 1... - Page 13 Discs and purposes The table shows main functions which are available on this recorder per disc category. This will help you choose discs. DVD-RW disc Video mode Characteristics on this Suitable for saving data in recorder Video mode format to play on compatible devices.
-
Page 14: Index To Parts And Controls
Introduction Index to parts and controls Front Panel 1. Disc tray Place a disc here when open. 2. Display Refer to “Front Panel Display Guide” on page 18. 3. A (OPEN/CLOSE) button* Press to open or close the disc tray. 4. -
Page 15: Rear Panel
Rear Panel AV2 ( DECODER ) AV1 ( TV ) ANTENNA 1. ANTENNA IN jack Connect to an antenna or cable. 2. AV2 (DECODER) socket Connect to VCR, camcorder, or other Audio-Video equipment. Use a commercially available Scart cable. 3. COMPONENT VIDEO OUTPUT jacks Connect to the component video input jacks on your Use a commercially available Component Video cable. - Page 16 Introduction Index to parts and controls (cont’d)
- Page 17 1. OPEN/CLOSE A button* Press to open or close the disc tray. 2. Number buttons Press to select channel numbers. Press to select a title/chapter/track on display. Or press to enter values for the settings in the Setup menu. 3. REPEAT button Press to display the Repeat menu.
-
Page 18: Front Panel Display Guide
Introduction Index to parts and controls (cont’d) Front Panel Display Guide 1. Current Status of the unit :Appears when disc playback is paused. Appears also during step by step playback. :Appears when playing a disc. :Appears during slow forward or slow reverse playback. -
Page 19: Preparation Of The Remote Control
Introduction Preparation of the remote control Installing batteries in the remote control ■ Install two R6 (AA) batteries (supplied) into the remote control, carefully match with the polarity indicated inside the battery compartment. Open the cover. Insert batteries. Make sure to match the + and - on the batteries to the marks inside the battery compartment. -
Page 20: On Screen Menu
Introduction On Screen menu This unit uses the following On Screen menu for most operations: Setup menu, Title list, Playlist, Original and Display menu. They allow you to change the playing status of disc during playback. The Display menu also gives you information on the status of the disc. Display menu With a disc inserted into the unit, press [DISPLAY] to display the On-Screen Display. - Page 21 <DVD-R, DVD-RW (Video mode)> Disc Format Finalise <DVD-RW (VR mode)> Disc Format Finalise Disc Protect OFF <Audio CD, MP3, JPEG, Video CD> CD Playback Mode Random Play Program Play PBC (Video CD only) Slide Show 1. Format (DVD-RW only): Allows you to erase all of the recorded contents on the disc.
-
Page 23: Connections
Connections Connect your recorder to your TV or stereo system. ● Connections... - Page 24 Connections Connections Connect the unit to a TV after considering the capabilities of your existing equipment. Before installation, unplug your TV and this unit. Antenna Cable Signal RF cable (supplied) Scart adaptor (not supplied) RF cable (not supplied) ■ Using the Scart socket 1) Connect the antenna or cable to the ANTENNA IN jack of this unit.
-
Page 25: Using The S-Video Out Or The Component Video Output Jacks And The Analog Audio Out Jacks
Using the S-VIDEO OUT or the COMPONENT VIDEO OUTPUT jacks and the ANALOG AUDIO OUT jacks If your TV has an S-Video or a Component Video input jack, use either an S-Video cable (to connect the S-VIDEO OUT jack) or a Component Video cable (to connect the COMPONENT VIDEO OUTPUT jacks), and an Audio Cable (to connect the ANALOG AUDIO OUT jacks). -
Page 26: Digital Audio For Better Sound Quality
Connections Connections (cont’d) Digital audio for better sound quality ■ The connections illustrated below are optional for better sound. Dolby Digital decoder, DTS decoder or MPEG decoder, etc. DIGITAL AUDIO OUTPUT PCM/BITSTREAM COAXIAL Coaxial cable (not supplied) COMPONENT AUDIO IN ANALOG VIDEO OUTPUT (AV3) -
Page 27: Basic Setup
Basic Setup Read this chapter for necessary settings to get started. ● Initial setting ● Channel setting ● Setting the clock ● Selecting the TV aspect ratio... -
Page 28: Initial Setting
Basic Setup Initial setting You need to follow these steps when you turn this unit on for the first time. 1) Press [I/y ON/STANDBY]. 2) Turn the TV on. Select the input to which the unit is connected. Initial Setting menu will automatically appear. 3) Press [ENTER] to start Channel Tuning. -
Page 29: Channel Setting
Basic Setup Channel setting Tuning of this unit to broadcast channels can be performed in two ways. Auto tuning Programme the tuner to scan only the channels you can receive in your area. 1) In stop mode, press [SETUP]. Setup Required Setting Playback Display... -
Page 30: To Select A Channel
Basic Setup Channel setting (cont’d) 7) Press [K / L] to start scanning. • The tuner will begin to search up or down automatically. When a channel is found, the unit will stop searching and the picture will appear on the TV screen. -
Page 31: Setting The Clock
Basic Setup Setting the clock Auto Clock Setting Channel Tuning must be set before setting Auto Clock. 1) In stop mode, press [SETUP]. 2) Select “Clock” using [K / L], then press [ENTER]. Setup Required Setting Playback Display Recording Clock Channel Disc Clock menu will appear. - Page 32 Basic Setup Setting the clock (cont’d) 4) Enter the date (day / month / year) using [K / L]. Press [B] to move the cursor to the next field. If you wish to go back to the previous field, press [{]. Clock Setting 01 / 01 / 2006(SUN) 0: 00...
-
Page 33: Selecting The Tv Aspect Ratio
Basic Setup Selecting the TV aspect ratio You can select the TV aspect ratio to match the format of the programme you are playing back with the unit and that of your TV screen (4:3 standard or 16:9 wide screen TV). -
Page 35: Recording
Symbols in this Section The following icons show the playable discs for each function described in this section. : Video mode DVD-RW disc : VR mode DVD-RW disc : DVD-R disc Most instructions are based on the remote control operation, unless otherwise noted. You can use the buttons on the remote control and those on the main unit as well when they have the same function. -
Page 36: Information On Dvd Recording
Recording Information on DVD recording Information ● This unit can record on DVD-R and DVD-RW. You can record on DVD-R only once. On DVD-RW, you can record and erase many times. ● It is possible to record on DVD-R only in Video mode. DVD-RW can record in the format you select from Video mode or VR mode. -
Page 37: Restrictions On Recording
Restrictions on recording You cannot record copy-protected video using this unit. Copy-protected video includes DVD-Video discs and some satellite broadcasts. If copy-protected material is detected, recording will pause or stop automatically and an error message appears on the screen. You can only record “Copy-once only” video using a DVD-RW disc in VR mode with Content Protection for Recordable Media (CPRM). -
Page 38: Selecting The Recording Format
Recording Selecting the Recording format Choosing the recording format of a blank disc Start When inserting a blank disc, the unit automatically starts to initialise the disc. You can also manually format a DVD- RW disc if you wish to reuse it. In stop mode, press [SETUP]. - Page 39 Notes • The recording format setting is effective only for DVD-RW discs. You cannot change the recording format for a DVD-R disc. DVD-R discs are always in Video mode. • You cannot mix two formats on one DVD-RW disc. If you insert a disc that has been recorded before, the recording format cannot be changed even if you change it in the Setup menu.
-
Page 40: Reformatting A Disc
Recording Selecting the Recording format (cont’d) Reformatting a disc If you are using a DVD-RW disc, you can format the disc by performing “Format”. By default it will be in Video mode. You can change this to VR mode in the Setup menu. -
Page 41: Selecting The Sound Mode
Selecting the Sound mode This unit can receive bilingual broadcasts. You can switch between modes by pressing [AUDIO] on the remote control. Each mode is indicated on the TV screen as follows. • During reception of bilingual broadcasts Mode Audio output Main audio from both Main speakers... -
Page 42: Setting External Input Audio
Recording Selecting the Recording format (cont’d) Setting External Input Audio When the external input audio is a bilingual broadcast, you can choose “Stereo” or “Bilingual” to record on a DVD. 1) In stop mode, press [SETUP]. 2) Select “Recording” using [K / L], then press [ENTER]. -
Page 43: Basic Recording
Recording Basic recording Start Follow the steps below to record a TV programme. Press [I/y ON/STANDBY] to turn on the unit. Turn on the TV and be sure to select the input to which the unit is connected. Press [OPEN/CLOSE A] to open the disc tray. Place the disc on the disc tray with its label facing up. - Page 44 Recording Basic recording (cont’d) Notes • You can change the channel while in the REC pause mode. • Recording starts immediately and continues until the disc is full or you stop recording. • If the clock is not set, the date and time space next to title names in the Original or Playlist will be blank. •...
-
Page 45: One-Touch Timer Recording
Recording One-touch Timer Recording Start This is a simple way to set the recording time in blocks of 30 minutes. Check that the disc you are recording onto has enough space remaining for the time you set. Turn on the unit and insert a recordable disc. Make sure that the TV input is set on the unit. - Page 46 Recording One-touch Timer Recording (cont’d) Notes • The remaining recording time will appear on the TV screen during One-touch Timer Recording. Press [DISPLAY] to see it on the TV screen. • The remaining recording time will be displayed on the front panel display during One-touch Timer Recording. •...
-
Page 47: Timer Recording
Recording Timer Recording Start You can set the unit to record up to 8 programmes, up to a month in advance. Daily or weekly programme recordings are also available. • Be sure to set the clock before entering a timer programming. - Page 48 Recording Timer Recording (cont’d) Enter the date using [K / L], then press [B]. Timer Programming Date Start 1. 01/01 --:-- Each time you press [L] at the current date, the timer recording date will change as follows. <e.g. 1st January> Daily (Everyday) M-F (Monday to Friday) W-SAT (Saturday)
- Page 49 Select the channel number to record using [K / L], then press [B]. Timer Programming Date Start 1. 01/01 12:57 To record from the external input, select “AV1”, “AV2”, “AV3” or “AV4”. Select the recording mode using [K / L], then press [B].
- Page 50 Recording Timer Recording (cont’d) Notes • If you have not set the clock, the clock setting window will appear instead of the Timer Programming list at step 1. In this case, press [ENTER]. Then continue from step 4 in “Manual Clock Setting” on page 32 before programming the timer recording.
-
Page 51: Checking, Cancelling, Or Correcting The Timer Programming Information
Checking, cancelling, or correcting the timer programming information In the following example, No. 5 timer programming overlaps on No. 1 and No. 6 timer programmes. In such a case, you should correct the programme time to clear the overlap. Timer Programming Date Start 1. -
Page 52: Pdc (Programme Delivery Control)
Recording Timer Recording (cont’d) PDC (Programme Delivery Control) Programme Delivery Control (PDC) assures that the TV programmes you have programmed for timer recording are recorded exactly from beginning to end, even if the actual broadcasting time differs from the scheduled time due to a delayed start or extension of the programme duration. -
Page 53: Satellite Link
■ If the recording time is partially overlapped: • The timer programming with the earlier start time (PROG. 2) has priority. PROG. 1 will start after PROG. 2 recording is complete. PROG. 1 PROG. 2 Actual PROG. 2 recording The first 30 seconds (approx.) are cut off. ■... - Page 54 Recording Timer Recording (cont’d) 4) With start time and the recording mode highlighted, press [ENTER]. Satellite Link Start Mode 17:30 To Standby Mode 5) Set the desired start time using [K / L / { / B]. • Change the value for the hour using [ confirm with [ •...
-
Page 55: Settings For An External Equipment
Recording Settings for an external equipment Connection to an external equipment Connect the external equipment using either the input jacks, AV1, AV2, AV3 (Rear) or AV4 (Front). However, for AV4 jacks, you have to select S-VIDEO input or VIDEO input jack depending on the connected devices. Use a commercially available Scart, S-Video or Video cable and an Audio cable for this connection. -
Page 56: Recording From An External Equipment
Recording Settings for an external equipment (cont’d) Recording from an external equipment Start Before recording from external equipment, see page 25 for connection instructions. Turn the TV and the unit on, and select the input of the TV to which the unit is connected. Press [OPEN/CLOSE A] to open the disc tray, then place the disc to record on. - Page 57 Note • During recording, if a signal other than PAL is detected (such as NTSC), recording is paused. • If you want to monitor the programme that you are recording, make sure the device such as a set top box is turned off when it is connected to AV2.
-
Page 58: Setting Disc Protection
Recording Setting disc protection Start Notes • The Disc Protect setting is available only when a disc recorded in VR mode is inserted. • You can select only “Disc Protect ON inserted. To cancel the disc protection: • Select “Disc Protect ON OFF”... -
Page 59: Finalising Discs
Recording Finalising discs Start You will need to fi nalise discs to play them back in other players. Finalising may take from several minutes up to an hour. (A disc recorded in Video mode can take up to 15 minutes. A disc recorded in VR mode can take up to 60 minutes.) A shorter recording period on the disc will require a longer time period for fi... - Page 60 Recording Finalising discs (cont’d) To cancel finalising (DVD-RW only): • After step 4, press [STOP C]. Select “Yes” using [{ / B] and then press [ENTER]. Finalising is canceled and the unit switches to stop mode. • If appears when [STOP C] is pressed, you cannot cancel finalising because the finalising has already reached at a critical point in its process.
-
Page 61: Auto Finalise
Auto finalise Start Note • Auto finalise function is not available for discs formatted in VR mode. You can fi nalise discs automatically when the disc space runs out if you set this in the Setup menu. In stop mode, press [SETUP]. Select “Recording”... -
Page 63: Basic Playback
Symbols in this Section The following icons show the playable discs for each function described on this section. : Video mode DVD-RW disc : VR mode DVD-RW disc : DVD-Video disc : DVD-R disc : Audio CD : CD-R/RW discs with MP3 files : CD-R/RW discs with JPEG files : Video CD : Video CD without PBC... -
Page 64: Playing Back A Dvd-Rw / Dvd-R
Playback Basic playback Playing back a DVD-RW / DVD-R Start Press [I/y y ON/STANDBY] to turn on the unit. Turn on the TV and be sure to select the input to which the unit is connected. Press [OPEN/CLOSE A] to open the disc tray. Place the disc on the disc tray with its label facing up. - Page 65 Press [TOP MENU] to display the Title menu. You can switch between the “Original” and “Playlist” in the VR mode using [MENU / LIST]. <Video mode> Title List 01/ 01/06 01:00 P12 XP <VR mode> Playlist 01/ 01/06 01:00 P12 XP Original 01/ 01/06 01:00 P12 XP Press [TOP MENU] to resume play.
- Page 66 Playback Basic playback (cont’d) Notes • For DVD-R (Video mode) and DVD-RW (Video mode) discs that are already finalised, a title list will be displayed instead of thumbnails. • If you insert a DVD-RW recorded in VR mode and it has a Playlist, the Playlist is displayed.
-
Page 67: Playing Back A Dvd-Video / Video Cd / Cd
Playing back a DVD-VIDEO / Video CD / CD Start Note • Some discs may start playback automatically. Press [I/y ON/STANDBY] to turn on the unit. Turn on the TV and be sure to select the input to which the unit is connected.