
Related Manuals for Miele H 4088 BM


Summary of Contents for Miele H 4088 BM
- Page 1 Operating and Installation Instructions Convection microwave oven H 4082 BM H 4088 BM en - US, CA To prevent accidents and machine damage read these instructions before installation or use. M.-Nr. 07 338 250...
-
Page 2: Table Of Contents
Contents IMPORTANT SAFETY INSTRUCTIONS....... . . 4 Guide to the oven..........10 Guide to the display. - Page 3 Contents Functions ............34 Bake .
-
Page 4: Important Safety Instructions
IMPORTANT SAFETY INSTRUCTIONS When using electrical appliances always observe basic safety precautions, including the following: WARNING - To reduce the risk of burns, electric shock, fire, injury to persons, or exposure to excessive microwave energy: Read all instructions before installing or using the oven. - Page 5 IMPORTANT SAFETY INSTRUCTIONS Technical Safety Installation, repair and maintenance work should be performed by a Miele authorized service technician in accordance with national and local safety regulations and the provided installation instructions. Contact Miele’s Technical Service Department for examination, repair or adjustment.
- Page 6 Times for cooking, heating and defrosting food in the convection microwave oven are shorter than that of traditional food preparation methods. Extensive microwaving could dry out food and cause possible ignition. Fire...
- Page 7 IMPORTANT SAFETY INSTRUCTIONS Only use accessories approved by Miele for use with this machine. Use of other accessories may cause damage and void the warranty. Only use the Miele roast probe supplied with this appliance. If a replacement is necessary it can be ordered from Miele or your Miele dealer.
- Page 8 Before serving food allow a sufficient standing time. Always check the temperature of the food itself after taking it out of the microwave oven. Do not judge by the plate temperature. The heat is created in the food, the dishes may stay cool to the touch.
- Page 9 Eggs can be cooked without their shells in the microwave oven only if the yolk membrane has been punctured first. The pressure could otherwise cause the egg yolk to explode. Danger of injuries.
-
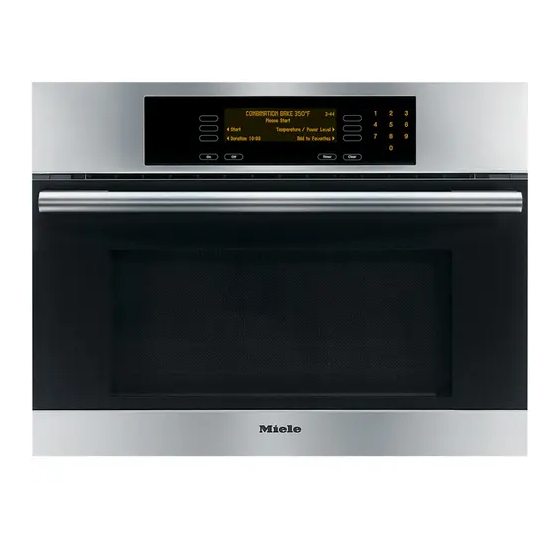
Page 10: Guide To The Oven
Guide to the oven a Control panel b Upper heating element c Light d Roast probe socket e Three level runners f Oven door... -
Page 11: Guide To The Display
a Touch controls Next to and below the display are electronic sensor controls which react to the touch of a finger. When the oven is turned on the display shows the allocation of the controls. The oven is operated by a touch of the respective control. - Page 12 Guide to the display Display This symbol is allocated to a touch control and shows in the display with an option or request, e.g. "back", "OK", etc. The display shows a maximum of six options. If more menu points are available, "more" will be displayed as the last menu option.
-
Page 13: Oven Accessories
Oven accessories Roast probe The roast probe is inserted in the food to monitor the roasting process. For more information see "Using the roast probe". Boiling wand When heating liquids, the provided boiling wand should be placed into the container. It results in even boiling of the liquid. - Page 14 Oven accessories Combi rack The combi rack is specially designed for microwaves and can be used with programs that use microwave power (combi programs). It should not be set on the bottom of the oven and do not use it with the Microwave (Solo) function.
-
Page 15: Safety And Energy Saving Features
System lock When locked, the oven cannot be operated, see "Settings - System lock". Automatic Safety Shut Off A solo oven function can be started without a cooking time set. To prevent a run-on operation and a fire hazard the oven shuts off automatically. -
Page 16: Settings J
Settings J The default oven settings can be changed in the function "Settings J". In this function you can customize the oven to suit your preferences. Settings may be adjusted by touching the corresponding touch control. Language J ^ Select the touch control next to the desired language and confirm by selecting "OK". -
Page 17: Temperatures
Temperatures The default temperature of each function can be adjusted. If a temperature out of the available range is selected, the oven will revert to the default temperature. ^ Touch the control of the function whose default temperature you wish to alter. -
Page 18: Tone Options
Settings J Tone Options Unique tones may be set for each of the two timers to differentiate them from an oven function tone. "Timer 1" and "Timer 2" The tone of "Timer 1" and "Timer 2" can be set to one of five tone options. ^ Select "Timer 1 Tone"... -
Page 19: Display
"Tone Short / Long" The duration of the timer and oven tones can be modified. – "Tone short" will beep in quick succession when an oven signal or the oven timer sounds. – "Tone long" a continuous tone will sound when an oven signal or the oven timer sounds. -
Page 20: Warming Function
Settings J Warming function The oven has a built-in warming function which is activated by default. Food which is not immediately removed from the oven will be kept warm for a short period of time. The display shows "Keep warm". The function can be deselected. -
Page 21: Reset
Reset The default settings of the oven can be restored with "Reset". Temperatures If the request is confirmed with "yes", all changed temperatures will be restored to the factory default. Settings If the request is confirmed with "yes", all changed settings will be restored to the factory default. -
Page 22: Selecting Cookware
Selecting cookware Microwaves: – are reflected by metal, – pass through glass and chinaware, – are absorbed by the food. Material and shape The material and shape of containers used affect cooking results and times. Circular and oval containers work best. The food will heat more evenly than in a square container. - Page 23 Exceptions: The enclosed combi rack is only suitable for combi functions not the microwave solo function. Do not set it on the oven floor. – Metal baking dishes are suitable for baking with a combination microwave baking method. However they are not recommended, metal reflects the microwaves causing longer cooking times.
- Page 24 Selecting cookware Plastics Use plastic dishes only for Microwave - Solo. They must be heat resistant up to 230°F (110°C) otherwise the plastic may melt into the food. Special plasticware, designed for use in microwave ovens is available in retail outlets.
- Page 25 Covering the food Use a cover only during the Microwave-Solo function. Do not use a cover if using a combination program which uses microwave power. Plastics are only heat-resistant up to 230°F (110°C). Higher temperatures (Broiling, Convection Bake, etc.) can cause the cover to melt into the food.
-
Page 26: Before Using The Oven
Before using the oven Programming the oven When the oven is first connected to the electrical supply you will be prompted to set the time of day. See "Settings - Clock". Cleaning the appliance Remove the protective film from the appliance front (if present). -
Page 27: Heating The Oven
Heating the oven New ovens may have a slight odor during the first use. To eliminate the odor quickly, the oven should be operated at a high temperature for 2 hours. Before heating the oven, remove all accessories and labels. Make sure the room is well ventilated during this process. - Page 28 Before using the oven ^ Set the timer by touching the "Delay Start" control. ^ Select "Duration". Set a cooking time by entering "2", "0", "0" using the number keypad. ^ Touch the "OK" control. The oven will run for 2 hours and the time remaining will appear in the display.
-
Page 29: Using The Oven
Turning the oven on and off ^ To turn the oven on or off touch the "On/Off" control. The main menu appears and displays 9 total menu options. ^ Select the desired menu (e.g. Bake) by touching the control next to it. Functions will then appear. - Page 30 Using the oven Manually starting a microwave function Only when Microwave is used must the oven be started manually. ^ Turn the oven "On". ^ Select the desired function e.g. Microwave. The submenu is shown. ^ Select the desired option from the submenu e.g.
-
Page 31: Selecting Cooking Times
The oven can be programmed to turn on and off automatically. If a combination function is selected, "Duration" can be selected. If a solo function is selected the following settings can be selected: + Delay Start With this function you can program the oven to turn on at a desired time. - Page 32 Selecting cooking times The entered program can be saved as its own program with "Add to favorites". See "Favorites" for more information. The start time will be displayed until the oven is turned on. Once the program has started, the remaining time will be displayed.
-
Page 33: Timer
The timer can be used to time any activity in the kitchen and can be set independently of a cooking function. Two timers (Timer 1 and 2) can be used individually or simultaneously. A maximum time of 59 minutes and 59 seconds can be selected. -
Page 34: Functions
Functions Solo functions – Bake select at the end of the baking time if the bottom of the cake needs a more brown finish. – Surround suitable for baking traditional recipes. – Convection Bake to bake or cook food with heated air fanned throughout the interior. -
Page 35: Bake
Bake, Surround Default temperature ..375°F (190°C) Conventional baking mode for traditional recipes and for the preparation of souffles. Any heat-resistant cookware is suitable, e.g. casserole dish, china, earthenware. However shiny, thin pans are not recommended. ^ Set the pan on the middle of the combi rack on the 1st or 2nd level runner from the bottom. -
Page 36: Combination Bake
Bake Combination Bake Default temperature ..325°F (160°C) This function is suitable for baking items with a longer bake time e.g. dough, cake, cheesecake, etc. This function combines the programs Microwave and Convection Bake. Heat reaches the food immediately, shortening cooking times while still achieving a browned finish. -
Page 37: Broil
Broil Broiling is done at a fixed temperature. The Broil function is designed for flat food like pork chops, steak, burgers and toast. The upper heating element radiates high heat in order to cook the food, it will glow red hot several minutes after being turned on to produce sufficient heat for broiling. -
Page 38: Micro Broil
Broil Micro Broil Micro Broil is done at a fixed temperature and cannot be changed. This function combines the programs Microwave and Broil allowing a power level to be selected. ^ Place the combi rack on the glass tray and place the food on it. ^ Insert the glass tray on the 2 runner from the bottom. -
Page 39: Microwave
– food can generally be cooked without adding much liquid or cooking oil. – defrosting, reheating and cooking in a convection microwave oven is quicker than using traditional oven methods. – nutrients, such as vitamins and minerals, are generally retained. - Page 40 Microwave Do Not Operate the Microwave Oven empty! The oven will be damaged. Be sure cookware is microwave safe. In all microwave functions the power level and cooking time can be selected. Combined microwave functions will shorten the cooking time and give a browned finish to the food.
- Page 41 Defrosting The function Microwave defrosts food gently and fast. The following microwave power levels are recommended for defrosting: – 2 bars for defrosting delicate food such as heavy cream, butter, cheese, etc. – 4 bars for defrosting all other foods. ^ Take the frozen food from the packaging and put it in a microwave safe container.
- Page 42 Microwave Reheating The oven is useful for reheating food. To reheat select a power level of: – full bar for drinks, – 10 to 12 bars for food, – 8 bars for baby food. ^ Set the cookware in the middle of the glass tray on the 1 level runner from the bottom.
-
Page 43: Defrost / Heat And Cook
Defrost / Heat and Cook To defrost, heat and cook at the same time use the function Microwave or the combination function. Microwave Solo This function is suitable for frozen food, which does not require browning. Frozen meals can be defrosted and then reheated or cooked. -
Page 44: Master Chef
Master Chef The "Master Chef" function contains an easy to use list of preset functions for commonly cooked foods e.g. pizza, chicken, etc. ^ Pay attention to notes in the display. For example the display may show a note to insert the roast probe or to add liquid. - Page 45 Maximum food weight Poultry Turkey Goose Meat Beef Pork Veal Lamb Fish Steak Fillets Whole Lobster tails Paella Casserole program dish heights Program Lasagna Gratin Casseroles Whole max. 10 lbs (4.5 kg) without stuffing Stuffed max. 12 lbs (5.5 kg) with stuffing max.
-
Page 46: Defrost
Defrost Default temperature ..75°F (25°C) The defrost function allows you to defrost food at a consistent temperature. Warm air is distributed over the food by the fan on the rear wall of the oven. ^ Place the food in the oven. -
Page 47: Roast
Do not preheat the oven. Exception: When cooking roast sirloin or tenderloins using Auto Roast preheat the oven to the temperature recommended in the recipe. Auto Roast Default temperature ..325°F (160°C) Surround Roast Default temperature ..375°F (190°C) This function allows you to brown meat and poultry. -
Page 48: Convection Roast
Roast Combination Auto Roast Default temperature ..325°F (160°C) By combining the Microwave and Auto Roast functions the cooking time is shortened. This function is not suitable for roast beef or tenderloins. The meat will cook before it browns. Use only heat resistant and microwave-safe cookware. -
Page 49: Using The Roast Probe
The oven comes equipped with a roast probe. The roast probe allows you to monitor the cooking temperature by measuring the core temperature of the meat. When the desired temperature is reached the oven will automatically turn off. The roast probe can be used during: –... - Page 50 Using the roast probe Once the selected core temperature is reached: – the display shows "Ready". – a signal will sound. – the oven turns off automatically. – the cooling fan stays on. ^ After roasting, cover the meat for about 10 minutes with aluminum foil.
-
Page 51: Favorites
If you cook a recipe with the same settings (function, time, temperature) often, you can save it as a Favorite for easy recall. Saving a favorite ^ Enter the function, temperature and cooking time of the recipe. The oven will begin heating. ^ Touch the "Add to Favorites"... - Page 52 Favorites Selecting Favorites ^ Select "Favorites" from the main menu. ^ Select the desired Favorite from the menu. Depending on the function saved you may need to press "Start" to begin the program. Follow the prompts. ^ Select and start your personal recipe. Delete Favorites ^ Select "Favorites"...
-
Page 53: Sabbath
Default temperature ..375°F (190°C) For religious observance, the compact microwave oven can remain set for use for 72 hours. The preset mode in the Sabbath program is "Surround". All you need to do is set the desired temperature. -
Page 54: Cleaning And Care
Cleaning and Care Let the oven cool before cleaning the interior, the inside door and the gasket. Danger of burns! Do not use a steam cleaner to clean the appliance. Pressurized steam could cause permanent damage to the surface and to components of the oven, for which the manufacturer cannot accept responsibility. - Page 55 To avoid permanent damage to PerfectClean treated surfaces, avoid: – scouring cleansers such as scouring powder, scouring liquid, and pumice stones – ceramic stove-top cleaners – steel wool – scouring pads, such as pot scrubbers, or used sponges that still contain abrasive cleanser residue –...
-
Page 56: Inside Of Door With Door Seal
Cleaning and Care Inside of door with door seal The inside of the door remains hot after use. Danger of burns! Clean the inside of the door and the door seal with a clean sponge cloth, dish liquid and warm water, or a clean, damp micro fiber cloth. -
Page 57: Accessories
Accessories Combi rack The combi rack has been treated with PrefectClean enamel. Do not wash in the dishwasher. ^ Wash the combi rack using a sponge and a solution of warm water and non- abrasive liquid detergent. ^ Dry with a soft cloth. Glass tray ^ Clean the glass tray in the dishwasher or wash it by hand. -
Page 58: Frequently Asked Questions
Repairs and other work by unqualified persons could be dangerous and may void the warranty. The following faults can be corrected without contacting the Miele Service Department: Why is the display dark when the oven is first turned on? - Page 59 Why is a noise heard after turning the oven off? This is normal. The fan will continue to run for a short time to cool the oven. When the oven has cooled sufficiently, the fan will turn off automatically. The fan will stop if the door is opened during the cooling phase. The fan will continue when the door is closed again until the cooling phase is complete.
- Page 60 Why does the food cool so fast when heated or cooked with Microwave? In the microwave oven, food begins to cook from the outside first, the inside of the food relies on the transfer of heat. If food is cooked at a high power level it is possible that the heat may not have reached the center of the food.
-
Page 61: Technical Service
Miele’s Service department, Extended Service Contracts offered by other providers for Miele products will not be recognized by Miele. Our goal is to prevent unauthorized (and untrained) service personnel from working on your Miele products, possibly doing further damage to them, you and/or your home. -
Page 63: Installation Instructions
Installation Instructions... -
Page 64: Electrical Connection
Electrical connection CAUTION: Before servicing, disconnect the power supply by either removing the fuse, shutting off the power main or manually "tripping" the circuit breaker. Installation work and repairs should only be performed by a qualified technician in accordance with all applicable codes and standards. -
Page 65: Installation
Installation options The appliance is designed for installation under a countertop, in a tall cabinet or in a tall cabinet in combination with an oven. Installation under a countertop When installed under a cooktop regard the installation instructions and dimensions of the cooktop. Installation... - Page 66 Installation Installation in a tall cabinet...
- Page 67 Installation Installation in a tall cabinet in combination with an oven...
-
Page 68: Machine Front Dimensions
Installation Machine front dimensions " (22/23 mm) B H 4082 BM: 1 " (47.5 mm) H 4088 BM: 1 " (45 mm) C Appliances with glass front: Appliances with metal front: (0.5 mm) '' (1.5 mm) -
Page 69: Programming The Oven
Installation If there are side handles, please remove them. ^ Connect the oven to the electrical supply. ^ Set the oven into the cabinet niche, push it all the way in and align it, right-angled. ^ Open the oven and fix the appliance with the two supplied screws at the side panels of the cabinet. - Page 72 Alteration rights reserved / 4508 M.-Nr. 07 338 250 / 00 (H 4082 BM, H 4088 BM)