Sign In
Upload
Manuals
Brands
Sony Manuals
Digital Camera
Cyber-Shot DSC-RX10M2
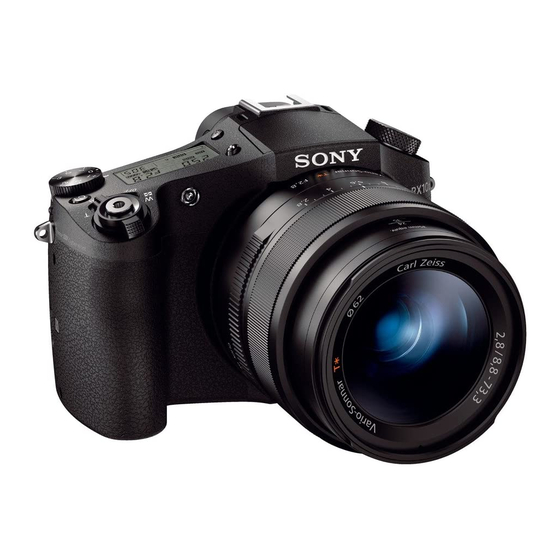
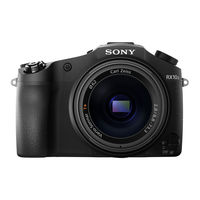
Sony Cyber-Shot DSC-RX10M2 Manuals
Manuals and User Guides for Sony Cyber-Shot DSC-RX10M2. We have
5
Sony Cyber-Shot DSC-RX10M2 manuals available for free PDF download: How To Use Manual, Manual, Service Manual, Instruction Manual
Sony Cyber-Shot DSC-RX10M2 Manual (261 pages)
Digital Still Camera
Brand:
Sony
| Category:
Digital Camera
| Size: 1.94 MB
Table of Contents
Inserting a Memory Card (Sold Separately)
2
Attaching a Lens
2
Setting the Language, Date, and Time
2
Confirming the Operation Method
2
Selecting a Shooting Mode
3
Using Shooting Functions
3
Using the Zoom
3
Adjusting the Exposure
5
Selecting a Drive Mode (Continuous Shooting/Self-Timer)
5
Selecting the ISO Sensitivity
5
Correcting the Brightness or Contrast
6
Adjusting Color Tones
6
Selecting an Effect Mode
6
Recording Movies
6
Customizing the Shooting Functions for Convenient Use
7
Setting the Other Functions of this Product
7
Viewing Still Images
8
Deleting Images
8
Viewing Panoramic Images
8
Using Viewing Functions
9
Changing Settings
9
Using Wi-Fi Functions
10
Connecting this Product and a Smartphone
10
Controlling this Product Using a Smartphone
10
Adding Applications to the Product
11
Installing the Applications
11
Starting the Applications
12
Managing the Applications
12
Using the Software
12
Connecting this Product and a Computer
12
Creating a Movie Disc
12
If You Have Problems
14
Troubleshooting
14
Shooting Still Images/Movies
14
Viewing Images
15
Memory Cards
16
Checking the Camera and the Supplied Items
17
Identifying Parts
18
List of Icons on the Screen
22
Monitor Mode
22
For Playback
23
Display Panel
29
Remaining Battery
30
Using the Shoulder Strap
31
Attaching the Eyepiece Cup
31
Adjusting the Viewfinder (Diopter-Adjustment)
32
About the [In-Camera Guide]
32
Inserting the Battery Pack into the Camera
33
Charging the Battery Pack While It Is Inserted in the Camera
34
Charge Lamp
35
Charging Time (Full Charge)
35
Charging by Connecting to a Computer
36
Battery Life and the Number of Images that Can be Recorded/Played Back Using a Battery Pack
37
Screen Mode
37
Supplying Power from a Wall Outlet (Wall Socket)
38
Removing the Battery Pack
39
Inserting a Memory Card
39
Removing the Memory Card
40
Attaching the Lens Hood
43
Setting Language, Date and Time
43
Using the Control Wheel
44
Using the Control Dial
45
Using Menu Items
46
Using the Fn (Function) Button
47
Shooting Still Images
50
Focus Indicator
51
Shooting Movies
52
List of Mode Dial Functions
53
Available Functions
53
Intelligent Auto
54
Superior Auto
55
About Scene Recognition
55
Scene Recognition
56
The Advantages of Automatic Shooting
56
Program Auto
57
Program Shift
57
Sweep Panorama
58
Scene Selection
60
Sports Action
60
Shutter Priority
62
Aperture Priority
63
Manual Exposure
64
Memory Recall
66
Menu Item Details
67
Record Setting
68
Priority Setting
68
Playback Speed
69
The Zoom Features Available with this Product
70
Zoom Setting
71
About Zoom Scale
72
Zoom Speed
73
Smart Telecon
73
Zoom Func. on Ring
73
Using Flash
74
Notes on Using the Flash
75
Flash Mode
76
Flash Comp
77
Switching the Screen Display (Shooting)
77
DISP Button (Finder)
79
Graphic Display
79
DISP Button (Monitor)
80
For Viewfinder
80
TC/UB Disp. Switch
81
Image Size (Still Image)
81
Aspect Ratio (Still Image)
82
Quality (Still Image)
83
Panorama: Size
84
Panorama: Direction
84
Changing the Focus Method Using the Focus Mode Dial
85
Focus Area
86
Center Lock-On AF
87
Manual Focus
88
Direct Manual Focus (DMF)
89
MF Assist (Still Image)
90
Focus Magnifier
90
Focus Magnif. Time
91
Peaking Level
92
Peaking Color
92
Pre-AF (Still Image)
93
AF Illuminator (Still Image)
94
Measuring the Exact Distance to the Subject
95
Exposure Comp
96
Exposure Compensation Dial
97
Metering Mode
97
AEL W/ Shutter (Still Image)
99
Exp.comp.set
99
Exposure Set. Guide
100
Reset EV Comp
101
Drive Mode
101
Single Shooting
101
Cont. Shooting
102
Self-Timer(Cont)
104
Cont. Bracket
106
Single Bracket
107
DRO Bracket
110
Bracket Order
110
Indicator During Bracket Shooting
111
ISO AUTO Min. SS
113
Multi Frame NR
114
D-Range Opt. (DRO)
115
White Balance
117
Capturing a Basic White Color in [Custom Setup] Mode
118
Picture Effect
119
Creative Style
121
Movie Recording Formats
123
File Format (Movie)
123
Record Setting (Movie)
125
Dual Video REC
128
Marker Display (Movie)
131
Marker Settings (Movie)
131
Steadyshot (Movie)
132
Audio Recording
133
Audio Level Display
133
Audio Rec Level
134
Audio out Timing
135
Wind Noise Reduct
135
Auto Slow Shut. (Movie)
136
MOVIE Button
136
Picture Profile
137
Black Gamma
138
Color Mode
139
Color Phase
139
Color Depth
139
High Frame Rate
141
To Recall Registered Settings
142
Function Menu Set
142
Custom Key Settings
142
Function of the Center Button
144
Function of the Left Button
144
Function of the Right Button
145
Smile/Face Detect
145
Smile Shutter
146
Soft Skin Effect (Still Image)
147
Face Registration (New Registration)
147
Face Registration (Order Exchanging)
148
Face Registration (Delete)
148
Red-Eye Reduction
149
Auto Obj. Framing (Still Image)
149
Steadyshot (Still Image)
150
Long Exposure NR (Still Image)
150
High ISO NR (Still Image)
151
Write Date (Still Image)
152
Color Space (Still Image)
153
Auto Review
154
Live View Display
154
Bright Monitoring
155
Release W/O Card
157
Dial / Wheel Lock
159
Deactivate Monitor
159
Playing Back Images
160
Playback Zoom
161
Image Index
161
Switching the Screen Display (During Playback)
162
Deleting a Displayed Image
163
Deleting Multiple Selected Images
163
Playing Back Movies
164
Motion Shot Video
164
Playing Back Panoramic Images
165
Specify Printing
166
View Mode
166
Display Rotation
167
Slide Show
167
Viewing Images on an HD TV
169
Viewing Images on a "BRAVIA" Sync-Compatible TV
171
Monitor Brightness
172
Viewfinder Bright
172
Finder Color Temp
173
Volume Settings
173
Adjusting the Volume During Playback
173
Audio Signals
174
Upload Settings(Eye-Fi)
174
Mode Dial Guide
176
Delete Confirm
176
Display Quality
176
Pwr Save Start Time
177
NTSC/PAL Selector
177
Demo Mode
178
Hdmi Resolution
181
Ctrl for Hdmi
182
HDMI Info. Display
183
Output Sel. (Movie)
184
USB Connection
185
Mass Storage
186
USB LUN Setting
186
USB Power Supply
187
Date/Time Setup
187
Daylight Savings
188
Area Setting
188
Copyright Info
188
How to Use the Keyboard
189
File Number
190
Select REC Folder
191
New Folder
191
Folder Name
192
Recover Image DB
192
Display Media Info
193
Certification Logo (Overseas Model Only)
193
Setting Reset
193
Playmemories Mobile
194
Connecting an Android Smartphone to this Product
194
Connecting the Product to an Iphone or Ipad
195
Calling up an Application Using [One-Touch(NFC)]
196
Smart Remote Embedded
197
One-Touch Connection with an NFC-Enabled Android Smartphone (NFC One-Touch Remote)
198
Send to Smartphone
199
Sending Images to an Android Smartphone (NFC One- Touch Sharing)
201
Send to Computer
202
Slideshow Settings
203
Airplane Mode
204
Access Point Set
205
Move Cursor
207
Other Setting Items
207
Edit Device Name
207
Disp MAC Address
208
SSID/PW Reset
208
Reset Network Set
208
Playmemories Camera Apps
209
Recommended Computer Environment
209
Opening a Service Account
209
Downloading Applications Directly to the Product Using the Wi-Fi Function
210
Launching the Downloaded Application
211
Uninstalling Applications
211
Changing the Order of Applications
211
Confirming the Account Information of Playmemories Camera Apps
212
Playmemories Home
212
Installing Playmemories Home
213
Software for Mac Computers
214
Image Data Converter
214
Installing Image Data Converter
215
Accessing Image Data Converter Guide
215
Remote Camera Control
215
Installing Remote Camera Control
216
Accessing the Help of Remote Camera Control
216
Connecting the Product to a Computer
216
Importing Images to the Computer
217
Disconnecting the Product from the Computer
218
Selecting a Disc to be Created
218
Creating DVD Discs (AVCHD Recording Discs) from High- Definition Image Quality Movies
220
Creating DVD Discs from Standard Image Quality Movies
221
On Operating Temperatures
222
On Moisture Condensation
222
On Image Data Compatibility
223
Shooting with the Viewfinder
224
Notes on the Flash
224
On the Internal Rechargeable Battery
225
Notes on the Battery Pack
225
Effective Use of the Battery Pack
226
Remaining Battery Indicator
226
How to Store the Battery Pack
227
On Battery Life
227
Charging the Battery Pack
227
Notes on Memory Card
228
Cleaning the Monitor
229
Number of Still Images
230
Recordable Time of Movies
231
Notes on Continuous Movie Recording
234
Plug Adaptor
234
On TV Color Systems
235
ZEISS Lens
235
AVCHD Format
236
Notes on the License
236
You Cannot Insert the Battery Pack into the Product
239
You Cannot Turn on the Product
239
The Power Turns off Suddenly
239
The Remaining Battery Level Indicator Shows an Incorrect Level
239
The Charge Lamp on the Product Flashes When Charging the Battery Pack
240
The Battery Pack Is Not Charged
240
You Cannot Record Images
241
Recording Takes a Long Time
241
The Image Is out of Focus
242
Zoom Does Not Work
242
The Flash Does Not Work
243
Fuzzy White Circular Spots Appear on Images Shot Using the Flash
243
The Close-Up Shoot Function (Macro) Does Not Work
243
The Recording Date and Time Are Not Displayed on the Screen
244
The Date and Time Are Recorded Incorrectly
244
The Aperture Value And/Or Shutter Speed Flashes
244
The Image Colors Are Not Correct
244
Dark Shadow Appears on the Image
245
The Eyes of the Subject Come out Red
245
Dots Appear and Remain on the Screen
245
You Cannot Shoot Images Continuously
245
The Image Is Not Clear in the Viewfinder
246
The Image Is Blurred
247
The Flash Takes too Long to Recharge
247
Images Cannot be Played Back
248
The Date and Time Are Not Displayed
249
The Image Cannot be Deleted
249
The Image was Deleted by Mistake
249
You Cannot Find the Wireless Access Point to be Connected
249
You Cannot Send Movies to a Smartphone
250
Smart Remote Embedded] or [Send to Smartphone] Is Canceled Halfway
250
You Cannot Use One-Touch Connection (NFC)
251
The Computer Does Not Recognize this Product
251
You Cannot Import Images
252
The Image and Sound Are Interrupted by Noise When Viewing a Movie on a Computer
252
Images Exported from a Computer Cannot be Viewed on this Product
252
Formatted the Memory Card by Mistake
253
You Cannot Print Images
253
The Color of the Image Is Strange
253
Images Are Printed with both Edges Cut off
253
You Cannot Print Images with the Date
254
The Lens Gets Fogged
254
The Product Stops with the Lens Portion Extended./The Product Turns off with the Lens Portion Extended
254
The Product Becomes Warm When You Use It for a Long Time
255
The Clock Set Screen Appears When You Turn on the Product
255
The Number of Recordable Images Does Not Decrease, or Decreases Two Images at a Time
255
The Product Does Not Work Properly
256
Self-Diagnosis Display
256
Warning Messages
257
Unable to Print
258
Situations this Product Has Difficulty Handling
259
Advertisement
Sony Cyber-Shot DSC-RX10M2 How To Use Manual (261 pages)
Brand:
Sony
| Category:
Digital Camera
| Size: 2.09 MB
Table of Contents
Inserting a Memory Card (Sold Separately)
2
Attaching a Lens
2
Setting the Language, Date, and Time
2
Selecting a Shooting Mode
3
Adjusting the Exposure
5
Selecting a Drive Mode (Continuous Shooting/Self-Timer)
5
Selecting the ISO Sensitivity
5
Customizing the Shooting Functions for Convenient Use
7
Setting the Other Functions of this Product
7
Deleting Images
8
Viewing Panoramic Images
8
Using Viewing Functions
9
Viewing Images on a Tv
9
Controlling this Product Using a Smartphone
10
Troubleshooting
14
Shooting Still Images/Movies
14
Viewing Images
15
Memory Cards
16
Checking the Camera and the Supplied Items
17
Identifying Parts
18
List of Icons on the Screen
22
Monitor Mode
22
For Playback
23
Display Panel
29
Using the Shoulder Strap
31
Attaching the Eyepiece Cup
31
Adjusting the Viewfinder (Diopter-Adjustment)
32
About the [In-Camera Guide]
32
Inserting the Battery Pack into the Camera
33
Charging the Battery Pack While It Is Inserted in the Camera
34
Charging by Connecting to a Computer
36
Battery Life and the Number of Images that Can be Recorded/Played Back Using a Battery Pack
37
Screen Mode
37
Supplying Power from a Wall Outlet (Wall Socket)
38
Removing the Battery Pack
39
Inserting a Memory Card
39
Removing the Memory Card
40
Attaching the Lens Hood
43
Setting Language, Date and Time
43
Using the Control Wheel
44
Using the Control Dial
45
Using Menu Items
46
Using the Fn (Function) Button
47
Shooting Still Images
50
Focus Indicator
51
Shooting Movies
52
List of Mode Dial Functions
53
Available Functions
53
Intelligent Auto
54
Superior Auto
55
About Scene Recognition
55
Scene Recognition
56
The Advantages of Automatic Shooting
56
Program Auto
57
Program Shift
57
Sweep Panorama
58
Scene Selection
60
Menu Item Details
60
Shutter Priority
62
Aperture Priority
63
Manual Exposure
64
Memory Recall
66
Playback Speed
69
The Zoom Features Available with this Product
71
Zoom Setting
72
About Zoom Scale
72
Zoom Speed
73
Smart Telecon
73
Zoom Func. on Ring
74
Using Flash
74
Notes on Using the Flash
75
Flash Mode
76
Flash Comp
77
Switching the Screen Display (Shooting)
77
DISP Button (Finder)
79
DISP Button (Monitor)
80
TC/UB Disp. Switch
81
Image Size (Still Image)
81
Aspect Ratio (Still Image)
82
Quality (Still Image)
83
Panorama: Size
84
Panorama: Direction
84
Changing the Focus Method Using the Focus Mode Dial
85
Focus Area
86
Center Lock-On AF
87
Manual Focus
88
Direct Manual Focus (DMF)
89
MF Assist (Still Image)
90
Focus Magnifier
90
Focus Magnif. Time
91
Peaking Level
92
Peaking Color
92
Pre-AF (Still Image)
93
AF Illuminator (Still Image)
94
Measuring the Exact Distance to the Subject
95
Exposure Comp
96
Exposure Compensation Dial
97
Metering Mode
97
AEL W/ Shutter (Still Image)
99
Exp.comp.set
99
Exposure Set. Guide
100
Reset EV Comp
101
Drive Mode
101
Cont. Shooting
102
Self-Timer(Cont)
104
Cont. Bracket
106
Single Bracket
107
DRO Bracket
110
Indicator During Bracket Shooting
111
ISO AUTO Min. SS
113
Multi Frame NR
114
D-Range Opt. (DRO)
115
White Balance
117
Capturing a Basic White Color in [Custom Setup] Mode
118
Picture Effect
119
Creative Style
121
Movie Recording Formats
123
File Format (Movie)
123
Record Setting (Movie)
125
Dual Video REC
128
Marker Display (Movie)
131
Marker Settings (Movie)
131
Steadyshot (Movie)
132
Audio Recording
133
Audio Level Display
133
Audio Rec Level
134
Audio out Timing
135
Wind Noise Reduct
135
Auto Slow Shut. (Movie)
136
MOVIE Button
136
Picture Profile
137
High Frame Rate
141
Items that Can be Registered
141
To Recall Registered Settings
142
Function Menu Set
142
Custom Key Settings
142
Function of the Center Button
144
Function of the Left Button
144
Function of the Right Button
145
Smile/Face Detect
145
Soft Skin Effect (Still Image)
147
Face Registration (New Registration)
147
Face Registration (Order Exchanging)
148
Face Registration (Delete)
148
Red-Eye Reduction
149
Auto Obj. Framing (Still Image)
149
Steadyshot (Still Image)
150
Long Exposure NR (Still Image)
150
High ISO NR (Still Image)
151
Write Date (Still Image)
152
Color Space (Still Image)
152
Auto Review
154
Live View Display
154
Bright Monitoring
155
Release W/O Card
157
Dial / Wheel Lock
159
Deactivate Monitor
159
Playing Back Images
160
Playback Zoom
161
Image Index
161
Switching the Screen Display (During Playback)
162
Deleting a Displayed Image
162
Deleting Multiple Selected Images
163
Playing Back Movies
164
Motion Shot Video
164
Playing Back Panoramic Images
165
Specify Printing
166
View Mode
166
Display Rotation
167
Slide Show
167
Viewing Images on an HD TV
169
Viewing Images on a "BRAVIA" Sync-Compatible TV
171
Monitor Brightness
172
Viewfinder Bright
172
Finder Color Temp
173
Volume Settings
173
Adjusting the Volume During Playback
173
Audio Signals
174
Upload Settings(Eye-Fi)
174
Mode Dial Guide
176
Delete Confirm
176
Display Quality
176
Pwr Save Start Time
177
NTSC/PAL Selector
177
Demo Mode
178
Hdmi Resolution
181
Ctrl for Hdmi
182
HDMI Info. Display
183
Output Sel. (Movie)
184
USB Connection
186
USB LUN Setting
186
USB Power Supply
187
Date/Time Setup
188
Area Setting
188
Copyright Info
188
How to Use the Keyboard
189
File Number
190
Select REC Folder
191
New Folder
191
Folder Name
192
Recover Image DB
192
Display Media Info
193
Setting Reset
193
Playmemories Mobile
194
Connecting an Android Smartphone to this Product
194
Connecting the Product to an Iphone or Ipad
195
Calling up an Application Using [One-Touch(NFC)]
196
Smart Remote Embedded
197
One-Touch Connection with an NFC-Enabled Android Smartphone (NFC One-Touch Remote)
198
Send to Smartphone
199
Sending Images to an Android Smartphone (NFC One- Touch Sharing)
201
Send to Computer
202
Slideshow Settings
203
Airplane Mode
204
Access Point Set
205
Other Setting Items
207
Edit Device Name
207
Disp MAC Address
208
SSID/PW Reset
208
Reset Network Set
208
Playmemories Camera Apps
209
Recommended Computer Environment
209
Opening a Service Account
209
Downloading Applications Directly to the Product Using the Wi-Fi Function
210
Launching the Downloaded Application
211
Uninstalling Applications
211
Changing the Order of Applications
211
Playmemories Home
212
Installing Playmemories Home
213
Software for Mac Computers
214
Image Data Converter
214
Installing Image Data Converter
215
Accessing Image Data Converter Guide
215
Remote Camera Control
215
Installing Remote Camera Control
216
Accessing the Help of Remote Camera Control
216
Connecting the Product to a Computer
216
Importing Images to the Computer
217
Disconnecting the Product from the Computer
218
Selecting a Disc to be Created
218
Creating DVD Discs (AVCHD Recording Discs) from High- Definition Image Quality Movies
220
Creating DVD Discs from Standard Image Quality Movies
221
On Image Data Compatibility
223
Shooting with the Viewfinder
224
Notes on the Flash
224
On the Internal Rechargeable Battery
225
Notes on the Battery Pack
225
Charging Time (Full Charge)
226
Effective Use of the Battery Pack
226
Remaining Battery Indicator
226
How to Store the Battery Pack
227
On Battery Life
227
Charging the Battery Pack
227
Notes on Memory Card
228
Number of Still Images
230
Recordable Time of Movies
231
Notes on Continuous Movie Recording
234
Plug Adaptor
234
On TV Color Systems
235
ZEISS Lens
235
AVCHD Format
236
Notes on the License
236
You Cannot Insert the Battery Pack into the Product
238
You Cannot Turn on the Product
239
The Power Turns off Suddenly
239
The Remaining Battery Level Indicator Shows an Incorrect Level
239
The Charge Lamp on the Product Flashes When Charging the Battery Pack
240
The Battery Pack Is Not Charged
240
You Cannot Record Images
241
Recording Takes a Long Time
241
The Image Is out of Focus
242
Zoom Does Not Work
242
The Flash Does Not Work
243
Fuzzy White Circular Spots Appear on Images Shot Using the Flash
243
The Close-Up Shoot Function (Macro) Does Not Work
243
The Recording Date and Time Are Not Displayed on the Screen
243
The Date and Time Are Recorded Incorrectly
244
The Aperture Value And/Or Shutter Speed Flashes
244
The Image Colors Are Not Correct
244
Noise Appears in the Image When You View the Screen in a Dark Place
244
Dark Shadow Appears on the Image
245
Dots Appear and Remain on the Screen
245
You Cannot Shoot Images Continuously
245
The Image Is Not Clear in the Viewfinder
246
The Image Is Blurred
247
The Flash Takes too Long to Recharge
247
Images Cannot be Played Back
248
The Date and Time Are Not Displayed
248
The Image Cannot be Deleted
249
The Image was Deleted by Mistake
249
You Cannot Find the Wireless Access Point to be Connected
249
You Cannot Send Movies to a Smartphone
250
Smart Remote Embedded] or [Send to Smartphone] Is Canceled Halfway
250
You Cannot Use One-Touch Connection (NFC)
251
The Computer Does Not Recognize this Product
251
You Cannot Import Images
252
The Image and Sound Are Interrupted by Noise When Viewing a Movie on a Computer
252
Images Exported from a Computer Cannot be Viewed on this Product
252
Formatted the Memory Card by Mistake
253
You Cannot Print Images
253
Images Are Printed with both Edges Cut off
253
You Cannot Print Images with the Date
254
The Lens Gets Fogged
254
The Product Stops with the Lens Portion Extended./The Product Turns off with the Lens Portion Extended
254
The Clock Set Screen Appears When You Turn on the Product
255
The Number of Recordable Images Does Not Decrease, or Decreases Two Images at a Time
255
The Product Does Not Work Properly
255
Self-Diagnosis Display
256
Warning Messages
257
Situations this Product Has Difficulty Handling
259
Sony Cyber-Shot DSC-RX10M2 How To Use Manual (261 pages)
Brand:
Sony
| Category:
Digital still camera
| Size: 1.74 MB
Table of Contents
Inserting a Memory Card (Sold Separately)
2
Attaching a Lens
2
Setting the Language, Date, and Time
2
Selecting a Shooting Mode
3
Using the Flash
4
Adjusting the Focus
4
Adjusting the Exposure
5
Adjusting Color Tones
6
Recording Movies
6
Deleting Images
8
Viewing Images on a Tv
9
Cleaning this Product
13
Using this Product Abroad
13
Other Information
13
Troubleshooting
14
Shooting Still Images/Movies
14
Viewing Images
15
Memory Cards
16
Identifying Parts
18
Monitor Mode
22
For Playback
23
Display Panel
29
Using the Shoulder Strap
31
Charging by Connecting to a Computer
36
Screen Mode
37
Removing the Battery Pack
39
Inserting a Memory Card
39
Removing the Memory Card
40
Attaching the Lens Hood
43
Setting Language, Date and Time
43
Using the Control Wheel
44
Using the Control Dial
45
Using Menu Items
46
Shooting Still Images
50
Shooting Movies
52
Available Functions
53
Intelligent Auto
54
Scene Recognition
56
Program Auto
57
Program Shift
57
Sweep Panorama
58
Scene Selection
60
Menu Item Details
60
Shutter Priority
62
Aperture Priority
63
Manual Exposure
64
Memory Recall
66
Playback Speed
69
Zoom Setting
72
Zoom Speed
73
Using Flash
74
Flash Mode
76
Focus Area
86
Manual Focus
88
Focus Magnifier
90
Peaking Level
92
Peaking Color
92
Exposure Comp
96
Exposure Compensation Dial
97
Metering Mode
97
Drive Mode
101
White Balance
117
Picture Effect
119
Creative Style
121
Dual Video REC
128
Steadyshot (Movie)
132
Audio Recording
133
Audio Level Display
133
Audio Rec Level
134
Wind Noise Reduct
135
Picture Profile
137
High Frame Rate
141
Function Menu Set
142
Custom Key Settings
142
Red-Eye Reduction
149
Auto Review
154
Live View Display
154
Playing Back Images
160
Playback Zoom
161
Image Index
161
Playing Back Movies
164
View Mode
166
Display Rotation
167
Slide Show
167
Monitor Brightness
172
Viewfinder Bright
172
Volume Settings
173
Adjusting the Volume During Playback
173
Audio Signals
174
Display Quality
176
Demo Mode
178
Hdmi Resolution
181
Ctrl for Hdmi
182
USB Connection
186
USB LUN Setting
186
USB Power Supply
187
Date/Time Setup
188
Area Setting
188
Copyright Info
188
How to Use the Keyboard
189
File Number
190
New Folder
191
Folder Name
192
Recover Image DB
192
Setting Reset
193
Send to Smartphone
199
Send to Computer
202
Slideshow Settings
203
Airplane Mode
204
Other Setting Items
207
Edit Device Name
207
Disp MAC Address
208
SSID/PW Reset
208
Recommended Computer Environment
209
Downloading Applications
210
Uninstalling Applications
211
Remote Camera Control
215
Connecting the Product to a Computer
216
Importing Images to the Computer
217
Remaining Battery Indicator
226
Charging the Battery Pack
227
Notes on Memory Card
228
Notes on Continuous Movie Recording
234
On TV Color Systems
235
AVCHD Format
236
Notes on the License
236
The Power Turns off Suddenly
239
The Image Is out of Focus
242
Images Cannot be Played Back
248
The Lens Gets Fogged
254
Self-Diagnosis Display
256
Warning Messages
257
Advertisement
Sony Cyber-Shot DSC-RX10M2 Service Manual (80 pages)
Brand:
Sony
| Category:
Digital Camera
| Size: 5.84 MB
Table of Contents
Table of Contents
7
1 Repair Parts List
9
Note on Repair Parts
9
Electrical Parts List
10
Af-2001 Flexible Board
10
Bt-2009 Flexible Board
10
CD-1006B Flexible Board
10
Cn-1026 Flexible Board
10
Fc-1002 Flexible Board
10
Fl-2006 Flexible Board
10
Fpc-2010 Flexible Board
10
Fr-1009 Flexible Board
10
Lc-1023 Board
10
Rl-1026 Flexible Board
11
Sy-1057 Board
11
Tp-1001 Board
17
Wf-1005 Board
18
2 Block Diagrams
19
Overall (1/3)
19
Overall (2/3)
20
Overall (3/3)
21
Power (1/3)
22
Power (2/3)
23
Power (3/3)
24
3 Frame Schematic Diagrams
25
Frame Wiring
25
4 Schematic Diagrams
27
Sony Cyber-Shot DSC-RX10M2 Instruction Manual (45 pages)
Digital Still Camera
Brand:
Sony
| Category:
Digital Camera
| Size: 3.27 MB
Table of Contents
Learning more about the Camera ("Help Guide")
2
Viewing the Guide
2
Important Safety Instructions
3
For Customers in the U.S.A
5
Regulatory Information
5
Declaration of Conformity
5
For Customers in Canada
6
For Customers in Europe
6
Checking the Supplied Items
8
Identifying Parts
9
Inserting the Battery Pack
12
Charging the Battery Pack
13
Charging Time (Full Charge)
14
Charging by Connecting to a Computer
15
Battery Life/Number of Images
16
Supplying Power
16
Inserting a Memory Card (Sold Separately)
17
Insert the Memory Card
17
Memory Cards that Can be Used
18
Setting the Language and the Clock
19
Shooting Still Images/Movies
20
Viewing Images
21
Deleting an Image
21
Introduction of Other Functions
22
Control Wheel
22
Control Dial
22
Menu Items
23
Custom Settings
25
Using Software
31
Importing Images to Your Computer and Using Them (Playmemories Home)
32
Adding Functions to the Camera
33
Number of Still Images and Recordable Time of Movies
33
Still Images
33
Notes on Using the Camera
35
Notes on High Frame Rate Shooting
38
Specifications
39
Advertisement
Related Products
Sony Cyber-Shot DSC-RX10M4
Sony DSC RX10 M3
Sony DSC-RX10M3
Sony DSCRX10M2.CE3
Sony DSCRX10M2.CEH
Sony Cyber-shot DSC-RX10
Sony DSC-RX100M3
Sony Cyber-shot DSC-RX100M4
Sony Cyber-shot DSC-RX100M6
Sony DSC-RX100M2/B
Sony Categories
Laptop
TV
Camcorder
CD Player
Digital Camera
More Sony Manuals
Login
Sign In
OR
Sign in with Facebook
Sign in with Google
Upload manual
Upload from disk
Upload from URL