Sign In
Upload
Manuals
Brands
Honeywell Manuals
Desktop
VX6
Honeywell VX6 Manuals
Manuals and User Guides for Honeywell VX6. We have
4
Honeywell VX6 manuals available for free PDF download: Reference Manual, Installation Instructions Manual, User Manual
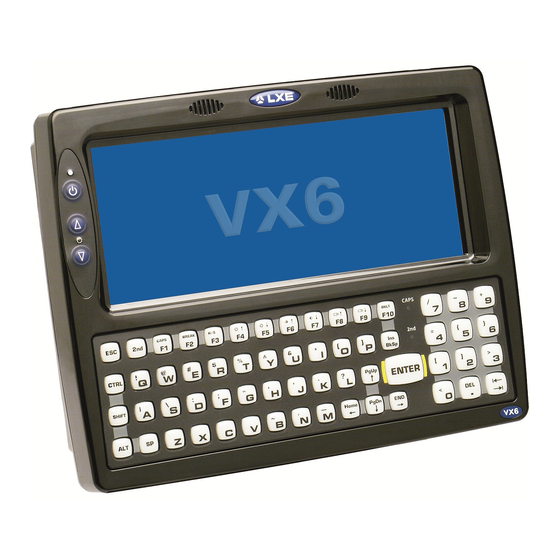
Honeywell VX6 Reference Manual (356 pages)
Brand:
Honeywell
| Category:
Desktop
| Size: 3.37 MB
Table of Contents
Table of Contents
5
Chapter 1 Introduction
21
Overview
21
When to Use this Guide
22
Document Conventions
23
Quick Start
24
Troubleshooting
24
Entering the Multi Applock Activation Key
25
Hotkey (Activation Hotkey)
25
Touch
25
Components
26
Figure 1-1 VX6 Components, Top View
26
Figure 1-2 VX6 Components, Front View
26
Figure 1-3 VX6 Components, Bottom View
27
Figure 1-4 VX6 Components, Back View
27
Figure 1-5 VX6 Control Panel
28
Figure 1-6 VX6 Access Panel
28
Data Entry
29
Keyboard Data Entry
29
Tethered Scanners
29
Bluetooth Scanners
29
Touchscreen Entry
30
Input Panel (Virtual Keyboard)
30
Right Click
30
Touchscreen and Mouse
31
Setup the Radio and Network
32
Setup Terminal Emulation Parameters
32
Activesync - Initial Setup
33
USB Connection
33
Serial Connection
33
Connect
33
Radio
33
Bluetooth
34
Initial Use
34
Figure 1-7 Bluetooth Devices Display - before Discovering Devices
34
Computer Is Connectable
35
Computer Is Discoverable
35
Prompt if Devices Request to Pair
35
Report Failure to Reconnect
35
Report When Connection Lost
35
Report When Reconnected
35
Settings Tab | Bluetooth Options
35
Continuous Search
36
Subsequent Use
36
Bluetooth Devices
37
Bluetooth Barcode Reader Setup
38
Figure 1-8 Sample Bluetooth Address Barcode Label
38
Introduction
38
VX6 with Label
38
Figure 1-9 about Tab and Bluetooth Address
39
VX6 Without Label
39
Bluetooth Beep and LED Indications
40
Saving Changes to the Registry
41
Getting Help
42
Manuals and Accessories
42
Manuals
42
Accessories
42
Chapter 2 Physical Description and Layout
47
Identifying Your VX6
47
Hardware Platforms
47
Software Revisions
47
Hardware Configuration
48
System Hardware
48
Figure 2-1 VX6 Hardware Configuration
48
Central Processing Unit
49
I/O Components
49
System Memory
49
Video Subsystem
49
Power Supply
50
Backup Battery
50
Uninterruptible Power Supply
50
PCMCIA Slots
50
CF Slot
50
SD Slot
50
Bluetooth LXEZ Pairing
51
Power Modes
52
Physical Controls
53
On/Off Switch
53
Figure 2-2 the Power (On/Off) Switch
53
External Connectors
54
Scanner Serial Connector (COM1)
55
Figure 2-3 Scanner Serial Connector (COM1)
55
Pinout
55
Printer/Pc Serial Connector (COM3)
56
Figure 2-4 Printer/Pc Serial Connector (COM3)
56
Pinout
56
Figure 2-5 Pinout - Serial Cable
57
RTS/CTS Handshaking and the Serial Port
57
Technical Specifications - Connection Cable
57
Figure 2-6 Pinout - Screen Blanking Cable
58
Figure 2-7 Sample Cable for Screen Blanking
58
Technical Specifications - Screen Blanking Cable
58
Ethernet/Usb Connector
59
Figure 2-8 VX6 USB Connector and External USB Adapter Cable Connector
59
Pinout
59
Ethernet/Usb Dongle Cables
60
Figure 2-9 VX6 Ethernet/Usb Dongle Cables
60
D15 Female Connector
61
Figure 2-10 D15 Female Connector
61
Pinout
61
Figure 2-11 Dongle Cable USB Host Port
62
Figure 2-12 Dongle Cable USB Client Port
62
Pinout
62
USB Client Connector
62
USB Host Connector
62
Figure 2-13 Dongle Cable Ethernet Port
63
Pinout
63
RJ45 Connector
63
Audio Connector
64
Figure 2-14 VX6 Audio Jack for External Speaker or Headphones
64
Pinout
64
Power Supply Connector
65
Figure 2-15 the Power Connector
65
Pinout
65
UPS Battery Pack Connectors
66
Figure 2-16 the UPS Battery Pack Input Connector
66
Figure 2-17 the UPS Battery Pack Output Connector
66
Input
66
Output
66
Pinout
66
UPS Battery Extension Cable Connectors
67
Figure 2-18 the UPS Battery Extension Cable Input Connector
67
Figure 2-19 the UPS Battery Extension Cable Output Connector
67
Input
67
Output
67
Pinout
67
Antenna Connections
68
Figure 2-20 2.4Ghz Antennas
68
Figure 2-21 RF Antenna SS Connector
68
Spread Spectrum RF Antenna Connector Pin
68
Vehicle Remote Antenna Mount
68
Internal Antenna
69
Figure 2-22 Internal Antenna Cables
69
The QWERTY Keyboard
70
IBM 3270 Overlay
70
IBM 5252 Overlay
70
Figure 2-23 QWERTY Keyboard Standard
70
Figure 2-24 QWERTY Keyboard with IBM 3270 Overlay
70
Figure 2-25 QWERTY Keyboard with IBM 5250 Overlay
70
Key Maps
71
Custom Key Maps
71
Numlock and the VX6
71
Keyboard Backlight
71
Keyboard Leds
72
Caps Led
72
Figure 2-26 Keyboard Leds
72
Figure 2-27 the Capslock Key
72
Figure 2-28 the Secondary Key
73
Secondary Keys LED
73
Control Keys
74
Figure 2-29 the VMT Keyboard Display Controls
74
General Windows CE Keyboard Shortcuts
75
USB Keyboard/Mouse
75
Input Panel (Virtual Keyboard)
76
Figure 2-30 Small and Large Virtual Keyboards
76
Enabling the Input Panel
77
Figure 2-31 Input Panel Properties
77
The Display
78
Cleaning the Display
78
Touchscreen
78
Touchscreen Heater
78
PCMCIA, CF and SD Slots
79
PCMCIA Slots
79
Figure 2-32 the PCMCIA and ATA Slots
79
PCMCIA Pinout
80
Figure 2-33 Inserting the 2.4Ghz Type II PCMCIA Radio
81
Install PCMCIA Cards
81
Install the 2.4Ghz Type II PCMCIA Radio
81
Figure 2-34 Cisco Antenna Cable Connections
82
Figure 2-35 Symbol 11Mb Antenna Cable Connections
82
Figure 2-36 Summit Antenna Cable Connections
83
CF Card Slot
84
Figure 2-37 Inserting the CF ATA Card
84
Replace a CF Card
84
SD Card Slot
85
Figure 2-38 Inserting the SD ATA Card
85
Install an SD Card
85
Power Supply
86
External Power Supply
86
Figure 2-39 Optional Power Supply Cable
86
Environmental Specifications
87
Specifications
87
Vehicle 12-80VDC Direct Connection
88
Figure 2-40 Direct Vehicle Power Connection Cable (12 Ft.)
88
Figure 2-41 Connecting the Power Cable to the Vehicle
88
Figure 2-42 Vehicle Connection Wiring Color Codes
88
Power Adapter Cable
89
VX6 Input Power Specifications
89
CMOS Battery
90
Fuse
90
Chapter 3 System Configuration
91
Introduction
91
Windows CE Operating System
91
2.4 Ghz Radio Configuration
91
Warmboot
91
Coldboot
91
Installed Software
92
Software Load
92
Software Applications
92
Applock
93
Java (Optional)
93
LXE Rfterm (Optional)
93
Wavelink Avalanche Enabler (Optional)
93
Desktop
95
My Computer Folders (Windows CE .NET)
96
Folders Copies at Startup
96
My Device Folders (Windows CE 5.0)
96
Start Menu Program Options
97
Communication
98
Activesync
98
Connect
99
Start FTP Server / Stop FTP Server
99
Command Prompt
100
Inbox
100
Internet Explorer
100
Media Player
100
Remote Desktop Connection
101
Transcriber
101
Windows Explorer
101
Taskbar
102
Advanced Tab
102
Control Panel Options
103
About
104
Language and Fonts
105
Identifying Software Versions
106
Radio MAC Address
106
Accessibility
107
Administrator Control
108
Bluetooth
109
Discover
110
Bluetooth Devices
111
Bluetooth Device Properties
112
Options
113
Settings
113
Turn off Bluetooth Button
113
About
114
Easy Pairing and Auto-Reconnect
115
Certificates
116
Date/Time
116
Dialing
117
Display
118
Appearance
118
Background
118
Backlight
118
Input Panel
119
Internet Options
120
Windows CE .NET
120
Windows CE 5.0
121
Keyboard
122
Mixer
123
Mouse
124
Network and Dialup Connections
124
Owner
125
Password
126
PC Connection
127
Pcmcia
128
Power
129
Regional Settings
130
Windows CE .NET
130
Windows CE 5.0
130
Remove Programs
130
Scanner
131
Storage Manager
131
Stylus
132
Calibration
132
Double Tap
132
System
133
General
133
Copyrights
134
Device Name
134
Memory
134
Terminal Server Client Licenses
135
Volume and Sounds
135
CF Flash Cards, CAB Files and Programs
136
Access Files on the Flash Card
136
Backup VX6 Files Using Activesync
137
Prerequisites
137
Serial Port Transfer
137
VX6 and Activesync Partnership
137
USB Transfer
138
Connect
138
Explore
138
Disconnect
139
Important Information - Cold Boot and Loss of Host Re-Connection
139
Radio Connection
139
Serial Connection
139
USB Connection
139
Troubleshooting
140
Create a Communication Option
141
Technical Specifications - Connection Cable
142
VX6 Utilities
143
Launch.exe
143
LAUNCH.EXE and Persistent Storage
146
Regedit.exe
147
Regload.exe
147
Regdump.exe
147
Warmboot.exe
147
Wavplay.exe
147
VX6 Command-Line Utilites
147
Coldboot.exe
147
Prtscrn.exe
147
API Calls
148
Reflash the VX6
149
How To: Reflash Using Keypress Method
149
How To: Reflash Using TAG File Method
150
Clearing Persistent Storage
151
Disabling the Touchscreen
151
Configuring Numlock Behavior
151
Disabling the Touchscreen Heater
151
Configuring Capslock Behavior
152
Configuring Ipv6
152
Enabling Grabtime
153
Synchronize with a Local Time Server
153
Network Configuration
154
2.4 Ghz Wireless Radios
154
Ethernet Connector
154
Wavelink Avalanche Enabler Configuration
155
Briefly
155
Enabler Install Process
155
Enabler Uninstall Process
155
Stop the Enabler Service
156
Update Monitoring Overview
156
Mobile Device Wireless and Network Settings
157
Enabler Configuration
158
File Menu Options
158
Avalanche Update Settings
159
Menu Options
159
Connection
160
Execution
161
Server Contact
162
Startup/Shutdown
163
Display
164
Scan Config
164
Shortcuts
165
Adapters
166
Figure 3-43 Avalanche Network Profile Displayed
167
Figure 3-44 Manual Settings Properties Panels
168
Status
169
Chapter 4 Scanner
171
Introduction
171
Main
173
COM Ports
174
Serial Port Pin 9
174
Barcode
175
Symbology Settings
176
Figure 4-5 Disable Scan Input Confirmation
177
Ctrl Char Mapping
178
Custom Identifiers
179
Figure 4-8 Symbology List with Custom ID
180
Barcode Processing
181
Step 1: Check Code ID
181
Step 2: Reject Disabled Symbologies
182
Step 3: Check Barcode Length
183
Step 4: Strip Leading Characters
184
Step 5: Strip Trailing Characters
185
Step 6: Strip Barcode Data Strings
186
Step 7: Replace Control Characters
188
Step 8: Add Prefix String
190
Figure 4-18 Code ID Strip
191
Step 9: Code ID
191
Step 10: Add Barcode Data
192
Step 11: Add Suffix String
192
Step 12: Add Terminating NUL
192
Step 13: Start Key Output Thread
193
Examples
194
Control Code Replacement Examples
194
Barcode Processing Examples
195
Length Based Barcode Stripping Examples
196
Figure 4-23 AIM Custom Setup for C1
197
Screen Blanking
198
Screen Blanking
199
Chapter 5 Wireless Network Configuration
201
Introduction
201
Summit Radio
202
Summit Client Utility
203
Help
203
Summit Tray Icon
204
Wireless Zero Config Utility and the Summit Radio
204
Main Tab
205
Admin Login
206
Profile Tab
207
Using the Scan Feature
208
Parameters
209
Status Tab
212
Diags Tab
213
Global Tab
214
Parameters
214
Sign-On Vs. Stored Credentials
219
Figure 5-9 Sign-On Screen
220
Windows Certificate Store Vs. Certs Path
221
Root CA Certificates
221
User Certificates
221
Figure 5-10 Choose Certificate
222
Summit Wireless Security
223
No Security
224
Figure 5-13 WEP Encryption
225
Wep
225
LEAP Without WPA Authentication
226
Figure 5-16 LEAP Credentials
227
Peap/Mschap
228
Figure 5-19 PEAP/MSCHAP Certificate Filename
229
Peap/Gtc
230
Figure 5-22 PEAP/GTC Certificate Filename
231
Wpa/Leap
232
Figure 5-24 WPA/LEAP Credentials
233
Eap-Fast
234
Figure 5-26 EAP-FAST Credentials
235
Eap-Tls
236
Figure 5-29 EAP-TLS Credentials
237
Figure 5-30 WPA/PSK Encryption
238
Wpa Psk
238
Cisco Radio
239
Cisco - Aironet Client Utility (ACU)
239
No Security
240
Profiles Tab
240
Leap
241
Wep
241
Firmware Tab
242
Statistics Tab
242
Status Tab
242
Survey Tab
242
Configuring for WPA
243
Installing Radio Drivers
243
System Requirements
243
Checking for the Cisco PEAP Supplicant
244
Wireless Network Configuration
246
Figure 5-40 Wireless Information Screen
247
Figure 5-42 Wireless Network Properties
248
Configuring the PEAP/MS-CHAP Supplicant
249
PEAP/MS-CHAP Authentication Configuration
249
Figure 5-45 Wireless Network Login
250
Server Authentication
251
Configuring the PEAP / GTC Supplicant
252
PEAP/ GTC Authentication Configuration
252
Figure 5-51 Login Screen
253
Server Authentication
254
Figure 5-55 PEAP Properties, Trusted Root Certificate
255
Figure 5-57 PEAP Properties, Connect Only if Server Name Ends in
256
Cisco ACU
257
Wpa/Leap
257
Figure 5-61 Profile Properties Screen
258
Figure 5-63 Login Screen
259
EAP-TLS Authentication Configuration
260
User Certificate
260
Setting EAP/TLS Parameters
261
Figure 5-69 Select Certificate
262
Validating the Server Certificate
263
WPA PSK Configuration
264
Symbol Radio
265
IP Information Tab
265
Ipv6 Information Tab
265
Wireless Information Tab
266
View Log
266
Add a New Connection
267
Select a User Certificate
268
Certificates
269
Root Certificates
269
Generating a Root CA Certificate
269
Figure 5-80 Download CA Certificate Screen
270
Installing a Root CA Certificate
271
Figure 5-84 Browsing to Certificate Location
272
User Certificates
273
Generating a User Certificate
273
Figure 5-88 Request a Certificate Screen
274
Figure 5-90 Advanced Certificate Details
275
Figure 5-91 Script Warnings
276
Figure 5-93 Certificate Issued
277
Installing a User Certificate
278
Figure 5-97 Browsing to Certificate Location
279
Figure 5-99 Private Key Not Present
280
Figure 5-101 Private Key Present
281
Advertisement
Honeywell VX6 Reference Manual (300 pages)
Vehicle Mount Computer Microsoft Windows CE E5 Operating System
Brand:
Honeywell
| Category:
Desktop
| Size: 2.45 MB
Table of Contents
Reference Guide
1
Limited Warranty
2
Table of Contents
3
Chapter 1: Introduction
15
End User License Agreement (EULA)
15
Reboot
16
Warmboot
16
Coldboot
16
Components
17
Top View
17
Front View
17
Bottom View
18
Back View
18
Control Panel
19
Access Panel
19
Chapter 2: Hardware
21
System Hardware
21
802.11B/G and A/B/G Wireless Client
22
Central Processing Unit
22
Input/Output Components
22
System Memory
22
Video Subsystem
22
Power Supply
23
Backup Battery
23
Uninterruptible Power Supply
23
Audio Interface
23
Card Slots
23
Compactflash (CF) Slot
23
PCMCIA Slots
23
Secure Digital (SD) Slot
23
Bluetooth LXEZ Pairing
24
Power Modes
25
On Mode
25
User Idle Mode
25
Primary Events
25
Suspend Mode
25
Off Mode
25
External Connectors
26
Scanner Serial Connector (COM1)
27
Printer / PC Serial Connector (COM3)
28
Technical Specifications - Connection Cable
29
RTS/CTS Handshaking and the Serial Port
29
Screen Blanking Cable
30
Serial Cable
30
Sample Cable for Screen Blanking
31
USB and Optional Ethernet Connector
32
Ethernet / USB Dongle Cables
33
D15 Female Connector
34
USB Client Connector
35
USB Host Connector
35
RJ45 Connector
36
Audio Connector
37
Power Supply Connector
37
UPS Battery Pack Connectors
38
Input Connector Pinout
38
Output Connector Pinout
38
UPS Battery Extension Cable Connector
39
Input Connector Pinout
39
Output Connector Pinout
39
Antenna Connections
40
Spread Spectrum RF Antenna Connector Pin
40
Vehicle Remote Antenna Mount
40
Internal Antenna
41
User Access Panel
42
Remove User Access Panel Cover
42
Inside the User Access Panel
42
Reinstall User Access Panel Cover
43
QWERTY Keyboard
44
IBM 3270 Overlay
44
IBM 5250 Overlay
45
Keyboard Leds
45
Caps Led
46
Secondary Keys LED
46
Control Keys
47
USB Keyboard / Mouse
48
LED Functions
48
Status LED
48
Keyboard Leds
48
Speakers
48
Display
49
Touch Screen
49
Touch Screen Heater
49
Power Supply
50
External Power Supply
50
Fuse
51
Chapter 3: Software
53
Introduction
53
Operating System
53
Windows CE Operating System
53
General Windows CE Keyboard Shortcuts
54
Warmboot
55
Coldboot
55
Clearing Persistent Storage / Reset to Default Settings
55
Folders Copied at Startup
55
Saving Changes to the Registry
56
Software Load
57
Software Applications
57
Activesync
57
Bluetooth (Optional)
57
Java (Optional)
57
Rfterm (Optional)
58
Avalanche
58
Software Development
58
Access Files on the CF/SD Card
58
VX6 Utilities
59
Launch.exe
59
LAUNCH.EXE and Persistent Storage
61
Regedit.exe
61
Regload.exe
61
Regdump.exe
61
Warmboot.exe
61
Wavplay.exe
61
VX6 Command-Line Utilities
62
Coldboot.exe
62
Prtscrn.exe
62
Desktop
63
Desktop Icons
63
Taskbar
64
My Device Folders
64
Wavelink Avalanche Enabler (Optional)
65
Internet Explorer
65
Start Menu Program Options
66
Communication
67
Activesync
67
Start FTP Server / Stop FTP Server
67
Summit
67
Certs
67
Command Prompt
67
Express Scan
68
Internet Explorer
68
Media Player
68
Microsoft File Viewers
68
Microsoft Wordpad
68
Remote Desktop Connection
69
Settings
69
Transcriber
69
Windows Explorer
69
Taskbar
70
General Tab
70
Advanced Tab
70
Expand Control Panel
70
Clear Contents of Document Folder
71
Taskbar Icons
71
VX6 os Upgrade
72
Introduction
72
Preparation
72
Procedure
72
Activesync
73
Introduction
73
Initial Setup
73
Connect Via USB
74
Cables for USB Activesync Connection
74
Serial Connection
75
Cable for Serial Activesync Connection
75
Wireless Connection
75
VX6 with Disabled Touch Screen
76
Synchronizing from the Mobile Device
76
Explore
76
Backup Data Files Using Activesync
76
Prerequisites
76
Serial Port Transfer
76
USB Transfer
76
Cold Boot and Loss of Host Re-Connection
77
Connect
77
Disconnect
77
Activesync Help
78
Configuring the VX6 with Lxeconnect
79
Install Lxeconnect
79
Using Lxeconnect
81
Control Panel
83
About
85
Language and Fonts
85
Version Tab and the Registry
85
Identifying Software Versions
86
MAC Address
86
Accessibility
87
Administration - Applock
88
Administration Mode
89
Setup a New Device
89
End User Mode
90
Passwords
90
End-User Switching Technique
91
Using a Stylus Tap
91
Using the Switch Key Sequence
91
Hotkey (Activation Hotkey)
92
Application Configuration
93
Application Panel
93
Launch Button
94
Auto at Boot
95
Auto Re-Launch
96
Allow Close
97
Manual (Launch)
97
End User Internet Explorer (EUIE)
98
Match
98
Hotkey
99
Password
99
Security Panel
99
Launch Timeout
100
Options Panel
100
Replace Timeout
100
Restart Timeout
100
Status Panel
100
Log
101
Save as
101
View
101
Applock Error Messages
102
Applock Help
102
Bluetooth
110
Bluetooth Devices
111
Discover
112
Stop Button
112
Bluetooth Device List
113
Clear Button
113
Bluetooth Device Menu
114
Right Click Menu Options
114
Bluetooth Device Properties
115
Settings
116
Turn off Bluetooth
116
Options
117
Reconnect
118
Options
119
OPP Setup
121
Buttons
123
OPP Send
123
About
124
Bluetooth Devices Display - before Discovering Devices
125
Initial Configuration
125
Using Bluetooth
125
Subsequent Use
126
Bluetooth Barcode Reader Setup
127
Bluetooth Indicators
127
Prerequisites
127
VX6 with Label
128
VX6 Without Label
128
Bluetooth Beep and LED Indications
130
Bluetooth Printer Setup
130
Easy Pairing and Auto-Reconnect
130
Pairing with an OPP Device
131
Remote Device Pushes File to VX6
131
Using OPP
131
LXEZ Pairing and External Application
132
VX6 Pushes File to Remote Device
132
Certificates
133
Date / Time
134
Device Management
135
Dialing
136
Display
137
Appearance
137
Background
137
Backlight
138
Input Panel
139
Installed Programs
140
Internet Options
141
Keyboard
144
Keypad
145
Keymap Tab
146
Remap a Key Sequence
146
Remap a Key to a Unicode Value
146
Remap a Single Key
146
Remap a Command
147
Remap a Key to a Sequence of Unicode Values
147
Remap an Application
147
Launchapp Tab
149
Runcmd Tab
150
License Viewer
151
Mixer
152
Mouse
153
MX3X-VXC Options
154
Allow Remote Desktop Autologon
154
Autolaunch Timesync
154
Communication
154
Enable TCP/IP Version 6
154
Disable SNMP
155
LXE BTRS Enabled
155
Capslock
156
Enable Auto Launch IP Wait
156
Enable Rfterm Auto Launch
156
Large SIP
156
Misc
156
Touch Screen Disable
156
Touch Screen Heater Disable
156
IP Wait Timeout
157
Status Popup
158
Network and Dialup Options
159
Create a New Connection
159
Network Capture
160
Netlog
160
Ndislog
162
Owner
163
Password
165
PC Connection
166
Pcmcia
167
PCMCIA 1 Tab Options
167
Intata Tab Options
168
PCMCIA 2 Tab Options
168
Power
169
Regional and Language Settings
171
Remove Programs
173
Scanner
174
Bar Code Readers
174
Return to Factory Default Settings
174
Barcode Processing Overview
174
Factory Default Settings
175
Main Tab
176
Screen Blanking
177
Pinout
178
Serial Cable
178
Technical Specifications - Screen Blanking Cable
178
COM1 Tab
179
COM3 Tab
180
Enable Handshaking
181
Serial Port Pin 9
181
Barcode Tab
182
Buttons
182
Enable Code ID
183
Notes
183
Options
183
Barcode - Custom Identifiers
184
ID Code Text Box
184
Name Text Box
184
Parameters
184
Add
185
Buttons
185
Clear All
185
Control Code Replacement Examples
185
Edit
185
Insert
185
Remove
185
Barcode Processing Examples
186
Barcode - Ctrl Char Mapping
187
Parameters
187
Translate All
187
Barcode - Symbology Settings
188
Parameters
189
Barcode Data Match List
190
Strip Leading/Trailing Control
190
Barcode Data Match Edit Buttons
191
Match List Rules
191
Add Prefix/Suffix Control
192
Length Based Barcode Stripping
192
Hat Encoding
195
Stylus
197
System
198
General Tab
198
Device Name Tab
199
Memory Tab
199
Copyrights Tab
200
Terminal Server Client Licenses
201
Volume and Sounds
202
Good Scan and Bad Scan Sounds
203
Wifi
204
Honeywell VX6 Installation Instructions Manual (62 pages)
vehicle-mount
Brand:
Honeywell
| Category:
Automobile Accessories
| Size: 1.5 MB
Table of Contents
Limited Warranty
2
Lithium Battery Safety Statement
3
Vehicle Power Supply Connection Safety Statement
5
Table of Contents
7
Chapter 1: Introduction
9
About this Guide
9
Preparing the Powered Vehicle Mounted Cradle for Use
10
Quick Start
10
Maintenance - Vehicle Mounted Devices
11
Cleaning
11
Chapter 2: Install U Mounting Brackets
13
U-Bracket Mount System
14
Components
14
Bottom Mounting Bracket
14
Back Bracket Assembly
15
Procedure
16
Mounting Positions
16
Torque Measurement
16
Mounting Dimensions
17
Step 1 - Mount Bottom Mounting Bracket to Vehicle
17
Step 2 - Attach Back Bracket to VX6
18
Step 3 - Attach Assembly to Bottom Mount Bracket
19
Step 4 - Attach UPS Battery Pack
20
Completed Assembly
21
Chapter 3: Install RAM Mounting Brackets
23
RAM Ball Mount System
24
Components
24
Procedure
25
Step 1A - Mount Vehicle RAM Mount Bracket
25
Torque Measurement
25
Mounting Dimensions
26
Step 1B - Mount Vehicle RAM Clamp Mount
27
Mounting Dimensions
28
Step 2 - Attach RAM Ball to the VX6
29
Step 3 - Attach VX6 Assembly to RAM Mount
30
Completed Assembly
31
RAM Bracket Mount System
32
Components
32
Procedure
33
Step 1A - Mount Vehicle RAM Mount Bracket
33
Torque Measurement
33
Mounting Dimensions
34
Step 1B - Mount Vehicle RAM Clamp Mount
35
Mounting Dimensions
36
Step 2 - Attach RAM Mount Ball to the VX6
37
Step 3 - Attach VX6 Assembly to RAM Mount
38
Completed Assembly
39
Chapter 4: Connect Cables
41
Vehicle 12-80 VDC Power Connection
42
Connect Vehicle 12-80VDC Connection
43
Connect VX6 Without a UPS Battery Pack
44
Connect VX6 to an Integrated Mount UPS Battery Pack
45
Connect VX6 to a Remotely Mounted UPS Battery Pack
46
Power Adapter Cable
47
Connect Power Adapter Cable
47
External Power Supply, Optional
48
Connect External Power Supply
48
Strain Relief Cable Clamps
49
Uninterruptible Power Supply Battery Pack
50
UPS Battery Pack Remote Mounting
50
UPS Battery Pack Remote Mounting Dimensions
51
Fuse Replacement for the VX6
52
Connect Antenna
53
Connect External Antenna
53
Internal Antenna
54
Remote Antenna Installation Kit
55
Components and Mounting Diagram
56
Typical Installation
56
Remote Antenna Mounting Instruction
57
Advertisement
Honeywell VX6 User Manual (48 pages)
Vehicle mount computer Microsoft windows CE 5 Operating System
Brand:
Honeywell
| Category:
Desktop
| Size: 1.41 MB
Table of Contents
Limited Warranty
2
Table of Contents
3
Chapter 1: Introduction
5
About this Guide
5
Components
6
Top View
6
Front View
6
Bottom View
7
Back View
7
Control Panel
8
Access Panel
8
Chapter 2: Set up a New VX6
9
Hardware Setup
9
Software Setup
9
End User License Agreement (EULA)
9
Backlights and Indicators
10
System Status LED
10
Keyboard Leds
10
Caps Led
10
Secondary Keys LED
10
Tapping the Touch Screen with a Stylus
11
Attach Stylus Tether and Sleeve
12
Using the Input Panel / Virtual Keyboard
13
Touch Screen
14
Calibrating the Touch Screen
14
Adjusting the Display Backlight Timer
14
Apply the Touch Screen Protective Film
14
Set Date and Time Zone
15
Grab Time Utility
15
Autolaunch Time-Sync
15
Synchronize with a Local Time Server
15
Adjust Speaker Volume
16
Using the Control Panel
16
Setup Terminal Emulation Parameters
17
Using the Applock Switchpad
18
Using the Keypad
18
Using the Touch Screen
18
Connecting Bluetooth Devices
19
Taskbar Connection Indicator
19
Reboot
20
Warm Boot
20
Cold Boot
20
Connecting the Headset Cable
21
Adjust Headset / Microphone and Secure Cable
22
Cleaning the Touch Screen
23
Startup Help
24
Chapter 3: Connecting Cables to the VX6
25
Connect Cable - Serial
25
Connecting to USB and Optional Ethernet Ports
26
Connecting an AC/DC Power Supply
27
Connecting Vehicle Power
28
Vehicle 12-80VDC Power Connection Cable
28
Connect Vehicle 12-80VDC Connection
30
Connect VX6 Without a UPS Battery Pack
31
Connect VX6 to an Integrated Mount UPS Battery Pack
32
Connect VX6 to a Remotely Mounted UPS Battery Pack
33
Power Adapter Cable
35
How to Connect Power Adapter Cable
35
Uninterruptible Power Supply Battery Pack
36
UPS Battery Pack Remote Mounting
36
UPS Battery Pack Remote Mounting Dimensions
37
Connecting a Tethered Scanner
38
Advertisement
Related Products
Honeywell Thor VX9
Honeywell Thor VM1A
Honeywell Viewer-Pro-Kit
Honeywell Thor VX8
Honeywell VX3Plus
Honeywell VXP
Honeywell VX89301PWRSPLY
Honeywell VX89303PWRSPLY
Honeywell VX89A302PSDC48V
Honeywell GENT VIG-RPT-72
Honeywell Categories
Thermostat
Controller
Control Unit
Security Camera
Accessories
More Honeywell Manuals
Login
Sign In
OR
Sign in with Facebook
Sign in with Google
Upload manual
Upload from disk
Upload from URL