Samsung SCU-2370 User Manual
Positioning system
Hide thumbs
Also See for SCU-2370:
- User manual (81 pages) ,
- Specifications (2 pages) ,
- Specifications (1 page)
Table of Contents
Advertisement
Quick Links
Download this manual
See also:
User Manual
Advertisement
Table of Contents

Related Manuals for Samsung SCU-2370


Summary of Contents for Samsung SCU-2370
- Page 1 Positioning System SCU-2370 SCU-9051 SCU-VAC User Manual SCU-VAC1...
- Page 2 Samsung Techwin. Disclaimer Samsung Techwin makes the best to verify the integrity and correctness of the contents in this document, but no formal guarantee shall be provided. Use of this document and the subsequent results shall be entirely on the user’s own responsibility.
-
Page 3: Safety Information
If this product fails to operate normally, contact the nearest service center. Never disassemble or modify this product in any way. (SAMSUNG is not liable for problems caused by unauthorized modifi cations or attempted repair.) When cleaning, do not spray water directly onto parts of the product. Doing so may cause fi re or electric shock. - Page 4 safety information Install it in a place with good ventilation. Avoid aiming the camera directly towards extremely bright objects such as sun, as this may damage the CCD image sensor. Apparatus shall not be exposed to dripping or splashing and no objects fi lled with liquids, such as vases, shall be placed on the apparatus.
-
Page 5: Important Safety Instructions
important safety instructions Read these instructions. Keep these instructions. Heed all warnings. Follow all instructions. Clean only with dry cloth. Do not block any ventilation openings. Install in accordance with the manufacturer’s instructions. Do not install near any heat sources such as radiators, heat registers, or other apparatus (including amplifi... - Page 6 PRECAUTIONS ON INSTALLATION AND USE Be sure to install the product vertically. Do never place it in other ways or reversely. For safety reasons to prevent a risk of accidental drop-off, use a strong safety chain while installing the product. The wall where you intend to install the product should be fi...
-
Page 7: Table Of Contents
24 Using and setting the menus 25 OSD Menu Chart 26 Camera Setting 37 Sequence Setting 47 P/T Setting 54 OSD Setting 55 Alarm Setting 58 Initialize 59 Status TROUBLESHOOTING 60 Troubleshooting PRODUCT SPECIFICATIONS 63 Product Specifi cations 65 Dimensions (SCU-2370/VAC/9051) English - 7... -
Page 8: Introduction
Features Versatile protocols and coaxial communication RS-422/485, Coaxial communication methods are supported. RS-422/485 (10 species) : SAMSUNG-T, SAMSUNG-E, Pelco(D/P), Panasonic, Honeywell, AD, Vicon, GE, Bosch. Coaxial Communications: Pelco Coaxitron (automatic detection) Wide Range Auto Security Functions Multiple Preset Function Saving : Up to 12 camera image properities can be saved individually to provide high quality pictures. -
Page 9: What's Included
WHAT’S INCLUDED Check if the following items are included in the product package. Main Body Sunshield L-type hexagon wrenches (5.0mm) Positioning System SCU-2370 SCU-9051 SCU-VAC User Guide SCU-VAC1 Fuse (2EA) User Guide Mount The following items are sold separately from the camera. -
Page 10: Component Names And Functions
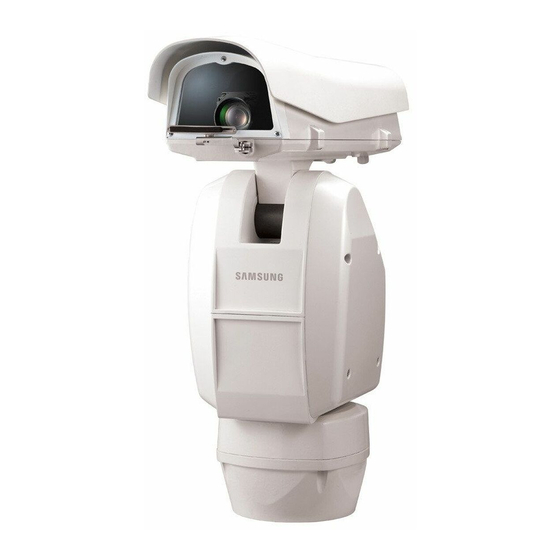
introduction COMPONENT NAMES AND FUNCTIONS Front ➌ ❶ ➋ ➍ ❶ Lens ❷ Wiper : Use it to wipe out the front glass of the housing. ❸ Sunshield ❹ Inside the housing 10_ introduction... - Page 11 Back ❶ ➋ ➌ ➍ ❶ COM/ID Setup Switch ❷ Video Out Cable ❸ Communication Cable ❹ Power Cable For the DIP switch settings, please refer to the on Pages 15~18. English - 11...
-
Page 12: Connection & Installation
connection & installation Camera Wiring Interface Board For the camera wiring, please refer to the picture below. (When using coaxial communication, a separate control signal connection is not required.) Video Power Supply Communications/ Control Signal Alarm Input Lighting Power Alarm Output Communication/Control Signal Diagram RS-422 Communications RS-485 Communications... -
Page 13: Camera And Appliances Wiring Diagram
Connecting the power connector and GND incorrectly to the NC/NO and COM ports may cause a short circuit and fi re, damaging the camera. CAMERA AND APPLIANCES WIRING DIAGRAM Connecting with Samsung Techwin’s “Stand Alone DVR” RS-485 : Camera Stand Alone DVR... - Page 14 & installation Connecting with the Samsung Techwin Controller SPC-6000 RS-485 : Camera RXD+ TXD+ TXD- RXD- RS-422 : Camera RXD+ TXD+ RXD- TXD- RXD+ <Controller> TXD+ RXD- TXD- To connect to Samsung PC DVR RS-485 : Camera PC DVR...
-
Page 15: Communication Protocol Dip Switch Settings
1 ~ 4 Protocol Settings Transfer Method (RS-485/422) Settings Response Mode Settings Terminal Resistance RX Terminal Resistance TX TEST Factory Default Protocol Settings Select a communication protocol for the camera. Protocol SAMSUNG-T SAMSUNG-E Pelco-D Pelco-P Panasonic Vicon Honeywell Bosch English - 15... - Page 16 connection & installation Communication Method Settings Select a communication method for the camera. Function Transfer Mode Switch RS-422(4Wire) RS-485(2Wire) Communication Response Settings Select a communication response method for the camera and controller: Response or No Response. Function Response Mode Switch Response No Response Termination Settings...
-
Page 17: Settings
Baud Rate Settings Select the transfer speed of a selected communication protocol. Baud Rate(BPS) 2,400 4,800 9,600 19,200 To use a third party controller with this product, please contact our After-Sales Service or Technology Department. Controls Using Different Protocols AD Protocol VICON Protocol GE Protocol... -
Page 18: Camera Id Dip Switch Settings
connection & installation CAMERA ID DIP SWITCH SETTINGS Assign a unique number for each camera to identify itself from others. The initial value of the switch is “0”, and all of the 8 switches are defaulted to OFF. Each switch has a unique value, and the board ID is the sum of the values of the switches. -
Page 19: Preparing Adapter And Cables
PREPARING ADAPTER AND CABLES Power Adapter Power adapter has the capacity of AC24V 6A. Video Cable The camera’s video output port is connected to the monitor with a BNC coaxial cable, shown below : If the distance between the camera and the monitor exceeds the recommended maximum, please use an auxiliary video amp. -
Page 20: Product Confi Gurations
connection & installation PRODUCT CONFIGURATIONS RS-485 SRD Series RS-485 SRD Series Coaxial Communication SRD Series Coaxial Communication SRD Series CONTROLLER (SUB) CONTROLLER (MAIN) CONTROL LINE VIDEO LINE CONTROL/VIDEO LINE connection & installation... -
Page 21: Camera Installation
CAMERA INSTALLATION Pole Mount Wall Mount Do not connect the camera to a power outlet until the installation is complete. Supplying power in the middle of the installation may cause fi re or damage the product. Bend back the wiper before opening the housing. ... - Page 22 Connect the cables. Insert the projector cables through the rear hole of the camera. Connect the wires to the PCB as appropriate. This is for SCU-2370. The wiring diagram for SCU-VAC/ VAC1/9051 is provided in the separate sub manual.) connection & installation...
-
Page 23: Setup
setup INTERFACE SYMBOLS Motion Detection Standby/Operation Display : When in standby mode, the “ ” in the upper right of the screen blinks and then changes to “ ” if motion is detected. Alarm Input Port Status Display : " 1 ", " 2 " and " 3 " in the upper right of the screen blink. Current Alarm Port Display According to Input Alarm Ports(Priority) : Only one of "... -
Page 24: Using And Setting The Menus
setup USING AND SETTING THE MENUS OSD (On-screen Display) Indicators Camera Setting Has submenu Focus & Zoom ▶ White Balance Has no submenu ------ ------ Operating Your Camera Panning and Tilting : Use the joystick of the controller or its direction buttons. Controlling Zoom : Move the joystick clockwise (Tele) or counterclockwise (Wide), or use the zoom buttons. -
Page 25: Osd Menu Chart
Day & Night Preset Others Swing SEQ. Group SEQ. Sequence Setting PTZ Trace Auto Run Power On Resume MD Dwell Time (SCU-2370/VAC/VAC1) Pan Limit Tilt Limit Area Setting Area Masking (SCU-2370/VAC/VAC1) P/T Setting Housing Load Wiper (SCU-2370/VAC/VAC1) Prop.P/T (SCU-2370/VAC1) Camera ID... -
Page 26: Camera Setting
CAMERA SETTING The camera setting section in this manual is explained based on SCU-2370. For SCU-9051/SCU-VAC, refer to the applicable user manual. Focus and Zoom Settings Focus Mode Main Menu AUTO : Performs continuous auto-focus. ▶ Camera Setting MANUAL : Changes the camera mode to Manual Focus. - Page 27 Zoom Tracking Through this menu you can set up the camera’s focus mode when Main Menu zooming. ▶ Camera Setting Mode Sequence Setting AUTO : Auto-focuses when zooming. P/T Setting TRACKING : Focuses manually when zooming. OSD Setting OFF : Disable the focus modes when zooming. (Full manual Alarm Setting mode) Initialize...
-
Page 28: White Balance
setup White Balance The White Balance menu adjusts the balance of the screen colors Main Menu under different lighting conditions. ▶ Camera Setting ATW : Adjusts the screen color automatically. Sequence Setting P/T Setting INDOOR : Adjusts the screen color to be optimal in an indoor environment. - Page 29 Exposure The Exposure settings are to control the camera’s exposure meter. Main Menu Brightness : Adjusts the screen brightness. ▶ Camera Setting (Over 50: Brighter, Under 50: Darker) Sequence Setting P/T Setting Iris AUTO : Automatically adjusts the exposure meter. OSD Setting MANUAL : Enables manual adjustment of the exposure Alarm Setting...
- Page 30 Back Light Unlike other cameras, Samsung Techwin’s unique W-V DSP chip Main Menu gives you a clear image of the subject even with bright backlight. ▶ Camera Setting Back Light Mode Sequence Setting OFF : Disables the Backlight mode.
- Page 31 HLC Masking Area <HLC ON> <HLC OFF> Level : Adjusts the HLC sensitivity level. Mask Color : Adjusts the mask color on the high lighted area. Even if HLC is on, car license plates may not be detectable depending on the location and angle of the camera as well as the lighting condition.
- Page 32 setup AGC(Auto Gain Control) AGC (Automatic Gain Control) adjusts the camera’s gain control Main Menu and the screen brightness if the camera has captured an object ▶ Camera Setting under low-light conditions. Sequence Setting OFF: P/T Setting AGC does not function. OSD Setting LOW/MEDIUM/HIGH: Alarm Setting...
- Page 33 SSNR(Samsung Super Noise Reduction) SSNR significantly reduces the amount of low luminance noise. Main Menu OFF : Disables the noise reduction function. ▶ Camera Setting LOW : Reduces only a small amount of noise, but generates Sequence Setting almost no afterimage.
- Page 34 SSDR(Samsung Super Dynamic Range) SSDR illuminates darker spots of an image while retaining the Main Menu same light level for brighter spots to even out the overall brightness ▶ Camera Setting of the image with high contrast between bright and dark spots.
- Page 35 Day & Night The Day & Night function allows the camera to switch between the Main Menu Color and B/W modes. ▶ Camera Setting MODE Sequence Setting AUTO : Operates in Color mode most times, and switches P/T Setting to B/W mode if a low light level is detected during OSD Setting nighttime.
- Page 36 setup Others Sync : Enables selecting Internal Synchronization or the Main Menu external Line Lock. ▶ Camera Setting INTERNAL : Synchronizes the camera’s output timing to the Sequence Setting internal crystal. P/T Setting LINE LOCK : Synchronizes the camera’s output timing to the AC adapter power to synchronize multiple OSD Setting cameras.
-
Page 37: Sequence Setting
Sequence Setting Preset This function enables the memorization of a selected location and Main Menu activates the Pan, Tilt, and Zoom functions at that location. Saved locations can be recalled using the Preset Execute command. Camera Setting ▶ Sequence Setting Setting Up Preset Numbers : P/T Setting Selecting the Preset Setting menu brings up a screen as shown... - Page 38 setup PTZF Setting (SCU-VAC/VAC1) If you open the PTZF setup menu, you will see the following PTZF Setting window. You can use the joystick to select a desired number. Preset = 001 (1~255) Select a preset number and press ENTER. You will move to the setup screen.
- Page 39 MD Function’s Prerequisite when using SCU-VAC/VAC1 (SCB-3000) : Preset Edit [001] Set Alarm Out of Camera Setting – Open Camera Menu – Special Intelligence menu to ON. ▶ 000/000/1X After Action For SCU-VAC/VAC1, the MD function will be activated 1.5 seconds after you have moved to the preset position.
- Page 40 setup Preset Name Setting Main Menu Using this function, you can add names to preset locations. Camera Setting up to 12 characters. Sequence Setting Once a name is entered, use the joystick and the Enter key to P/T Setting perform the Set command and save the name. ▶...
- Page 41 Home Position Preset Sets one of the currently configured preset positions as the home PTZF Setting position. Edit 001H 001H Home Position ▶ Execute Clear Status Execute Preset Recalls a saved preset location. PTZF Setting While in Sequence mode operation, the actual movement can be Edit 001H slower than the specified when moving the camera in the direction...
- Page 42 setup Swing SEQ The Swing function commands the camera to move between 2 Main Menu selected locations, monitoring the route. Camera Setting Pan Swing : ▶ Sequence Setting Activates the Pan function for the Swing operation. P/T Setting OSD Setting Tilt Swing : Alarm Setting Activates the Tilt function for the Swing operation.
- Page 43 Group SEQ Selecting Group SEQ recalls a group of multiple preset locations in Main Menu a consecutive manner. Up to 6 groups can be defined and up to 255 presets can be memorized for each group. Camera Setting ▶ Sequence Setting Setting : P/T Setting Using the joystick,enter desired preset numbers into the PSET...
- Page 44 Sequence Setting Representative Stop saving the Preset Protocol Model trace Swing SEQ PELCO-D/P KDB300A Ack, Iris Open Group SEQ SAMSUNG-E SSC-5000 OSD ON, Iris Open ▶ PTZ Trace Auto Run PANASONIC WV-CU161C OSD ON Power On Resume VICON V1300X-DVC Iris Open...
- Page 45 Auto Run If there is no controller operation by the user for a certain time, the Main Menu sequence operation designated by the user will be executed. Camera Setting Mode : ▶ Sequence Setting HOME : Auto run Home Position (Refet to the Preset Menu.) P/T Setting PRESET : Auto run a selected preset number.
- Page 46 P/T Setting action when the power is reconnected. OSD Setting MD Dwell Time (SCU-2370/VAC/VAC1) : Alarm Setting When Motion Detection under the Preset Edit menu is selected, Initialize MD Dwell Time performs the Group function.
-
Page 47: P/T Setting
P/T Setting Pan/Tilt Limit The moving ranges in the Pan/Tilt directions can be limited. Position : Selecting the Position menu brings up the following screen if it is Main Menu for the Pan Limit setting. Move the joystick left and right to select Camera Setting a movement range from the starting point to the end. - Page 48 setup Area Setting The Area Setting menu enables selecting certain locations in the course of the Pan and Tilt operation, and then display the areas with the OSD (On Screen Display) texts when the camera passes through them. Up to 8 areas can be selected. Area Name : Main Menu You can add names to selected areas.
- Page 49 Area Masking (SCU-2370/VAC/VAC1) If a monitoring location includes a highly private area, the area can be Main Menu selectively excluded from monitoring. Camera Setting Position : Sequence Setting As shown in the picture below, move the joystick to select the upper ▶...
- Page 50 setup Housing Load You can select a housing load of the camera module that will be Main Menu installed on the housing. Camera Setting Sequence Setting Pan/Tilt movement speed depends on the camera module’s weight. For optimal speed control, set the weight of the camera module between 3 kg ~ 10 kg. ▶...
- Page 51 Wiper (SCU-2370/VAC/VAC1) You can use Wiper to wipe out the front glass of the housing so as Main Menu to secure a clear view. Camera Setting To activate Wiper, set the menus below to your preference. Sequence Setting Pump Enable: ▶...
- Page 52 Prop. P/T (SCU-2370/VAC1) This commands the camera to change the Pan and Tilt speed Main Menu automatically according to the current zoom ratio. Moving the Camera Setting joystick clockwise (Tele) slows down and counterclockwise (Wide) accelerates the Pan and Tilt speed, allowing detailed adjustments.
- Page 53 Image Hold (SCU-2370) While in Group Trace, this will display still image of the last preset Main Menu video until the camera moves to the next preset position. Camera Setting This is useful to help the screen observer keep sharp eyes and to monitor multiple locations within a network.
-
Page 54: Osd Setting
setup OSD SETTING In this menu, you can configure the OSD (On Screen Display) settings. Camera ID : Main Menu Displays or hides Camera ID in the upper left of the screen. Camera Setting Camera Name : Sequence Setting Add a name to the camera. (First check the Note.) P/T Setting ▶... -
Page 55: Alarm Setting
ALARM SETTING Setting Up Alarm Input Alarm Enable : Main Menu On/Off : Enables or disables the Alarm function. Camera Setting Sequence Setting Enables selecting an Alarm Input method. P/T Setting OSD Setting - NO (Normally Open) ▶ Alarm Setting Initialize Status IN 1.2.3... - Page 56 setup P(Priority) : Set the priority of Alarm Inputs. If more than one alarm is simultaneously activated, the alarm with the highest priority activates before the others. Once the alarm is canceled, the next highest priority alarm activates. SEQ. : Enables setting up a sequence action for the camera in response to an alarm.
- Page 57 Connecting the power connector and GND incorrectly to the NC/NO and COM ports may cause a short circuit and fi re, damaging the camera. The maximum power capacity of the built-in relay is 30VDC/2A, 125VAC/0.5A, and 250VAC/0.25A. Operating the camera beyond the capacity may decrease the camera’s lifespan and damage it.
-
Page 58: Initialize
IR Illuminator Settings (SCU-2370/VAC/VAC1) With IR Illuminator, you can control the red-infrared lighting. Main Menu Camera Setting On/Off : Sequence Setting Activate or deactivate IR Illuminator. P/T Setting Time: OSD Setting Operates the infrared illuminator for the time specifi ed by user ▶... -
Page 59: Status
Camera Default Set : (SCU-2370) This mode can be used if the camera module has been Initialize replaced and you want to keep the camera’s existing settings ▶ Power On Reset for the new module. To reset the camera, first replace the old module with a new Factory Default Set camera module. -
Page 60: Troubleshooting
troubleshooting TROUBLESHOOTING If the product does not function properly, please see the below for trouble shooting. Problem Cause and Solution Page ► Check if the camera and peripheral devices are properly connected. Controller does not work. ► Verify the setups of ID, protocol, and baud rates. 15~18 ►... - Page 61 Problem Cause and Solution Page ► Check the White Balance. ► Adjust Color Menu in Image Adj. Picture’s colors are not good. ► Check if the cover or the camera lens is dirty or smudged. If it is, clean the dirt off. ►...
- Page 62 troubleshooting Problem Cause and Solution Page ► Make sure that the camera and monitor are installed within the recommended distance. When coaxial communication is not available. ► Use the video amplifier equivalent to coaxitron if the recommended installation distance is exceeded. Check the Power cord’s by periods The Power cord’s coating has been damaged.
-
Page 63: Product Specifications
Specifications PRODUCT SPECIFICATIONS <SCU-2370> NTSC Imaging Device 1/4” Exview HAD CCD TV Standard NTSC Total Pixels 811(H) x 508(V) 795(H) x 596(V) Effective Pixels 768(H) x 494(V) 752(H) x 582(V) Scanning System 2:1 Interlace Synchronization Internal / Line Lock Horizontal Scan Rate 15.734 KHz... -
Page 64: Specifications
White Balance ATW / INDOOR / OUTDOOR / Manual / AWC Electronic Shutter AUTO(1/60~120,000sec)/MANUAL/A.FLK AUTO(1/50~120,000sec)/MANUAL/A.FLK Serial Com. RS-422/485, Coaxial Communication SAMSUNG-T, SAMSUNG-E, Pelco-D, Pelco-P, Pelco Coaxitron, Panasonic, Honeywell, AD, Protocol Vicon, ,GE, Bosch Alarm 3 In, 2 Out 1 Out Operating Temperature/ -50°C to +50°C / Less than 90% RH... -
Page 65: Dimensions (Scu-2370/Vac/9051)
DIMENSIONS (SCU-2370/VAC/9051) English - 65... - Page 66 specifications Wall Mount 72.1 153.7 496.8 Pole Mount 72.1 154.7 specifications...
- Page 67 MEMO...
- Page 68 MEMO...
- Page 69 MEMO...
- Page 70 MEMO...
- Page 71 MEMO...
- Page 72 TEL : +82-70-7147-8740~60, FAX : +82-31-8018-3745 SAMSUNG TECHWIN AMERICA Inc. SAMSUNG TECHWIN EUROPE LTD. 1480 Charles Willard St, Carson, CA 90746, UNITED STATES Samsung House, 1000 Hillswood Drive, Hillswood Business Park Tol Free : +1-877-213-1222, FAX : +1-310-632-2195 Chertsey, Surrey, UNITED KINGDOM KT16 OPS www.samsungcctvusa.com TEL : +44-1932-45-5300, FAX : +44-1932-45-5325 www.samsungtechwin.com...