Fujitsu UTY-RVNYN Installation Manual
Remote controller
Hide thumbs
Also See for UTY-RVNYN:
- Technical manual (16 pages) ,
- Design & technical manual (58 pages)

Related Manuals for Fujitsu UTY-RVNYN


Summary of Contents for Fujitsu UTY-RVNYN
-
Page 1: Installation Manual
REMOTE CONTROLLER (WIRED TYPE) INSTALLATION MANUAL For authorized service personnel only. PART No. 9380222040... -
Page 2: Table Of Contents
INSTALLATION MANUAL WARNING PART No. 9380222040 REMOTE CONTROLLER (WIRED TYPE) personnel. Contents Do not install the unit in the following areas: 1. SAFETY PRECAUTIONS ................1 2. ACCESSORIES ..................2 3. ELECTRICAL REQUIREMENT ..............2 parts to fall or the unit to leak water. 4. -
Page 3: Accessories
2. ACCESSORIES 4. SELECTING AN INSTALLATION LOCATION The following installation parts are supplied. Use them as required. 4.1. Dimensions Name and Shape Q’ty Application 21.3 Installation manual This manual Operating manual Instruction book for operation Connecting cable For connecting the remote controller cable to the wall mounted type and 33.5 Screw... -
Page 4: Installing The Remote Controller
5.2.1 When connecting to the wall mounted type 5. INSTALLING THE REMOTE CONTROLLER 5.1. Wiring and insert it to the connector. Pattern 1 Connecting cable Indoor unit WARNING Outdoor Connector Functional unit / earthing power Wire destination. Do not turn on the power again until installation is completed. supply terminal Remote controller... -
Page 5: Installation
(5) Connect the functional earthing wire of remote controller and the remote 5.3. Installation WARNING connection. Cable tie (large) Functional earthing Remote controller cable wire Wrap the connector and remote controller CAUTION cables with vinyl tape or some other type of insulation as shown in the figure. -
Page 6: Setting The Dip Switch
C. When routing the cable on-wall: 5.3.6 Setting the DIP switch (1) Cut off the cable guide of the front case with using a knife or a CAUTION nipper. (2) Deburr the edge of the cable guide. Cut off manual or the operating manual supplied with the air conditioner. Please set DIP switch according to designation. -
Page 7: Installation Methods
When routing the cable on top of the front case: (2) Remote controller DIP switch 1 setting Seal the cable guide of the front case of the remote controller cable with Set the remote controller DIP switch No. 2 according to the following an epoxy putty. -
Page 8: Initial Setting
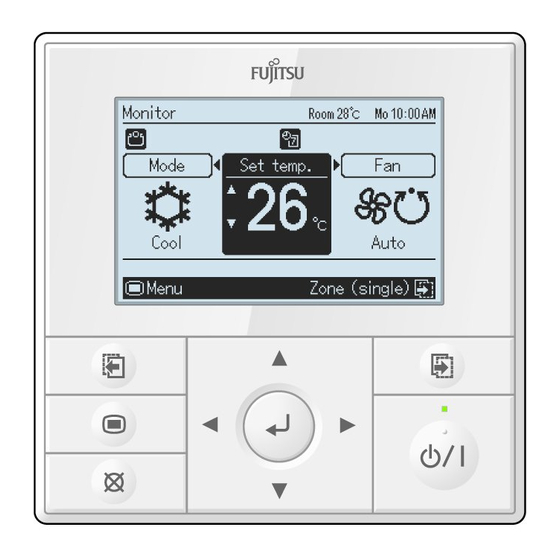
Time 8. INITIAL SETTING hour 8.1. Initial setting without zone control When “Language” Cancel: following procedure: Select a language with the [Cursor button] on the “Language” screen Language English Deutsch Français screen when “No” is selected and press [Enter button]. Español Italiano Português... -
Page 9: Service Screen Setting
-Note- Not the all the setting value cannot be set to "0". Set whether to use a spring return damper. Switch "Not in use" or "In outlets” screen when “No” is selected and press [Enter button]. use" with [Cursor button (Up/Down)]. Initial setting will be ended. -
Page 10: Function Setting
When you select [Test run] with the [Cursor button (Up/Down)] and press the Select the [Function No.] with pressing the [Cursor button (Left/ “Yes” sor button (Up/Down)]. press the [Enter button]. Function setting Mo 10:00 R.C. Function Setting Monitor Mo 10:00 address The test run will be performed. -
Page 11: Zone Initial Setting
9.6.2 Damper type setting 9.6. Zone initial setting Set when you use spring return damper. Select [Damper type setting] with pressing the [Cursor button (Up/ Enable items for zone initial setting are displayed. Zone initial setting Mo 10:00 Number of outlets system according to the installation conditions. - Page 12 9.6.4 Temperature sensor setting Select the [Zone setting No.] with pressing the [Cursor button (Left/ Set whether to use temperature sensor of the remote controller. Select [Temperature sensor setting] with pressing the [Cursor button Zone function setting Mo 10:00 Zone function Zone setting Zone initial setting Mo 10:00...
-
Page 13: Setting The Room Temperature Detection Location
2 ) Setting record 10. SETTING THE ROOM TEMPERATURE Record the setting change in the following table. DETECTION LOCATION Setting Description Setting No. Indoor room temperature 10.1. Without zone control sensor switching function The detection location of the room temperature can be selected from the and turn it on again. -
Page 14: Management Function
1 ) Indoor room temperature sensor switching function Record the temperature sensor setting in the following table. The following settings are needed when use the control by wired remote Controller sensor Memo controller temperature sensor/optional sensor. Primary controller sensor Disable Enable ( ...Factory setting) Setting Description... -
Page 15: Management Setting
“Management function” screen is Enter current password. displayed. button]. Password setting Mo 10:00 “Management select” screen is displayed. Enter current password. Management function Management select Mo 10:00 Mo 10:00 Edit Economy Set temp.auto return Set temp.range Cancel : On timer Off timer Back: Setting:... -
Page 16: Others
-Note- If the function you are selecting is restricted by [Management] display. The message is displayed constantly during the management function is enabled. Back: Restricted by the management function XXXXXX XXXXXX 12. OTHERS 12.1. Error code display will be shown. If “Error”...