Panasonic WJ-ND300 Operating Instructions Manual
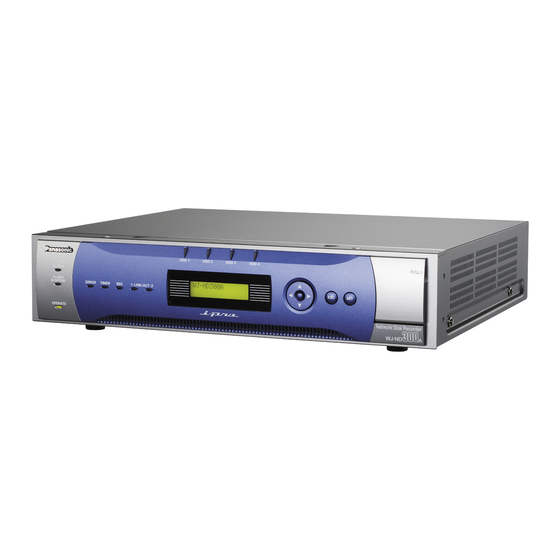
Network disk recorder
preliminary
Hide thumbs
Also See for WJ-ND300:
- Setup instructions (98 pages) ,
- Installation manual (40 pages) ,
- Operating instructions manual (27 pages)

Related Manuals for Panasonic WJ-ND300


Summary of Contents for Panasonic WJ-ND300
-
Page 1: Operating Instructions
Network Disk Recorder Operating Instructions WJ-ND300 Model No. PRELIMINARY Before attempting to connect or operate this product, please read these instructions carefully and save this manual for future use. -
Page 3: Table Of Contents
CONTENTS Preface ..........................4 Features ........................4 About these Operating Instructions ................5 System Requirements for a PC ................... 5 Trademarks and Registered Trademarks ..............5 Abbreviations ......................6 Terms Used in these Operating Instructions ............... 6 Recording/Playback/Live Image Transmission ............... 8 Recording ........................ -
Page 4: Preface
Up to 32 cameras can be connected via a network and it is possible to record their camera pictures. It is possible to perform the settings or operate the WJ-ND300 (this unit) using a web browser installed on a PC connected to a net- work. -
Page 5: About These Operating Instructions
Reader is not installed on the PC, download the latest Adobe® Reader from the Adobe web site and install it. "WJ-ND300" or "ND300" shown in the illustrations used in these operating instructions indicate this unit or the WJ- ND300 series. -
Page 6: Abbreviations
Abbreviations The following abbreviations are used in these operating instructions. ® ® Microsoft Windows 2000 Professional Service Pack 4 is described as Windows 2000. ® ® ® ® Microsoft Windows XP Professional SP1a or SP2 and Microsoft Windows XP Home Edition SP1a or SP2 are described as Windows XP. - Page 7 Event Action Event action refers to a specific operation performed when an event occurs. Event operations are divided into ALM (Alarm Mode), ADM (Activity Detection Mode), and are selectable. In ALM, the occurrence of an event is announced by screen display, LED, or buzzer (Alarm Operation). In ADM, the occurrence of an event is not announced, but the unit starts event recording, performs the preset operations, and enters the event into the event log.
-
Page 8: Recording/Playback/Live Image Transmission
Recording/Playback/Live Image Transmission Recording Images will be transmitted from cameras to this unit and will be recorded. Images from up to 32 cameras can be recorded on a single network disk recorder. Recorded images are compliant with the JPEG format. It is possible to perform the settings relating recording such as resolution, recording rate, etc. -
Page 9: Recording
Recording Start/stop recording manually. Refer to a system administrator for the required settings for manual recording. Refer to the Setup Instructions (PDF) for descriptions of how to turn on the unit and how to display the operation win- dow. Screenshot 1 Display the [HDD] tab. - Page 10 About the recording mode and the priority There are 5 recording modes. Each recording mode and priority is as follows. When two or more recordings with different recording modes started simultaneously, only recording with the highest priority will start. Recording Mode Description Priority Emergency...
-
Page 11: Playback
Playback A recorded image can be played. Playback is also available during recording. Screenshot 1 Display the [HDD] tab. Step 1 Click the [PLAY] button. → Playback of a recorded image will be performed. will be displayed in the status display area. Playback will start from the finish point (time and date) of the last playback. - Page 12 Other functions for playback Pausing • Playback will be stopped when this button is clicked during playback. • Playback will be resumed when this button is clicked during pausing. Frame play/reverse • Frame play/reverse frame play is available only during paus- frame play ing.
- Page 13 Playback on a multi- • Displays playback images on a 4-Screen. screen • Up to 4 camera images can be displayed simultaneously on a 4-Screen screen. Images of the camera group (A-H) consisted from 4 camera channels in advance will be switched and displayed sequen- tially on a 4-Screen screen.
-
Page 14: Playback After Selecting A Disk
Playback after Selecting a Disk Images from cameras will be recorded on the built-in hard disk drive of this unit. Select a disk and play images as follows. The following disks can be selected. • HDD normal recording area/event recording area: Recording area in the built-in hard disk of this unit. Recorded images by manual recording (page 9) or event recording will be stored in this area. - Page 15 Screenshot 2 The selected disk will be displayed on the status display Step 3 area. Click the [HDD] tab. Screenshot 3 The [HDD] page will be displayed. Step 4 Click the [PLAY] button. → Recorded images on the selected disk will be played.
-
Page 16: Playback From A Designated Time And Date
Playback from a Designated Time and Date Start playback by designating the desired time and date of a recorded image to be played. Playback is also available during recording. Screenshot 1 Click the [GO TO DATE] button in the playback point Step 1 operation area after selecting the desired camera chan- Click the [i] button and enter the desired time and... -
Page 17: Search And Play Recorded Event
Search and Play Recorded Event Search for a recording event and play it (recording event search) Recording events can be searched by filtering as follows. Note: Area of the hard disk drive subject to search for recording events is different depending on the disk area. To search for recording events in the HDD normal recording area and event recording are, select "NORMAL AREA???"... -
Page 18: How To Operate
CAM: Site alarm PRE: Pre-event recording Text: When text information is attached to the recorded image, "Added" will be displayed. When text infor- mation is not attached to the recorded image, "None" will be displayed. How to Operate Screenshot 1 Click the [Search] button in the [Search] box of the Step 1 [Control] tab. - Page 19 Screenshot 2 The search results (recording event list) will be dis- Step 3 played below the [Control] tab. Click the time of the desired recording event. → Play a recorded image of the recording event from the selected time. Step 4 Click the [STOP] button to stop playback.
-
Page 20: Monitor Live Images
Monitor Live Images Live image will be displayed in the web browser window. It is possible to display live images on a single screen or a multi-screen in the web browser window. It is also possible to display live images sequentially (sequential display). Display Images from a Camera on a Single Screen Screenshot 1 Display the [Cam Select] tab. -
Page 21: Display Images From Cameras On A 4-Screen
Display Images from Cameras on a 4-Screen Images from cameras will be displayed on a 4-Screen screen. Screenshot 1 Display the [Camera Select] tab. Step 1 Click the button of the [Multiscreen] box. Screenshot 2 Images from cameras will be displayed on a 4-Screen Step 2 screen. -
Page 22: Display Images In The Sequential Display
Display Images in the Sequential Display Displayed images from cameras will be switched automatically. Camera images will be displayed sequentially according to the settings performed in advance. Screenshot 1 Display the [Cam Select] tab. Step 1 Click the button of the [Sequence] box. →... -
Page 23: Control Cameras
Control Cameras When displaying live images, the following camera controls are possible. • Panning/tilting: Moves a camera horizontally/vertically. • Zooming: Zooms in/out of images. • Focus: Adjusts the focus. • Iris: Adjusts the iris of the lens. • Preset action: Moves a camera to the preset position registered in advance. -
Page 24: Zoom/Focus/Iris Operations
Zoom/Focus/Iris Operations Zooming: Zooms in/out of images. Depending on the models of the connected cameras, the image size for the respective zooming portion may be different. For further information, refer to the operating instructions of the camera. Focus adjustment: Adjusts the focus. The auto focus function is available. Iris adjustment: Adjusts the iris of the lens. -
Page 25: Move A Camera To The Preset Position
Move a Camera to the Preset Position Moves a camera to the preset position registered in advance. Registering preset positions is required to perform the preset function. Refer to the operating instructions of the connected camera for the descriptions of how to register the preset posi- tion. -
Page 26: About The Event Function
A command alarm is sent from a PC via a network. • Site alarm: An alarm using Panasonic Protocol is sent from a network camera. Action at an Event Occurrence The event action will be performed according to the settings when an event occurs. - Page 27 Select "ON" or "OFF" to determine whether or not to notify of an alarm occurrence (or error information) to a PC according to the "Network Panasonic Protocol" of the setup menu ("Comm" – "Network Panasonic Protocol"). To receive a notification (or error information) and display the contents of the notification, the optional software...
-
Page 28: Cancel The Alarm Action
Cancel the Alarm Action The alarm action will be performed when an event is detected. To cancel the alarm action manually, do the following. Screenshot 1 [ALARM RESET] will be displayed in the status display Step 1 area when an alarm occurs. Click the [ALARM RESET] button. -
Page 29: Copying (Duplicate)
Copying (Duplicate) Images recorded on the normal area/event area can be copied manually onto the copy area of the hard disk drive. It is recommended to make back-up copies on a regular basis for unexpected situations such as malfunction of the hard disk. -
Page 30: Deletion Of Recorded Images Saved On The Hard Disk Manually
Deletion of Recorded Images Saved on the Hard Disk Manually Delete recorded images saved in the normal area, the event area or the copy area of the hard disk manually. By setting a time and date, the images recorded the day before the set time and date will be subject to deletion. Important: •... -
Page 31: Display/Edit The Text Information
Display/Edit the Text Information It is possible to attach text information to images when recording. It is possible to enter up to 200 characters for text information. These are the descriptions of how to display/edit the attached text information to images. Note: Displaying/editing text information is possible during pausing playback on a single screen. -
Page 32: Transmits Camera Images Onto An Ftp Server
Transmits Camera Images onto an FTP Server It is possible to transmit images to an FTP server. Image transmission can be performed at a designated time periodically (FTP SEND BY PERIODIC TIMER) or at an event occurrence (FTP ALARM SENDING). Transmit Images from Cameras Periodically It is necessary to perform the settings on the setup menu in advance to transmit images from cameras to an FTP server periodically. -
Page 33: Check Logs
Check Logs The following logs can be checked. • Error log • Access log • Event log (event occurrence time and details) • Network trouble log Check the Error Log The error log will be displayed in list form. Screenshot 1 Display the [Control] tab. -
Page 34: Check The Access Log
Check the Access Log The time when logged in/out for this unit, the user name, and the IP address will be displayed. Screenshot 1 Display the [Control] tab. Step 1 Click the [Access Log] button in the [Log] box of the [Control] tab. -
Page 35: Check The Event Log
Check the Event Log The event logs (event occurrence times and their details) will be displayed. Refer to page 26 for further information about each event. Screenshot 1 Display the [Control] tab. Step 1 Click the [Event Log] button in the [Log] box of the [Control] tab. -
Page 36: Check The Network Trouble Log
Check the Network Trouble Log The network log (network event) will be displayed in list form. Screenshot 1 Display the [Control] tab. Step 1 Click the [Net Log] button in the [Log] box of the [Control] tab. Screenshot 2 The network trouble log (the NW log window) will be dis- Step 2 played in list form below the [Control] tab. -
Page 37: Download Recorded Images
Download Recorded Images Designate the start point and the end point of played images and download images to a PC. Recorded images will be downloaded as image data files (filename.n3r). Refer to page 39 for the descriptions of how to play the downloaded images. Important: •... - Page 38 Screenshot 3 The download window will be displayed. Step 5 Click the [Save] button. Screenshot 4 The "Save as…" window will be displayed. Step 6 Create a new folder in the desired directory and click the [Save] button. → Recorded images will be downloaded as image data files (filename.n3r).
-
Page 39: Play Downloaded Images
Play Downloaded Images Recorded images will be downloaded as image data files (filename.h3r). It is possible to play, save and print down- loaded images using the viewer software on the provided CD-ROM (Downloading this software is also available.) Download the Viewer Software Screenshot 1 Display the [HDD] tab. -
Page 40: Install The Viewer Software
Install the Viewer Software Screenshot 1 The user information entry screen will be displayed. Step 1 Double-click the downloaded file (n3vsetup.exe). Step 2 Complete the user information fields and click the [Next] button. Note: User information entry is not required to proceed. Screenshot 2 The setup type selection screen will be displayed. - Page 41 Screenshot 3 The wizard is ready to install. Step 4 Click the [Install] button. Screenshot 4 Step 5 Click the [Finish] button. The installation of the viewer software is complete.
-
Page 42: Playback Downloaded Images
Playback Downloaded Images Screenshot 1 Start up the viewer software and display the following Step 1 window. Click the [OPEN] button. Screenshot 2 The [Open file] window will be displayed. Step 2 Select the downloaded image data file (filename.n3r). Step 3 Click the [Open] button. -
Page 43: Save Downloaded Images
Save Downloaded Images It is possible to save the paused image as a jpeg file (extension: jpg). Saving the downloaded file is available only when the image is paused. Screenshot 1 Start operation when playing the downloaded images Step 1 using the viewer software. -
Page 44: Print The Displayed Image
Print the Displayed Image It is possible to print the paused image. Screenshot 1 Start operation when playing the downloaded images Step 1 using the viewer software. Click the [PAUSE] button. Step 2 Click the [PRINT] button. Note: The time and date being displayed on the viewer when paused will also be printed. -
Page 45: Perform The Alteration Detection
Perform the Alteration Detection It is possible to detect the alteration of the data if a code for the alteration detection has been attached to the down- loaded data. Refer to page 37 for descriptions of how to attach a code for the alteration detection. Screenshot 1 Start up the viewer software and display the following Step 1... -
Page 46: Notification By E-Mail
Notification by E-Mail Alarm Mail Notification The following mail will be sent to notify of an alarm occurrence to a registered address when an alarm occurs. Contents of the alarm mail: In ND300 (192.168.1.250), alarm was occurred. Alarm date: xx-xxx-xxxx xx:xx:xx GMT xx:xx (Example: 1-JAN-2005 GMT+09:00) Cause of alarm: Displays an event type and a camera channel or an alarm number (Example: COMMAND ALARM 5CH) - Page 47 List of characters to be replaced Item to be displayed Display style of Example entered characters Time and date when the alarm occurred %#05000000 4-digit display (2003 - 2099) Month when the alarm occurred (number) %#05000100 1 or 2-digit display (1 - 12) Month when the alarm occurred (letters) %#05000200 Displays first 3 letters (Jan, Feb …...
-
Page 48: Warning Mail Notification
Warning Mail Notification The following mail will be sent to notify of a trouble occurrence to a registered address when the trouble occurs. ND300 (192.168.0.250) STATUS REPORT. Time and date: 2005-1-1 12:00:00 STATUS: The description of the trouble will be displayed. (Ex. THERMAL ERROR) Display Description DATE... -
Page 49: About The Error Log
About the Error Log The following are the descriptions about the contents of the error log and the network error log. Content Error Log Network log Indication on Output from the connec- the LED tor on the rear panel Power outage PWR LOSS –... - Page 50 Content Error Log Network log Indication on Output from the connec- the LED tor on the rear panel Network camera CAM cc ERR – NET-3-0 ERR Camera error output error detection CAMERA cc ERROR Network camera CAM cc RECOVER – –...
- Page 51 Content Error Log Network log Indication on Output from the connec- the LED tor on the rear panel Password error for – DDNSUSERPASS_ERR – Network error output DDNS user name DDNS IP address – DNSIPADDUPDATE_ERR – Network error output update error Other error for –...
- Page 52 Parameter in the logs above Parameter Description Detail Unit/unit number 1-4: Extension unit, 9: RAID of this unit, 0: SINGLE of this unit FAN number 1-4: FAN number (FAN1-FAN4) Disk number 1-4: Disk number (HDD1-HDD4), 5: Others (Unknown HDD) Network port number 1: Camera port, 2: Client PC port, 3: Maintenance port Camera number 01-32: Camera number...
-
Page 53: Troubleshooting
Troubleshooting Before asking for repairs, check the symptoms with the following table. Contact your dealer if a problem cannot be solved even after checking and trying the solution or a problem is not described below, and when having a problem with installations. Reference Symptom Cause/solution... - Page 54 Reference Symptom Cause/solution pages • Depending on the traffic of the network, there might The image is not being be difficulties in displaying images. Press the [F5] but- – refreshed. ton on the keyboard to request images. • Are the correct user name and password entered? Cannot close the authenti- Refer to the Confirm the correct user name and password.
- Page 55 When using a PC on which Windows XP Service Pack2 (SP2) is installed The following may occur during operation when using a PC on which Windows XP Service Pack2 (SP2) is installed. Follow the instructions below when the following occurred. By performing the following solutions, other applications and the security level may not be affected.
- Page 56 Reference Symptom Cause/solution pages • Click the information bar and select "Download File…". The following message is When downloading fails even though you selected displayed on the information "Download File…", perform the following operation. bar. Click "Internet Options…" on the Tools menu of "To help protect your Internet Explorer, and then click the "security"...
- Page 57 For customer support, call 1.877.733.3689 Panasonic Sales Company Executive Office: Three Panasonic Way 2H-2, Secaucus, New Jersey 07094 Division of Panasonic Puerto Rico Inc. Zone Office San Gabriel Industrial Park 65th Infantry Ave. KM. 9.5 Carolina Eastern: Three Panasonic Way, Secaucus, New Jersey 07094 P.R.