
Related Manuals for Motorola MBP161


Summary of Contents for Motorola MBP161
- Page 1 User’s Guide Digital Audio Baby Monitor Models: MBP161, MBP161-2 The features described in this User’s Guide are subject to modifications without prior notice.
- Page 2 Please retain your original dated sales receipt for your records. For warranty service of your Motorola product, you will need to provide a copy of your dated sales receipt to confirm warranty status.
-
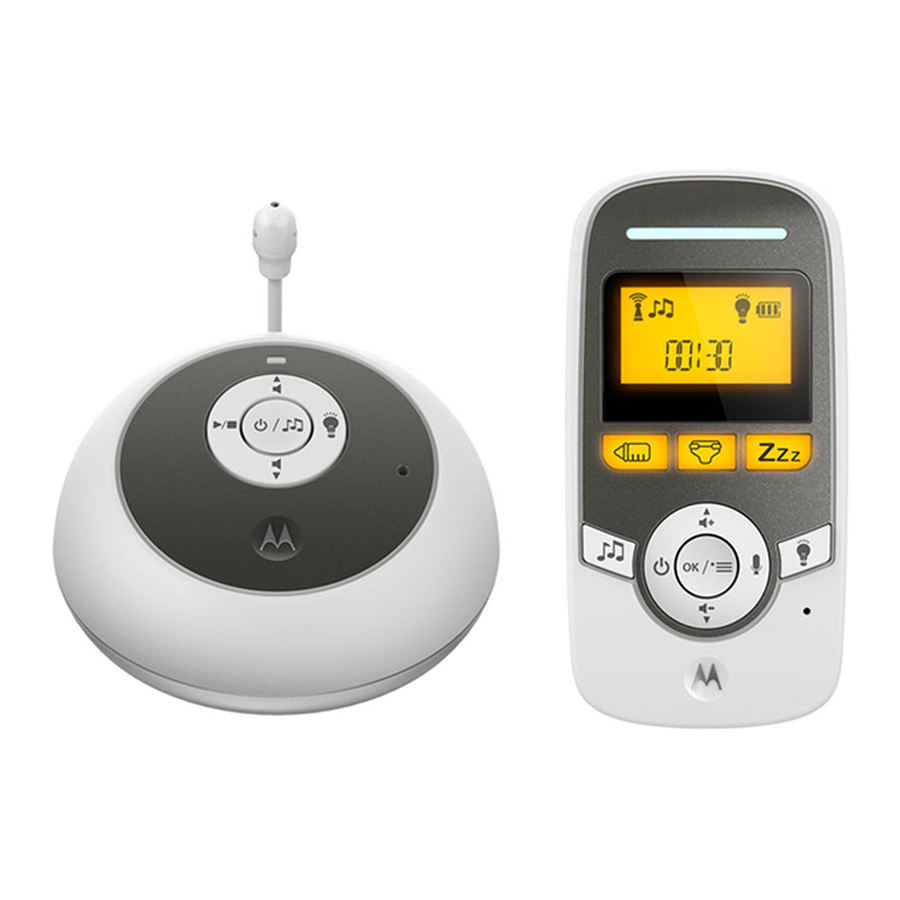
Page 3: Overview Of Parent Unit
Overview of the Parent Unit Sound Level Indicator Microphone LCD Display Lullaby Timer Buttons Press to start or stop lullaby playback. Control Key Panel Power jack UP / VOLUME + Speaker Press to increase speaker volume. 10. Battery compartment cover While in a menu, press to scroll up. -
Page 4: Parent Unit Display Icons
Parent Unit display icons Connection status - Displays when the parent unit is linked to the baby unit. - Flashes when the link between the baby unit and the parent unit is lost or the parent unit is out of range of the baby unit. Battery status scrolls when battery is charging. - Page 5 Overview of the Baby Unit Temperature Sensor menu. Speaker In lullaby menu: Press to play or select Power jack lullaby. Power/Link indicator PLAY/STOP On steadily when the baby unit is Press to start or stop lullaby playback. powered on and linked to the parent NIGHT LIGHT unit.
-
Page 6: Table Of Contents
Table of contents 1. Safety Instructions ..................7 2. Getting Started..................10 Baby unit power supply................10 Parent unit battery installation and power supply ........11 Belt clip/stand on parent unit..............12 3. Using Your Digital Audio Baby Monitor..........13 Power on or off .................. -
Page 7: Safety Instructions
1. Safety Instructions WARNING: Strangulation Hazard. Children have STRANGLED in cords. Keep this cord out of the reach of children (more than 3ft (1m) away). Never use extension cords with AC Adapters. Only use the AC Adapters provided. Safety Instructions... - Page 8 BABY MONITOR SET UP & USE: • Determine a location for the digital audio baby monitor that will provide the best audio reception of your baby in his/her crib. • Place the Baby Unit on a flat surface, such as a dresser, bureau or shelf, or mount the Unit on a wall securely using the keyhole slots under the stand.
- Page 9 CAUTION There is a risk of explosion if the battery is replaced by an incorrect type. Dispose of used batteries according to the instructions. Use only rechargeable battery pack with rating: 2.4V 450mAh Safety Instructions...
-
Page 10: Getting Started
2. Getting Started Baby unit power supply DC JACK DC PLUG 1. Insert the DC plug of the power adapter with the bigger DC plug into the DC jack on the back of the baby unit. 2. Connect the other end of the power adapter to a suitable electrical outlet. NOTE Only use the provided power adapter. -
Page 11: Parent Unit Battery Installation And Power Supply
Parent unit battery installation and power supply A rechargeable battery pack is supplied and should be fitted, so that the parent unit can be carried to another location without losing the link with the baby unit(s). Charge the parent unit before using it for the first time or when the parent unit indicates that battery is low. -
Page 12: Belt Clip/Stand On Parent Unit
Belt clip/stand on parent unit The parent unit comes with a desktop stand attached to the back of the unit. To place the parent unit on a desk, simply pull out the stand as shown above. NOTE Place the parent unit on a flat, even surface. Getting Started... -
Page 13: Using Your Digital Audio Baby Monitor
3. Using Your Digital Audio Baby Monitor Please read these instructions carefully, and be aware that this digital audio baby monitor is only intended as an aid. It is not a substitute for responsible and proper adult supervision. Power on or off 3.1.1 Power on or off the baby unit •... -
Page 14: Nightlight
The number of LED lights indicate how loud the volume has been raised. When the speaker volume is set to off, the screen displays Nightlight Turn on nightlight so that the room is gently lit and isn’t so dark at night. The soft glow can allay a child’s fears and help them or you avoid obstacles when up and around the room at night. - Page 15 NOTE If the time limit is reached, the corresponding timer button will light up and the parent unit will emit an alarm. Press to stop the timer. 3.4.2 Reset feeding timer 1. Press on the parent unit when it is not in use. 2.
- Page 16 4. Press again to save the timer. The screen will display the timer for 3 seconds before returning to idle mode. NOTE If no key is pressed within 3 seconds after adjusting the timer in step 3, the adjusted timer will be saved automatically. 3.4.5 Set sleep timer 1.
-
Page 17: Lullaby
Lullaby You can play lullaby to drown out disturbances so that your child can slumber peaceful and easily. 3.5.1 Select lullaby on the baby unit 1. Press on the baby unit to enter lullaby menu. 2. Press repeatedly to select your preferred lullaby. 3.5.2 Start or end lullaby playback from the baby unit 1. -
Page 18: Talk To The Baby Unit
Talk to the baby unit You can use the TALK function of the parent unit to talk to and comfort your baby. To talk to the baby unit: 1. Press and hold on the parent unit. 2. Speak towards the microphone on the parent unit. Your voice is broadcast to the baby unit. -
Page 19: Disposal Of The Device (Environment)
4. Disposal of the Device (Environment) At the end of the product lifecycle, you should not dispose of this product with normal household waste. Take this product to a collection point for the recycling of electrical and electronic equipment. The symbol on the product, user's guide and/or box indicates this. -
Page 20: Cleaning
5. Cleaning Clean your Digital Audio Baby Monitor with a slightly damp cloth or with an anti- static cloth. Never use cleaning agents or abrasive solvents. Cleaning and care • Do not clean any part of the Digital Audio Baby Monitor with thinners or other solvents and chemicals - this may cause permanent damage to the product which is not covered by the warranty. -
Page 21: Troubleshooting
6. Troubleshooting Power/Link Indicator on the parent unit does not come on • Check whether the parent unit is powered on. • Check whether the supplied battery pack is correctly installed and that they are not drained. • Recharge the parent unit by connecting it to the electrical outlet. Power/Link Indicator on the baby unit flashes •... - Page 22 The digital audio baby monitor system produces a high- pitched noise • The parent unit and the baby unit are too close to each other. Make sure that the parent unit and baby unit are at least 3 feet away from each other. •...
-
Page 23: General Information
To order a replacement battery pack for parent unit, contact customer service. Consumer Products and Accessories Limited Warranty ("Warranty") Thank you for purchasing this Motorola branded product manufactured under license by Binatone Electronics International LTD ("BINATONE") What Does this Warranty Cover? Subject to the exclusions contained below, BINATONE warrants that this Motorola branded product ("Product") or certified accessory ("Accessory") sold... - Page 24 PROVIDED UNDER THIS EXPRESS LIMITED WARRANTY IS THE EXCLUSIVE REMEDY OF THE CONSUMER, AND IS PROVIDED IN LIEU OF ALL OTHER WARRANTIES, EXPRESS OR IMPLIED. IN NO EVENT SHALL MOTOROLA OR BINATONE BE LIABLE, WHETHER IN CONTRACT OR TORT (INCLUDING...
- Page 25 (c) use of the Products or Accessories for commercial purposes or subjecting the Product or Accessory to abnormal usage or conditions; or (d) other acts which are not the fault of MOTOROLA or BINATONE., are excluded from coverage.
- Page 26 (b) broken seals or that show evidence of tampering; (c) mismatched board serial numbers; or (d) nonconforming or non-Motorola branded housings, or parts, are excluded from coverage. Communication Services. Defects, damages, or the failure of Products or Accessories due to any communication service or signal you may subscribe to or use with the Products or Accessories is excluded from coverage.
- Page 27 FCC, ACTA and Industry Canada (IC) Regulations Warning: Changes or modifications to this equipment not expressly approved by the party responsible for compliance could void the user's authority to operate the equipment. NOTE: This equipment has been tested and found to comply with the limits for a Class B digital device, pursuant to Part 15 of the FCC Rules.
-
Page 28: Technical Specifications
8. Technical Specifications BABY UNIT: Frequency 1921.536 - 1921.448 MHz Channels Operating temperature 41ºF - 113ºF Power supply adapter Input 100-240VAC, 50/60Hz, 150mA Rating Output 6VDC, 450mA PARENT UNIT: Frequency 1921.536 - 1921.448 MHz Channels Operating temperature 41ºF - 113ºF Battery rating 2.4V 750mAh Ni-MH battery pack Power supply adapter Input 100-240VAC, 50/60Hz, 150mA... - Page 29 MOTOROLA and the Stylized M Logo, are trademarks or registered trademarks of Motorola Trademark Holdings, LLC. and are used under license. All other trademarks are the property of their respective owners. © 2014 Motorola Mobility LLC. All rights reserved. US_EN Version 4.0 Printed in China...